Key Takeaways
- Overmixing develops unwanted gluten strands, creating a tough, dense crumb that collapses during baking.
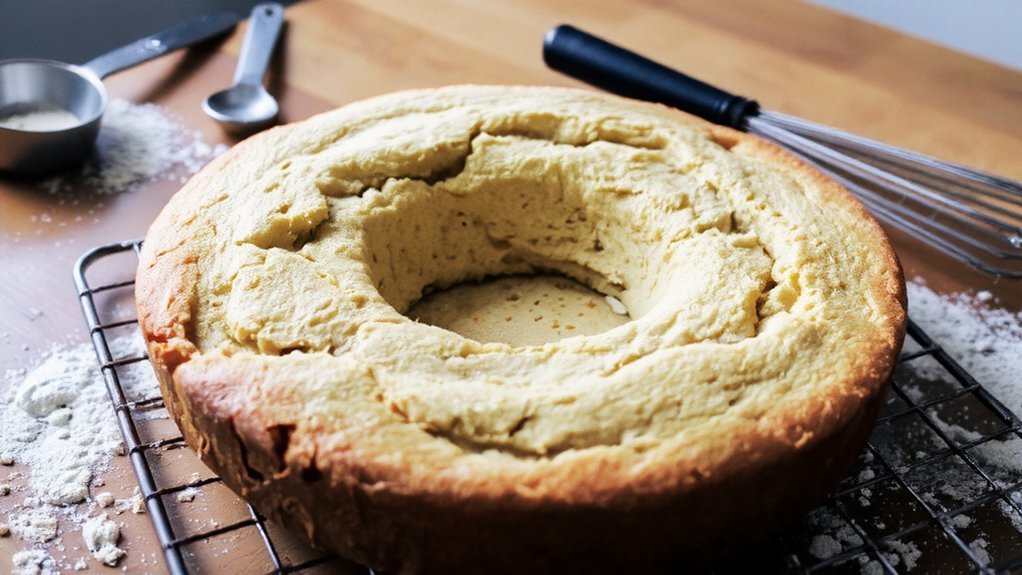
- Underbaking leaves the crumb structure unset with excess moisture, causing the center to sink and collapse.
- Oven temperature inaccuracies and uneven heat distribution prevent proper rise and even baking throughout the cake.
- Cold baking pans interfere with proper rise and heat distribution, resulting in a sunken center.
- Opening the oven door prematurely releases steam and disrupts internal structure before the protein network sets.
Overmixing Your Batter
When you overmix your batter, you’re developing gluten strands that shouldn’t be present in cake. This excessive gluten development creates a tough, dense crumb structure that collapses during baking, causing your cake to sink in the middle.
Overmixing develops unwanted gluten strands, creating a tough, dense crumb that collapses and sinks during baking.
Here’s what happens: overmixing deflates air incorporation that’s essential for lift and rise. You’re also breaking down the delicate emulsion between fat, eggs, and liquid.
The result? Your cake lacks the structural support needed to stay level while baking.
Mix your dry ingredients just until combined. Blend wet ingredients gently.
Fold them together with a spatula using minimal strokes—aim for no more than 20 to 30 folds. You want some flour streaks remaining; they’ll incorporate during baking. This restraint preserves air pockets and prevents gluten development, guaranteeing a light, level cake every time.
Oven Temperature Problems

Your oven’s temperature calibration directly affects your cake’s rise and structural integrity, as even a 25-degree variance can cause improper baking and collapse. Uneven heat distribution—whether from hot spots near heating elements or cold zones away from them—creates inconsistent crumb development, leaving some sections undercooked while others overcook and sink.
You’ll need to verify your oven’s actual temperature with an oven thermometer and rotate your cake pan halfway through baking to counteract these temperature inconsistencies.
Temperature Calibration Issues
Because ovens rarely maintain their factory-set temperatures accurately, an improperly calibrated oven is one of the most common culprits behind sunken cakes.
You’ll want to verify your oven’s actual temperature using an independent oven thermometer rather than trusting the dial.
Thermometer drift occurs gradually over time, causing your oven to run cooler or hotter than displayed.
This discrepancy directly affects cake rise and structure.
Check probe accuracy by placing a quality thermometer on the center rack and preheating for fifteen minutes.
If you discover significant temperature variance—typically more than 25°F—you’ve identified your problem.
You can either recalibrate your oven according to manufacturer instructions or adjust your recipe’s temperature accordingly.
Understanding your oven’s true temperature gives you control over consistent baking results, eliminating this common sinking issue entirely.
Uneven Heat Distribution
Even with a properly calibrated oven, you’ll still encounter sunken cakes if heat doesn’t distribute evenly throughout the baking chamber.
Hot spot mapping reveals problem areas where temperatures spike or dip markedly.
To identify these zones, place strips of parchment paper on different rack positions and observe browning patterns during a test bake.
Rack positioning directly impacts heat circulation.
The middle rack typically offers the most uniform temperature, while upper and lower racks experience greater extremes.
Avoid crowding your oven with multiple items, as this blocks air circulation and creates dead zones.
Rotate your cake halfway through baking to compensate for persistent hot spots.
If your oven shows severe uneven heating despite calibration, consider using an oven thermometer at multiple points to document temperature variations precisely.
Underbaking Your Cake
Underbaking creates a structural collapse that causes your cake to sink as it cools. When you pull your cake from the oven too early, the crumb structure hasn’t fully set, leaving excessive moisture content that destabilizes the interior matrix.
Use the Toothpick Test to verify doneness: insert a toothpick into the center, and it should emerge with minimal moist crumbs attached.
Here’s what underbaking looks like:
- Wet batter clings to the toothpick’s tip
- The cake’s center jiggles noticeably when you gently shake the pan
- Steam escapes heavily when you open the oven door
You’ll gain confidence by following your recipe’s precise baking time, then checking doneness systematically. Don’t rely solely on appearance—internal temperature matters.
Your cake deserves complete structural integrity, not a collapsed middle.
Incorrect Leavening Agents
While proper baking time sets your cake’s foundation, the wrong leavening agents will sabotage it regardless of how long you bake.
You’ve got complete control over this critical variable.
Expired leaveners—baking soda and baking powder—lose potency over time, delivering insufficient rise.
Your cake collapses because it can’t support its own structure.
Check expiration dates ruthlessly.
Acid imbalance directly compromises leavening effectiveness.
Baking soda requires acid (buttermilk, yogurt, vinegar) to activate properly.
Without adequate acid, you’ll get weak lift and dense crumbs.
Conversely, excess acid can over-activate baking soda, causing premature rising and subsequent sinking.
You must measure leaveners precisely—too much creates large bubbles that burst and deflate your cake.
Too little leaves insufficient rise for proper structure.
Follow your recipe exactly, use fresh ingredients, and you’ll eliminate this sinking problem entirely.
Pan Preparation Mistakes

You’ll find that improper pan preparation substantially impacts your cake’s structural integrity, starting with how you grease and flour the surface.
Using a pan that’s too large or too small for your batter volume forces uneven baking and can cause the cake to collapse in the center.
Additionally, you must verify your pan’s temperature before pouring in the batter, as a cold pan can interfere with proper rise and set, leading to sinking.
Greasing and Flouring Incorrectly
Improper pan preparation creates a foundation for cake failure before you’ve even poured the batter.
You’re sabotaging your results when you skip critical greasing and flouring steps.
Your fat selection matters—use butter, oil, or cooking spray applied evenly to prevent sticking.
Flour selection is equally important; choose all-purpose flour for coating, not cake flour, which doesn’t adhere properly. Here’s what you need to do:
- Apply your chosen fat thoroughly to every interior surface, including corners and seams
- Dust the entire pan with flour, tapping out excess to create a thin, uniform barrier
- Line the pan bottom with parchment paper for maximum insurance against sticking
These deliberate, methodical steps guarantee your cake releases cleanly and maintains structural integrity throughout baking.
Using Wrong Pan Size
Because cake batter volume directly determines baking time and heat distribution, selecting the correct pan size fundamentally affects your cake’s rise and structural integrity.
When you use a pan diameter that’s too large, your batter spreads thin, baking too quickly on the edges while the center remains underdone. Conversely, an undersized pan forces excessive batter depth, creating uneven cooking and that dreaded sunken middle.
You’re practically fighting against physics when your cake shape doesn’t match the recipe’s specifications. Always verify your pan diameter before mixing ingredients. If you must substitute, adjust batter quantity accordingly or modify baking time. This single decision determines whether you’ll achieve a perfectly risen cake or face disappointing collapse.
Neglecting Pan Temperature Check
While selecting the right pan size prevents uneven batter distribution, preparing that pan correctly proves equally essential to successful cake baking.
You’ll want to verify your pan’s temperature before pouring batter.
Cold pans cause uneven heat distribution, resulting in sunken centers.
Different pan materials—metal, glass, ceramic—conduct heat differently, requiring temperature adjustments.
Store your pans in a consistent location to avoid temperature fluctuations that affect their thermal properties.
Here’s what you need to check:
- Preheat your oven to the exact temperature specified, then place your pan inside for 2-3 minutes
- Test the pan’s heat using an infrared thermometer to confirm even temperature distribution
- Allow dark or non-stick pans to cool slightly before filling, as they retain more heat than standard aluminum
These practices eliminate temperature-related sinking issues.
Opening the Oven Door Too Early
One of the most common reasons your cake sinks is opening the oven door before it’s fully baked. When you take an oven peek during baking, you disrupt the delicate internal structure your cake’s developing.
The sudden steam release causes temperature fluctuations that collapse the crumb before the protein network sets properly.
Your batter relies on consistent heat to stabilize. Premature door openings allow hot air to escape rapidly, shocking the cake’s interior and preventing adequate rise. The batter settles unevenly, creating that unwanted dip.
Premature oven door openings shock your cake’s interior, preventing adequate rise and creating uneven settling that causes unwanted dips.
Resist the urge to check your cake until the minimum baking time passes. Use your oven’s window if available, keeping the door sealed. This simple restraint prevents structural failure and delivers the level, risen cake you’re after.
Cooling Process Issues
After your cake finishes baking, how you cool it dramatically affects its structural integrity.
You’ve got the power to prevent sinking by mastering proper cooling techniques.
- Use a cooling rack immediately — Transfer your cake from the pan to a cooling rack within minutes to allow air circulation underneath, preventing steam buildup that weakens the crumb structure
- Control your covering technique — Wait until your cake cools completely before covering it; premature covering traps condensation that causes structural collapse and sogginess
- Avoid temperature shock — Don’t move your cake between extreme temperatures; gradual cooling prevents the dense, sunken center that results from rapid contraction
You control your cake’s destiny.
Skip the countertop cooling and invest in a reliable cooling rack.
Your attention to these details determines whether you’ll enjoy a perfectly risen cake or face disappointment.
Ingredient Measurement Errors
Incorrect ingredient ratios fundamentally compromise your cake’s structural integrity and cause sinking.
You’ll want to prioritize scale accuracy when measuring, as it eliminates the guesswork that cup measurements introduce.
Cup packing varies dramatically—flour settles differently depending on how you scoop it, creating inconsistent ratios batch to batch.
Too much liquid relative to flour weakens your batter’s ability to support itself during baking.
Conversely, insufficient leavening agents won’t generate enough rise to counteract the batter’s weight.
You’re responsible for precise measurements: use a digital scale in grams rather than relying on volumetric cups.
Weigh your flour, sugar, eggs, and liquids exactly.
This approach gives you complete control over your cake’s outcome and eliminates the common pitfalls that cause disappointing results.
Frequently Asked Questions
Can I Fix a Sunken Cake After It’s Already Cooled?
Yes, you can salvage your cooled sunken cake.
Apply a crumb coat of frosting to seal loose crumbs, then fill the center depression with frosting, ganache, or cake filling to create an even surface.
You’ve got complete control over your cake’s destiny—layer it with fillings, mask imperfections with decorative frosting, or crumble it for cake pops.
Don’t let one setback dictate your final product’s success.
Does Humidity in My Kitchen Affect How My Cake Rises?
Yes, ambient humidity directly impacts your cake’s rise. High moisture absorbs into your flour, increasing flour hydration and altering your dry-to-wet ratio.
You’ll need to adjust your recipe by reducing liquid or adding more flour to compensate.
Low humidity dries ingredients faster, potentially causing dense results. Monitor your kitchen’s conditions and recalibrate measurements accordingly—you control your baking outcome by adapting to environmental variables.
What’s the Difference Between Baking Powder and Baking Soda?
You’ve got two distinct leavening agents.
Baking soda reacts immediately upon contact with acid, requiring you to bake your batter right away—that’s your reaction timing advantage.
Baking powder contains baking soda plus acid already built in, giving you control over when rising happens.
You’re free to let batter sit longer with powder.
Soda demands acidic ingredients like buttermilk or vinegar; powder doesn’t need that acid requirement.
How Do I Know When My Cake Is Fully Baked?
You’ll know your cake’s fully baked when you perform the toothpick test—insert it into the center and pull it out. If it emerges clean or with just a few moist crumbs clinging to it, you’re done. You’re not looking for a completely dry toothpick, which indicates overbaking.
Additionally, check the crumb texture; it should spring back when you gently press the surface. These methods give you complete control over your baking results.
Should I Use Room Temperature or Cold Ingredients When Baking?
You’ll get ideal results using room temperature ingredients for most cakes.
Room temperature butter, eggs, and dairy blend more thoroughly, creating better emulsification and even crumb structure.
Chilled ingredients won’t incorporate properly, trapping air pockets unevenly.
However, you can use chilled ingredients if you’re intentionally preventing gluten development or need slower mixing.
Plan ahead—remove ingredients from your fridge thirty minutes before baking for peak performance.


Leave a Comment