Key Takeaways
- Mix 3 cups flour, 1½ teaspoons yeast, 1 teaspoon salt, 1 tablespoon sugar, 1 tablespoon olive oil, and 1 cup warm water.
- Knead 8–10 minutes until smooth and elastic, then let dough rise 1–2 hours until doubled in size.
- Divide dough into eight portions, shape into balls, rest 10 minutes, then flatten to ¼-inch discs for final 30–40 minute rise.
- Bake at 500°F for 3–4 minutes on preheated baking stone to achieve ideal air pockets and light golden color.
- Cool completely, then store at room temperature two days or freeze individually up to three months in resealable bags.
Ingredients You’ll Need
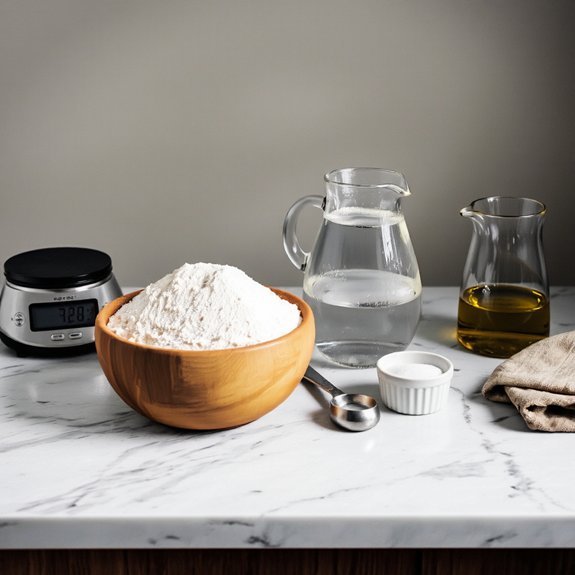
You’ll need just six core ingredients to make authentic pita bread: 3 cups all-purpose flour, 1½ teaspoons instant yeast, 1 teaspoon salt, 1 tablespoon sugar, 1 tablespoon olive oil, and 1 cup warm water (110°F).
For flour varieties, you can substitute bread flour for enhanced gluten development and chewier texture, or use whole wheat flour for nuttier flavor and denser crumb. These ingredient substitutions alter your final product’s characteristics substantially.
Water temperature proves critical—it activates yeast without killing it. Don’t exceed 120°F or you’ll compromise fermentation. Instant yeast dissolves quickly without proofing, streamlining your process.
Quality olive oil contributes richness and aids browning. Salt strengthens gluten structure and controls fermentation speed. Sugar feeds yeast and promotes browning during baking.
Measure precisely by weight when possible for consistency and superior results.
Preparing and Kneading the Dough
Combining your measured ingredients marks the beginning of dough development.
You’ll pour your warm water into a bowl, then add flour, salt, and yeast.
Mix until a shaggy mass forms, then let it rest for ten minutes.
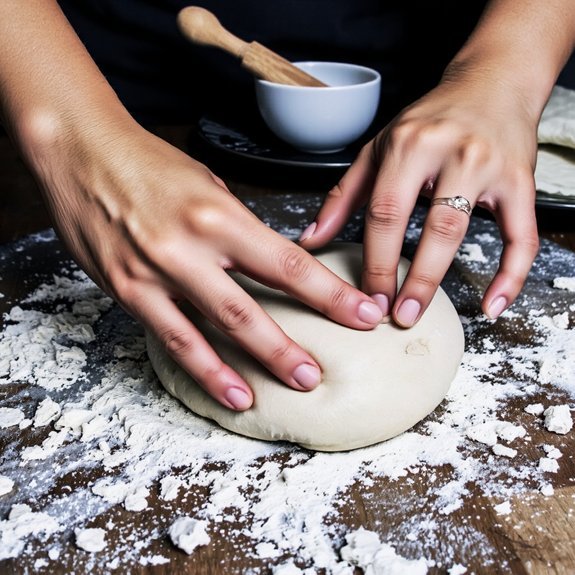
Now you’ll employ proper hand technique.
Push the dough away with your palm, fold it back, then rotate it.
You’re building gluten structure that’ll create pita’s characteristic pocket.
Knead for eight to ten minutes until the dough becomes smooth and elastic.
Monitor dough temperature throughout—you’re aiming for 75-78°F.
This ideal range promotes proper fermentation without overheating.
The dough shouldn’t stick excessively; adjust flour or water minimally if needed.
You’ve now prepared dough ready for its first rise, setting the foundation for authentic pita bread.
Rising and Shaping Your Pita
After kneading, place your dough in a lightly oiled bowl, turning it to coat all surfaces.
Cover with plastic wrap and let it rise at room temperature for one to two hours until doubled.
You’ll achieve best results through proper temperature control—aim for 70-75°F for predictable fermentation.
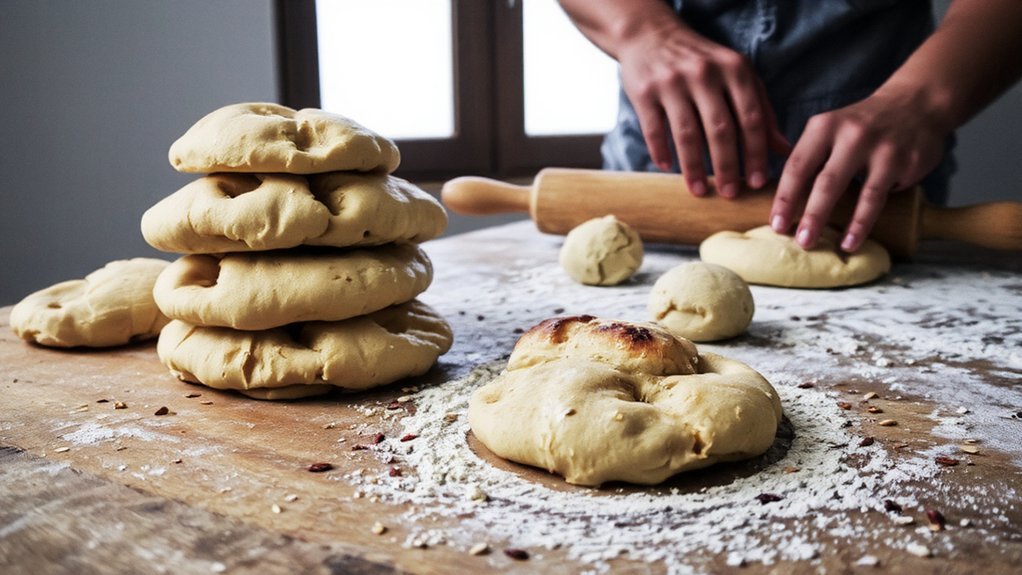
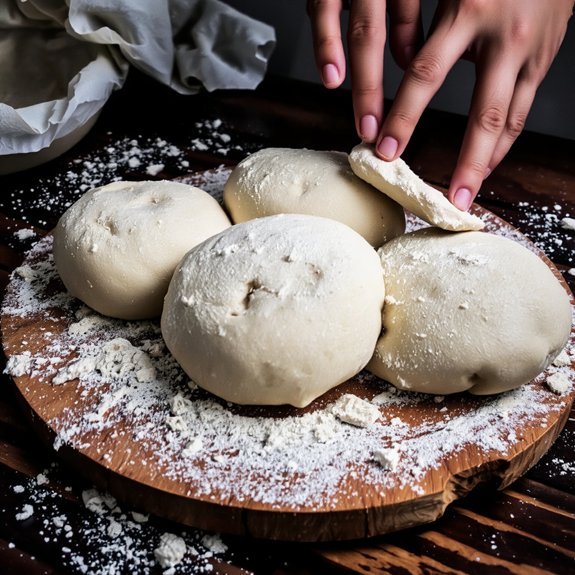
Divide your dough into eight equal portions and shape each into a smooth ball.
Rest these for ten minutes, allowing the gluten to relax.
Then flatten each ball into a quarter-inch-thick disc using your hands or a rolling pin.
Stack your shaped dough between parchment paper to prevent sticking.
This final rise, lasting thirty to forty minutes, enables pocket formation during baking.
Your pitas will develop their signature hollow centers when baked at high heat, creating the ideal vessel for your favorite fillings.
Baking for Perfect Air Pockets

Baking temperature makes all the difference in achieving those characteristic air pockets that define proper pita bread. You’ll want your oven preheated to 475-500°F, allowing the thermal mass to build sufficient heat for rapid dough expansion.
| Factor | Temperature | Timing | Result |
|---|---|---|---|
| Oven Heat | 475°F | 5 min | Slight pockets |
| Oven Heat | 500°F | 3-4 min | Ideal pockets |
| Oven Heat | 525°F | 2-3 min | Large pockets |
| Oven Heat | 450°F | 6 min | Flat bread |
| Oven Heat | 550°F+ | 1-2 min | Burnt exterior |
You’ll place your shaped dough directly on a preheated baking stone or steel. This thermal mass accelerates bottom cooking, forcing steam upward through the dough. You’re looking for a light golden color, typically achieved in 3-4 minutes. Don’t open the oven door—that releases essential oven steam needed for pocket formation. Your bread’s success depends on maintaining consistent, intense heat throughout baking.
Storage and Serving Tips
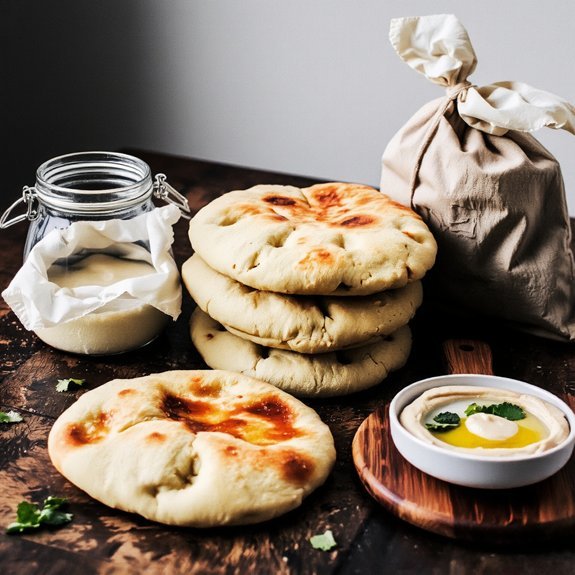
Properly stored pita bread maintains its soft texture and subtle flavor for days, though you’ll want to act quickly once your loaves cool completely.
Place cooled pitas in airtight containers or resealable bags at room temperature for up to two days.
For extended storage, you’ll benefit from freezing methods—wrap individual pitas in plastic wrap, then place them in freezer bags for up to three months.
Thaw frozen pitas at room temperature or reheat them directly in a 350°F oven for five minutes to restore their pliable structure.
Serving suggestions include warming pitas before filling them with your preferred ingredients.
You can reheat them in a dry skillet, oven, or toaster for ideal texture. This approach prevents soggy pockets and enhances your eating experience, giving you complete control over your meal preparation.
Frequently Asked Questions
Can I Make Pita Bread Without a Stand Mixer or Food Processor?
You’ll absolutely master pita bread through hand kneading and bowl mixing.
Combine your dry ingredients in a bowl, then gradually incorporate water while mixing with your fingers.
Once the dough forms, transfer it to your work surface and knead vigorously for ten minutes until you’ve developed sufficient gluten structure.
This tactile method gives you direct control over hydration and texture, ensuring you’re not dependent on machines to achieve authentic, perfectly puffed pitas.
What’s the Difference Between Pita Bread and Other Types of Flatbread?
You’ll find pita bread distinguishes itself through its Middle Eastern leavening methods, which create that characteristic pocket. Unlike other flatbreads, you’re working with yeast-based dough that produces steam during high-heat baking, causing separation between layers.
This pocket formation isn’t accidental—it’s engineered through precise hydration ratios and temperature control. You’re getting a versatile vessel that holds fillings, whereas naan, tortillas, and focaccia lack this structural advantage.
Your freedom to customize fillings makes pita uniquely practical.
How Do I Fix Pita Bread That Doesn’t Puff up During Baking?
You’ll fix non-puffing pita by adjusting dough hydration—aim for 65-70% water content for proper steam expansion.
Make sure your oven reaches 475°F minimum before baking. Create oven steam by placing a preheated cast-iron skillet on the lower rack, then carefully pour boiling water into it when you load your pitas.
This moisture-rich environment generates the steam pressure that forces your dough to separate and puff. Bake for 3-4 minutes until you’ve achieved that signature pocket.
Can I Freeze Pita Dough, and if So, for How Long?
Yes, you can freeze pita dough for up to three months.
After dough portioning, wrap individual balls tightly in plastic wrap and freeze them.
Proper yeast management makes sure fermentation continues slowly during freezing.
Thaw your portions overnight in the refrigerator before shaping and baking.
This method preserves dough quality and gives you the freedom to bake fresh pita whenever you choose, without compromising texture or rise performance.
What’s the Best Way to Reheat Stored Pita Bread to Restore Softness?
You’ll restore softness best using the steam method: wrap your pita in damp paper towels and microwave for 10-15 seconds.
Alternatively, you can use skillet reheating—place your bread directly on a medium-heat skillet for 20-30 seconds per side, allowing the retained moisture to redistribute.
Both techniques rehydrate the gluten structure without drying out your bread, giving you that fresh-baked texture you’re after.


Leave a Comment