Key Takeaways
- Melt 6 tablespoons butter with 1 cup brown sugar, then arrange pineapple rings and maraschino cherries in concentric circles.
- Whisk together 1¾ cups flour, 2–2½ teaspoons baking powder, and ½ teaspoon salt for uniform dry ingredients.
- Vigorously whisk eggs, gradually add oil, then fold wet ingredients into dry mixture using 12–15 deliberate spatula folds.
- Bake in preheated 350°F oven for 35–40 minutes until a toothpick emerges with minimal crumbs.
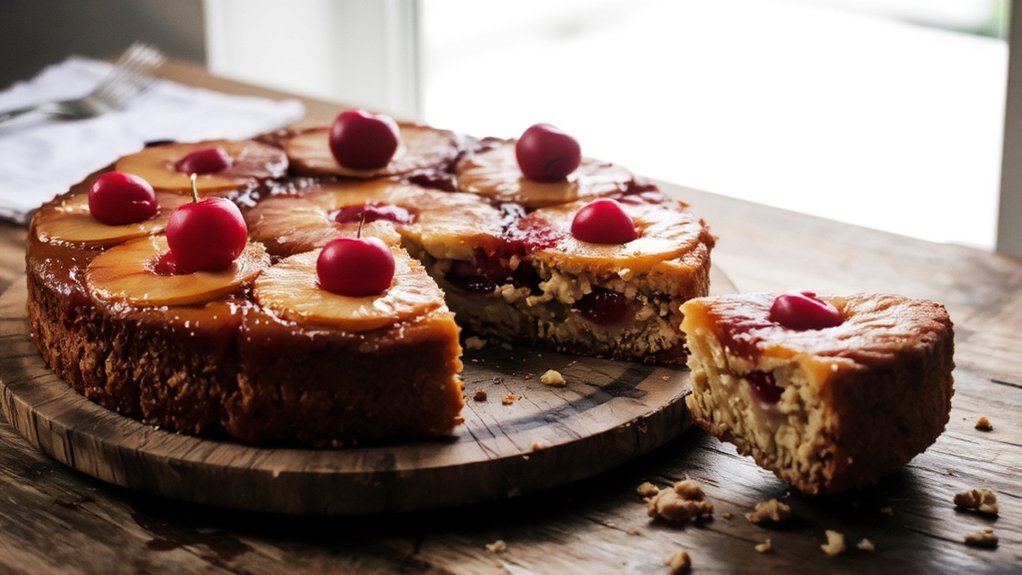
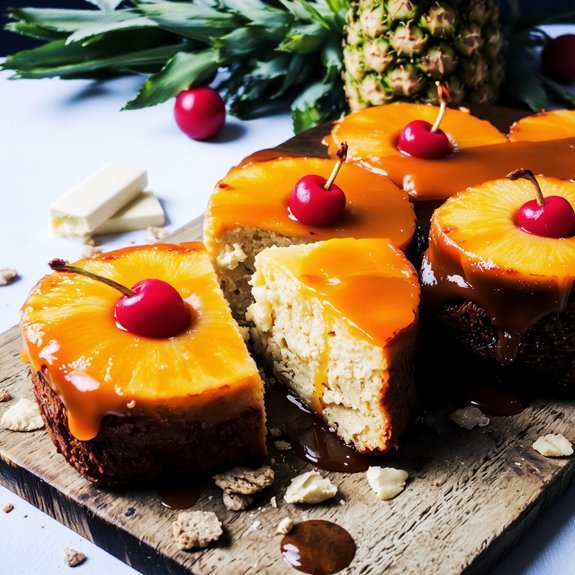
- Invert cake onto a serving plate immediately after cooling to reveal the caramelized, glazed pineapple crown.
Why This Classic Dessert Never Goes Out of Style
Whether you’re baking for a dinner party or a family gathering, the pineapple upside down cake delivers consistent results that rely on fundamental pastry principles: caramelized fruit creates structural integrity through sugar reduction, while the inverted cake structure naturally glazes the topping during the baking process.
Caramelized fruit creates structural integrity; the inverted structure naturally glazes during baking for consistent, restaurant-quality results.
You’ll find this dessert endures because it bridges cultural nostalgia with accessible technique. The recipe requires no exotic ingredients—just butter, brown sugar, pineapple, and standard cake components.
Its appeal transcends generations, anchoring family traditions across decades. You control the outcome through precise measurements and methodical execution.
The visual impact—that glistening caramelized crown—satisfies both aesthetic and culinary expectations. You’re not following fleeting trends; you’re mastering timeless methodology that consistently produces restaurant-quality results in your own kitchen.
Essential Ingredients for the Perfect Upside-Down Cake
Five essential components form the foundation of an exceptional pineapple upside-down cake: butter, brown sugar, fresh pineapple, cake batter, and maraschino cherries.
You’ll need 6 tablespoons of unsalted butter and ¾ cup of packed brown sugar for your caramelized base.
Fresh pineapple rings—roughly ¼-inch thick—work best, though canned variants offer convenience.
Your cake batter requires 1¾ cups all-purpose flour, 2 teaspoons baking powder, ½ teaspoon salt, ½ cup butter, ¾ cup sugar, 2 large eggs, and ¾ cup whole milk.
For allergy swaps, you can substitute gluten-free flour or use dairy-free butter alternatives without compromising results.
Regional variations exist worldwide—some bakers incorporate coconut cream or substitute maraschino cherries with candied cherries or nuts.
You’ve got freedom here.
Precision matters, but your preferences guide ingredient selection.
Equipment You’ll Need to Get Started
You’ll need a 9-inch round cake pan with at least 2-inch sides to accommodate the pineapple and batter layers properly.
Gather mixing bowls in varying sizes, measuring cups calibrated for both wet and dry ingredients, and a kitchen scale to guarantee precise ratios that yield consistent results.
Additional utensils should include a whisk, rubber spatula, and wooden spoon to facilitate proper mixing techniques and batter incorporation.
Essential Baking Pan Sizes
For an authentic pineapple upside-down cake, you’ll need a 9-inch round cake pan with a minimum depth of 1.5 inches—this dimension promotes even heat distribution and prevents overflow during baking.
You’re free to choose between steel, aluminum, or cast iron based on your preference, though aluminum conducts heat most uniformly.
The pan dimensions directly impact your baking results, so don’t compromise on size.
Dark-colored pans absorb more heat, potentially darkening your cake’s exterior; lighter pans offer gentler, more controlled baking.
Verify your pan’s bake depth before starting, as shallow pans may cause caramelized fruit to spill onto your oven floor.
Consider investing in a quality pan—it’ll serve you reliably for years of baking projects.
Mixing Bowls and Utensils
Gathering the right mixing bowls and utensils establishes the foundation for efficient cake preparation.
You’ll need three nesting bowls—one for dry ingredients, one for wet ingredients, and one for the pineapple topping.
Select stainless steel options for durability and easy cleaning.
Equip yourself with a whisk for incorporating air into batters, a rubber spatula for precise folding, and measuring spoons for accuracy.
A wooden spoon works well for stirring dense mixtures without damaging bowl surfaces.
For organization hacks, arrange utensils in order of use before starting.
Store mixing bowls vertically to maximize cabinet space.
Apply care tips by hand-washing immediately after use to prevent batter hardening.
Keep your utensils grouped by function—dry measuring tools separate from wet ones—ensuring quick access and streamlined workflow throughout your baking process.
Measuring Tools and Scales
Accurate measurements determine whether your pineapple upside-down cake rises properly or falls flat, making precise tools indispensable beyond the mixing bowls and utensils you’ve already organized. You’ll need a digital kitchen scale for weighing dry ingredients—the gold standard for consistency. Dry measuring cups work for flour, sugar, and baking powder, while liquid measuring cups handle buttermilk and melted butter.
A set of measuring spoons covers smaller quantities like vanilla extract and salt. Master calibration techniques by zeroing your scale before each ingredient and verifying measurements twice.
Understand unit conversion between metric and imperial systems to adapt recipes freely. These tools eliminate guesswork, ensuring your cake’s structure depends on precision rather than approximation.
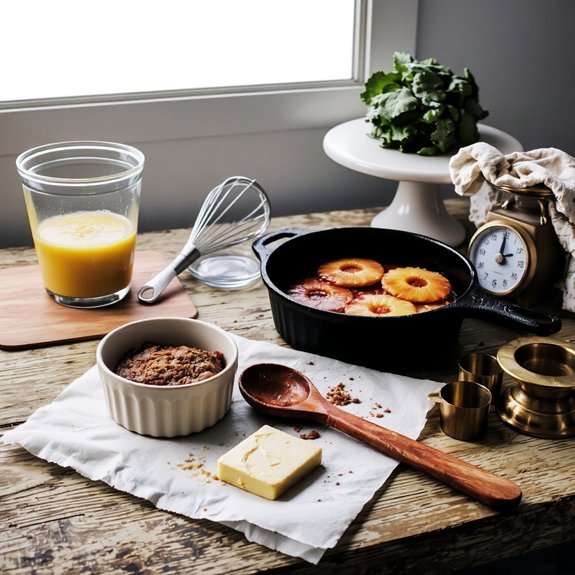
Preparing Your Cast Iron Skillet With Caramel
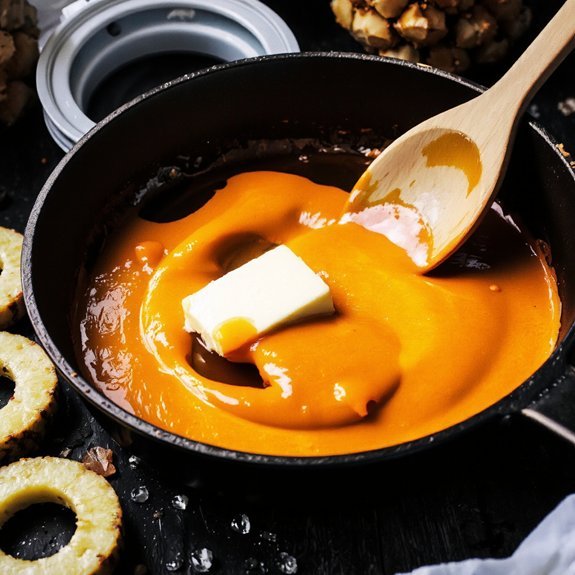
Melt 6 tablespoons of unsalted butter over medium heat in your 9-inch cast iron skillet, then add 1 cup of packed brown sugar and ¼ teaspoon of sea salt.
Stir continuously for 2-3 minutes until the mixture achieves a uniform, glossy consistency.
This caramelization process develops complex flavor profiles while creating a natural non-stick barrier.
Caramelization develops complex flavor profiles while creating a natural non-stick barrier for optimal baking results.
To prevent sticking, make sure your heat remains moderate—excessive temperatures cause crystallization and burning.
If caramel troubleshooting becomes necessary, reduce heat immediately and add 1 tablespoon of heavy cream to restore smoothness.
Once the caramel reaches 350°F on your instant-read thermometer, distribute pineapple rings and maraschino cherries evenly across the surface.
Position them strategically, as they’ll become your cake’s decorative top layer once inverted.
This preparation step determines your final presentation’s visual appeal and structural integrity.
Arranging the Pineapple and Cherries
Positioning your pineapple rings and maraschino cherries requires strategic placement to achieve both visual balance and structural stability.
You’ll want to arrange your rings in concentric circles, starting from the skillet’s center and working outward.
This pattern variations approach guarantees even heat distribution during baking.
For fruit placement, position each cherry within the pineapple ring’s center hole, securing it firmly into the caramel base.
Space rings uniformly, maintaining approximately half-inch gaps between each.
This methodology prevents crowding and allows caramel to flow freely around each piece.
You’re free to experiment with offset patterns if preferred, though centered arrangements yield best results.
Press pineapple rings gently into the warm caramel—they’ll adhere slightly without sinking.
Your precise fruit placement now determines your cake’s final presentation, so take time making sure each piece sits exactly where you want it.
Mixing the Cake Batter From Scratch
You’ll combine your dry ingredients—flour, baking powder, salt, and sugar—in a medium bowl, whisking them together to guarantee even distribution and aeration.
Next, you’ll blend your wet ingredients—eggs, melted butter, vanilla extract, and milk—in a separate bowl, stirring until fully incorporated and uniform in consistency.
Finally, you’ll fold the wet mixture into the dry ingredients using a spatula, mixing until just combined to avoid overdeveloping the gluten structure.
Dry Ingredients Combination
Combine 1¾ cups of all-purpose flour, 2½ teaspoons of baking powder, and ½ teaspoon of table salt in a medium mixing bowl.
| Ingredient | Measurement |
|---|---|
| All-purpose flour | 1¾ cups |
| Baking powder | 2½ teaspoons |
| Table salt | ½ teaspoon |
Whisk these components together for 30 seconds, ensuring granule uniformity throughout the mixture. This blending technique distributes leavening agents evenly, preventing dense pockets in your finished cake. You’ll achieve ideal moisture absorption during the wet ingredient incorporation phase by maintaining proper dry ingredient homogeneity.
Don’t skip this whisking step—it’s critical for structural integrity. Your cake’s crumb structure depends on even distribution of baking powder particles. This methodology guarantees consistent rise and texture, giving you control over your baking outcome without compromise.
Wet Ingredients Blending
Now that your dry ingredients are uniformly distributed, gather your wet components: 4 large eggs, ¾ cup of whole milk, ⅓ cup of vegetable oil, and 1 teaspoon of vanilla extract.
Whisk your eggs vigorously for 2-3 minutes to maximize aeration techniques, incorporating air that’ll create volume in your finished cake.
Add vegetable oil gradually while continuing to whisk; this fat acts as an emulsifier, binding water and oil molecules together seamlessly.
Pour in milk and vanilla extract, whisking until fully incorporated.
The emulsifier roles of egg yolks guarantee a homogeneous batter without separation.
Combine your wet mixture with dry ingredients using 12-15 deliberate folds, maintaining the aeration you’ve developed.
Don’t overmix—this preserves your cake’s tender crumb structure and guarantees maximum rise during baking.
Baking Instructions and Timing
Once you’ve prepared your batter and arranged the pineapple slices in the caramelized butter, pour the mixture into your prepared 9-inch cast-iron skillet or round cake pan, filling it to approximately three-quarters capacity.
Preheat your oven to 350°F, ensuring proper oven calibration for consistent results.
Bake for 35-40 minutes until golden brown. Assess doneness indicators by inserting a toothpick into the cake’s center; it should emerge with minimal crumbs, not wet batter.
The cake’s surface will firm slightly while retaining slight jiggle at the very center—this indicates ideal moisture retention.
Cool in the pan for 10 minutes before inverting onto a serving plate. This resting period allows structural integrity while the caramelized topping sets properly, preventing collapse and ensuring your pineapple arrangement remains intact.
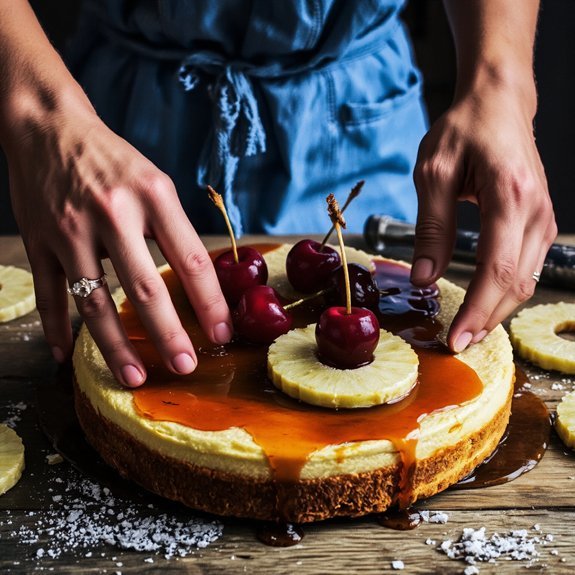
How to Invert Your Cake Without Breaking It
After the 10-minute cooling period, you’ll need to execute the inversion carefully to preserve the caramelized topping and pineapple arrangement.
Position your serving plate directly over the cake’s surface, ensuring it’s large enough to accommodate the entire diameter.
Apply firm, even pressure while flipping the pan and plate simultaneously in one decisive motion.
Don’t hesitate—a gentle release happens when you lift the pan away immediately after inversion.
If the cake resists, run a thin knife around the perimeter to loosen stubborn edges.
The cooling interval between baking and inversion is critical; it allows structural integrity without compromising the topping’s adherence.
Work quickly but deliberately.
Any caramelized pieces that stick to the pan can be repositioned manually onto the cake’s surface for seamless presentation.
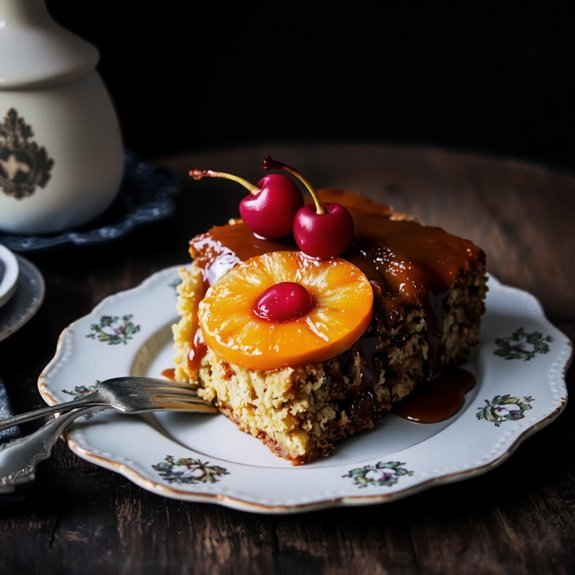
Serving Suggestions and Pairing Ideas
With your pineapple upside down cake perfectly inverted and cooled to room temperature, you’re ready to plate and serve.
Consider these strategic pairings to elevate your dessert experience.
Coffee pairings work exceptionally well—serve alongside a robust espresso or French press brew to complement the caramelized sugar notes and buttery crumb structure.
Robust espresso or French press brew complements caramelized sugar notes and buttery crumb structure beautifully.
The acidity cuts through richness effectively.
Alternatively, construct a cheese board featuring sharp aged cheddar, tangy goat cheese, and creamy brie.
This combination creates textural contrast and flavor complexity that enhances the cake’s tropical elements.
For beverage alternatives, opt for sparkling wine or light rum-based cocktails.
These selections cleanse the palate between bites without overwhelming delicate caramelized pineapple flavors.
Portion control: serve 3-4 ounce slices to allow multiple flavor combinations within a single sitting.
Storage Tips and Make-Ahead Instructions
Because pineapple upside down cake’s caramelized sugar layer absorbs moisture over time, you’ll want to store it in an airtight container at room temperature for up to two days, or refrigerate it for up to five days to extend shelf life.
For best freezer methods, wrap individual slices in plastic wrap, then aluminum foil, storing them for up to three months at zero degrees Fahrenheit.
Make-ahead preparation maximizes your flexibility. Bake the cake one day prior, allowing the flavors to develop fully.
You can also prepare your caramelized sugar and pineapple topping separately, storing each component refrigerated until assembly. This modular approach lets you control timing without compromising quality.
Thaw frozen portions at room temperature for two hours before serving, preserving the cake’s structural integrity and textural balance.
Frequently Asked Questions
Can I Use Fresh Pineapple Instead of Canned Pineapple Chunks?
You can absolutely substitute fresh pineapple for canned chunks. However, you’ll need to account for juice content differences—fresh pineapple yields approximately 15-20% more liquid than canned varieties.
Ripeness impact’s critical; select fully mature fruit with golden coloring for ideal sweetness and structural integrity.
Dice uniformly to 3/4-inch cubes, drain excess juice thoroughly, and reduce your recipe’s added liquid by 2-3 tablespoons to maintain your cake’s proper moisture balance and texture consistency.
What’s the Best Substitute if I Don’t Have a Cast Iron Skillet?
You can substitute a carbon steel skillet, which distributes heat evenly at 350°F without warping.
A ceramic skillet works too, though you’ll need to reduce your oven temperature by 25°F to prevent browning too quickly.
Both alternatives require you to monitor caramelization closely.
You’re not locked into cast iron—these options give you flexibility while maintaining proper heat retention and even cooking results for your inverted cake.
How Do I Prevent My Cake From Sinking in the Middle?
You’ll prevent sinking by maintaining proper mixing technique—cream butter and sugar until light, then fold in dry ingredients carefully to avoid deflating air pockets.
Calibrate your oven temperature precisely to 350°F using an independent thermometer, ensuring even heat distribution.
Don’t open the oven door during baking. Bake for exactly 35-40 minutes until a toothpick emerges clean. This methodical approach gives you consistent, level results every time you take control of your baking.
Can I Make This Cake Ahead and Freeze It for Later?
You can absolutely freeze your cake for extended storage duration.
Wrap it tightly in plastic wrap and aluminum foil to prevent freezer burn.
You’ll maintain ideal quality for up to three months.
For thawing techniques, transfer it to your refrigerator overnight—this gradual process preserves moisture and structure.
Alternatively, you can thaw it at room temperature for approximately two hours.
This methodology gives you complete freedom to bake whenever you want.
What Should I Do if My Caramel Burns or Tastes Bitter?
If you’ve burned your caramel, you can salvage it by immediately removing the pan from heat and submerging its bottom in ice water to halt the cooking process.
To neutralize bitterness, you’ve got options: stir in a tablespoon of butter or cream to mask the acrid notes, or start fresh with a new batch.
You’re in control—don’t settle for compromised results when salvage or restart gives you the freedom to achieve excellence.


Leave a Comment