Key Takeaways
- Cream butter and peanut butter until fluffy, then add egg and vanilla before combining dry ingredients into the wet mixture.
- Chill dough at least 2 hours or overnight to reduce spreading and achieve the signature crackled top appearance.
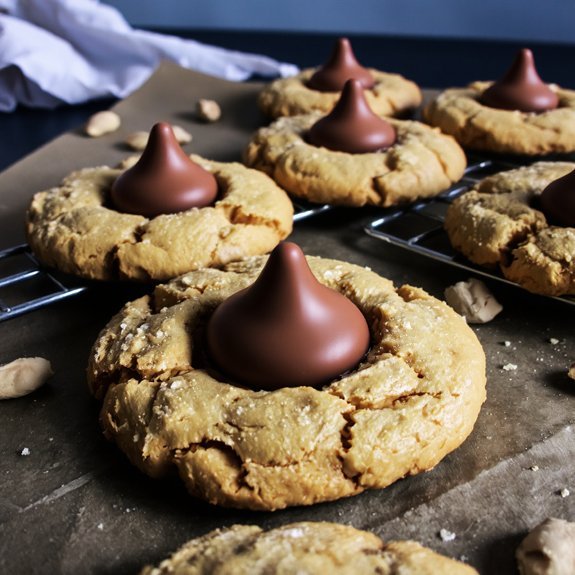
- Bake at preheated temperature for 8–10 minutes until golden but soft, then immediately press a chocolate kiss into the center.
- Press the room-temperature Hershey Kiss into the warm cookie about 30 seconds after removal for optimal adhesion and centered placement.
- Store cooled cookies in airtight containers at room temperature for up to two weeks or freeze for three months.
Ingredients You’ll Need
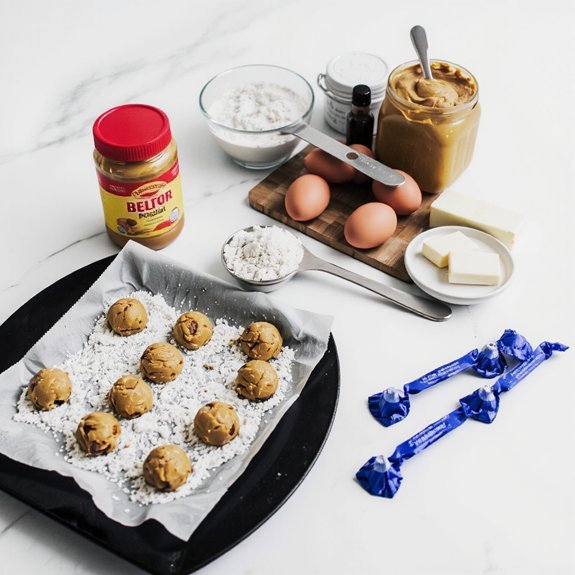
You’ll need just a handful of pantry staples to create these beloved cookies.
Start with creamy peanut butter—check the label reading to verify you’re selecting natural varieties without unnecessary additives.
Select natural peanut butter varieties by carefully checking labels to avoid unnecessary additives.
All-purpose flour, sugar, and brown sugar form your base.
Don’t overlook the ingredient origins of your baking essentials; quality matters.
You’ll require one egg to bind everything together, plus baking soda for that perfect rise.
A pinch of salt enhances flavors beautifully.
Finally, grab a bag of chocolate kisses for the signature topping.
This straightforward ingredient list gives you complete control over what goes into your batch.
No mystery components.
No preservatives you can’t pronounce.
Just pure, delicious freedom to bake cookies your way, knowing exactly what you’re putting on the table for your family.
Equipment and Tools
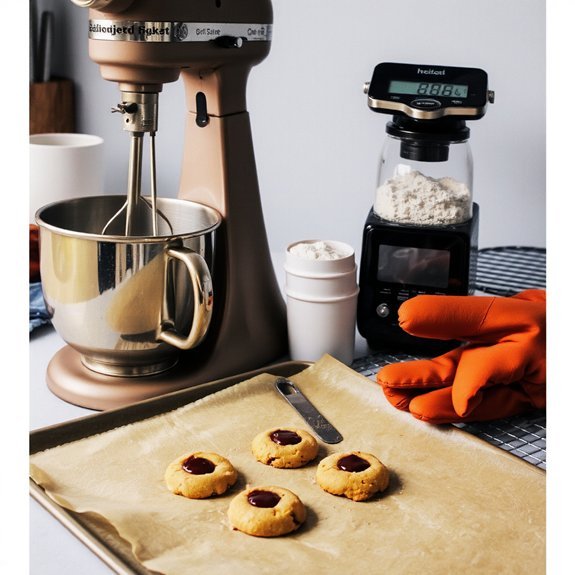
What transforms a simple ingredient list into perfectly baked cookies? Your equipment choices.
You’ll need measuring spoons for precise peanut butter and vanilla portions—accuracy matters when crafting these classic treats.
Grab a sturdy mixing bowl and electric mixer to combine your ingredients efficiently without arm fatigue.
A baking sheet lined with parchment paper prevents sticking and promotes even browning.
You’ll want a silicone spatula for scraping every last bit of dough from bowl surfaces, maximizing your yield.
Don’t overlook a cookie scoop for uniform sizing—consistency produces professional results.
A wire cooling rack allows air circulation, preventing soggy bottoms.
Finally, keep an oven thermometer handy to verify your baking temperature’s accuracy.
These tools empower you to bake with confidence and precision, transforming basic ingredients into extraordinary cookies that satisfy every time.
Step-by-Step Baking Instructions
With your equipment assembled and ingredients measured, it’s time to transform them into those iconic chocolate-topped treats.
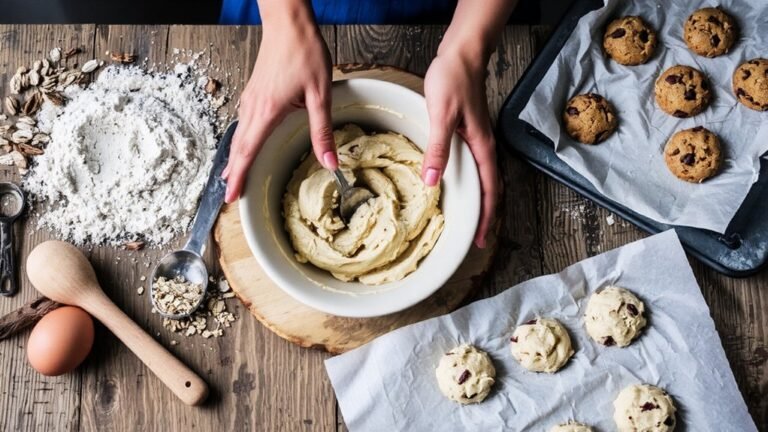
Begin by creaming butter and peanut butter together until fluffy—this mixing order guarantees proper incorporation. Add eggs and vanilla, beating well.
Combine dry ingredients separately, then gradually blend them into your wet mixture until just combined.
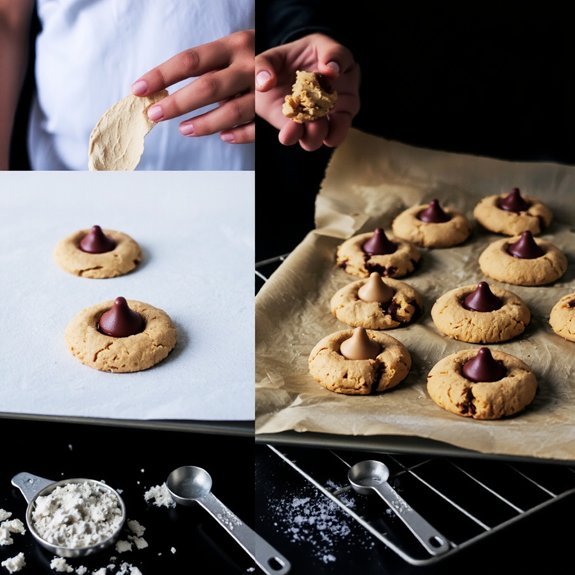
Roll dough into balls and space them evenly on your baking sheet. Your first timing checkpoint arrives at 8-10 minutes—cookies should be golden but still soft. Remove them immediately and press a chocolate kiss into each center while heat remains.
Let them cool on the baking sheet for 2 minutes before transferring to a wire rack. This second timing checkpoint prevents breakage.
Store in an airtight container to maintain that perfect texture and flavor.
Tips for Perfect Blossoms
You’ll want to keep your oven temperature precise—too hot and your cookies’ll brown before the chocolate softens, too cool and they won’t puff properly for that signature crackled top.
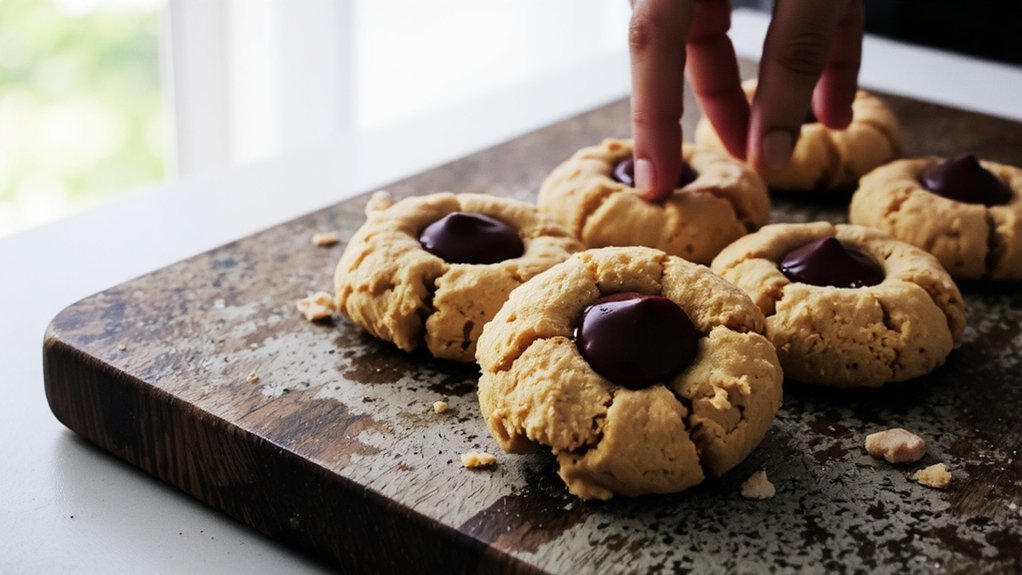
Place your chocolate kiss dead center on each cookie while it’s still warm from the oven, pressing gently so it nestles into the peanut butter base without sinking completely. Timing is your secret weapon here; if you wait too long, the cookie hardens and your kiss won’t adhere, but catch it at that perfect moment and you’ll achieve those picture-perfect blossoms every time.
Temperature Control Matters
Since temperature dramatically influences how your dough spreads and sets, mastering heat control is essential for achieving those signature crackled edges and perfectly positioned chocolate kisses.
You’ll want to account for thermal gradients within your oven, as hot spots can unevenly bake your cookies.
Consider these critical temperature factors:
- Preheat thoroughly for 15-20 minutes to establish consistent baking conditions
- Use an oven thermometer to verify actual temperature versus dial readings
- Rotate baking sheets halfway through to counteract thermal imbalances
- Make altitude adjustments—higher elevations require lower temperatures and extended baking times
Chilled dough bakes more slowly, giving you flatter cookies with pronounced cracks.
Room-temperature dough spreads faster, risking overdone edges before centers set.
You’ll achieve ideal results by chilling your dough and maintaining precise oven conditions, ensuring every batch delivers that coveted peanut butter perfection.
Chocolate Kiss Placement
Pressing a chocolate kiss onto a warm cookie requires perfect timing—too early and it’ll sink straight through, too late and it won’t adhere properly. You’ll want to wait roughly thirty seconds after removing your cookies from the oven, allowing them to set just enough to support the chocolate.
Position each kiss at the center of your cookie for ideal visual symmetry. Press gently but firmly, twisting slightly for secure contact.
If you’re feeling adventurous, experiment with creative patterns—offset placements or diagonal arrangements can elevate your presentation beyond standard rows.
Your chocolate shouldn’t be cold from the refrigerator; room temperature kisses work best. They’ll meld slightly into the peanut butter cookie’s surface, creating that signature indented appearance.
This simple technique transforms ordinary cookies into stunning, bakery-quality treats that showcase your baking confidence and attention to detail.
Storage and Shelf Life
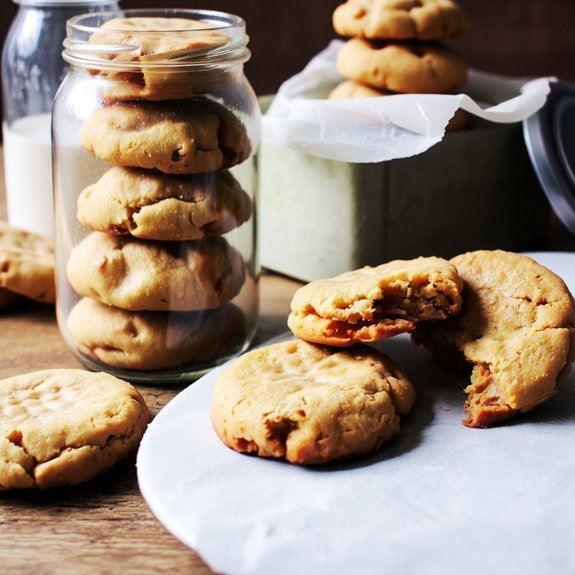
When stored properly, peanut butter blossom cookies retain their delightful texture and flavor for up to two weeks at room temperature.
Properly stored peanut butter blossom cookies maintain their delightful texture and flavor for up to two weeks at room temperature.
You’ll maximize freshness by using these storage strategies:
- Place cooled cookies in airtight containers with parchment paper between layers
- Store at room temperature away from direct sunlight and heat sources
- Refrigerate for extended freshness up to three weeks
- Freeze in airtight containers for freezer longevity up to three months
You control how long you enjoy these treats.
Room temperature storage works perfectly for cookies you’ll consume within days.
For longer preservation, you’ll appreciate the freezer option—simply thaw at room temperature before serving.
This freedom means you’re never locked into a rigid timeline.
Whether you’re stashing a batch for later or sharing immediately, these storage methods keep your peanut butter blossoms tasting fresh and irresistible.
Variations and Flavor Twists
You can elevate peanut butter blossoms beyond the classic recipe by experimenting with complementary flavors that enhance rather than overpower the cookie’s signature taste.
Consider savory twists by incorporating sea salt, adding depth and complexity to each bite.
You might infuse the dough with espresso powder or cinnamon for warmth and richness.
For dessert hybrids, you’re free to explore chocolate-stuffed centers instead of traditional chocolate kisses, or swirl in salted caramel.
Creamy peanut butter pairs beautifully with maple, honey, or brown butter undertones that you can easily incorporate into your base recipe.
Don’t overlook texture variations either.
You could roll cookies in crushed pretzels, toasted coconut, or chopped nuts before baking.
These creative modifications let you personalize your batch while maintaining the beloved peanut butter blossom identity.
Troubleshooting Common Issues
When you’re baking peanut butter blossoms, you’ll likely encounter two frustrating issues: cookies that spread into flat discs instead of holding their shape, and Hershey Kisses that slide right off the warm surface.
Spreading occurs when your dough’s too warm or lacks enough flour, so you’ll want to chill your mixture and verify your measurements before scooping.
To keep those chocolate kisses firmly planted, you’ll need to press them gently into cookies that are still hot enough to soften the chocolate’s base but not so hot that the dough continues spreading around them.
Cookies Spreading Too Much
If your peanut butter blossoms are flattening into thin wafers instead of holding their signature dome shape, you’re likely dealing with one of several fixable issues.
The material science of cookie dough demands precision.
Your ingredients’ temperature and ratio directly affect spread.
Consider these adjustments:
- Chill your dough thoroughly—at least two hours or overnight
- Use room-temperature peanut butter, not warm or straight from the fridge
- Reduce butter slightly or increase flour for firmer dough
- Lower oven temperature by 25°F and extend baking time
Overmixing develops gluten, causing excessive spread.
Mix just until combined.
Your Visual Appeal depends on proper baking temperature and dough consistency.
Don’t sacrifice freedom from failures—these adjustments restore your cookies’ characteristic rounded shape and guarantee restaurant-quality results every time you bake.
Hershey Kiss Won’t Stick
Once you’ve perfected your dough’s consistency and baking technique, you’ll face another common challenge: the Hershey Kiss sliding off or refusing to adhere to your warm cookie.
The problem stems from the wax coating on the chocolate, which creates surface tension that prevents proper bonding with the cookie’s soft surface. You’re fighting physics here—that protective layer keeps the Kiss from melting sufficiently to stick.
Here’s your solution: place the Kiss on the cookie immediately after removing it from the oven when the surface is still slightly tacky. Press gently but firmly for a few seconds.
If it’s still resisting, try using unwrapped chocolate instead, or briefly warm the Kiss’s bottom by holding it near heat before pressing it down. These approaches override that frustrating surface tension and guarantee your chocolate crowns stay put.
Serving Suggestions
How you present these beloved cookies can transform them from a simple treat into an elegant dessert experience.
Elevate humble cookies into an elegant dessert experience through thoughtful presentation and creative serving ideas.
You’ve got the freedom to get creative with your festive platters by arranging cookies on tiered cake stands or vintage china platters.
Consider these serving ideas:
- Pair with cold milk for a classic, nostalgic combination
- Serve alongside coffee or hot chocolate for cozy gatherings
- Offer with dessert wines like Moscato for sophisticated occasions
- Create a dessert board with complementary treats like brownies or fruit
You’ll find that drink pairings elevate the entire experience.
The chocolate-peanut butter combination harmonizes beautifully with both casual beverages and refined selections.
Whether you’re hosting an intimate gathering or a festive celebration, thoughtful presentation and strategic drink pairings transform these simple cookies into memorable moments.
Why These Cookies Stand Out
What makes peanut butter blossoms genuinely special is their perfect balance of contrasting textures and flavors—you’ll experience a soft, chewy peanut butter base that gives way to a melting chocolate kiss on top.
These cookies aren’t just delicious; they’re iconic.
Their heritage origins trace back to the 1950s, making them a timeless classic you won’t find everywhere.
What truly sets them apart is their nostalgic appeal—they transport you to childhood memories and holiday gatherings, evoking genuine warmth and comfort.
The combination of simple, quality ingredients creates something sophisticated yet approachable.
You control the baking process, ensuring each batch reaches your exact preference.
Whether slightly underbaked for extra chewiness or crisp around the edges, peanut butter blossoms deliver reliability and pure satisfaction every single time.
Frequently Asked Questions
Can I Make Peanut Butter Blossom Cookies Without Chocolate Kisses on Top?
You’ll absolutely nail peanut butter blossoms without traditional chocolate kisses.
Try alternative toppings like white chocolate chips, peanut butter cups, or candied nuts for texture variations that’ll keep things fresh.
You could press jam, caramel, or fudge into the center instead. Experiment with pretzel pieces or crushed cookies for that satisfying crunch you’re craving.
Your cookies won’t lose their charm—you’re just creating your own signature twist that breaks free from convention.
Are Peanut Butter Blossom Cookies Safe for People With Peanut Allergies?
No, traditional peanut butter blossom cookies aren’t safe for you if you’ve got peanut allergies. You’ll want to explore allergen alternatives like sunflower seed butter or tahini-based versions instead.
Before serving these treats to anyone with allergies, implement emergency preparedness by clearly labeling ingredients and keeping antihistamines accessible. You’re empowered to enjoy festive cookies without compromising your health or freedom by choosing safer substitutes that deliver that same delicious flavor you’re craving.
How Did Peanut Butter Blossom Cookies Originate and Who Invented Them?
You’ll find that peanut butter blossom cookies emerged from Midwestern ingenuity during the 1950s. A resourceful baker submitted this innovative recipe to a Pillsbury Grand National Baking Contest, where it captured hearts and won recognition.
The combination of peanut butter dough crowned with a chocolate kiss became an instant classic. You’re enjoying a treat born from creative independence and culinary boldness that revolutionized American cookie culture.
Can I Freeze Peanut Butter Blossom Cookie Dough Before Baking?
Yes, you can absolutely freeze your peanut butter blossom cookie dough.
Simply portion it into balls, place them on a baking sheet, and transfer to freezer storage for up to three months. When you’re ready to bake, you’ve got freedom—no thawing tips needed.
Bake directly from frozen, adding just a few extra minutes to your baking time. This method lets you enjoy fresh-baked cookies whenever you want without compromising quality or taste.
What Is the Nutritional Information per Cookie for Peanut Butter Blossoms?
You’ll find each peanut butter blossom delivers roughly 110-130 calories, depending on size. The calorie breakdown skews toward fat, given the peanut butter and chocolate kiss.
You’re looking at a macronutrient ratio favoring fat over carbs and protein. Each cookie packs about 6 grams of fat, 14 grams of carbs, and 3 grams of protein. These indulgent treats aren’t light, but they’re worth savoring in moderation when you crave that classic peanut-chocolate combo.


Leave a Comment