You’ll master pan-seared salmon that has crisp skin and flaky, moist flesh by following a few reliable techniques. Start with room-temperature, well-dried fillets, season simply, and use a hot, heavy skillet and high-smoke-point oil. I’ll walk you through timing, temperature, and finishing touches so you get consistent restaurant-quality results.
Ingredients and Measurements
For this pan-seared salmon you’ll want 4–8 oz fillets (skin-on, deboned and descaled), typically 2–4 fillets totaling about 1–1.33 lb so they cook evenly in roughly 4–8 minutes per side.
Choose fillets when sourcing salmon: fresh, firm flesh with bright color and a mild scent, or properly thawed frozen portions. Pat fillets dry, bring to room temperature 15–20 minutes, then season. Pat dry both sides of the fillets to ensure a crispy sear.
Select firm, bright salmon fillets—fresh or properly thawed—pat dry, rest 15–20 minutes, then season.
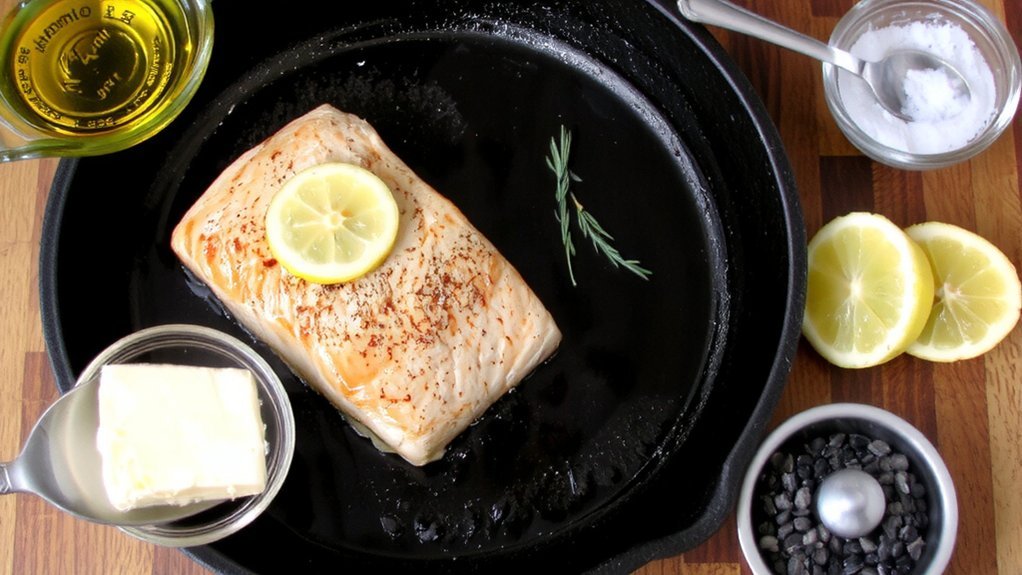
Essential seasoning options are salt and freshly ground black pepper; add garlic (1–5 cloves, minced), lemon juice or zest from half to one lemon, and herbs like parsley or dill (about 1 tablespoon chopped). Optionally use red pepper flakes for heat.
If using butter for finishing, allocate 1–4 tablespoons to baste or spoon over the cooked fillets. Salt up to ten minutes prior.
Recommended Cookware and Oils
You’ll want a heavy, well-heated skillet—stainless clad, carbon steel, or enameled cast iron are top choices, while non-stick works for delicate fillets.
Use high-smoke-point oils like grapeseed or refined canola and finish with a knob of butter for flavor.
Pick your pan by heat retention and responsiveness: carbon steel for quick sears, enameled cast iron for steady heat, stainless for precise temperature control.
Consider the 4Qt Hybrid Sauté Pan, which is recommended for cooking and designed for various cooking methods.
Best Skillets for Searing
Which skillet you choose matters when searing salmon. You want the best materials for consistent crust and control: cast iron or enameled cast iron for superior heat retention, stainless steel for even distribution and durability, carbon steel for lighter, responsive searing, and non‑stick when ease and gentle handling matter.
Follow straightforward cooking tips: pat fillets dry, preheat the pan thoroughly, press the fish briefly to guarantee contact, avoid overcrowding, and monitor cooking time by thickness. For best results, use high-heat oils like avocado oil and about 1 to 2 tablespoons to coat the bottom of the pan.
Use wide, thin spatulas or tongs to flip without tearing skin and a thermometer to verify doneness.
Choose cookware that matches your technique—weight, heat retention, and surface reactivity determine sear quality and flavor control.
Buy one good skillet and learn its behavior; consistency beats switching pans frequently for home.
High Smoke Point Oils
One essential choice when searing salmon is the oil: pick one with a high smoke point so you can heat the pan hot enough to build a crisp crust without burning the fat. Oil selection also impacts flavor and nutritional value, so opt for fats with a High smoke point.
Use avocado oil for its ~520°F smoke point and heart-healthy monounsaturated fats; it preserves the fish’s delicate taste. Canola and sunflower offer neutral options that won’t compete with seasonings. Peanut works if you want a subtle nutty accent.
Clarified butter gives rich flavor at high heat but costs more. Understand high smoke point oils benefits for safety, texture, and nutrient retention. Use a thin film, control heat, and finish in the oven if needed.
Consider oil flavor profiles—olive or sesame for intentional pairing—while keeping oil minimal.
Rest salmon briefly before serving.
Choosing Pan Materials
Three factors determine the best pan for searing salmon: heat responsiveness, heat retention, and reactivity.
You’ll pick carbon steel when you want rapid temperature changes and crackling skin; it builds a patina but won’t tolerate acidic basting.
Choose cast iron for unmatched heat retention and deep sear, accepting weight and slow heat-up.
Stainless steel balances heat distribution and nonreactivity, so you can baste with lemon or wine and get a lighter sear.
Nonstick simplifies cleanup and prevents sticking on delicate fillets but won’t handle extreme high heat.
Consider enameled cast iron or hybrids if you need cast-iron retention without reactivity or combined nonstick and stainless advantages.
Use this cookware performance comparison to match pan material characteristics to your recipe for peak searing results today.
Carbon steel pans are often pre-seasoned for immediate use, so you can start searing without lengthy setup.
Preparing the Fillets
Pat the fillets very dry with paper towels and check for and remove any scales and pin bones so the skin crisps and the flesh cooks evenly.
You’ll want the fillets to come to room temperature for about 15–20 minutes to promote uniform cooking.
After drying and deboning, rest them briefly on a rack or plate before seasoning and searing.
This simple method produces restaurant-quality pan-seared salmon with a crisp exterior and a tender, barely cooked center.
Patting Dry Thoroughly
Because you remove surface moisture, the skin will crisp instead of steaming, letting oil cling and form a brown, flavorful crust.
You should pat fillets thoroughly with clean paper towels, using deliberate patting techniques that blot without pressing through the flesh. Dry both skin and flesh before seasoning and again just before the pan to prevent condensation.
If time allows, place skin-side up in the fridge for 30–60 minutes to enhance moisture management and repeat patting after refrigeration. Avoid rinsing or using cloth towels that may reintroduce bacteria or moisture. Discard damp towels as you work to stop rewetting.
Proper drying promotes quick searing, reduces sticking, and yields an even Maillard crust while preserving delicate texture. Follow this routine every time for consistent results. This technique helps retain the fish’s omega-3 benefits while achieving a crispy skin.
Remove Scales and Bones
You’ll remove scales and pin bones before cooking to guarantee safety, clean texture, and a crispy skin: scrape scales from tail toward the head over a sink, rinse under cold running water, pat the fillet dry, then run your fingertips along the centerline and use clean tweezers or needle‑nose pliers to pull each pin bone out firmly in the direction it’s embedded.
Use the back of a knife or fish scaler and apply gentle, controlled pressure so you don’t damage the skin; contain scales on a covered surface and rinse thoroughly.
Check both sides even if only one will be skin‑on. Dry skin well to aid crisping. Also, during cooking remember that basting is crucial.
Follow scaling techniques and deboning tips: remove bones individually, re‑feel fillet, sanitize tools, and chill on ice.
Room-Temperature Resting
With the fillet scaled, deboned, and dried, get it ready for the pan by briefly letting it come closer to room temperature—about 15–20 minutes—so it cooks evenly, but never leave raw salmon out more than 2 hours total. Salmon is rich in omega-3 fatty acids, which support heart and brain health.
You’ll pat dry again, season just before searing, and ascertain the skillet is hot; this prevents moisture acting against a crisp skin.
Use these fish preparation techniques to balance presentation and safety: keep the fillet covered, avoid cross-contamination, and return it to refrigeration if the prep window extends. Room temperature safety matters—refrigerate if ambient conditions are warm.
Remember resting won’t tenderize but helps even cooking and a better sear; act promptly to maintain quality.
Store unused raw fillets below 40°F (4°C) and check freshness regularly daily.
Seasoning and Resting
If you pat the fillet dry and brush it lightly with oil, season immediately with kosher salt, freshly ground black pepper, and any dry rub spices you like—garlic and onion powders, paprika, thyme—so the seasoning sticks and the skin crisps without drawing out moisture. Before seasoning, make sure the salmon is at room temperature and patted dry.
Use seasoning techniques: rub salt and spices evenly or mix them into oil and brush on; season the pan to help form a crust. Season immediately to prevent moisture loss and keep spices vibrant.
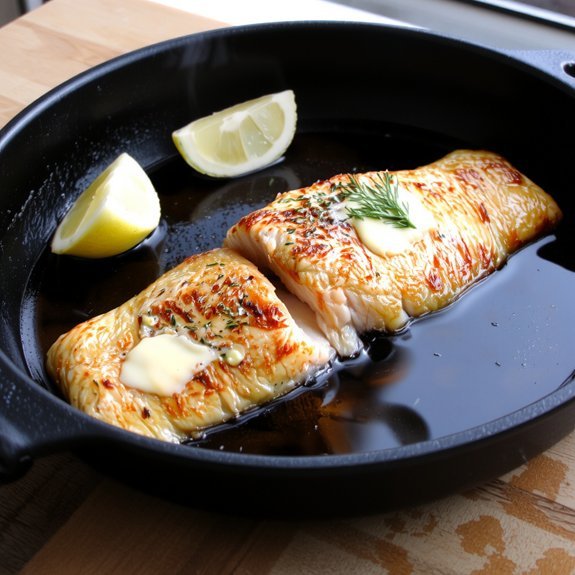
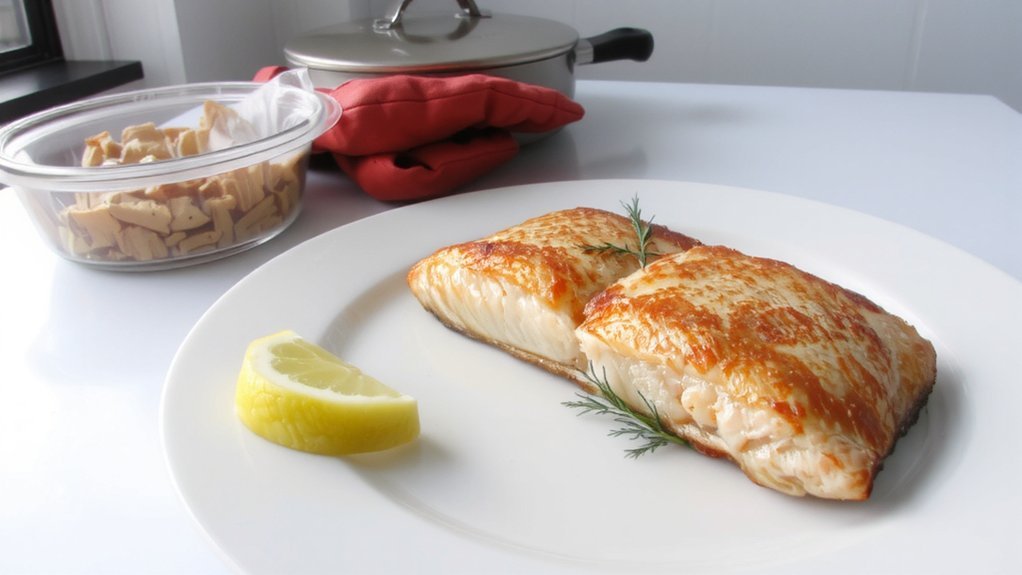
After searing, remove the fillet and use resting methods: rest 3 to 5 minutes on a warm plate, loosely tented with foil so the crust stays crisp.
Finish with a lemon squeeze or fresh dill. Brief rest locks juices and sharpens flavor for ideal serving temperature.
Pan-Searing Step-by-Step
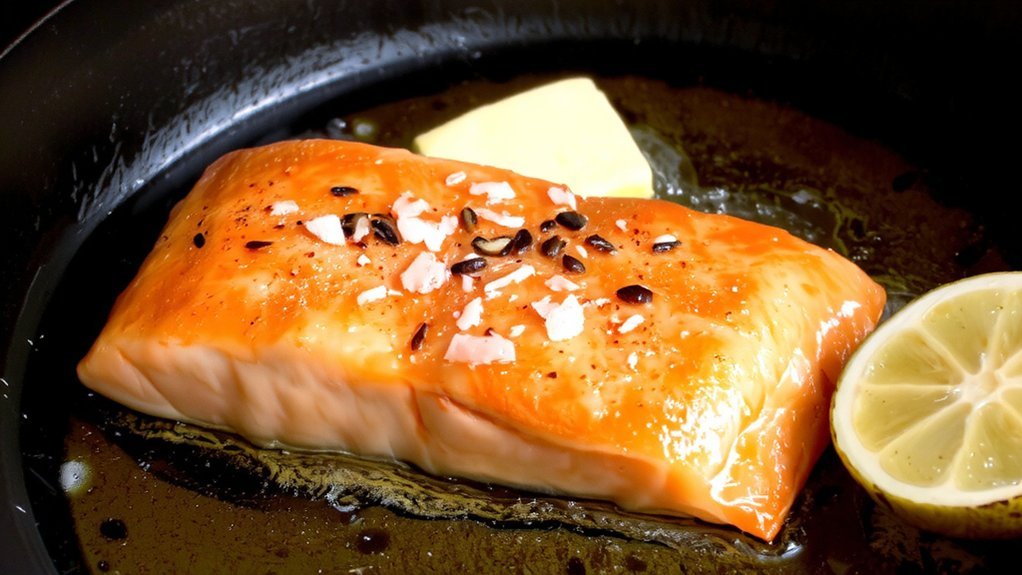
After seasoning and a short rest, heat a heavy skillet until very hot—test by flicking water so drops bead—and add 1–2 tablespoons of a high smoke-point oil until it shimmers. Dry fillets thoroughly; you want Skin crisping and even contact. Properly cooked salmon skin is safe and tasty. Lay salmon skin-side down, leaving about an inch between pieces, and press gently for 10–15 seconds. Cook undisturbed 4–6 minutes; use Searing techniques that avoid premature flipping. When flesh is opaque halfway up and skin releases easily, flip with a thin spatula and sear second side 2–5 minutes to desired doneness. Transfer promptly to stop carryover cooking. Avoid overcrowding and steaming to preserve crust. Monitor sizzle; if it’s muted, raise heat and wait for shimmer now.
| Step | Action |
|---|---|
| 1 | Heat pan |
| 2 | Oil shimmers |
| 3 | Dry, place skin-down |
| 4 | Press, sear |
| 5 | Flip, finish |
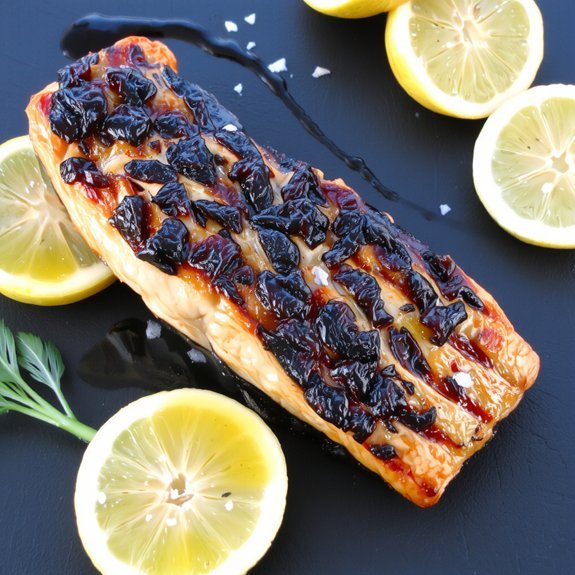
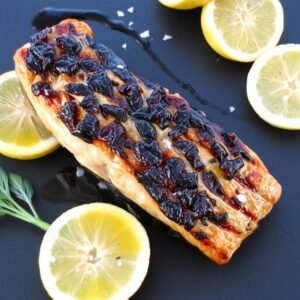
Flavor Enhancements and Serving Ideas
When you want to elevate pan-seared salmon, concentrate on bold, balanced accents and contrasting textures. Before cooking, always pat salmon dry with paper towels to help achieve a crisp skin. Use a dry rub of oregano, garlic powder and paprika with kosher salt and black pepper to build savory depth and a crisp crust.
You’ll choose high-smoke-point oil and a hot pan for an even sear. Finish with lemon juice or zest and a lemon-garlic butter or herb-infused oil to add brightness and richness.
For flavor pairing, match fruity salsas, mustard creams or light vinaigrettes; add wilted spinach, roasted potatoes or quinoa for balance.
Prioritize herb selection, using dill, parsley or thyme, or baby arugula for peppery lift.
Garnish with fresh herbs and a citrus squeeze before serving.
Storage, Reheating, and Leftovers
Because cooked salmon spoils quickly, refrigerate it within two hours and store cooled fillets tightly wrapped or in airtight containers on the coldest shelf at or below 40°F; use within 3–4 days or freeze for 3–4 months (marinated fillets up to 6 months). Always refrigerate fresh salmon promptly to Keep it Cold.
You should cool portions quickly, avoid cross‑contamination, label frozen packages, and keep salmon away from odors.
Thaw overnight in the refrigerator.
For reheating methods, warm gently at 275°F until 125–130°F internal, baste with butter or lemon to retain moisture; avoid the microwave.
Inspect leftovers for odor, color, or texture changes and discard if off. Manage leftover storage; don’t refreeze thawed portions; label and date packages.
- Cool, pat dry, wrap airtight.
- Thaw overnight in the fridge.
- Reheat gently; baste with butter again.


Leave a Comment