
Key Takeaways
- Combine flour, yeast, salt, sugar, oil, and warm water; knead 8–10 minutes until smooth and elastic dough forms.
- Proof dough 90 minutes at room temperature until doubled, then divide into eight balls and rest 30 minutes.
- Heat cast-iron skillet to 450°F; roll dough to ¼-inch thickness and cook 2–3 minutes per side until charred.
- Maintain 65–70% hydration ratio and use high-protein flour (12–14%) for optimal gluten structure and elasticity in naan.
- Store cooked naan in parchment-lined containers or freeze up to two months; reheat on skillet 1–2 minutes per side.
Ingredients You’ll Need

To create authentic naan bread, you’ll need to combine 3 cups (375g) all-purpose flour, 1½ teaspoons (7.5g) instant yeast, 1 teaspoon (6g) salt, 1 tablespoon (12.5g) sugar, 2 tablespoons (30ml) vegetable oil, and 1 cup (240ml) warm water.
Combine 3 cups flour, 1½ teaspoons yeast, 1 teaspoon salt, 1 tablespoon sugar, 2 tablespoons oil, and 1 cup warm water for authentic naan.
You’re free to experiment with flour varieties like whole wheat or bread flour for distinct texture profiles.
The yeast fermentation requires precise hydration ratios—don’t deviate substantially from the water measurement, as it affects gluten development and dough elasticity.
For dairy alternatives, you’ll find that yogurt substitutes or coconut milk can replace traditional yogurt when added at 3-4 tablespoons (45-60ml).
These alternatives modify the dough’s acidity and browning characteristics during cooking.
Maintain accurate ingredient ratios for ideal results, ensuring your naan achieves the desired rise, color, and taste profile.
Step-by-Step Instructions
Begin by combining your dry ingredients—flour, instant yeast, and salt—in a large mixing bowl, then create a well in the center where you’ll pour the warm water and vegetable oil.
Mix until you’ve formed a shaggy dough, then knead for eight to ten minutes until smooth and elastic.
Your equipment checklist should include a kitchen scale, stand mixer, and proofing schedule tracker.
Allow the dough to rise for ninety minutes at room temperature until doubled in volume.
Divide into eight equal portions, approximately 75 grams each.
Shape each portion into balls and rest for thirty minutes.
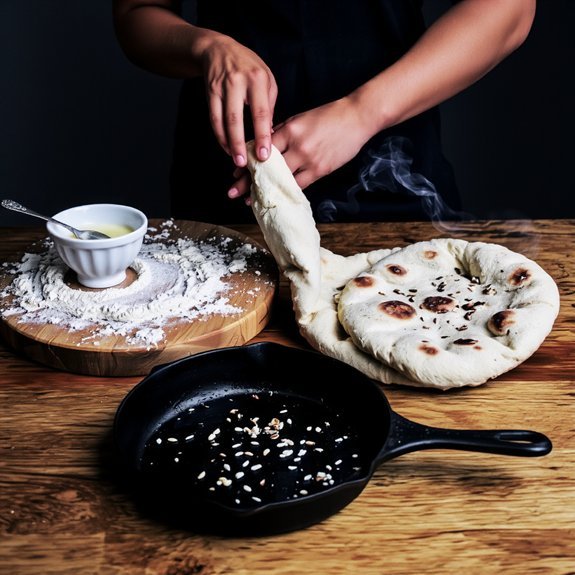
Heat your cast-iron skillet or griddle to 450°F.
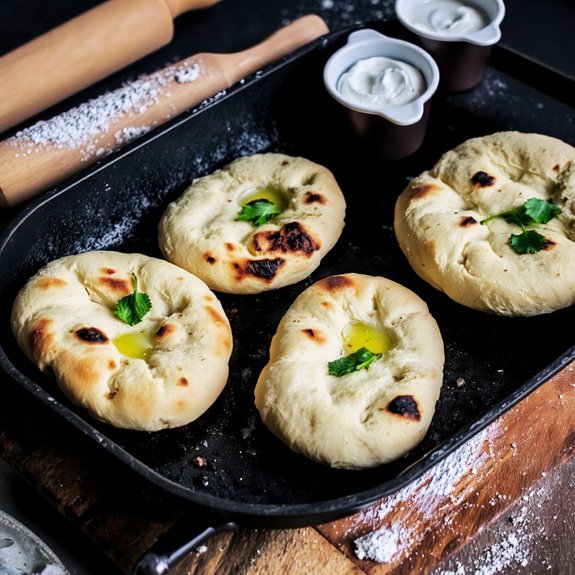
Roll each ball to quarter-inch thickness and cook two to three minutes per side until charred and puffed.
This proofing schedule guarantees ideal fermentation and texture development, giving you complete control over your final product.
Tips for Perfect Naan Every Time
Achieving consistently excellent naan requires you to monitor three critical variables: dough hydration, surface temperature, and cooking duration.
Monitor dough hydration, surface temperature, and cooking duration to achieve consistently excellent naan every time.
You’ll control gluten development through precise hydration ratios—aim for 65-70% water content relative to flour weight.
Surface moisture directly impacts browning; dust your work surface minimally to maintain dough tackiness without sticking.
- Cast iron or steel surfaces reach ideal 500°F+ temperatures for proper char development
- Rest dough balls 30 minutes minimum for gluten relaxation and extensibility
- Cook each naan 90-120 seconds per side for even heat penetration
- Monitor surface moisture levels—slightly tacky dough produces superior texture
- Use high-protein flour (12-14%) for enhanced gluten structure and elasticity
You’ll achieve restaurant-quality results by respecting these technical parameters and refusing to compromise on precision.
Serving Suggestions and Pairings

Once you’ve mastered the technical fundamentals of dough hydration and surface temperature control, you’ll discover that naan’s versatility truly shines through strategic pairing.
Meal pairings demand consideration of complementary flavor profiles and textural contrasts.
You’ll find naan excels with curries—both cream-based kormas and oil-forward vindaloos—leveraging its absorption capacity for sauce delivery.
Grilled meats, charred vegetables, and legume-forward preparations all benefit from naan’s structural integrity.
Drink pairings require balancing the bread’s slightly charred bitterness with beverage characteristics.
You’ll want crisp lagers or wheat beers that cut through richness without overpowering delicate spice notes.
Alternatively, lassis—yogurt-based beverages with mango or rose variations—provide cooling counterpoints to heat-intensive dishes.
Strategic pairing elevates your naan beyond mere bread, transforming it into a calculated component within holistic culinary presentations.
Storage and Make-Ahead Options

You’ll find that naan’s dough actually improves with cold fermentation, allowing you to prepare it 24–48 hours in advance by refrigerating it in an airtight container at 4°C (40°F). This extends your preparation flexibility substantially.
For freezing methods, portion your dough into individual balls and freeze up to three months.
Thaw overnight in the refrigerator before cooking.
Cooked naan freezes equally well for approximately two months.
Reheating techniques depend on storage method:
- Thaw frozen dough at refrigerator temperature for 8–12 hours
- Reheat cooked naan directly on cast-iron skillet at medium-high heat for 1–2 minutes per side
- Wrap refrigerated naan in damp cloth before microwaving 30 seconds
- Use convection oven at 175°C (350°F) for 3–4 minutes for ideal texture restoration
- Store cooled naan in parchment-lined containers to prevent moisture accumulation
This approach maximizes your operational autonomy while maintaining quality standards.
Frequently Asked Questions
Can I Make Naan Without a Traditional Tandoor Oven at Home?
You’ll absolutely achieve authentic naan without a tandoor. Master two primary methods: utilize your stovetop skillet at high heat (450°F equivalent) for direct char development, maintaining precise dough hydration ratios of 3:1 flour-to-liquid.
Alternatively, deploy your oven broiler, positioning naan 4-6 inches from the heating element for 2-3 minutes per side. Both techniques generate the requisite thermal intensity, producing properly blistered, puffed flatbread with ideal crust texture and interior structure.
What’s the Difference Between Naan and Other Indian Breads Like Roti?
You’ll find naan and roti diverge fundamentally in leavening differences.
Naan incorporates yeast or yogurt, producing fermentation and a pillowy crumb structure, while roti remains unleavened flatbread.
Regional variations distinguish them further—naan dominates North Indian cuisine with enriched doughs containing eggs and butter, whereas roti prevails across varied regions with minimal fat ratios.
Naan’s hydration percentage runs higher, typically 65-70%, enabling superior oven-spring development.
You’re choosing between fermented indulgence and utilitarian sustenance when selecting between these breads.
How Long Does Naan Dough Need to Rise Before Cooking?
You’ll need to let your naan dough rise for 4-8 hours at room temperature, though you’ve got flexibility depending on yeast activation rates and proofing variations.
Cold fermentation overnight yields superior flavor development and texture.
Professional bakers typically employ bulk fermentation at 75-80°F, monitoring gluten matrix development through the windowpane test.
You’re not locked into rigid timelines—warmer conditions accelerate proofing, while cooler temperatures extend it, giving you control over your final product’s characteristics.
Is Naan Bread Vegan, and What Are Suitable Substitutes for Dairy?
You’ll find that traditional naan isn’t vegan due to yogurt and ghee content.
However, you’re free to substitute coconut yogurt at a 1:1 ratio for dairy yogurt, maintaining fermentation benefits.
Replace ghee with vegan ghee using refined coconut oil or commercial vegan alternatives at identical measurements.
These substitutions preserve dough hydration and browning characteristics while eliminating animal products entirely.
Why Does My Naan Bread Turn Out Dense or Chewy Instead of Fluffy?
Your naan’s density stems from excessive gluten development and improper flour selection.
You’re likely overworking the dough, which toughens the crumb structure.
Choose bread flour sparingly—all-purpose flour delivers superior lightness.
Control your mixing ratios: too much water creates chewiness, while insufficient hydration yields dense results.
Proof adequately at room temperature, allowing fermentation to generate air pockets.
Your dough should remain supple, not overworked.
Master these variables, and you’ll achieve that desirable fluffy texture you’re after.


Leave a Comment