
Key Takeaways
- Select yeast type based on timeline and flavor goals: instant yeast for speed, wild yeast for complexity, commercial strains for consistency.
- Proof yeast in 105–110°F water for 5–10 minutes; foamy bloom confirms viability before adding to dough.
- Maintain dough temperature between 75–78°F and monitor fermentation by volume increase of 50–75%, aroma evolution, and texture smoothness.
- Store yeast in airtight, opaque containers at 32–50°F; active dry lasts 2–4 years, instant yeast 3–4 years when sealed.
- Document hydration percentages, fermentation times, and ambient conditions to identify patterns and troubleshoot issues like dense crumb or off-flavors.
Understanding Different Types of Yeast
Yeast’s role in baking hinges on selecting the right strain for your specific application. You’ve got three primary options: commercial baker’s yeast, instant yeast, and wild yeast.
Selecting the right yeast strain—commercial baker’s, instant, or wild—fundamentally determines your baking success and flavor outcomes.
Commercial baker’s yeast offers you predictable fermentation and consistent results, making it ideal for standardized recipes. Instant yeast, conversely, contains fewer dead cells and activates faster, giving you greater control over timing. Wild yeast—captured from your environment—presents unpredictable fermentation timelines but delivers unique flavor profiles that commercial strains can’t replicate.
Understanding strain genetics empowers you to manipulate dough development deliberately. Different strains produce varying alcohol levels, acidity, and gas production rates.
You’ll discover that strain selection directly impacts your bread’s texture, crust development, and flavor complexity. This knowledge liberates you from recipe dependency, enabling you to experiment confidently and achieve precisely the results you’re pursuing.
Selecting the Right Yeast for Your Recipe

You’ll find that active dry yeast and fresh yeast differ fundamentally in their moisture content and fermentation rates, requiring you to adjust hydration levels and timing based on which you’re using.
Instant yeast, conversely, offers you enhanced convenience through its smaller granule size, which accelerates dissolution and produces faster, more predictable fermentation than active dry varieties.
Your recipe’s timeline, desired flavor development, and ingredient ratios will ultimately determine which yeast type you should select for ideal results.
Active Dry Vs Fresh
When you’re selecting yeast for your baking project, understanding the structural and performance differences between active dry and fresh yeast becomes essential. Active dry yeast contains larger granules with a protective coating, offering extended shelf life and stability.
Fresh yeast, conversely, delivers higher moisture content and faster fermentation rates, making it ideal for culinary traditions requiring rapid rise times. You’ll find active dry yeast more forgiving for beginners, while fresh yeast demands precise temperature control.
Nutritional content differs slightly between the two; fresh yeast provides marginally higher B-vitamin concentrations. Active dry requires rehydration before mixing, whereas fresh yeast integrates directly into your dough.
Your choice depends on recipe requirements, storage capabilities, and desired fermentation speed. Both yield excellent results when you understand their distinct characteristics and applications.
Instant Yeast Benefits
Engineered through further processing of active dry yeast, instant yeast—also called bread machine yeast—offers superior fermentation reliability and consistency.
You’ll benefit from its smaller granule size, which dissolves faster and integrates seamlessly into doughs without pre-hydration.
This efficiency delivers time savings, reducing your overall prep work substantially.
You’ll appreciate the cost savings too. Since instant yeast’s enhanced potency means you’re using less per batch, your supply stretches further.
You won’t need to adjust hydration levels in your recipes, eliminating guesswork and potential failures.
When you choose instant yeast, you’re selecting predictability. It performs uniformly across varying temperatures and conditions, giving you the control and consistency serious bakers demand.
For recipes requiring speed and dependability, instant yeast remains your ideal choice.
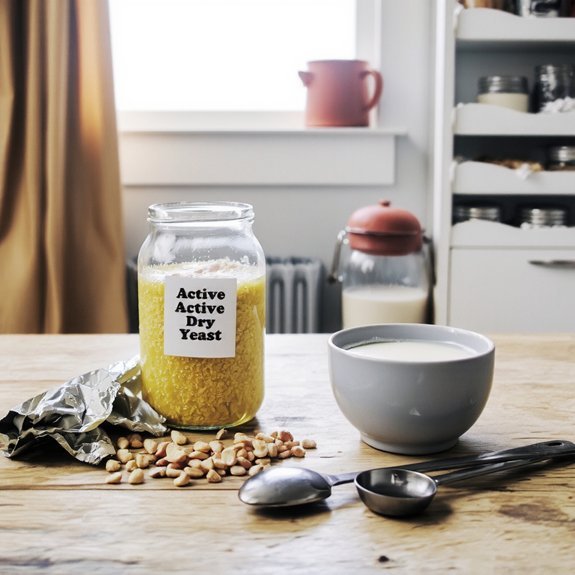
Proper Storage and Shelf Life
Because yeast’s viability diminishes over time through natural metabolic decline and environmental degradation,
proper storage is critical for maintaining leavening power.
You’ll maximize your yeast’s effectiveness by implementing these storage strategies:
- Temperature control: Keep yeast between 32-50°F in your refrigerator or freezer to dramatically slow metabolic activity and extend viability.
- Moisture control: Store yeast in airtight containers, preventing humidity exposure that accelerates degradation and reduces fermentation capacity.
- Expiration labeling: Check dates religiously—active dry yeast remains viable 2-4 years refrigerated, while instant yeast lasts 3-4 years when properly sealed.
- Container integrity: Use opaque, hermetic vessels that block light and oxygen, both enemies of yeast stability.
You’ll gain freedom from failed rises and unpredictable fermentation by respecting these storage fundamentals.
Your baking results depend on treating yeast as the living organism it truly is.
Activating Yeast: Proofing and Blooming
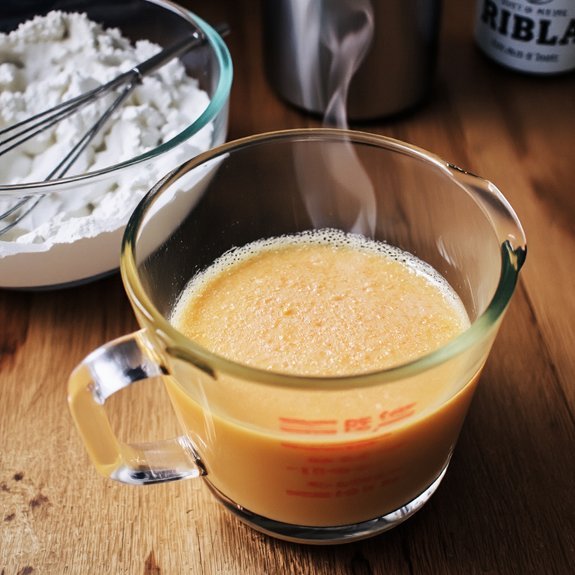
How do you know if your yeast is actually alive and ready to leaven your dough? Proofing—activating yeast before mixing—ensures you’re not wasting ingredients on dead cells.
| Temperature | Time | Result |
|---|---|---|
| 105-110°F | 5-10 min | Ideal activation |
| Below 100°F | 15+ min | Sluggish response |
| Above 115°F | Immediate | Cell death |
Combine yeast with warm water and observe bloom visuals: a foamy layer indicates viable yeast. Water chemistry matters—chlorinated or mineral-heavy water can inhibit fermentation. Use filtered or dechlorinated water when possible.
This blooming process confirms yeast viability before you commit your flour and salt. You’ll detect any dead yeast immediately rather than discovering it hours into bulk fermentation when you’ve already invested time and resources into a failed batch.
Temperature and Its Role in Fermentation

You’ll find that yeast fermentation accelerates dramatically when you maintain temperatures between 75–80°F (24–27°C), where enzyme activity peaks and metabolic processes operate most efficiently.
Conversely, you’ll observe markedly slower fermentation at cooler temperatures—typically below 65°F (18°C)—because reduced heat constrains yeast cell metabolism and reproduction rates.
Optimal Heat for Activation
Activating yeast requires precise temperature control because the microorganisms’ metabolic rate directly correlates with heat exposure.
You’ll want to master the fundamentals of heat transfer and water chemistry to achieve consistent results.
Here’s what you need to know:
- Ideal temperature range: Keep your water between 105-110°F (40-43°C) for best activation without killing the cells.
- Heat transfer dynamics: You’re managing thermal energy transfer to accelerate yeast metabolism without denaturing proteins.
- Water chemistry impact: Mineral content and pH influence yeast activation rates, so you’re not just controlling temperature alone.
- Timing precision: You’ll see visible fermentation within 5-10 minutes at ideal temperatures, signaling successful activation.
Master these variables, and you’ll gain complete control over your fermentation process.
Cold Fermentation Slows Growth
While rapid activation demands warmth, cold fermentation operates on an entirely different metabolic principle.
When you refrigerate your dough, yeast slows considerably, extending fermentation over hours or days.
This deliberate deceleration grants you remarkable control—you’re not enslaved to tight timelines or rushed schedules.
During cold fermentation, yeast consumes sugars at a measured pace, producing complex flavor development that quick fermentation can’t achieve.
You’ll notice deeper, more nuanced tastes in your finished bread.
Simultaneously, cold conditions promote gluten strengthening as the extended timeframe allows protein networks to develop naturally without aggressive mixing.
You’ll also benefit from improved dough handling and superior oven spring.
Cold fermentation transforms baking from a race against time into a deliberate, manageable process where you dictate the pace.
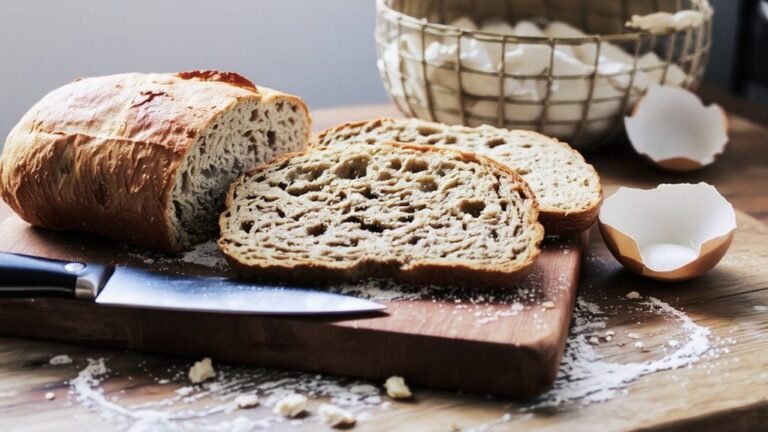
Recognizing Signs of Successful Fermentation
Because yeast metabolism directly impacts dough development and final product quality, you’ll want to monitor specific indicators throughout the fermentation process.
Yeast metabolism directly shapes dough development and final product quality, making fermentation monitoring essential for consistent, superior results.
- Aroma evolution – Notice how the dough’s scent shifts from mild to distinctly yeasty and slightly sweet, signaling active fermentation and organic acid production.
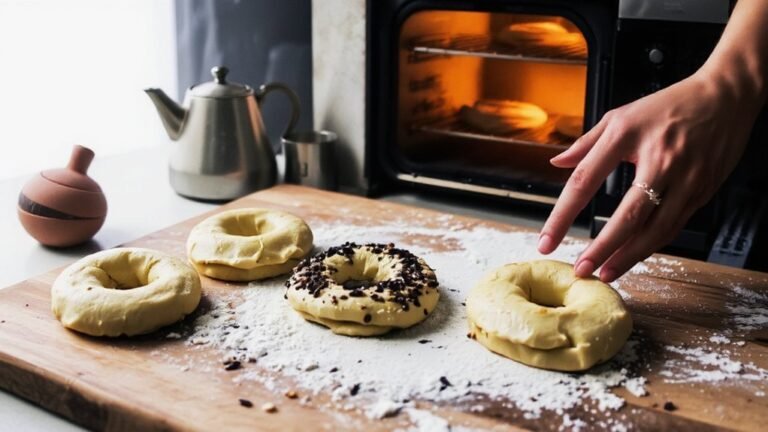
- Volume increase – Watch for dough that rises 50-75% above its original mass, indicating robust yeast activity and gas production.
- Texture transformation – Feel the dough become smoother, more extensible, and slightly tacky as gluten develops and fermentation progresses.
- Crumb structure development – Observe how an open, irregular crumb pattern emerges, revealing proper fermentation timing and flavor complexity.
These signs guarantee you’ll achieve ideal results without guesswork or unnecessary intervention.
Calculating Fermentation Times
How do you determine when your dough’s reached ideal fermentation?
You’ll calculate fermentation times by considering multiple variables: temperature, dough hydration, and yeast quantity.
Room temperature dramatically affects fermentation speed—warmer environments accelerate it, while cooler ones slow it down.
Use fermentation calculators to input your specific conditions and receive precise timing estimates.
These tools account for your flour type, salt content, and desired flavor development.
Don’t overlook altitude adjustments, which notably impact fermentation rates.
Higher elevations require extended times due to lower atmospheric pressure and faster water evaporation.
You’ll need to monitor your dough visually alongside calculated times, looking for proper volume increase and surface activity.
Record your results meticulously.
This data becomes invaluable for future bakes, allowing you to refine your process and achieve consistent, superior results without guesswork.
Common Yeast-Related Baking Problems
Even with precise fermentation calculations, you’ll encounter predictable yeast-related failures that derail your baking.
Understanding these common issues empowers you to troubleshoot independently and master your craft.
- Dense crumb structure – Insufficient yeast activity or inadequate fermentation time creates compact, heavy bread lacking proper rise and air distribution.
- Crust discoloration – Uneven browning results from inconsistent oven temperature, excessive sugar in your dough, or over-fermentation affecting surface moisture content.
- Poor dough elasticity – Weak gluten development combined with yeast imbalance produces dough that won’t hold gas bubbles effectively, collapsing during baking.
- Sour, off-flavors – Over-fermentation generates excessive acetic acid, overwhelming your bread’s natural complexity and taste profile.
Recognizing these symptoms lets you adjust your process confidently without compromising your baking independence.
Tips for Consistent Results Every Time
You’ll achieve reliable results by implementing standardized procedures that control the variables affecting yeast performance.
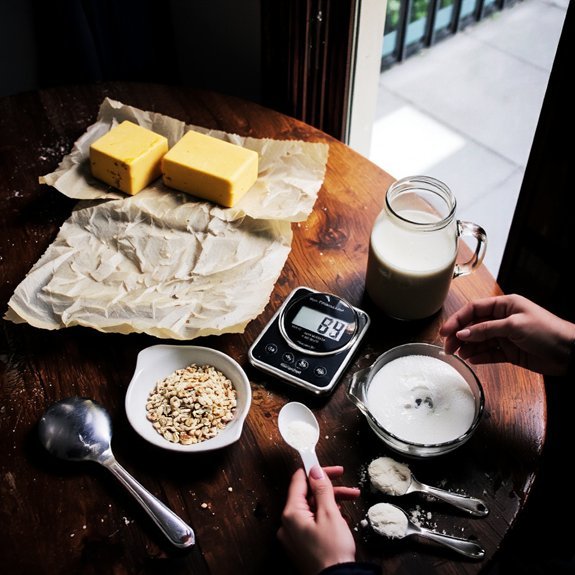
Start with accurate scaling—use a digital scale rather than volume measurements to guarantee precise ingredient ratios. Temperature control proves critical; maintain your dough between 75-78°F for ideal fermentation.
Maintain a clean workspace to prevent contamination that compromises yeast activity. Document your process meticulously, noting hydration percentages, fermentation times, and ambient conditions.
This data reveals patterns affecting your outcomes. Use the same yeast source consistently, as different brands exhibit varying potency levels.
Proof your yeast before mixing if using older supplies. Store yeast properly in cool, dry conditions to preserve viability. These methodical practices eliminate guesswork, granting you reproducible success batch after batch.
Frequently Asked Questions
Can I Substitute One Type of Yeast for Another in My Recipes?
You can substitute yeast types, but you’ll need precise conversions.
One tablespoon of active dry yeast equals one package of instant yeast or compressed yeast.
However, sourdough starter won’t convert directly—it demands different hydration ratios and fermentation timing.
You’ve got freedom to experiment, yet understand that substitutions alter rise rates, flavor development, and texture.
Don’t just swap without adjusting your recipe’s liquid content and proofing schedule accordingly.
How Does Altitude Affect Yeast Fermentation and Baking Times?
At higher altitudes, you’ll encounter reduced pressure that accelerates yeast fermentation dramatically. Your dough experiences quicker proofing times—sometimes 25-50% faster than sea level recipes.
You’ll need to adjust your baking schedule accordingly, reducing bulk fermentation and final proof periods. Lower atmospheric pressure allows CO2 to escape more rapidly from your dough, demanding vigilant monitoring to prevent over-proofing and structural collapse in your finished products.
What Is the Difference Between Instant Yeast and Active Dry Yeast?
You’ll find instant yeast has smaller particle size than active dry yeast, enabling faster hydration and fermentation. Your activation method differs too—instant yeast doesn’t require blooming in water beforehand, while active dry yeast benefits from it.
You can substitute instant yeast one-for-one in recipes, though you’ll achieve quicker results. This distinction gives you flexibility; choose based on your timeline and preferred baking control.
Can I Use Expired Yeast, and How Do I Test Its Viability?
You shouldn’t use expired yeast; it’ll likely fail.
Test viability by dissolving a quarter teaspoon in warm water with sugar.
Viable yeast’ll foam within ten minutes.
For yeast storage and shelf life extension, you’ve got freedom to refrigerate or freeze your supply—this dramatically extends potency beyond printed dates.
Keep containers airtight and away from heat and moisture to maximize longevity.
Why Does My Dough Rise Differently in Winter Versus Summer?
Your dough’s rising patterns shift seasonally due to temperature effects and humidity influence. Winter’s cooler air slows yeast fermentation, extending rise times substantially.
Summer’s warmth accelerates metabolic activity, producing faster, more vigorous rises. You’ll also notice humidity variations affect gluten hydration and dough elasticity.
To maintain consistent results, you’ve got to adjust fermentation schedules seasonally and monitor ambient conditions carefully. Controlling your environment—through temperature regulation or timing adjustments—gives you the freedom to achieve predictable outcomes year-round.


Leave a Comment