
Key Takeaways
- Add baking soda last to buttermilk batter, then immediately transfer to a preheated oven to maximize rise.
- Use a 1:1 weight ratio of buttermilk to flour for optimal hydration in cakes and quick breads.
- Keep buttermilk and fat cold when making biscuits and scones to achieve superior flakiness and layer separation.
- Mix dry ingredients thoroughly before adding buttermilk to ensure even leavening distribution throughout the batter or dough.
- Substitute buttermilk with milk plus lemon juice or vinegar (1 tbsp acid per cup); let sit 5–10 minutes.
What Is Buttermilk and Where Does It Come From?
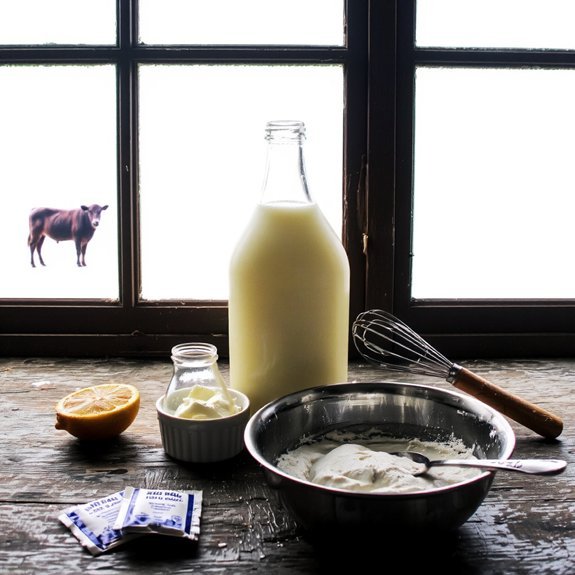
Buttermilk—the tangy liquid left behind after churning butter—isn’t just a byproduct; it’s an essential ingredient that transforms your baked goods.
You’ll find its cultural origins deeply rooted in European dairy traditions, where traditional churning produced this acidic liquid naturally.
Today’s commercial buttermilk differs from its historical counterpart; manufacturers culture skim milk with lactic acid bacteria to replicate that tang you need.
When you use buttermilk in your recipes, you’re leveraging its acidity to activate baking soda, creating lift and tenderness.
This chemical reaction produces carbon dioxide, giving you lighter cakes, fluffier pancakes, and more tender biscuits.
The lactic acid also tenderizes gluten strands, preventing tough textures.
Understanding buttermilk’s composition—primarily water, lactose, and lactic acid—empowers you to substitute and adjust recipes confidently.
The Science of Buttermilk’s Acidity in Baking
When you combine buttermilk with baking soda, you’re initiating an essential acid-base reaction that directly impacts your baked goods’ texture and rise. The lactic acid in buttermilk neutralizes baking soda, producing carbon dioxide gas that creates lift and crumb structure.
The lactic acid in buttermilk neutralizes baking soda, producing carbon dioxide gas that creates essential lift and crumb structure in your baked goods.
This reaction also triggers Maillard acceleration, browning your baked goods faster and developing complex flavors. Additionally, buttermilk’s acidity causes casein solubilization, breaking down milk proteins and creating a more tender crumb.
You’ll notice improved moisture retention and enhanced browning compared to recipes using water or regular milk. Understanding this chemistry empowers you to control your baking outcomes precisely.
Adjust buttermilk ratios strategically to achieve your desired texture, color, and flavor profile in any application.
How Buttermilk Reacts With Baking Soda

The acid-base chemistry you’ve just learned provides the foundation for understanding how buttermilk and baking soda interact at the molecular level.
When you combine these ingredients, the acid neutralizes the base, producing carbon dioxide gas that leavens your baked goods.
- The lactic acid in buttermilk immediately begins neutralizing baking soda
- Gas bubbles form instantly, requiring prompt mixing order adherence
- Delaying batter transfer to the oven sacrifices rise potential
- Proper oven spring depends on capturing CO₂ before heat sets the crumb structure
- Over-mixing after combining ingredients releases gas prematurely, reducing lift
Your timing matters tremendously.
Add baking soda last, then transfer your batter immediately to a preheated oven.
This maximizes oven spring and guarantees the light, tender crumb you’re pursuing.
Best Buttermilk Substitutes When You Don’t Have Any

You can create acidic milk alternatives by adding lemon juice or vinegar to regular milk, which mimics buttermilk’s acidity and replicates the chemical reaction with baking soda.
If you’re avoiding dairy, you’ll need to combine a non-dairy milk with an acid—such as coconut milk with vinegar or almond milk with lemon juice—to achieve the same leavening effect.
Let the mixture sit for 5-10 minutes before using it in your recipe to allow the acid to properly curdle and activate.
Acidic Milk Alternatives
What happens when you’ve committed to a buttermilk-dependent recipe but find your refrigerator empty?
You’ve got acidic alternatives that’ll deliver comparable results without compromise.
Create your own buttermilk substitute by combining regular milk with acid.
Here’s what you can use:
- Lemon juice—add 1 tablespoon per cup of milk
- White vinegar—use 1 tablespoon per cup of milk
- Yogurt—thin with water to achieve proper consistency
- Sour cream—dilute similarly to yogurt for ideal texture
- Kefir—requires minimal thinning due to existing acidity
These options provide the acidic element your baked goods need for proper rise and tenderness.
The nutritional comparison shows slight variations, but they’re negligible for most applications.
Select based on your culinary pairings—tangy yogurt works beautifully in pancakes, while vinegar suits dense cakes perfectly.
Let mixtures sit five minutes before using to activate the acidic reaction fully.
Dairy-Free Substitution Options
Accommodating dairy-free baking doesn’t require sacrificing buttermilk’s functional properties—you’ll achieve comparable acidity and moisture with plant-based alternatives.
You can combine non-dairy milk with lemon juice or vinegar to replicate buttermilk’s acidic profile.
Soy milk paired with apple cider vinegar creates reliable results for most recipes.
Consider your flavor pairing carefully when selecting alternatives.
Coconut milk works well in chocolate or spiced applications, while oat milk suits vanilla-forward baked goods.
Almond milk delivers neutral results across varied recipes.
Nutritional differences exist between options.
Soy milk provides comparable protein content to dairy buttermilk, whereas other plant-based milks typically contain less.
Fortified varieties offer similar calcium and vitamin D levels.
You’ll want to account for these variations when developing recipes requiring specific nutritional profiles.
Your chosen substitute’s fat content affects texture and crumb structure considerably.
Buttermilk in Quick Breads and Pancakes
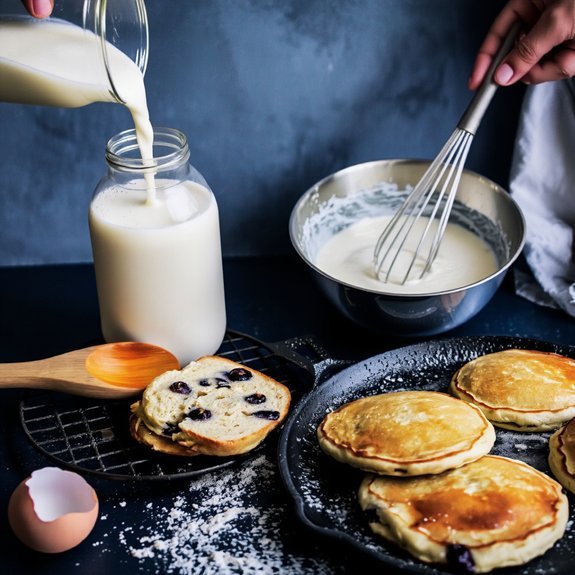
Incorporating buttermilk into quick breads and pancakes leverages its acidity to activate chemical leavening agents, creating superior texture and moisture retention.
You’ll achieve consistently tender crumbs and fluffy pancakes by following these key techniques:
- Use a 1:1 ratio of buttermilk to flour weight for ideal hydration
- Let batter rest 5-10 minutes before cooking to fully activate baking soda
- Substitute regular milk with buttermilk in any recipe calling for acidic ingredients
- Adjust baking soda quantity—typically ¼ teaspoon per cup of buttermilk
- Add flavor variations like cinnamon, vanilla, or lemon zest for complexity
These adjustments guarantee you won’t encounter dense results or flat pancakes.
Serving suggestions include pairing quick breads with whipped butter and preserves, while offering pancakes with maple syrup and fresh berries.
You’ll master buttermilk baking through precise measurement and understanding its chemical interactions.
Creating Tender Cakes With Buttermilk
When you add buttermilk to your cake batter, the lactic acid reacts with baking soda to create carbon dioxide, which produces fine air bubbles that yield a tender crumb.
You’ll want to balance your liquid ratios carefully, as buttermilk’s acidity and thickness differ from regular milk, affecting both moisture content and structure.
This chemical reaction also neutralizes the metallic aftertaste of baking soda while promoting the Maillard reaction for improved browning and flavor development.
Acid Reacts With Baking Soda
Because buttermilk’s lactic acid activates baking soda immediately upon contact, you’ll generate carbon dioxide bubbles that create lift and tender crumb structure in your batter.
This chemical interaction involves specific reaction kinetics that you can control:
- Timing matters: The acid-base reaction begins instantly, so you’ll mix and bake quickly to capture gas before it escapes
- Gas solubility: CO₂ dissolves differently in liquid batters, affecting bubble distribution and final texture
- pH adjustment: Buttermilk lowers your batter’s pH, creating ideal conditions for protein denaturation
- Temperature influence: Warmer batters accelerate reaction rates, while cooler ones slow the process
- Ratio precision: Use one teaspoon baking soda per cup buttermilk for complete neutralization
Understanding these principles gives you freedom to adjust recipes confidently, ensuring consistent results every time you bake.
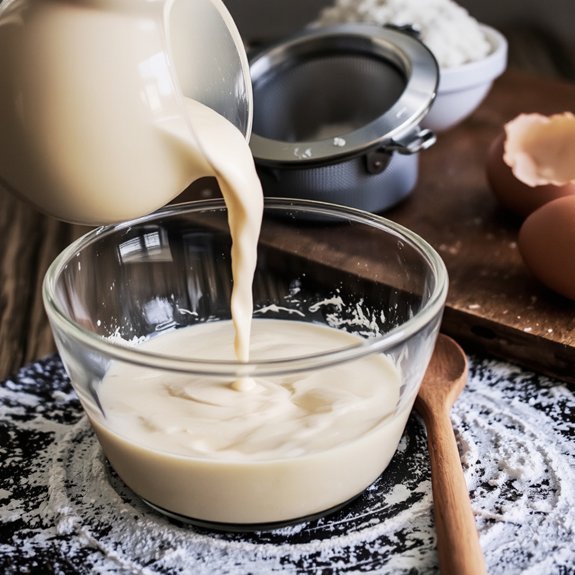
Moisture Balance For Tender Crumb
Buttermilk’s high moisture content—roughly 90% water—directly influences your cake’s crumb structure by keeping gluten strands pliable and preventing over-development that’d create toughness.
You’ll achieve ideal results by maintaining precise hydration ratios, typically 1:1 buttermilk to flour by weight for most cake recipes.
This moisture establishes an environment where crumb aeration develops uniformly.
The lactic acid simultaneously tenderizes protein networks while the liquid phase supports gas bubble formation during mixing and baking.
You’re effectively controlling moisture distribution to prevent dense, dry crumbs.
When you substitute buttermilk for standard milk, you’re trading water content for acidic compounds that enhance tenderness.
Monitor your batter’s consistency carefully—it should coat your whisk without dripping excessively.
This balance guarantees your finished cake remains moist, tender, and structurally sound throughout storage.
Perfect Biscuits and Scones Using Buttermilk
Creating tender, flaky biscuits and scones relies on buttermilk’s acidity to react with baking soda, producing carbon dioxide that creates lift and a delicate crumb structure.
You’ll achieve ideal results by following these key principles:
- Keep your dough handling minimal—overworking develops gluten, toughening your baked goods
- Use cold buttermilk and cold fat for maximum flakiness in your layers
- Mix dry ingredients thoroughly before adding buttermilk to guarantee even leavening
- Fold dough gently two to three times for distinct, separated layers
- Master browning techniques by baking at 425°F until golden-brown edges form
The acid-base reaction between buttermilk and baking soda activates immediately, so work quickly.
Don’t overhandle your dough or you’ll compact those precious air pockets. Your reward: perfectly risen, tender biscuits and scones with superior texture and flavor.
Storage Tips and Shelf Life for Buttermilk
Once you’ve finished baking, proper storage will extend your buttermilk’s usability and prevent spoilage. You’ll want to keep your buttermilk in the coldest part of your fridge, where it’ll last approximately two weeks from the opening date. For extended preservation, consider freezing methods—pour buttermilk into ice cube trays or freezer bags for convenient portioning. Frozen buttermilk maintains quality for three months.
| Storage Method | Fridge Duration | Temperature | Best For |
|---|---|---|---|
| Original Container | 2 weeks | 35-40°F | Regular baking |
| Freezer Bags | 3 months | 0°F or below | Long-term storage |
| Ice Cube Trays | 3 months | 0°F or below | Portion control |
| Thawed Buttermilk | 1 week | 35-40°F | Post-thaw use |
Always seal containers tightly to prevent absorption of surrounding odors.
Frequently Asked Questions
Can I Use Buttermilk Past Its Expiration Date if It Smells Sour?
You shouldn’t use expired buttermilk, even if sourness seems normal.
While buttermilk’s naturally tangy smell makes smell evaluation tricky, spoilage indicators beyond typical tartness signal dangerous bacterial growth.
Trust your independence—examine the liquid for pink streaks, mold, or off-putting odors distinctly different from standard sourness.
When doubt creeps in, discard it.
Your health’s worth more than salvaging one ingredient.
Fresh buttermilk’s reliability guarantees better baking results anyway.
Does Buttermilk Work the Same in Savory Cooking as It Does in Baking?
You’ll find buttermilk functions differently in savory cooking than baking. While baking relies on its acidic functions for leavening reactions, savory applications leverage marinade benefits.
You can use buttermilk to tenderize meats through enzymatic breakdown, enhance flavor absorption, and create tangy dressings. The acidic properties remain consistent, but you’re exploiting them for texture modification and taste development rather than chemical rise.
This versatility gives you freedom to experiment across cuisines.
How Do I Make Buttermilk From Regular Milk and Vinegar Accurately?
You’ll measure one tablespoon of white vinegar or lemon juice per cup of regular milk—precision matters here.
Pour your milk into a container and add the acid, then let it sit undisturbed at room temperature for five to ten minutes.
Temperature control guarantees proper curdling.
Stir gently once it’s thickened.
You’ve now created an acceptable buttermilk substitute that’ll work in your baking projects without compromising results.
Will Buttermilk Affect the Color or Texture of My Baked Goods?
Yes, buttermilk’ll notably impact your baked goods. You’ll achieve a finer crumb structure due to the acid reacting with baking soda, creating CO2 that aerates your batter effectively. The lactic acid accelerates the browning reaction, giving you deeper, more golden exteriors.
You’ll notice a tender, moist crumb and enhanced browning compared to regular milk. This chemical interaction grants you greater control over your final product’s texture and appearance, allowing freedom in your baking results.
Can I Freeze Buttermilk for Later Use in Baking Recipes?
Yes, you can freeze buttermilk for extended storage.
Use airtight, freezer-safe containers—leaving headspace for expansion.
Freeze for up to three months.
When you’re ready, thaw it in your refrigerator overnight.
Thawing tips: don’t use heat, which damages the composition.
Shake well after thawing since separation may occur.
Your baked goods’ll perform identically to fresh buttermilk applications.
This method gives you complete control over your baking schedule.


Leave a Comment