
Key Takeaways
- Cool layers completely on wire racks before storage to prevent condensation and texture damage.
- Wrap each layer individually in plastic wrap or airtight containers to lock in moisture.
- Store at room temperature up to two days or refrigerate for three to five days.
- Freeze wrapped layers in airtight containers for up to three months of extended freshness.
- Acclimate cold layers to room temperature before assembly to prevent cracking during frosting and trimming.
Why Proper Storage Matters for Cake Quality

Because cake’s delicate crumb structure and moisture content deteriorate rapidly when exposed to improper conditions, you’ll want to implement strategic storage techniques that preserve both texture and flavor.
Incorrect storage accelerates staling through moisture loss and unwanted ingredient interaction that compromises your cake’s integrity.
You’re investing time and resources into baking, so protecting that investment makes sense.
Proper storage maintains presentation aesthetics when you’re ready to assemble or serve your layers.
You’ll prevent surface drying, mold development, and flavor degradation that undermine your effort.
Temperature fluctuations and humidity exposure create conditions where crumbs dry out and frosting separates unevenly.
Cooling Your Cake Layers Completely

Before you can safely store your cake layers, you’ll need to cool them completely to room temperature.
This process is critical because storing warm cake traps steam, which compromises your crumb structure and promotes mold growth.
Storing warm cake traps steam, compromising crumb structure and promoting mold growth.
Remove your layers from the pans immediately after baking to maximize air circulation.
Place them on wire racks rather than solid surfaces—this prevents moisture accumulation underneath.
Make certain adequate space between layers so air flows freely around all sides.
Cooling typically takes two to three hours, depending on cake thickness and room temperature.
Resist the temptation to refrigerate partially cooled layers; condensation will form and damage the texture.
Once completely cool to the touch, your layers are ready for storage.
This foundational step guarantees best quality and longevity.
Wrapping Techniques for Maximum Freshness
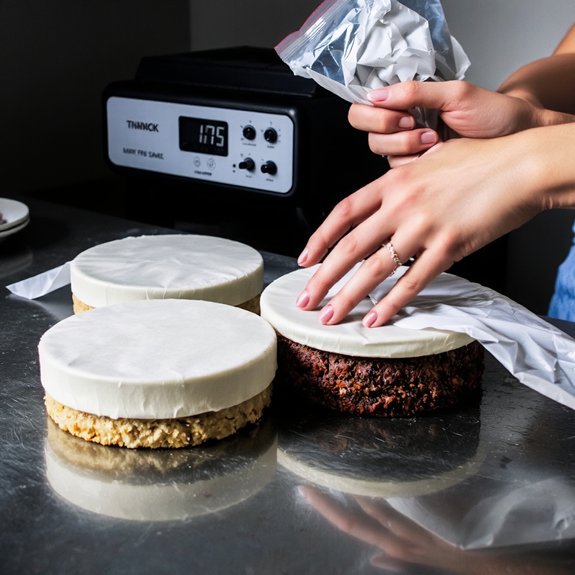
Once your cake layers have reached room temperature, you’ll want to wrap them properly to lock in moisture and prevent them from absorbing odors or drying out.
| Wrapping Method | Benefits | Best For |
|---|---|---|
| Plastic wrap | Airtight seal, economical | Short-term storage |
| Beeswax wraps | Reusable, eco-friendly, breathable | Sustainable bakers |
| Compostable film | Biodegradable, moisture-resistant | Environmentally conscious storage |
You’ll achieve ideal results by wrapping each layer individually, ensuring complete coverage without air pockets. Beeswax wraps offer a sustainable alternative, molding perfectly around cake edges while remaining reusable for future projects. Compostable film provides reliable moisture protection while aligning with eco-conscious practices. Whatever method you choose, store wrapped layers at room temperature for up to two days, or refrigerate for extended freshness.
Room Temperature Storage Methods

You’ll want to place your cake layers in an airtight container to maintain moisture and prevent oxidation at room temperature.
For ideal protection, you can use a cake box with a fitted lid, ensuring the container’s interior dimensions accommodate your layers without forcing them together. Store your container in a cool, dry area away from direct sunlight and heat sources to preserve texture and flavor quality.
Airtight Container Method
For room temperature storage that keeps cake layers fresh for up to two days, an airtight container provides an effective barrier against moisture loss and external odors.
Here’s how you’ll achieve ideal results:
- Select rigid containers – Choose hard-sided, food-grade plastic or glass containers that won’t collapse and damage your layers
- Prevent odor transfer – Place parchment paper between layers and the container walls to isolate flavors
- Ensure proper sealing – Verify all gaskets and lids create an impenetrable seal before storing
- Implement labeling system – Mark containers with storage date and cake variety for easy identification
You’ll maintain structural integrity and flavor profile by controlling the internal environment.
Stack layers carefully, allowing adequate space to prevent frosting compression.
Check your seal regularly to confirm no air infiltration occurs during storage.
Cake Box Storage Tips
While bakery boxes offer a convenient alternative to rigid containers, they require strategic preparation to maintain cake layer quality at room temperature.
You’ll want to establish proper stacking order and use quality box liners to prevent shifting and moisture absorption. Here’s what you need to know:
| Factor | Recommendation |
|---|---|
| Box Liner Material | Parchment or food-grade tissue |
| Stacking Order | Largest layer on bottom |
| Layer Separation | Parchment between each layer |
You should line your box bottom with parchment before placing the first cake layer. Position larger layers beneath smaller ones to distribute weight evenly. Insert parchment between each layer, preventing frosting transfer and adhesion. Make sure your box isn’t overstuffed—you need adequate space for air circulation. Close the box securely but avoid compression. This method works best for cakes you’ll use within 24 hours.
Refrigerating Cake Layers Successfully
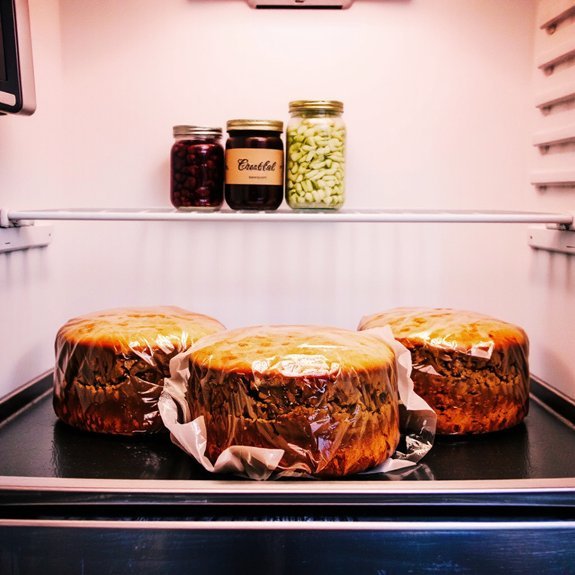
You’ll need to prepare your cake layers by wrapping them tightly in plastic wrap or placing them in airtight containers to prevent moisture loss and odor absorption.
You should store your layers at 35-40°F (1.5-4°C), which maintains ideal texture while preventing premature drying or condensation.
Refrigerated cake layers typically last 3-5 days, though you can extend their shelf life to 2-3 months by freezing them instead.
Preparing Layers for Storage
Cooling your cake layers completely before refrigeration prevents condensation that’d otherwise compromise texture and structure.
Take these steps to prepare your layers for storage:
- Allow layers to cool to room temperature—typically two to three hours
- Apply a thin crumb sealing layer using frosting or simple syrup to lock in moisture
- Wrap each layer individually in plastic wrap, then aluminum foil for maximum protection
- Label packages with baking date and flavor for easy identification
Structure reinforcement occurs when you stabilize layers with support boards between each one.
This prevents shifting and compression during storage.
Store layers on a flat refrigerator shelf rather than stacking them directly, ensuring consistent temperature exposure.
Proper preparation guarantees your layers maintain their integrity and quality throughout the storage period.
Optimal Temperature Settings
Once your layers are wrapped and supported, maintaining the right temperature becomes the next critical factor in preserving quality.
You’ll want to store cake layers between 35-40°F, which keeps them fresh without compromising texture or flavor.
This temperature range slows microbial growth while preventing the crumb structure from becoming dense or dry.
Before storage, verify your refrigerator maintains consistent cooling.
Check your oven calibration if you’ve recently baked, as baking temperatures directly impact how your layers respond to refrigeration.
Layers baked at incorrect oven temperatures may have structural weaknesses that become apparent during storage.
Avoid temperature fluctuations by choosing a stable shelf position away from the door.
You’ll protect your investment by respecting these precise temperature requirements, ensuring your cake layers remain ideal for assembly.
Duration and Shelf Life
Properly refrigerated cake layers’ll maintain their quality for 3-4 days when stored in airtight containers at the specified temperature range.
You’ll maximize freshness by implementing these essential practices:
- Label containers with storage dates to track freshness systematically
- Monitor microbial indicators like off-odors or visible mold growth daily
- Maintain consistent refrigeration without temperature fluctuations
- Separate layers with parchment paper to prevent sticking and contamination
You must discard any layers showing microbial compromise immediately.
Don’t rely solely on appearance—trust your senses completely.
Proper labeling dates enables you to respect the 3-4 day window rigorously.
Extended storage beyond this timeframe risks degradation and safety concerns.
Freezing Cake Layers for Long-Term Storage
Wrapping your cake layers properly before freezing guarantees they’ll maintain their quality for several months.
You’ll want to wrap each layer individually in plastic wrap, then aluminum foil, to prevent freezer burn and moisture loss.
Wrap each cake layer individually in plastic wrap, then aluminum foil, to prevent freezer burn and moisture loss.
Place wrapped layers in airtight containers or freezer bags for added protection during transport logistics.
You can freeze unfrosted or frosted layers, though unfrosted versions offer greater flexibility.
When you’re ready to use them, thaw layers at room temperature for two to three hours before decorating or assembling.
Consider recipe adjustments if you’re freezing particularly delicate or moisture-sensitive cakes.
Dense cakes like pound cake freeze exceptionally well, while lighter sponges may require extra wrapping precautions.
Properly frozen layers remain viable for up to three months, ensuring you’ve always got quality cake bases ready.
How Long Each Storage Method Lasts
The shelf life of your cake layers depends entirely on which storage method you’ve chosen.
- Room temperature: Your unfrosted layers last 1-2 days maximum
- Refrigerated storage: Properly wrapped layers remain viable for up to one week
- Frozen layers: You’ll maintain quality for 2-3 months when stored correctly
- Frozen frosted cakes: These last approximately 3-4 months without degradation
Implementing labeling standards proves essential for batch tracking and preventing waste.
You should mark each container with the baking date and storage method used.
This practice guarantees you’re utilizing your layers within ideal timeframes and maintaining consistent quality across your batches.
Temperature fluctuations compromise shelf life, so you’ll want to maintain consistent conditions in your freezer.
Proper documentation through batch tracking systems gives you complete control over inventory rotation and prevents expired materials from entering your workflow.
Thawing Frozen Cake Layers Properly
You’ll thaw your frozen cake layers using one of two primary methods: the refrigerator approach, which takes 8-12 hours but provides superior moisture retention, or room temperature thawing, which requires 2-3 hours depending on layer thickness.
The refrigerator method is preferable because it minimizes condensation damage—the moisture that forms when cold cake surfaces meet warm air and can compromise frosting adhesion and crumb structure.
If you must thaw at room temperature, keep your layers in their original packaging until they reach ambient temperature to prevent condensation from pooling on the cake’s surface.
Refrigerator Thawing Method
When you’re ready to use frozen cake layers, thawing them in the refrigerator is the most reliable method for preserving structural integrity and moisture content.
This controlled approach prevents condensation damage and unwanted odor absorption from your freezer.
Follow these steps for ideal results:
- Transfer cake layers from freezer to refrigerator while still wrapped
- Allow 4-8 hours for complete thawing, depending on layer thickness
- Keep layers in original packaging to prevent spice migration between stacked cakes
- Resist removing wrapping until fully thawed to avoid surface moisture
Don’t rush the process with room temperature thawing—you’ll compromise texture and increase condensation risk.
The refrigerator’s stable, cool environment guarantees your cake layers remain structurally sound and ready for frosting or assembly.
This methodical approach gives you maximum control over your baking timeline.
Room Temperature Timing
Room temperature thawing can work effectively when you’re pressed for time, though it requires careful attention to prevent moisture loss and textural degradation.
You’ll need approximately two to three hours for standard layer cakes, depending on thickness and ambient temperature.
Position your frozen layers on a level surface away from direct heat sources or sunlight.
Don’t unwrap them during thawing—the packaging prevents surface condensation that’d compromise texture.
Monitor your event timing closely; you’re aiming for peak freshness by serving time.
Once thawed, you’ve got a narrow window before quality deteriorates.
Test doneness by inserting a toothpick into the center—it should penetrate easily without resistance.
This method demands precision and attention, but it’ll deliver properly thawed layers ready for frosting and assembly.
Preventing Condensation Damage
Condensation forms when frozen cake layers warm to room temperature, creating moisture that seeps into the crumb structure and compromises texture.
You’ll need to manage this deliberately:
- Thaw cake layers in airtight containers to minimize moisture exposure
- Monitor humidity levels—keep your kitchen between 40-50% relative humidity
- Use kitchen ventilation fans to circulate air and reduce condensation buildup
- Allow gradual temperature adjustment before removing containers
Proper humidity monitoring prevents surface dampness that degrades frosting adhesion and cake integrity.
Activate kitchen ventilation 15 minutes before unwrapping thawed layers.
This controlled approach safeguards your cake’s structural quality and guarantees clean, precise assembly for decorating.
You’ll achieve superior results by respecting the physics of temperature shifts rather than rushing the process.
Common Storage Mistakes to Avoid
To preserve your cake layers’ quality and texture, you’ll want to sidestep several frequent storage errors.
First, don’t commit labeling neglect—always date and identify your layers to track freshness accurately.
You’ll prevent waste and confusion by maintaining clear records.
Second, avoid stacking errors by placing parchment paper between layers before stacking.
Direct contact causes frosting transfer and structural damage.
Never stack layers without proper support; use cake boards or containers designed for this purpose.
Don’t store cake layers near strong-smelling foods, as they’ll absorb odors easily.
Resist storing them in overly cold environments, which can accelerate staling.
Finally, make sure your storage container seals properly—inadequate sealing exposes layers to air and moisture fluctuations, compromising texture and taste.
These practices maximize your control over storage outcomes.
Preparing Pre-Stored Layers for Assembly
Bringing your cake layers from cold storage to assembly-ready condition requires deliberate attention to temperature and moisture management.
Temperature and moisture management are essential when transitioning cake layers from cold storage to assembly-ready condition.
You’ll need to execute these critical steps:
- Remove layers from refrigeration 30-45 minutes before assembly to reach ideal working temperature
- Perform level trimming using a serrated knife or cake leveler to guarantee stable, flat surfaces
- Install support doweling through stacked layers to prevent shifting and structural failure
- Check for condensation and gently pat dry with paper towels if necessary
This gradual acclimation prevents thermal shock that compromises structural integrity.
Cold cake layers crack easily during trimming and frosting; room temperature layers accept fillings and crumb coats smoothly.
You’ll achieve superior results and maintain complete control over your assembly process by respecting these preparation fundamentals.
Frequently Asked Questions
Can I Store Unfrosted and Frosted Cake Layers Together Without Them Sticking?
You shouldn’t store unfrosted and frosted cake layers together without separation.
Frosting types vary in composition—buttercream, fondant, or ganache—and’ll transfer moisture or oils onto unfrosted surfaces, compromising texture and causing sticking.
Instead, you’re better off wrapping unfrosted layers individually in plastic wrap, then allowing proper chilling time before combining them.
Store frosted layers separately on parchment-lined containers.
This approach preserves your cake’s structural integrity and prevents unwanted adhesion between different layers.
What’s the Best Container Material for Storing Cake Layers—Plastic, Glass, or Metal?
You’ll want airtight plastic or glass containers for ideal results.
Plastic offers superior moisture barrier properties and won’t react with frosting acids, ensuring material safety. Glass works well but weighs more and risks breakage.
Metal containers can corrode and potentially compromise your cake’s quality. Choose food-grade plastic with tight-sealing lids—it’s your most practical, durable option that protects layers from moisture loss while maintaining structural integrity during storage.
Should I Store Cake Layers With Parchment Paper Between Each Layer?
Yes, you’ll want parchment between layers. Parchment benefits include preventing frosting transfer and moisture absorption that’d compromise your cake’s integrity.
After edge trimming, place parchment sheets directly atop each cooled layer before stacking. This approach protects delicate surfaces and maintains structural stability during storage.
You’ll make sure your layers stay pristine, allowing you complete control over assembly timing without degradation concerns.
Can I Store Different Cake Flavors in the Same Container Together?
You shouldn’t store different cake flavors together in one container.
Flavor transfer and aroma mixing will compromise each cake’s distinct taste profile.
You’re risking that your vanilla layer absorbs chocolate notes, or your lemon cake picks up coffee undertones.
Keep each flavor in separate, airtight containers to preserve their integrity.
This approach gives you complete control over your final product’s quality and prevents unwanted cross-contamination.
How Do I Prevent Freezer Burn on Frozen Cake Layers Effectively?
You’ll prevent freezer burn by employing flash freezing first—place unwrapped layers on a tray at zero degrees for two hours.
Then vacuum seal each layer individually using a commercial-grade sealer, removing maximum air. This dual approach eliminates moisture exposure and oxidation.
You’re effectively creating an airtight barrier that preserves your cake’s texture and flavor integrity. Store sealed layers at consistent freezing temperatures, avoiding temperature fluctuations that compromise quality.


Leave a Comment