Key Takeaways
- Sift flour by loading the sifter half full, holding it 8–10 inches above the bowl, and completing 8–10 steady passes for optimal aeration.
- Sifting reintegrates air between compacted flour particles, restoring lighter density and ensuring accurate measurements for consistent baking results.
- Aerated flour creates nucleation sites for gas distribution, enabling leavening agents to work efficiently and produce lighter cakes and fluffier breads.
- Sifting is non-negotiable for delicate recipes like angel food cake, macarons, and genoise sponge that demand precise aeration and crumb control.
- Compressed flour can exceed recipe ratios by 20–30%, causing dry, dense results; sifting prevents this measurement variance and texture problems.
Why Flour Compacts and What That Means for Your Baking

When flour sits in storage, its particles gradually settle and compress under their own weight, increasing the density of what you’ll scoop from the bag.
Flour particles gradually settle and compress under their own weight during storage, increasing density.
Transport vibration accelerates this compaction during shipping and handling.
Ambient humidity also plays a critical role—moisture causes particles to bond together, creating dense clumps throughout your flour.
This matters because compacted flour measures differently than loose flour.
When you scoop directly from the bag without sifting, you’re actually using more flour than your recipe calls for.
This excess flour absorbs more liquid than intended, resulting in dry, dense baked goods with poor texture.
Sifting reintegrates air between particles, restoring flour to its original, lighter state.
This guarantees accurate measurements and consistent baking results.
You maintain control over your ingredients and outcomes—exactly what reliable baking demands.
The Science Behind Aeration and Better Baked Goods
Incorporating air into flour fundamentally alters how your baked goods develop structure and texture. When you sift, you’re creating tiny air pockets that become nucleation sites for gas retention during baking. These pockets allow carbon dioxide and steam to distribute evenly throughout your batter or dough.
Sifting strengthens protein structure by separating flour particles, enabling gluten strands to form more uniformly. This enhanced network traps gases more efficiently, producing superior rise and crumb structure. Without aeration, your flour particles remain compacted, restricting gas expansion and yielding dense, compact results.
You’re effectively giving your leavening agents—baking powder, baking soda, or yeast—optimal conditions to work. Better gas retention means lighter cakes, fluffier breads, and more tender pastries. This scientific principle explains why sifted flour consistently outperforms unsifted alternatives in baking outcomes.
Essential Tools for Sifting Flour at Home
Now that you understand how sifting improves your baked goods at the molecular level, you’ll want to equip yourself with the right tools to execute this technique effectively.
You’ve got options when it comes to sifting equipment:
- Flour sifter – A mechanical device with a squeeze handle that breaks up clumps and aerates flour simultaneously
- Fine-mesh strainer – A versatile tool that doubles as a sifter for smaller batches
- Rubber spatula – Essential for scraping sifted flour from bowl sides without compacting it
- Bench scraper – Ideal for transferring flour and ensuring you capture every aerated particle
Each tool serves distinct purposes in your sifting workflow.
A flour sifter handles volume efficiently, while a fine-mesh strainer offers precision.
Your rubber spatula and bench scraper prevent waste by consolidating sifted flour without recompacting it, maintaining the aeration you’ve worked to achieve.
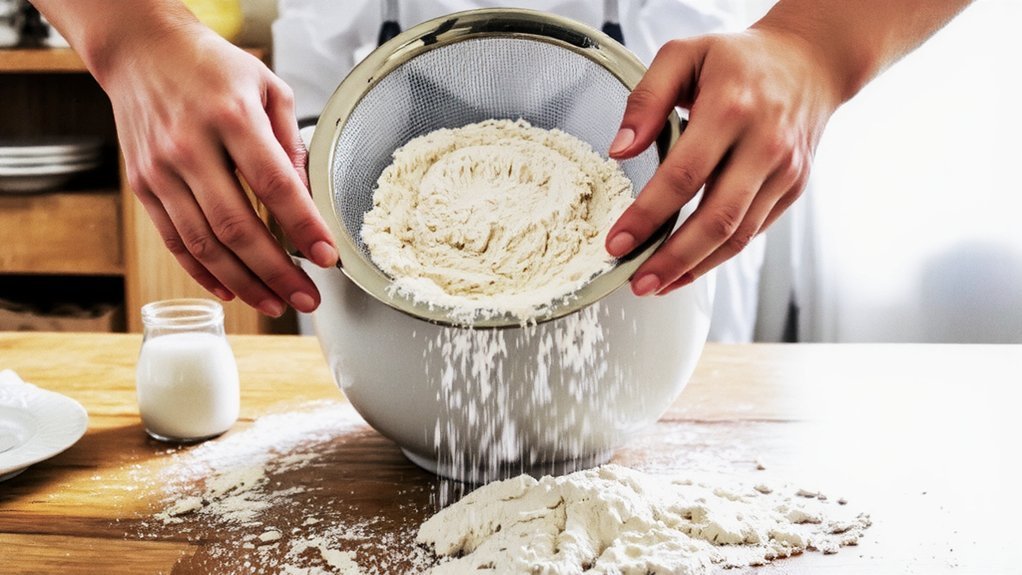
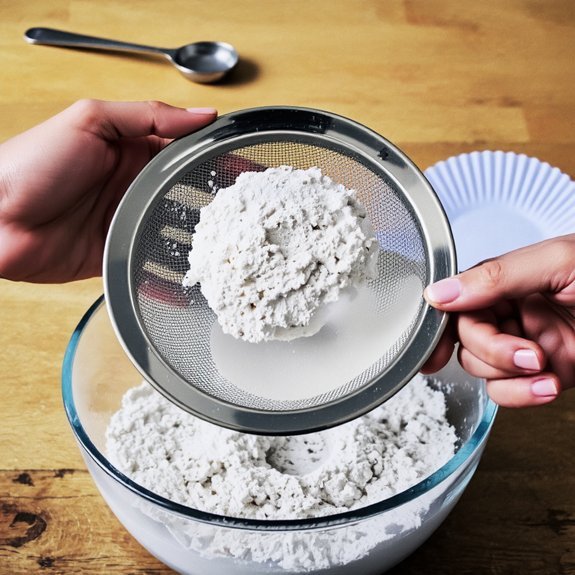
Step-by-Step Guide to Sifting Flour Correctly
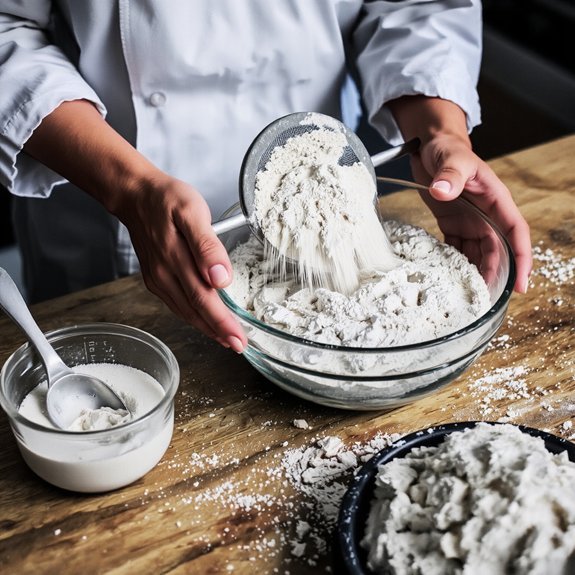
Mastering the mechanics of flour sifting requires attention to several critical variables: flour quantity, sifter height, and downward pressure.
You’ll start by measuring your flour precisely, then loading your sifter no more than half full.
Position the sifter 8-10 inches above your mixing bowl—this height optimizes aeration while minimizing mess.
Apply steady, controlled downward pressure on the handle, using smooth strokes.
You’re breaking up clumps and incorporating air, so don’t rush.
Complete 8-10 passes until you’ve achieved uniform texture throughout.
For visual confirmation, consult a visual checklist identifying properly sifted flour’s light, fluffy appearance.
If you’re new to this technique, a video walkthrough demonstrates ideal hand positioning and rhythm.
This methodical approach guarantees consistent results every time you bake, giving you complete control over your flour’s final composition.
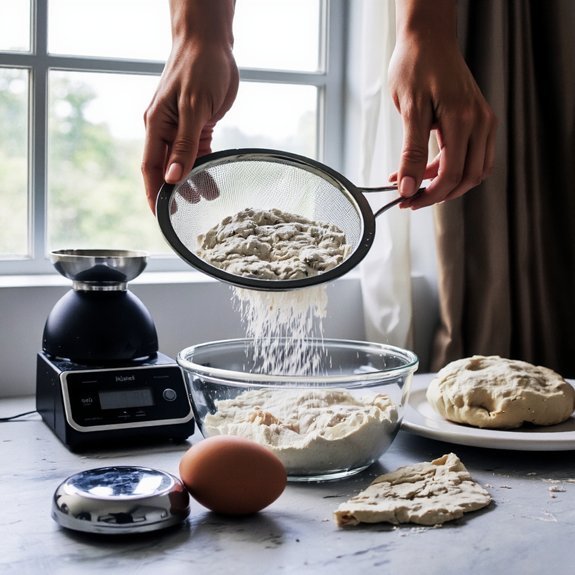
The Fine-Mesh Sifter Method
You’ll want to select a fine-mesh sifter with a 2-3 millimeter screen opening to break up flour clumps effectively. Hold the sifter at a 45-degree angle over your mixing bowl, then squeeze the handle mechanism repeatedly in smooth, controlled motions to force the flour through the mesh.
Make sure you move the sifter across the bowl in overlapping passes so you achieve uniform aeration throughout the entire flour batch.
Selecting the Right Sifter
Why does sifter design matter when you’re aerating flour?
You’re investing in a tool that’ll directly impact your baking results, so choosing wisely guarantees you’re not wasting effort or ingredients.
Consider these essential factors:
- Mesh fineness – Aim for 40-50 mesh count; finer screens trap lumps more effectively without creating resistance
- Material sustainability – Stainless steel resists corrosion and outlasts aluminum, reducing replacement frequency and waste
- Handle ergonomics – Comfortable grips reduce hand fatigue during repetitive squeezing motions
- Aesthetic design – Quality construction reflects durability; avoid flimsy models with loose joints
You’ll want a sifter that balances performance with longevity.
Premium options cost more upfront but deliver consistent results and won’t fail mid-batch.
Don’t compromise on this foundational tool—it’s your freedom to bake confidently.
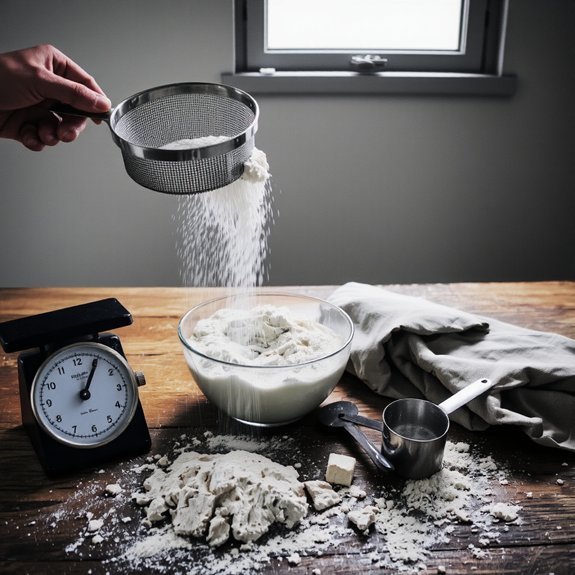
Proper Sifting Technique Steps
Once you’ve selected your fine-mesh sifter, proper technique guarantees maximum aeration and lump elimination.
Position your hand posture with your dominant hand gripping the handle firmly while your non-dominant hand stabilizes the bowl beneath.
Maintain moderate grip pressure—tight enough for control, loose enough to move freely.
Push the handle away from you with a smooth, deliberate motion, then pull it back. This forward-backward action forces flour through the mesh consistently.
Work in sections, moving the sifter gradually across your bowl’s diameter.
Don’t rush; controlled movements prevent splashing and promote uniform aeration. For dense flour batches, sift twice.
Keep your wrist relaxed to avoid fatigue and maintain consistent pressure throughout.
Proper hand posture and grip pressure distinguish efficient sifting from ineffective motions.
Using a Whisk as an Alternative Sifting Tool
You can substitute a whisk for a fine-mesh sifter by vigorously stirring your flour in a bowl, lifting and folding the mixture to incorporate air and break up clumps.
This method works best for lighter flours and small quantities, though you’ll need more elbow grease than with a traditional sifter.
Choose the whisk technique when you’re sifting minimal amounts or lack access to specialized equipment, but recognize that it won’t aerate flour as thoroughly as a mechanical sifter does.
Whisk Technique and Method
How can a whisk effectively replace a traditional sifter?
You’ll achieve excellent results by mastering proper technique.
Here’s what you need to know:
- Grip ergonomics: Hold the whisk firmly near the handle’s base, positioning your wrist at a 45-degree angle for ideal control and reduced fatigue.
- Circular motions: Move the whisk in broad, sweeping circles through your flour, lifting it high to incorporate maximum air.
- Repetition: Perform 8-10 passes to guarantee thorough aeration and lump elimination.
- Maintenance tips: Rinse immediately after use and dry completely to prevent rust and buildup.
This method demands slightly more effort than traditional sifters, but you’ll gain independence from specialized equipment while achieving professional-quality results.
When to Choose Whisks
While whisks won’t entirely replace dedicated sifters in every scenario, they’re particularly effective for specific baking applications.
You’ll find whisks invaluable when facing time constraints, as they deliver faster aeration than traditional methods.
Their efficiency shines when you’re combining dry ingredients with minimal fuss.
Ingredient compatibility matters considerably.
Whisks excel with lighter flours and powdered ingredients but struggle with densely packed cocoa or cornstarch.
You should choose whisks for quick incorporation when ingredient clumping isn’t your primary concern.
Consider whisks your go-to tool when precision matters less than speed.
They’re portable, require no special equipment, and demand nothing more than vigorous wrist action.
For recipes where you’re aerating rather than purely breaking up lumps, whisks deliver reliable results without complication.
When Sifting Flour Is Non-Negotiable
Because certain baked goods depend on specific crumb structures and rise patterns, sifting flour becomes essential rather than optional in particular applications.
You’ll want to sift when you’re tackling delicate recipes that demand precision:
- Angel food cakes – require maximum aeration to achieve their signature light, cloud-like texture
- Macarons – need evenly distributed dry ingredients for consistent rise and structure
- High-altitude baking – demands sifted flour to counteract oxygen’s reduced density effects
- Humidity-sensitive recipes – benefit from sifting to break up compacted flour clumps caused by humidity effects
You’re not sifting for tradition’s sake. You’re ensuring your flour’s density remains consistent, controlling gluten development, and guaranteeing uniform ingredient distribution.
Sift flour to maintain consistent density, control gluten development, and ensure uniform ingredient distribution—not out of tradition, but precision.
When recipes explicitly call for sifting, you’re respecting the baker’s engineering. Skip it, and you’re compromising your results.
Recipes That Absolutely Require Sifted Flour
When you’re working with recipes engineered around precise flour density, skipping the sifter isn’t just cutting corners—it’s fundamentally altering the formula’s chemistry. You’ll encounter several baking applications where sifting becomes non-negotiable for success.
| Recipe Type | Sifting Requirement | Result Without Sifting |
|---|---|---|
| Genoise Sponge | Mandatory | Dense, collapsed crumb |
| Victoria Sponge | Required | Uneven rise, tough texture |
| Angel Food Cake | Critical | Heavy, compact structure |
| Macarons | Essential | Failed shells, hollow feet |
You’re managing flour compaction that directly impacts gluten development and air incorporation. Genoise Sponge demands sifted flour to maintain its delicate foam structure. Victoria Sponge requires consistent flour aeration for that signature tender crumb. Without sifting, you’re introducing unwanted density that sabotages your batter’s lift capacity. You’re not following tradition—you’re respecting the science underlying these formulas.
Common Sifting Mistakes That Ruin Your Baking
You’ll compromise your batter’s texture when you overpack flour into your measuring cup, as compacted flour increases density and throws off your ingredient ratios.
Skipping the sifting process altogether defeats the purpose of aerating your dry ingredients, which leaves you with dense, heavy baked goods that lack the intended crumb structure.
Both mistakes stem from underestimating how critical proper flour preparation is to your recipe’s final outcome.
Overpacking the Flour
One of the most detrimental mistakes in sifting occurs when you compress flour into your measuring cup before sifting, which substantially increases the density and weight of your ingredient.
Retail packaging often settles during transport, creating false density expectations.
Here’s what happens when you overpack:
- You’ll exceed recipe flour ratios by 20-30%, resulting in dense, dry baked goods
- Your dough becomes unworkable, lacking the elasticity needed for proper rise
- Consumer expectations for light, airy textures vanish entirely
- You’re forced to discard failed batches, wasting ingredients and money
Instead, spoon flour directly into your measuring cup without pressing down, then level with a knife.
This technique respects your ingredient’s true weight and guarantees consistent, predictable results every time you bake.
Skipping the Sifting Process
Although sifting seems like an optional step, skipping it undermines the fundamental structure of your baked goods. You’re tempted by time savings, but you’ll sacrifice consistency and texture.
When you don’t sift, you’re accepting compacted flour that distributes unevenly throughout your batter. This creates dense pockets and inconsistent crumb structure.
The taste impact becomes evident immediately. Your cakes turn heavy, your cookies become brittle, and your pastries lack the delicate rise you’re after. You’re also mixing in unwanted lumps that resist full hydration, leaving grainy textures.
Sifting aerates flour, removes impurities, and guarantees uniform ingredient distribution. That five-minute investment prevents failed batches. You’re choosing quality over convenience—a trade-off that guarantees superior results every single time.
Storage Tips for Pre-Sifted Flour
To maintain the aeration and consistency of pre-sifted flour, you’ll need to store it in an airtight container that prevents moisture infiltration and oxidation.
- Use glass or food-grade plastic containers with tight-sealing lids to maintain flour quality
- Label containers with labeling dates so you’re not guessing about freshness
- Store airtight containers in cool, dark environments away from sunlight and heat sources
- Keep flour separate from strong odors that can compromise taste and performance
You’ll preserve your flour’s texture and leavening power by implementing these storage strategies.
Pre-sifted flour remains viable for up to eight months when properly contained.
Don’t compromise your baking results—take control of your storage conditions and guarantee consistent quality every time you bake.
Frequently Asked Questions
How Long Does Sifted Flour Remain Effective Before It Needs Resifting?
You’ll find that sifted flour remains effective for approximately 30 minutes before clump formation begins.
Moisture absorption and density changes compromise your results.
For ideal performance, you shouldn’t resift prematurely; instead, resift immediately before mixing when you’re ready to bake.
This timing preserves aroma retention and maintains the precise, technical consistency your recipe demands.
You’ve got the freedom to work efficiently by sifting just before use rather than ahead of time.
Can I Sift Flour in Advance and Freeze It for Later Use?
You can sift flour and freeze it, though it’s unconventional.
Your freezing technique should involve airtight containers to prevent moisture absorption and freezer burn.
When you’re ready to bake, apply these thawing tips: let the flour reach room temperature in its sealed container before opening—this prevents condensation from compromising your flour’s texture.
You’ll maintain the aeration benefits you achieved through sifting, giving you maximum flexibility in your baking schedule.
Does Sifting Flour Affect Its Nutritional Content or Shelf Life?
Sifting doesn’t substantially affect flour’s nutritional content or mineral loss during the process itself.
However, you’ll notice increased oxidation rates once sifted flour’s exposed to air.
This oxidation can degrade certain nutrients and reduce shelf life.
You’re better off sifting immediately before use rather than storing sifted flour long-term.
This practice preserves nutritional integrity and maintains your flour’s quality, giving you control over freshness.
What’s the Difference Between Sifting and Other Flour Aeration Methods?
You’ll find sifting mechanics work differently than alternatives like whisking or aerating with forks. Sifting forces flour through fine mesh, breaking up compacted particles systematically.
Whisking incorporates air faster but less uniformly. Aerating with forks takes longer and won’t eliminate lumps as effectively.
You’ve got freedom choosing your method, but sifting gives you superior control over flour’s final density and consistency for precise baking results.
Is Sifting Necessary for Gluten-Free or Specialty Flour Types?
Yes, you’ll want to sift gluten-free and specialty flours. These variants compact more readily during storage, creating stubborn clumps that’ll compromise your recipe’s structure.
Sifting provides essential clump prevention and texture improvement, ensuring even distribution throughout your batter or dough. You’re breaking up density patterns unique to alternative flours—rice flour, almond flour, and blends settle differently than wheat. Don’t skip this step; your results depend on it.


Leave a Comment