
Key Takeaways
- Clean the pan thoroughly with a stiff brush and vinegar to remove rust, debris, and moisture before seasoning begins.
- Apply a thin layer of high-smoke-point oil like grapeseed or avocado, then buff away excess until nearly dry.
- Bake the oiled pan upside down at 500°F for one hour in a well-ventilated oven to polymerize the oil.
- Repeat the oil-and-bake cycle at least five times, allowing complete cooling between cycles, to build durable protective layers.
- Store seasoned pans dry with thin oil coating and paper towels between stacked surfaces to maintain the seasoning long-term.
Understanding Cast Iron Seasoning
Building a protective layer on cast iron requires understanding the chemistry behind seasoning.
You’re creating a polymerization chemistry process where oils bond to metal through heat exposure.
This isn’t new—seasoning history traces back centuries, with cooks discovering that repeated oil applications and high temperatures produced superior cooking surfaces.
When you heat oil past its smoke point, fatty acids undergo polymerization, forming hardened polymeric chains.
Heating oil past its smoke point triggers polymerization, transforming fatty acids into hardened polymeric chains that bond to iron.
These layers build incrementally, creating a non-stick patina that improves with use.
You’re not merely coating the pan; you’re establishing molecular bonds between oil and iron.
Understanding this process gives you control.
You’ll know why cast iron requires specific temperatures, why certain oils work better, and how to restore neglected pans.
This knowledge frees you from guesswork, enabling confident seasoning.
Cleaning and Preparing Your Pan

Now that you understand the chemistry driving seasoning success, you’re ready to prepare your pan properly.
Start by removing any rust, debris, or stuck on food using a stiff brush or steel wool.
For stubborn buildup, apply white vinegar and scrub thoroughly.
Rinse completely with hot water.
Next, inspect your pan’s handle repair status.
Address any cracks or damage before seasoning, as moisture penetrates compromised areas, causing rust.
Dry your pan immediately with a lint-free cloth.
Place it in a 200°F oven for five minutes to eliminate residual moisture.
This step proves critical—trapped water undermines your seasoning layer’s integrity.
Your pan now stands ready for the seasoning process.
You’ve eliminated obstacles preventing proper oil adhesion and established a dry foundation that maximizes coating effectiveness.
The Seasoning Process Step-by-Step

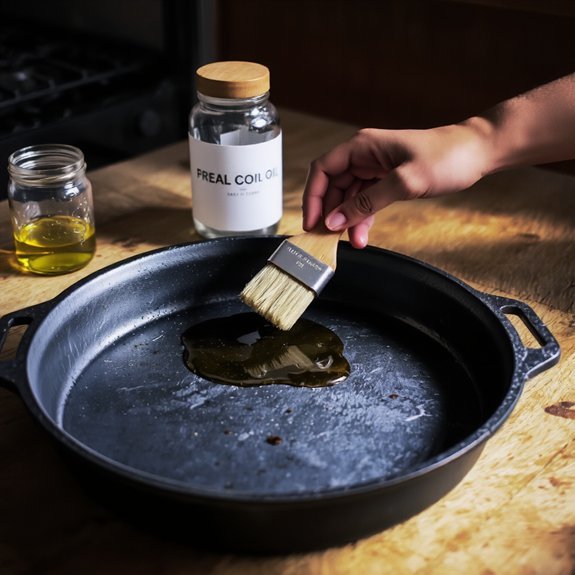
With your pan thoroughly cleaned and dried, you’re ready to apply oil in thin, controlled layers that’ll build a durable non-stick surface.
Use a high-smoke-point oil like grapeseed or avocado oil—apply it sparingly with a cloth, then buff away excess until the pan appears almost dry.
Position your rack in the middle of your oven and preheat to 500°F. Place the oiled pan upside down on the rack to prevent pooling.
Provide adequate ventilation requirements by opening windows or running exhaust fans; this process generates smoke.
Bake for one hour, then cool completely before removing.
Repeat this cycle five to seven times for ideal results. Each layer hardens into polymerized protection, creating your seasoning foundation through proven chemical bonding.
Building Multiple Layers for Durability

Repeating the oil-and-bake cycle creates cumulative seasoning layers that substantially enhance your pan’s durability and non-stick performance.
Each repetition deposits polymerized oil that bonds to cast iron’s surface, building protective barriers analogous to industrial coatings.
You’ll notice aesthetic layers developing—a darkened, glossy patina that indicates successful seasoning advancement.
To maximize durability, complete minimum five cycles before regular use.
Stack thin applications rather than one thick coat, which prevents flaking.
Temperature consistency matters: maintain 450-500°F throughout baking to guarantee proper polymerization.
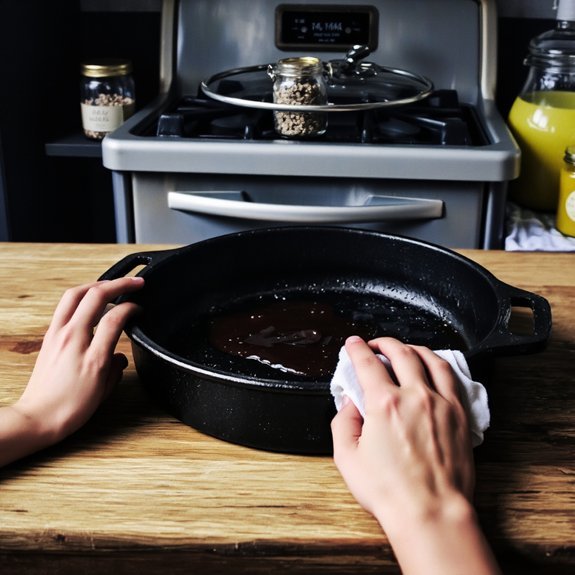
After each cycle cools completely, wipe away excess oil to prevent sticky residue accumulation.
This methodical approach yields resilient cookware resistant to rust and food sticking.
Your investment in repetitive seasoning pays dividends through years of reliable performance.
Long-Term Maintenance and Care
Once you’ve established your seasoning foundation, maintaining that protective layer requires consistent, deliberate practices that preserve polymerization and prevent degradation.
Maintaining your seasoning foundation demands consistent, deliberate practices that preserve polymerization and prevent degradation.
You’ll protect your investment through these proven rustproof methods:
- Store your pans in a dry environment—moisture is your enemy
- Wipe each pan with a thin oil layer before storage
- Stack pans with paper towels between surfaces to prevent contact
- Keep your seasoning active through regular cooking use
- Apply light oil coats after each wash while the pan’s still warm
Storage tips matter substantially.
You’re defending against oxidation and rust formation by controlling humidity levels in your storage space. Never store cast iron in damp basements or near sinks. Proper care means your seasoning compounds continuously, creating an increasingly durable, nonstick surface that rewards your disciplined maintenance routine with years of reliable performance.
Frequently Asked Questions
Can I Season Cast Iron Baking Pans in a Regular Kitchen Oven?
Yes, you can season your cast iron baking pans in a regular kitchen oven.
You’ll want to preheat your oven to 450-500°F for ideal polymerization.
Place your pan on the middle rack to guarantee even heat distribution.
Apply a thin oil layer, then wipe excess thoroughly.
Bake for one hour.
You’ve got complete control over this process—repeat cycles build superior seasoning without commercial coatings constraining your cookware’s potential.
What’s the Best Oil Type for Seasoning Cast Iron Baking Pans?
You’ll want oils with high smoke points and saturated fats for ideal seasoning.
Grapeseed, avocado, and refined coconut oil deliver superior results because they’re chemically stable at high temperatures.
You’re building polymerized layers through oxidation, so saturated fats resist breakdown better than unstable alternatives.
Cast a thin coat, wipe excess, then heat-cure your pan.
This method gives you durable, non-stick surfaces without compromising your cast iron’s integrity or your kitchen’s independence.
How Long Does Cast Iron Seasoning Typically Last Before Needing Reapplication?
Your cast iron’s usage lifespan determines seasoning durability—typically lasting 1-3 years with regular cooking. You’ll maintain that protective layer through consistent use since cooking oils build polymerized coatings.
However, aggressive cleaning effects degrade seasoning faster. You can extend longevity by avoiding harsh scrubbing and acidic foods.
When you notice sticking or rust spots, reapply seasoning. High-heat cooking actually strengthens your pan’s surface, so you’re building resilience naturally through proper use and minimal invasive cleaning.
Will Seasoning Cast Iron Affect the Taste of Baked Goods?
You won’t experience flavor transfer from cast iron seasoning into your baked goods.
The polymerized oil layer you’ve built creates a stable, inert surface—it doesn’t leach into food.
Your taste perception remains unaffected because seasoning doesn’t alter your ingredients’ chemical composition.
Scientific analysis shows properly seasoned cast iron maintains structural integrity during baking temperatures, preventing any coating breakdown that’d compromise your baked products’ flavor profile.
Can I Season Vintage or Antique Cast Iron Baking Pans Safely?
You can safely season vintage cast iron, though you’ll want to weigh restoration ethics against practical use.
If you’re preserving historical patina for collector value, don’t strip it.
Instead, you’re free to build new seasoning layers atop existing surfaces using high-heat oil applications.
For functional pieces you’ll actually bake with, gentle restoration followed by standard seasoning won’t compromise safety—just respect the pan’s historical character while reclaiming its utility.


Leave a Comment