Key Takeaways
- Grease pan thoroughly with butter or oil, dust with flour, and line bottom with parchment paper for maximum reliability.
- Choose appropriate pan material; aluminum and steel conduct heat evenly while silicone liners provide reliable non-stick surfaces.
- Apply lubricant in complete, uniform coverage using circular motions, paying special attention to corners and crevices.
- Use flour, cocoa powder, or cornstarch as dry barriers; apply thin, controlled layers to prevent residue buildup.
- Allow cake to cool in pan for 10–15 minutes before removal, or rapid chill at 35–40°F for 20–30 minutes.
The Importance of Proper Pan Preparation
Why do cakes stick to pans? Without proper preparation, you’re surrendering control to preventable failure.
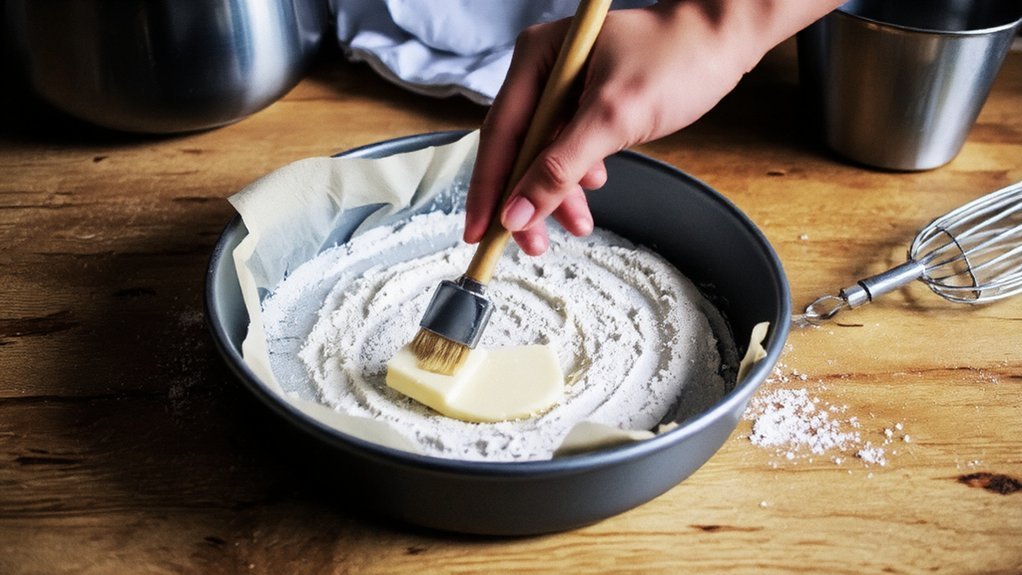
Your pan’s surface needs three essentials: a grease barrier, flour coating, and parchment paper reinforcement.
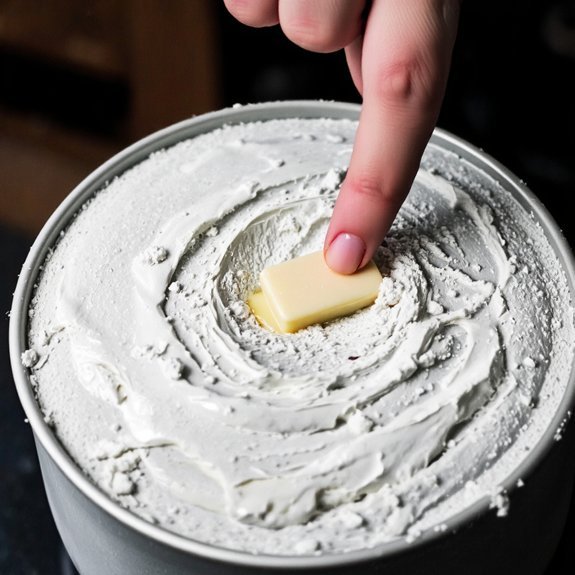
You’ll want to use butter or oil—it creates a protective layer between cake and metal.
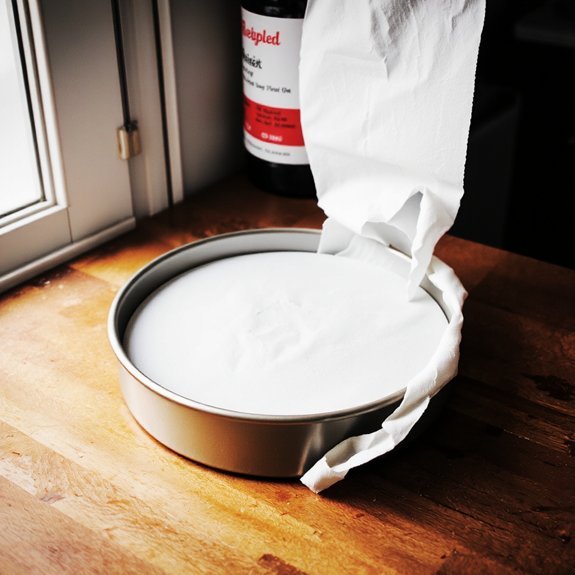
Dust that greased surface with flour; it further prevents adhesion.
For maximum reliability, line your pan’s bottom with parchment paper, ensuring you’re free from sticking disasters.
This preparation approach guarantees even browning across your cake’s surface while maintaining structural integrity throughout baking.
You’re establishing ideal conditions for clean removal.
Don’t skip these steps—they’re your foundation for success.
Proper pan preparation isn’t optional; it’s your direct path to perfectly released cakes every single time.
Choosing the Right Baking Pan Material
How much does your pan’s material actually matter?
Your choice directly impacts whether you’ll battle stubborn sticking or achieve effortless releases.
Your pan material choice directly determines whether you’ll face stubborn sticking or enjoy effortless releases.
You’ve got freedom in selecting materials that suit your baking style and needs.
Consider these options:
- Aluminum advantages – conducts heat evenly, lightweight, affordable
- Steel pans – durable, excellent heat distribution, long-lasting
- Glass – allows visual monitoring, heats slowly, prone to browning edges
- Silicone considerations – flexible for easy removal, conducts heat unevenly, requires careful handling
- Ceramic – non-reactive, aesthetic appeal, delicate and expensive
You’ll want aluminum or steel for reliable, consistent results.
Silicone offers convenience but demands adjusted baking times.
Glass works when you monitor closely.
Your decision depends on prioritizing heat distribution, durability, or release ease.
Match your pan material to your baking demands.
Mastering the Greasing Technique
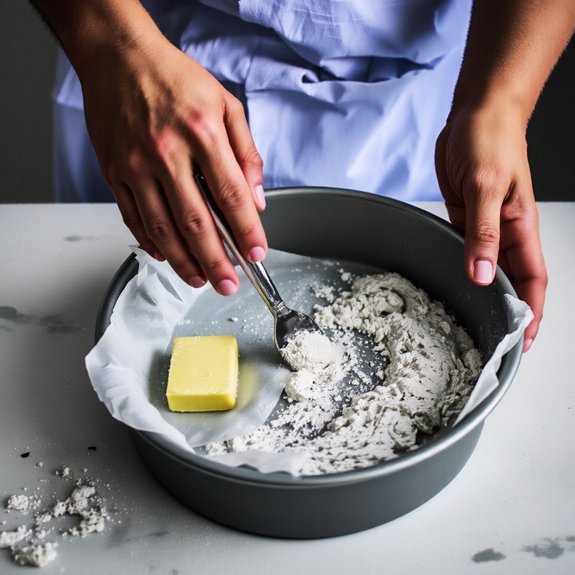
You’ll need to select the right lubricant—whether butter, oil, cooking spray, or a commercial pan release—based on your cake type and desired crust texture.
Your application method matters equally; you can brush melted butter or oil evenly across all surfaces, use cooking spray in short bursts to avoid pooling, or dust flour over the lubricant for extra grip.
Whichever combination you choose, make sure complete, uniform coverage on the bottom and sides to create an effective barrier between batter and pan.
Choosing the Right Lubricant
What makes one lubricant superior to another when it comes to preventing cake stickage?
You’ll want to weigh smoke point and flavor transfer—critical factors that determine your success.
Here’s what you need to know:
- Butter adds flavor but has a low smoke point; use it for enhanced taste
- Vegetable oil offers a high smoke point without flavor interference
- Coconut oil provides moderate smoke point with subtle flavor notes
- Cooking spray delivers convenience and even coating with minimal residue
- Shortening guarantees complete release with neutral flavor and excellent heat tolerance
Your choice depends on your cake’s flavor profile and baking temperature.
Neutral oils work universally, while butter enhances richness.
Don’t mix lubricants—pick one and coat thoroughly.
You’re in control of your baking outcome.
Application Methods That Work
Selecting the right lubricant sets the foundation, but application technique determines whether your cake actually releases from the pan.
You’ll want to master two critical methods: center pouring and spiral smoothing.
Start by center pouring your lubricant directly into the pan’s middle, then use a pastry brush or paper towel to distribute it outward in circular motions.
This spiral smoothing technique provides even coverage without over-saturating any single area. Pay particular attention to corners and crevices where batter typically adheres.
Don’t skimp on coverage—a thin, insufficient layer invites sticking. Conversely, avoid excessive application that pools at the bottom.
You need consistent, complete contact between lubricant and pan surface. For ideal results, apply your chosen lubricant immediately before pouring batter, guaranteeing maximum effectiveness and giving you reliable cake release every time.
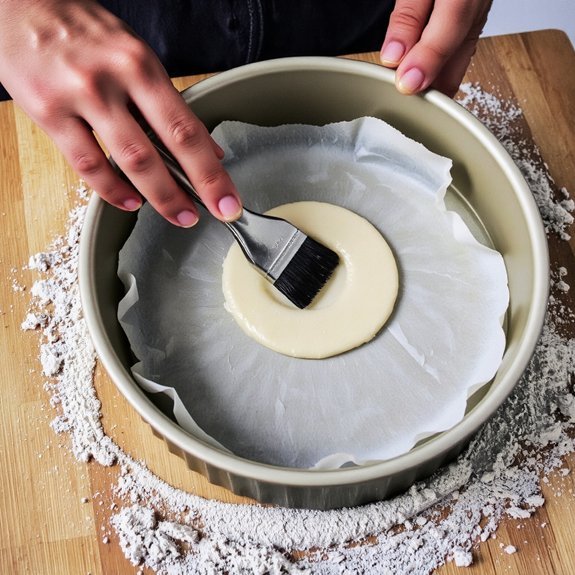
Using Parchment Paper and Cake Strips
Because parchment paper and cake strips address different aspects of the sticking problem, combining them creates the most reliable prevention method.
You’ll gain complete control over your baking results through this dual approach.
Parchment paper prevents direct contact between batter and pan surfaces.
Cake strips regulate heat distribution, eliminating uneven browning that causes sticking.
Here’s what you need:
- Cut parchment to fit your pan’s bottom using a sizing guide
- Compare brand options—quality varies substantially
- Wrap moistened cake strips around pan exteriors
- Layer parchment on top of strips for maximum protection
- Test your pan size before committing to full batches
This method guarantees your cakes release cleanly, giving you freedom from frustrating demolition jobs.
You’re investing minimal effort for guaranteed results.
The Role of Flour in Pan Coating
You’ll find that flour serves as your primary dry barrier when coating cake pans, but you must select the right type and apply it with precision to prevent sticking.
Different flour varieties—all-purpose, cake flour, and cornstarch blends—offer varying coverage densities, so you’ll want to match your choice to your cake’s moisture content and texture.
When traditional flour doesn’t suit your needs, you can deploy alternatives like cocoa powder for chocolate cakes or ground nuts for specialty batters.
Flour Types and Coverage
How does flour’s composition affect its ability to prevent sticking? You’ll find that different flours deliver varying results based on their protein content and absorption rates.
Choose your flour strategically:
- All-purpose flour offers balanced protein content for reliable coverage
- Cake flour absorbs less moisture, reducing sticking but requiring thinner application
- Whole wheat flour provides superior grip due to higher protein levels
- Cornstarch absorbs moisture exceptionally well, preventing adhesion effectively
- Rice flour creates a non-stick barrier without gluten interference
You’re not limited to wheat options. Higher protein content increases friction between cake and pan, while superior absorption rates eliminate moisture pockets where sticking occurs.
Apply flour evenly across all surfaces—corners particularly demand attention. You’ll achieve consistent results by matching flour type to your specific cake recipe and pan material.
Proper Dusting Techniques
Distributing flour evenly across your pan’s interior requires a deliberate, systematic approach that guarantees complete coverage without excess buildup. You’ll master this technique through soft tapping—gently striking the pan’s sides to settle flour into crevices. Edge focus demands particular attention; these vulnerable zones collect most sticking problems.
| Technique | Coverage | Outcome |
|---|---|---|
| Soft tapping | 95% | Reliable release |
| Vigorous shaking | 60% | Inconsistent results |
| Finger application | 40% | Uneven distribution |
| Systematic rotation | 98% | Superior protection |
Rotate your pan slowly while tapping, ensuring flour reaches corners and seams. Don’t oversaturate—excess flour creates dense, undesirable cake bottoms. You’ll achieve ideal results by applying thin, controlled layers. This methodical approach gives you complete command over your baking outcome, eliminating frustration and failed releases.
Flour Alternatives for Coating
While flour remains the traditional choice for pan coating, several alternatives offer distinct advantages depending on your cake type and desired crust texture.
Consider these options:
- Cocoa powder – Ideal for chocolate cakes; eliminates white streaks and enhances flavor pairings
- Cornstarch – Creates smoother release and superior visual enhancements on delicate cakes
- Breadcrumbs – Adds textural interest and pairs well with spiced or fruit-forward batters
- Oil-based coatings – Provides maximum release without residue; perfect for intricate pan designs
- Nut flours – Contributes complementary flavors while preventing sticking
You’ll find that matching your coating to your cake’s primary flavors prevents unwanted taste conflicts.
Cornstarch delivers exceptional visual results on finished products, while cocoa and nut flours seamlessly integrate into your cake’s overall flavor profile.
Your choice depends on achieving both functional release and aesthetic excellence.
Temperature Control and Cooling Methods
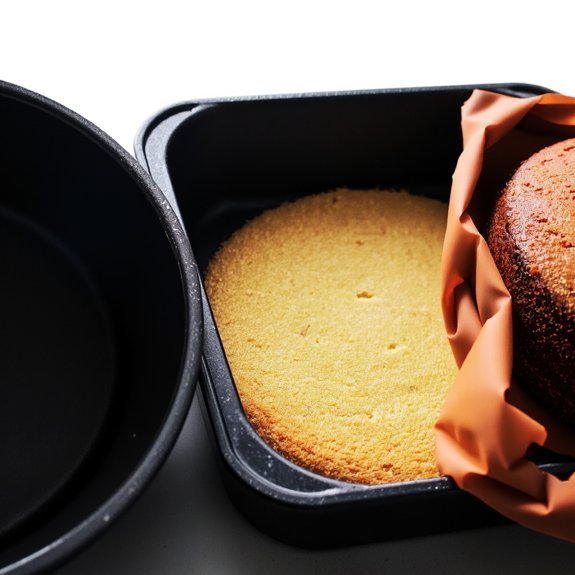
Once you’ve removed your cake from the oven, you’ll need to manage temperature and cooling carefully to prevent sticking. Proper oven calibration guarantees even baking and prevents overcooking, which increases sticking risk. Allow your cake to cool in the pan for 10-15 minutes before attempting removal—this brief rest lets the structure set without becoming too firm.
| Method | Temperature | Time |
|---|---|---|
| Pan Cooling | Room temp | 10-15 min |
| Rapid Chilling | 35-40°F | 20-30 min |
| Complete Cooling | Room temp | 2-3 hours |
Rapid chilling accelerates the process if you’re pressed for time. Transfer your cake to the refrigerator after initial cooling to firm the exterior, making release easier. Avoid thermal shock—don’t move cakes directly from hot ovens to freezers. This systematic approach maximizes your freedom to remove cakes cleanly without damage or frustration.
Alternative Non-Stick Solutions and Products
Beyond traditional preparation methods, you’ll find specialized products designed to optimize cake release and minimize sticking.
These innovations give you greater control over your baking outcomes without relying solely on conventional greasing techniques.
Consider these modern solutions:
- Silicone liners conform perfectly to pan contours, creating reliable non-stick surfaces that withstand repeated use
- Reusable mats eliminate parchment paper waste while delivering consistent release performance
- Specialty cake release sprays combine oil and flour in precise ratios for ideal coverage
- Non-stick pan coatings provide superior durability compared to standard finishes
- Silicone baking cups offer versatile, eco-friendly alternatives for various pan types
You’ll appreciate how these products streamline your preparation process and reduce cleanup demands.
Investing in quality non-stick solutions grants you independence from traditional methods while ensuring professional-grade results every time you bake.
Frequently Asked Questions
Can I Use Butter Instead of Oil for Greasing Cake Pans?
Yes, you can use butter for greasing cake pans. You’ll get ideal results with clarified butter or unsalted butter, which won’t leave salt residue that compromises your cake’s quality. Melt it slightly for easier application, then coat your pan thoroughly.
However, butter can burn at higher temperatures, so monitor your oven carefully. For maximum release, combine butter with a light flour dusting. This method gives you complete control over your baking outcomes.
What’s the Best Way to Remove a Stuck Cake From the Pan?
You can dislodge your stuck cake using the steam method: place a hot, damp towel around the pan’s exterior for 30-60 seconds. This loosens the cake’s grip.
Alternatively, apply freezer shock by refrigerating the pan for 15 minutes, which contracts the cake slightly.
Run a thin knife around the edges, then invert onto a cooling rack. You’ll reclaim your cake without sacrificing it to the pan.
Does Cake Batter Thickness Affect How Easily It Sticks to Pans?
Yes, your batter’s viscosity directly impacts surface adhesion. Thicker batters create stronger contact with pan surfaces, increasing sticking risk. You’ll find that thinner batters flow more freely, reducing friction and adhesion points. However, you can’t compromise batter consistency for your recipe’s structural integrity.
Instead, you’ll control sticking through proper pan preparation—greasing, flouring, or using parchment paper—regardless of your batter’s thickness. This approach preserves your recipe’s success while maintaining release freedom.
Should I Grease the Pan Before or After Flouring It?
You’ll grease your pan first, then flour it.
This grease sequence guarantees the flour adheres properly to the pan’s surface.
The flour benefits you’re getting include creating a protective barrier that prevents batter adhesion.
You’ve got the freedom to use butter, oil, or cooking spray for greasing—whatever works best for your baking style.
This method gives you reliable, consistent results every time.
How Long Should I Wait Before Turning Out a Freshly Baked Cake?
You’ll want to wait 10-15 minutes after removing your cake from the oven. This allows carryover baking to finish—your cake’s internal temperature continues rising and stabilizing. Check that the internal temperature reaches 200-210°F for ideal structure.
Once cooled slightly, you can safely turn out your cake without it collapsing or sticking. Don’t rush this step; patience gives you the freedom to confidently demold without disaster.


Leave a Comment