Key Takeaways
- Separate eggs carefully using three bowls, ensuring whites contain zero yolk or shell fragments for maximum volume.
- Let room-temperature whites rest 30 minutes, then whip at medium speed until soft peaks form before adding sugar.
- Gradually incorporate superfine sugar one tablespoon at a time while beating at medium-high speed until stiff, glossy peaks form.
- Avoid grease contamination, temperature fluctuations, and overbeating; grainy texture and separation indicate failure and ruined batch.
- Store finished meringues in airtight containers at room temperature for up to two weeks, protecting from humidity.
Essential Equipment and Ingredients
You’ll need a few key pieces of equipment to make French meringue successfully. Invest in a clean copper or stainless steel bowl—copper reacts chemically with egg whites, stabilizing foam.
Copper or stainless steel bowls are essential for French meringue—copper chemically stabilizes egg white foam for superior results.
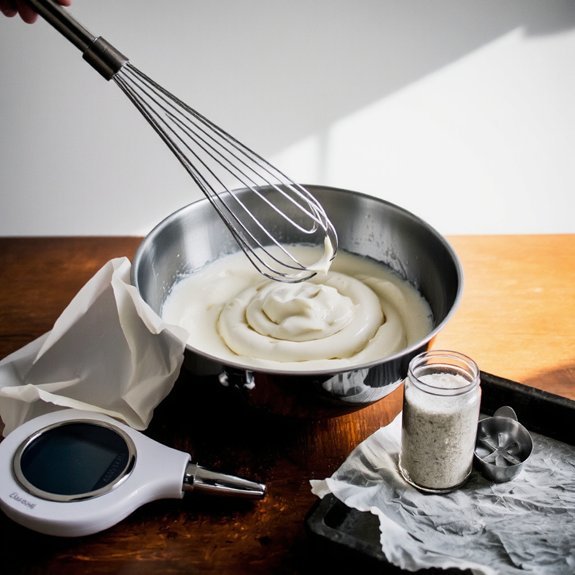
Use an electric mixer or whisk for consistent, efficient beating. A reliable thermometer guarantees you’ll reach the proper temperature during cooking.
Don’t neglect equipment maintenance; wash all tools thoroughly and dry completely to prevent fat contamination.
For ingredient sourcing, obtain room-temperature eggs with pristine whites—any yolk contamination ruins your batch. Select superfine or caster sugar for quick dissolution.
Some bakers prefer adding cream of tartar for extra stability, though it’s optional. Source high-quality ingredients from reputable suppliers, guaranteeing freshness and purity for superior results and complete control over your meringue’s success.
Preparing Your Egg Whites

With your equipment cleaned and ingredients assembled, the success of your French meringue hinges on properly preparing your egg whites.
Your separation technique determines everything. Crack eggs deliberately over a bowl, transferring yolks between shell halves to let whites drip down. Any yolk contamination ruins your meringue—fat prevents proper whipping. Use three bowls: one for cracking, one for whites, one for yolks.
| Factor | Requirement | Impact |
|---|---|---|
| Shell cleanliness | Remove all fragments | Prevents grit, guarantees smooth texture |
| Yolk separation | Complete isolation | Allows maximum volume when whipping |
| Bowl temperature | Room temperature | Facilitates ideal protein structure |
| Timing | Immediate use | Preserves protein integrity |
Let whites sit at room temperature for thirty minutes before whipping. This maximizes volume expansion and creates stable peaks. You’re now ready to transform these prepared whites into glossy, voluminous meringue.
Whipping Egg Whites to the Perfect Peak
Achieving the correct peak consistency requires careful attention to speed and timing.
You’re manipulating protein chemistry—the same science that’s governed meringue history for centuries.
Start at medium speed to incorporate air gradually, then increase to medium-high once you’ve established a foamy base.
You’ll notice three distinct stages: soft peaks droop when you lift the whisk.
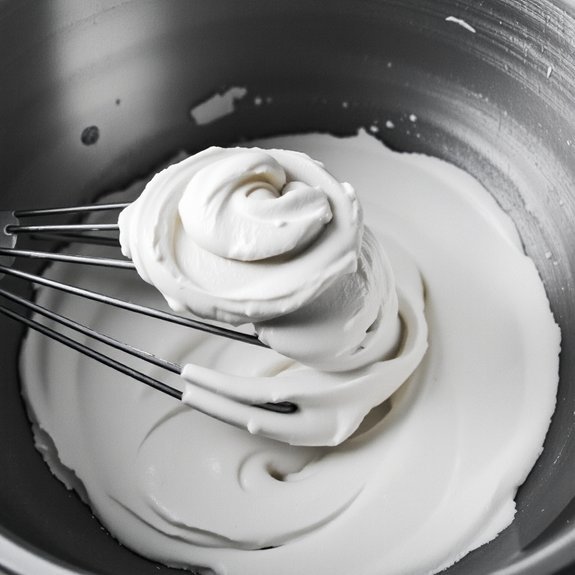
Stiff peaks stand upright without drooping.
Overbeaten peaks become grainy and separated.
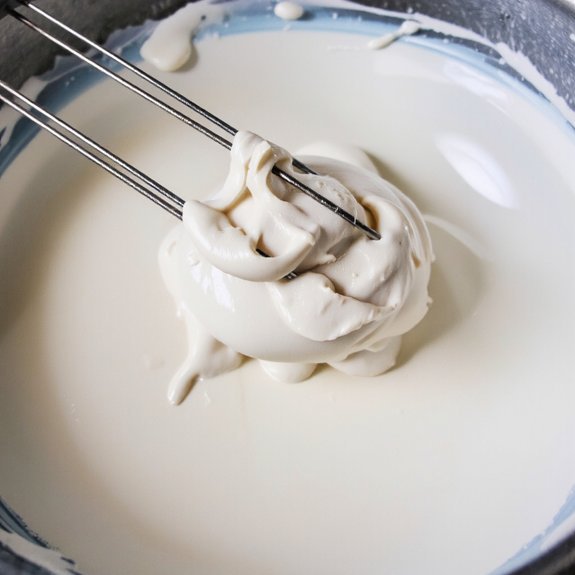
For French meringue, you’re targeting stiff peaks—firm enough to hold their shape but not so overdone that they lose moisture.
Watch carefully during the final moments.
The difference between perfect and ruined takes seconds.
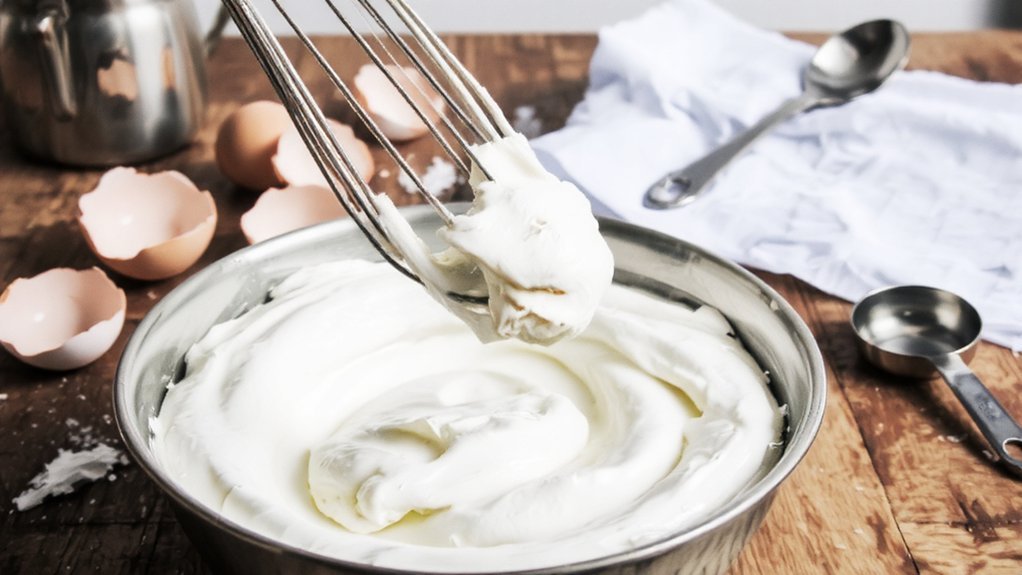
You’ll know you’ve succeeded when your peaks gleam and hold sharp points.
Incorporating Sugar Gradually
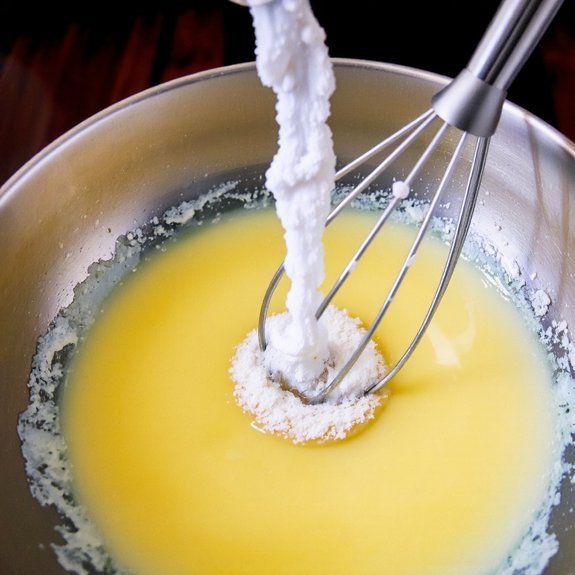
Adding sugar while the egg whites are still whipping stabilizes the foam and dissolves completely into the mixture, creating a glossy, stable meringue.
You’ll add sugar gradually—typically one tablespoon at a time—while maintaining medium-high speed.
This controlled approach guarantees best sugar solubility and prevents the whites from deflating.
Temperature effects matter substantially during this process:
- Warmer egg whites dissolve sugar faster and more completely
- Cool whites require extended beating time for full incorporation
- Room temperature (68-72°F) offers ideal conditions
- Cold eggs resist sugar integration and destabilize the foam
- Ambient kitchen heat accelerates the dissolution process
Continue beating after each sugar addition until it’s fully incorporated and the mixture becomes glossy.
You’ll achieve stiff, shiny peaks—your meringue’s ideal final state.
Don’t rush; patience guarantees superior texture and stability.
Achieving the Ideal Consistency
You’ll achieve ideal French meringue consistency by whipping your egg whites to stiff peaks—a process that requires proper technique and timing to incorporate maximum air.
Your sugar incorporation method directly impacts final texture; you must add granulated sugar gradually while whisking at high speed to make sure it dissolves completely and stabilizes the foam.
The result you’re seeking is a glossy, thick mixture that holds sharp peaks and feels smooth rather than grainy when you rub it between your fingers.
Whipping Egg Whites Properly
How do you know when egg whites have reached the proper consistency?
You’ll recognize three distinct stages as you whip:
- Foamy stage: Large bubbles form, whites become opaque
- Soft peaks: Whites hold peaks that curl over when the whisk lifts
- Stiff peaks: Whites form sharp, upright peaks that hold their shape
- Dry stage: Over-whipped whites become grainy and separate (avoid this)
You’ll want to stop at stiff peaks for ideal meringue structure.
Temperature effects markedly impact whipping speed—room temperature egg whites incorporate air faster than cold ones.
Consider altitude adjustments too; higher elevations require longer whipping times due to lower air pressure.
Use a clean, grease-free bowl and whisk; even trace fat prevents proper volume development.
Achieving this consistency demands precision and attention to your specific conditions.
Sugar Incorporation Techniques
When should sugar enter your whipped egg whites?
Add it once you’ve reached soft peaks—the stage where your whites hold shape but tips curl over. You’ll control your meringue’s final texture through sugar incorporation timing and technique.
Sprinkle sugar gradually, one tablespoon at a time, while continuously beating.
This measured approach lets you dissolve sugar completely into the foam structure. Sugar chemistry matters here: smaller particle size dissolves faster, creating smoother meringue. Fine granulated sugar works better than coarse varieties.
Keep beating until you reach stiff, glossy peaks.
The mixture should feel completely smooth between your fingers—no graininess indicates proper dissolution. You’re creating a stable emulsion where sugar particles integrate fully, giving you that ideal, workable consistency for piping and shaping your French meringue.
Common Mistakes and How to Avoid Them
Because French meringue’s success hinges on precise technique, understanding where things typically go wrong will help you achieve consistent results.
The most common pitfalls you’ll encounter include:
- Grease contamination: Even minimal oil prevents proper volume expansion
- Inadequate whisking: Under-beaten whites won’t stabilize your meringue structure
- Temperature fluctuations: Room-temperature ingredients whip faster and more reliably
- Incorrect sugar ratios: When recipe scaling, maintain precise weight measurements for stability
- Humidity interference: High moisture environments destabilize foam formation
You’ll also need to account for altitude adjustments when you’re at higher elevations, as lower atmospheric pressure affects whipping times.
Don’t rush the process. Patience yields superior results.
Make sure your bowl and whisk are impeccably clean—any residual grease sabotages your meringue.
When recipe scaling, recalculate all proportions meticulously.
These details distinguish amateur from professional meringue.
Uses and Storage Tips
French meringue’s versatility extends across desserts, pastries, and confections—from piping decorative shells and pavlovas to topping pies and layering dacquoise.
French meringue transforms any dessert creation—from elegant shells and pavlovas to pie toppings and dacquoise layers.
You’ll discover endless dessert pairings that complement your meringue’s light, crispy texture and subtle sweetness.
For storage, you control the shelf life through proper technique.
Keep finished meringues in an airtight container at room temperature for up to two weeks, protected from humidity that compromises their crispness.
For extended preservation, use freezer storage by placing meringues in a freezer-safe container with parchment between layers.
They’ll remain viable for three months frozen, though you should thaw them at room temperature before serving to maintain their delicate structure and ideal flavor profile.
Frequently Asked Questions
Can I Make French Meringue Without a Stand Mixer or Electric Beater?
Yes, you can absolutely make French meringue through vigorous hand whisking. You’ll need patience and elbow grease, but it’s entirely doable.
Whisk your egg whites and sugar over a double boiler, maintaining constant motion until you’ve reached stiff peaks. Progressive folding of ingredients prevents deflation.
Your freedom from electric gadgets won’t compromise results—just expect a longer timeline. The technique demands precision and determination, rewarding you with professional-quality meringue through sheer personal effort.
Why Does My Meringue Weep or Separate After a Few Hours?
Your meringue weeps because you’re not controlling humidity impact and you’re overlooking egg freshness.
Use room-temperature eggs that’re at least a week old—they’ll stabilize better.
Whip them until they’re glossy and stiff.
Don’t store your meringue in humid environments; that’ll break down your structure.
Add cornstarch or a touch of vinegar for insurance.
These techniques give you freedom to create stable, reliable meringues consistently.
Is It Safe to Eat Raw Egg White Meringue for Vulnerable Groups?
You shouldn’t consume raw egg white meringue if you’re pregnant or immunocompromised.
You’re exposing yourself to salmonella risks that could seriously compromise your health.
Pasteurized eggs offer you safer alternatives—they’re heat-treated to eliminate pathogens while maintaining meringue’s structure.
If you’re immunocompromised, you need extra precautions; pasteurization isn’t optional for you.
You’re protecting yourself by choosing this route.
Standard raw meringue simply isn’t worth the health gamble for vulnerable groups.
Can I Substitute Regular Sugar With Powdered Sugar or Other Alternatives?
You can substitute regular sugar with powdered sugar, though you’ll need to adjust your technique. Powdered sugar’s confectioners suitability works well since it dissolves faster, reducing beating time.
You’ve got freedom with alternative sweeteners like honey or agave, but they’ll change your meringue’s texture and stability. Experiment with monk fruit or stevia for zero-calorie options.
Always dissolve sweeteners thoroughly before whipping egg whites to achieve proper peak formation and structure.
How Do I Fix Meringue That Has Become Grainy or Over-Whipped?
You can’t reverse over-whipped meringue, so start fresh.
For graininess, you’ve likely overbeaten or used impure ingredients.
Control your mixer speed—don’t exceed medium-high.
Maintain proper temperature control; work with room-temperature eggs for ideal stability.
When folding tips matter most: use gentle, deliberate strokes with a spatula.
Fold carefully to preserve air incorporation without breaking down your structure.
This restores your meringue’s glossy finish and smooth texture.


Leave a Comment