Key Takeaways
- Color should progress from pale to golden brown; avoid pale or charred exteriors across all baked goods.
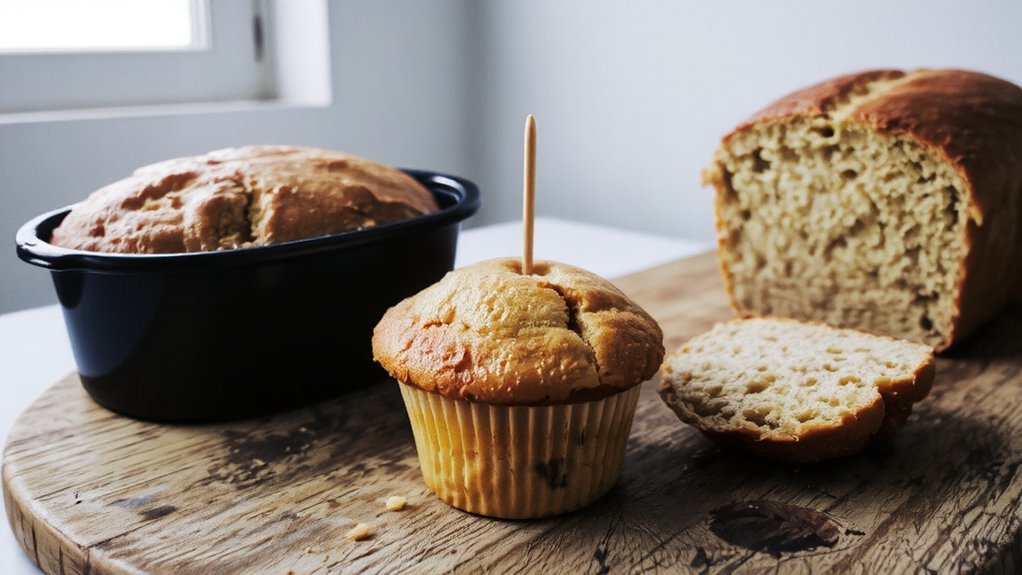
- Insert a toothpick into the center; clean or nearly clean indicates doneness; wet batter means more time needed.
- Gently press cake tops; immediate spring-back signals doneness; cookie centers should feel slightly soft while edges firm.
- Use an instant-read thermometer: cakes 205–210°F, yeast breads 190–210°F, custard-based items 150–160°F in the thickest part.
- Tap pie or bread bottoms; hollow sounds indicate thorough baking; combine visual cues with multiple testing methods.
Visual Cues: Color and Appearance
When you’re baking, color’s your first indicator of doneness.
You’ll notice distinct color gradients developing as your baked goods transform from pale to golden to deep brown.
Light golden tones typically signal proper doneness for most items, while darker shades suggest you’re approaching overbaking territory.
Pay close attention to surface sheen—glossy surfaces often indicate moisture still present, while matte finishes suggest adequate moisture evaporation.
The edges usually brown first, so don’t judge the entire piece by its perimeter alone.
Different baked goods require different color targets.
Cookies should appear set at the edges with slightly soft centers.
Bread crusts develop rich, deep browns.
Cakes reach a light golden hue.
You’ll develop an intuitive sense for proper coloring with practice.
Trust what you observe, but remember that oven variations mean your visual cues work best alongside other doneness tests.
The Toothpick or Skewer Test
You’ll insert a toothpick or skewer into the center of your baked good and observe what comes out to determine doneness.
The results vary depending on what clings to the toothpick—whether it’s wet batter, moist crumbs, or nothing at all—which tells you if you need more baking time. This test works best for dense baked goods like cakes, brownies, and muffins, where you can easily read the texture of what adheres to the tool.
How the Test Works
Why’s the toothpick test so reliable?
During baking, you’re witnessing two critical transformations: starch gelatinization and protein coagulation.
These chemical changes determine doneness.
Insert a toothpick into your baked good’s center.
You’re checking whether moisture remains in the crumb structure.
If it emerges clean or with just a few dry crumbs, you’ve achieved full starch gelatinization and protein coagulation—your baked good’s done.
Wet batter clinging to the pick signals incomplete cooking.
This method works because you’re directly gauging the interior’s moisture content, which correlates precisely with structural integrity.
The toothpick doesn’t lie: it reveals whether heat’s penetrated thoroughly enough to transform raw ingredients into stable, set crumbs.
For dense items like brownies or cheesecakes, expect slightly moist results—that’s intentional.
You’re distinguishing between underbaked and properly moist.
Reading the Results
How do you interpret what the toothpick reveals?
When you withdraw the toothpick, examine it carefully.
If it comes out clean or with only a few moist crumbs clinging to it, your baked good’s done.
Wet batter means you’ll need more time.
However, don’t rely solely on this test.
Consider your oven calibration—ovens vary noticeably in actual temperature versus displayed readings.
A cake that appears golden brown might still contain undercooked interior.
Pay attention to flavor cues too; underbaked goods often taste raw or gummy, while properly baked items feel tender yet structured.
Combine the toothpick test with visual cues and your oven’s known tendencies.
You’ll gain confidence in determining doneness accurately across different recipes and equipment variations.
Best Baked Goods for Testing
Which baked goods respond best to the toothpick test?
You’ll find that cakes, brownies, and quick breads yield the clearest results.
These dense, crumb-based items provide reliable indicators when you insert a toothpick into their centers—clean or nearly clean means done; wet batter means more time.
Muffins and cupcakes also work excellently for this method.
You’re getting time efficient samples since these smaller portions bake faster, allowing you to test doneness without sacrificing much product.
For budget friendly options, focus on basic cakes and brownies.
They’re inexpensive to produce and offer consistent, readable results.
Avoid testing delicate items like soufflés or chiffon cakes—they’re too sensitive to the insertion method.
Stick with sturdy, moisture-rich baked goods for dependable, accurate testing every time.
The Touch Test for Different Baked Goods
You’ll gain valuable insight into doneness by pressing your finger gently against baked goods’ surfaces, as different items require distinct tactile responses. This tactile training develops your ability to distinguish between undercooked and properly baked products without relying solely on timers.
| Baked Good | Tactile Response |
|---|---|
| Cakes | Springs back immediately when pressed |
| Cookies | Firm exterior with slight give in center |
| Bread | Hollow sound when tapped; firm crust |
| Brownies | Toothpick test preferred; slight crumb resistance |
| Muffins | Tops feel set; minimal indentation remains |
Follow proper hygiene protocol before conducting touch tests—wash hands thoroughly to prevent contamination. Press the surface gently using your index finger; excessive pressure distorts results. You’ll notice temperature differences that indicate doneness levels. Master this technique, and you’ll eliminate guesswork from your baking process entirely.
Using an Instant-Read Thermometer
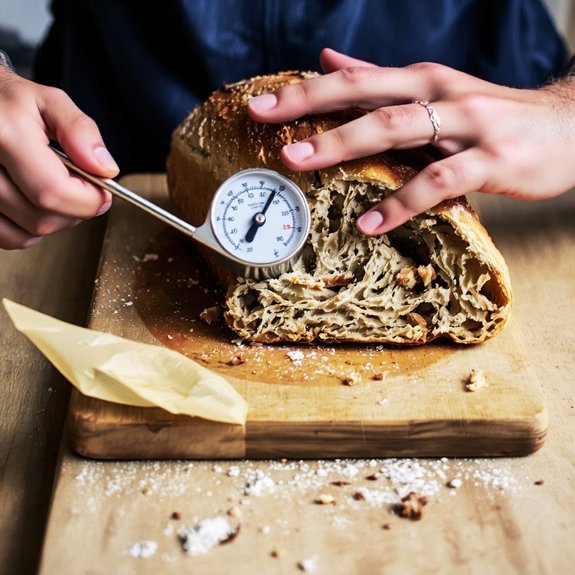
An instant-read thermometer provides objective, measurable data that removes ambiguity from the doneness assessment. You’ll insert the probe into the thickest part of your baked good, avoiding contact with pans or bones, and read the temperature within seconds.
Different baked goods require specific internal temperatures. Cakes and quick breads reach doneness at 205-210°F, while yeast breads need 190-210°F. You’ll find custard-based items like cheesecake require 150-160°F for food safety.
For accuracy and food safety, prioritize probe sanitation between uses. Wash it thoroughly with hot soapy water or use sanitizing wipes. You should also maintain battery maintenance by checking your thermometer’s batteries regularly, ensuring consistent performance during critical baking moments.
The Cake Spring-Back Method
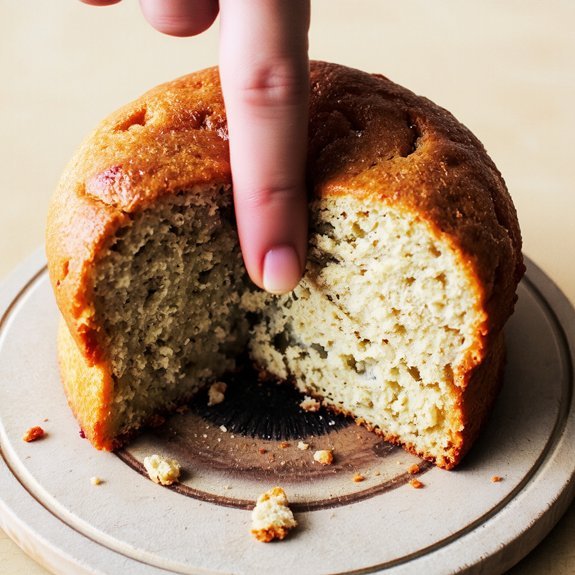
When you need a quick, tool-free doneness check, the spring-back method offers reliable tactile feedback that doesn’t require equipment or temperature readings. Gently press the cake’s center with your fingertip. Fully baked cakes spring back immediately, while underbaked ones leave a slight indentation. This technique varies based on ingredient influence—denser batters containing oil or applesauce respond differently than lighter, butter-based formulas. Pan depth also affects results; shallow pans bake faster than deep ones, requiring adjusted timing expectations.
| Cake Type | Spring-Back Response | Pan Depth Impact |
|---|---|---|
| Chocolate | Slow return | Affects center doneness |
| Vanilla | Quick rebound | Surface-dependent check |
| Oil-based | Delayed response | Deeper pans need longer |
| Butter | Immediate spring | Shallow pans bake faster |
You’ll master this method quickly through practice.
Checking Bread for Proper Doneness
Unlike cakes, bread requires different doneness indicators because its structure and crust behave distinctly during baking. You’ll want to check for a deep golden-brown exterior and listen for a hollow sound when you tap the loaf’s bottom—this indicates proper crust development and oven spring completion.
Insert a thermometer into the center; it should read 190-210°F depending on bread type. You can also examine the crumb structure by slicing a cooled sample; you’re looking for an even distribution of holes without large air pockets or dense sections.
The crumb should spring back slightly when pressed. Trust your judgment: if the crust appears too pale, return it to the oven for 5-10 minutes. These methods confirm you’ve achieved ideal texture and flavor development throughout your loaf.
Cookie Texture and Cooling Considerations
Determining cookie doneness differs markedly from bread assessment because you’re evaluating set structure rather than internal temperature. You’ll recognize properly baked cookies when the edges firm up while centers retain slight give. Don’t overbake—you’re after that sweet spot where fat crystallization creates desirable texture contrasts.
| Cookie Stage | Visual Cue | Crumb Structure | Action |
|---|---|---|---|
| Underbaked | Doughy center | Wet, dense | Return to oven |
| Ideal | Golden edges, soft middle | Tender with structure | Cool on sheet |
| Slightly overbaked | Even golden color | Crisp edges, chewy middle | Transfer immediately |
| Overbaked | Dark brown | Hard, brittle throughout | Discard |
Remove cookies from heat when edges set but centers still jiggle slightly. This approach lets residual heat finish cooking while you control final crumb structure through strategic cooling timing.
Pastry and Pie Crust Indicators
You’ll recognize a properly baked pie crust when it reaches a deep golden brown color throughout, indicating the Maillard reaction has developed full flavor and structure.
Test the crust’s crispness by gently tapping the edge with a fork—it should feel firm and produce a slight crackling sound rather than yielding to pressure.
Watch for gentle bubbling around the filling’s edges, which signals that the interior has reached the proper temperature and the filling has set adequately.
Golden Brown Color
Why’s golden brown color so important for pastries and pie crusts?
You’re observing the Maillard reaction—a chemical process that develops flavor, aroma, and structure.
When your crust reaches this stage, you’ve achieved ideal browning without burning.
Your color perception matters here.
Light golden means underbaked; deep golden indicates proper doneness.
The crust should look uniformly bronzed, not pale or charred.
This visual indicator tells you proteins and sugars have bonded appropriately, creating that desirable texture and taste.
You’ll notice the edges brown faster than centers, so rotate your pan halfway through baking if needed.
Trust what you’re seeing—golden brown signals your pastry’s ready to cool.
This simple visual cue gives you complete control over your baking results.
Crispy Texture Test
How can you verify that your pastry’s interior matches its golden exterior? Test the texture by gently pressing the surface—it should feel crisp and firm, not soft or yielding.
Listen for a hollow sound when you tap the bottom of pie crusts; this indicates thorough baking throughout.
Consider airflow impact during baking. Make sure your oven rack positions allow proper air circulation around your pastry, preventing soggy bottoms.
Check coating techniques you’ve applied. If you’ve brushed egg wash or butter on the surface, verify it’s set and hardened, not tacky.
Insert a fork into the crust edge; it should break cleanly without crumbling excessively. These tactile and auditory tests confirm your pastry’s doneness independently of color alone, giving you complete control over your baking results.
Filling Bubble Indicators
When your pie’s filling begins to bubble around the edges or through vents, that’s a reliable sign the interior’s reached the proper temperature. You’re witnessing steam escape from the filling, which indicates heat penetration throughout.
Watch for these key indicators:
- Large, vigorous bubbles breaking at the surface consistently
- Steady steam rising from edge vents without sputtering
- Bubble size expanding to roughly quarter-inch diameter
- Continuous bubbling for at least one minute across multiple spots
Don’t confuse occasional tiny bubbles with genuine doneness signals. You need sustained, robust bubbling activity.
These signs show your filling’s thickened sufficiently and reached ideal temperature. The steam escape mechanism confirms moisture’s properly evaporating and setting your filling’s structure.
Trust this physical evidence over guesswork—it’s your most dependable indicator that your pie’s interior’s truly finished baking.
Common Mistakes to Avoid When Testing Doneness
Since improper testing techniques can lead to undercooked or overbaked results, you’ll want to master the correct methods. Avoid over-relying on your timer—it’s merely a guide, not gospel. Different ovens vary substantially, and pan substitution changes heat distribution and baking duration.
| Mistake | Problem | Solution |
|---|---|---|
| Timer reliance | Ignores oven variations | Use multiple testing methods |
| Opening door frequently | Disrupts temperature stability | Test only near end time |
| Pan substitution without adjustment | Alters bake time unpredictably | Add 5-10 minutes if needed |
Don’t trust appearance alone; light browning doesn’t guarantee doneness inside. Avoid poking randomly—use the toothpick test consistently in the center. Stop second-guessing yourself once you’ve confirmed doneness through proper techniques. You’re in control of your baking outcomes.
Frequently Asked Questions
Can I Rely on Baking Time Alone Without Using Other Doneness Testing Methods?
You shouldn’t rely solely on baking time. Recipe variability and ingredient moisture differences mean your oven, pan type, and exact ingredients won’t perfectly match published times.
You’re better served testing doneness through multiple methods—toothpick insertion, visual browning, and tactile firmness checks. These techniques give you genuine control and confidence, letting you achieve consistent results without being enslaved to arbitrary timer settings that might fail you.
How Do Altitude and Oven Type Affect Baked Goods’ Cooking Time and Doneness?
Your altitude dramatically impacts baking because boiling point shifts lower, causing liquids to evaporate faster and leavening agents to rise quicker. You’ll need to reduce leavening and increase liquid slightly.
Convection differences matter too—convection ovens circulate heat faster, reducing your baking time by 25 percent compared to conventional models. You’re responsible for adjusting recipes accordingly and monitoring your results closely rather than trusting preset times.
What Should I Do if My Baked Good Seems Done but Appears Undercooked Inside?
You’ve got options when your baked good’s exterior looks done but the interior’s raw.
Slice it open to assess doneness accurately.
If needed, rebake it at a lower temperature to prevent over-browning the outside.
Alternatively, you can microwave finish stubborn spots for 15-30 seconds.
This gives you control—take ownership of your baking outcome rather than accepting mediocre results.
Why Do Some Baked Goods Continue Cooking After Removal From the Oven?
You’ve likely experienced carryover cooking—when your baked goods continue baking after you’ve removed them from the oven.
This happens because the residual heat trapped inside keeps raising the internal temperature. You’ll want to pull your items out when they’re slightly underdone, accounting for this phenomenon. Check internal temperature with a thermometer; it’ll climb several degrees during cooling, ensuring you achieve your desired doneness without overdoing it.
How Can I Prevent Overbaking While Ensuring the Center Is Fully Cooked?
You’ll prevent overbaking by mastering ingredient ratios—they determine moisture content and baking speed.
Lower oven temperatures give your center time to cook without browning edges excessively.
Use shielding strips around pan perimeters to deflect heat from vulnerable areas.
Insert a toothpick into the thickest section; it shouldn’t emerge completely dry.
You’re taking control of your baking’s outcome by understanding these technical variables.
Leave a Comment