Key Takeaways
- Master the crumb coat technique by applying a thin frosting layer, chilling thirty minutes, then confidently finishing with final frosting for professional results.
- Use offset spatulas with horizontal strokes on sides and circular motions on vertical surfaces while rotating your turntable constantly for smooth, polished finishes.
- Stack level cake layers with flat sides aligned and apply a frosting dam around the perimeter to prevent shifting during decoration.
- Apply food-grade edible glitter using gum arabic adhesive immediately after frosting while tacky, layering different particle sizes for dimensional depth and sophistication.
- Present your cake off-center with strategic lighting and contrasting surfaces to highlight texture, create visual interest, and draw the viewer’s eye upward.
Essential Tools and Supplies for Cake Decorating
Before you’ll frost your first cake, you’ve got to assemble the right tools.
Before you frost your first cake, gather the essential tools—offset spatulas, piping bags, decorating tips, a turntable, and bench scraper.
Your basic kit includes offset spatulas, piping bags, decorating tips, a turntable, and a bench scraper.
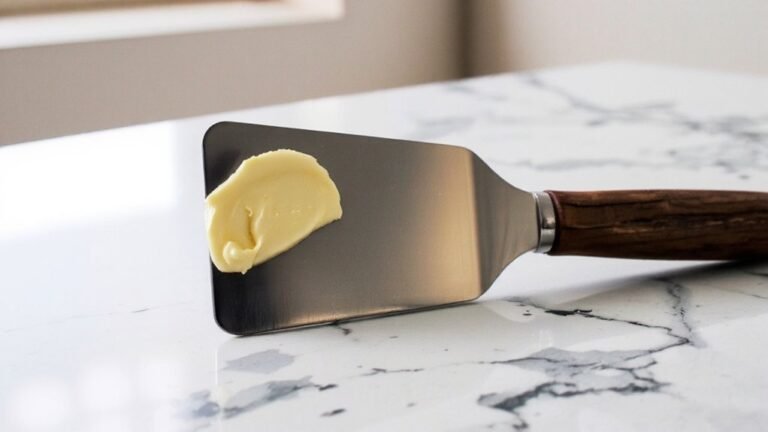
You’ll need both angled and straight spatulas for precise application and smooth finishes.
Invest in quality stainless steel tools that won’t warp or corrode.
Proper tool maintenance guarantees longevity and performance—wash and dry immediately after use to prevent rust and residue buildup.
Storage solutions matter substantially.
Keep your piping tips organized in a dedicated container and store spatulas flat in a drawer divider.
A turntable should sit on a stable shelf away from moisture.
Select professional-grade equipment rather than novelty alternatives.
You’ll achieve superior control and finish quality with reliable, durable tools built for serious decorating work.
Preparing Your Cake for Decorating

With your tools assembled and maintained, you’re ready to prepare your cake for decorating.
First, make sure your cake’s at room temperature—this prevents frosting from melting and allows even crumb coating.
Level uneven layers using a serrated knife, creating a stable foundation for stacking.
Next, consider your flavor pairings when selecting complementary frosting and fillings.
This strategic choice enhances both aesthetics and taste.
Apply a thin crumb coat—a preliminary frosting layer that traps loose crumbs—then refrigerate for thirty minutes until firm.
Once chilled, apply your final frosting layer with confidence.
A properly prepped cake provides a smooth, professional canvas for your decorative work.
You’re now positioned to execute advanced techniques without structural compromise or visual imperfections that undermine your creative vision.
Mastering the Crumb Coat Technique
The crumb coat’s primary purpose is to seal loose cake particles into a stable base layer, preventing them from migrating into your final frosting.
A crumb coat seals loose cake particles into a stable base layer, preventing them from migrating into your final frosting.
This technique demands precision and a strategic adhesion strategy.
Your crumb containment method relies on these critical steps:
- Apply a thin frosting layer using offset spatula techniques
- Work at controlled temperature to prevent frosting softening
- Chill the coated cake for thirty minutes minimum
- Execute your final coat with confidence on a stabilized surface
You’ll notice immediate results: cleaner final applications, professional appearance, and reduced frosting waste.
The thin initial layer captures all loose particles effectively.
This foundational step separates amateur decorators from skilled professionals. Don’t skip or rush this phase—it’s non-negotiable for achieving flawless cake decoration.
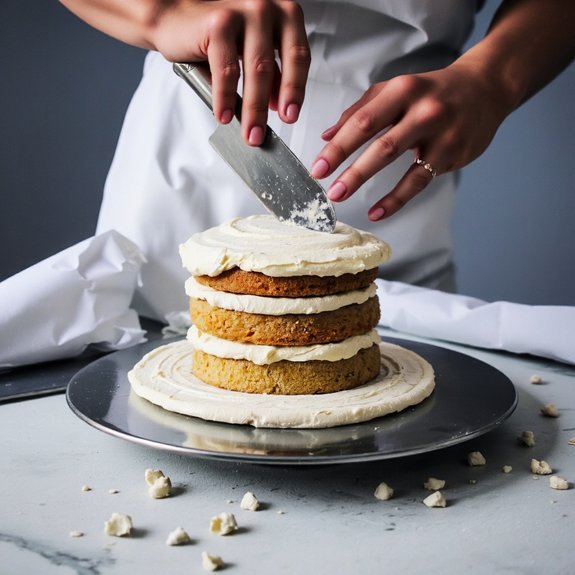
Stacking and Leveling Your Cake Layers
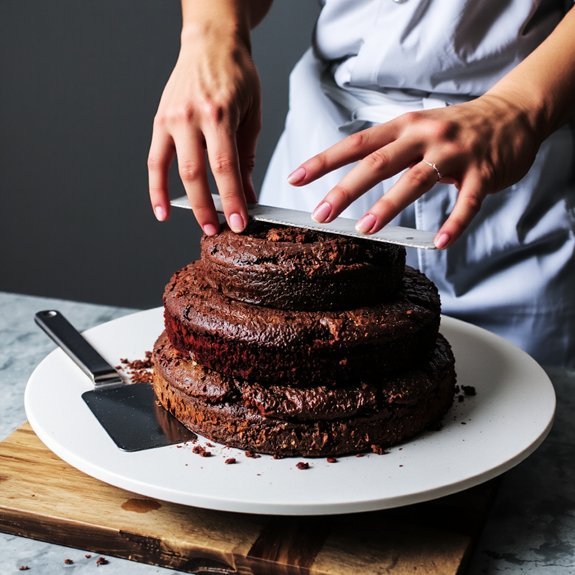
Once you’ve secured your crumb coat and chilled your cake to stability, you’re ready to build the structure that’ll support all your decorative work. Start by placing your first layer on a rotating turntable with the flat side down—this establishes proper layer orientation and prevents wobbling.
Use a serrated knife to level the top, removing any dome or unevenness. This height consistency step is critical; measure your layers to guarantee uniform thickness throughout.
Apply a thin frosting dam around each layer’s perimeter before adding filling—this prevents shifting under pressure. Stack your second layer with the flat side up, maintaining perpendicular alignment. Check levelness frequently using a cake leveler or knife. Repeat this process methodically. You’re not just stacking; you’re engineering stability that’ll let your decorative vision shine without structural compromise.
Frosting Application and Smoothing Methods
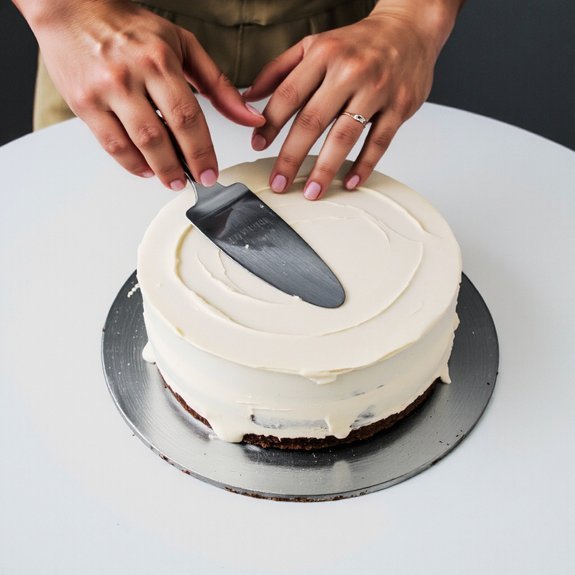
Applying frosting evenly across your cake’s surface requires a combination of technique and the right tools.
You’ll want to maintain proper temperature control—your frosting shouldn’t be too soft or too stiff.
Perform consistency testing by lifting your spatula; the frosting should hold its shape without cracking.
Deploy these essential techniques:
- Use an offset spatula for horizontal strokes across flat surfaces
- Apply a thin crumb coat first, then chill before your final layer
- Work in circular motions for vertical sides
- Rotate your cake platform constantly for uniform coverage
Start with room-temperature cake and adequately chilled frosting.
You’re building control through deliberate movements, not rushing.
Each stroke matters.
Your freedom to create flawless finishes comes from mastering these fundamentals, allowing you to move forward confidently to decorative elements.
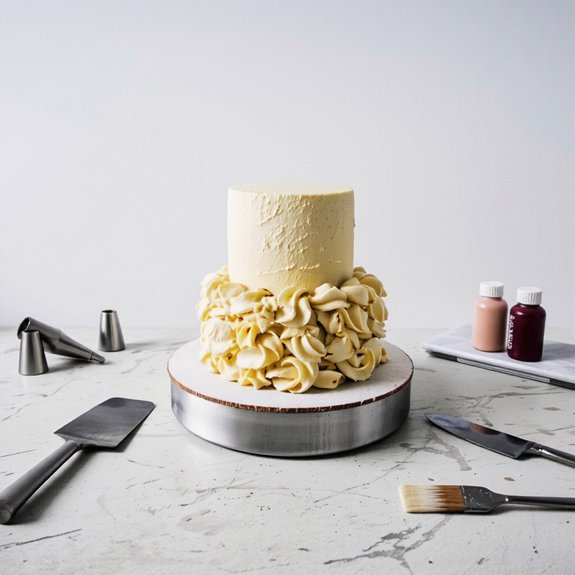
Piping Techniques for Borders and Designs
With your frosting base perfected, you’re ready to elevate your design work through piping—the technique that transforms a finished cake into an artistic statement. Master essential borders and designs by controlling pressure and angle with precision.
| Technique | Tip Size | Pressure | Best Use |
|---|---|---|---|
| Rope Border | #21 | Steady, medium | Classic edges |
| Scroll Work | #16 | Variable | Elegant accents |
| Shell Border | #18 | Pulsing | Dynamic movement |
| Bead Work | #3 | Light, consistent | Delicate details |
You’ll achieve professional results by practicing fundamental strokes. Start with borders—they frame your cake decisively. A rope border demands consistent hand movement; scroll work requires confident, flowing motions. Hold your bag at forty-five degrees for most techniques. Your freedom to experiment increases as muscle memory develops. Build complexity gradually, layering designs for maximum visual impact without overwhelming the cake’s structure.
Creating Flowers and Advanced Decorative Elements
Elevating your piping skills to create dimensional flowers and intricate embellishments requires mastering petal formation, layering techniques, and specialized tip designs.
You’ll develop precision through consistent practice with various piping tips that produce realistic petals, leaves, and scrollwork.
Advanced decorative elements you can master include:
- Gumpaste florals for lifelike, hand-crafted flowers with superior texture and longevity
- Isomalt accents for transparent, glass-like decorative pieces that catch light dramatically
- Pulled sugar work for elegant, sculptural elements requiring temperature control
- Brush embroidery for painted effects that add depth and dimension
You’ll combine these techniques strategically, layering buttercream piping with sugar work to achieve professional results.
Focus on controlled hand movements, consistent pressure, and proper tip angles.
Your independent experimentation with these methods drives mastery and creative confidence.
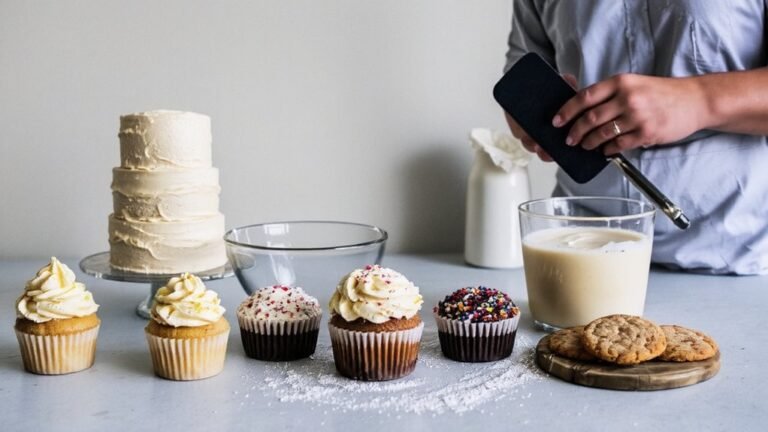
Finishing Touches and Professional Presentation
You’ll elevate your cake’s visual impact by applying edible glitter and sparkle elements strategically to highlight focal points and create dimension.
Your presentation technique—including cake placement, background selection, and angle positioning—directly influences how effectively the design communicates to viewers.
These final refinements transform a well-decorated cake into a professionally executed centerpiece that commands attention and demonstrates mastery of your craft.
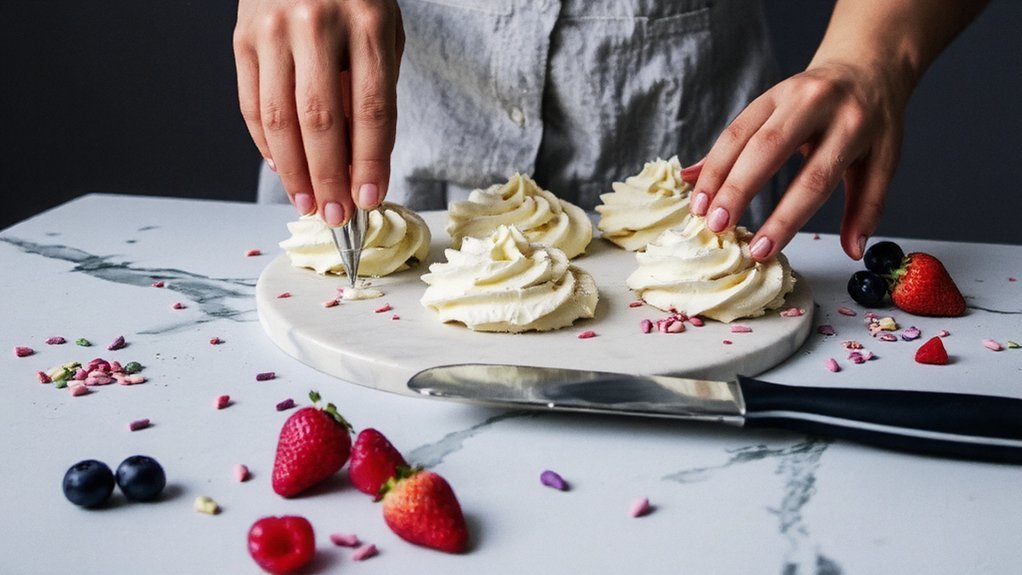
Edible Glitter and Sparkle
Adding edible glitter and sparkle transforms a cake from ordinary to extraordinary, creating visual impact that commands attention. You’ll find that modern edible glitter utilizes sophisticated edible chemistry to achieve stunning effects without compromising safety.
Color stability remains paramount—premium formulations resist fading under light and heat exposure.
When you’re applying sparkle elements, consider these essential techniques:
- Use gum arabic as an adhesive for maximum glitter adherence
- Apply glitter immediately after frosting while surfaces remain tacky
- Layer different particle sizes for dimensional depth
- Store decorated cakes in cool, dark environments to preserve color stability
You’re not simply decorating; you’re mastering the intersection of culinary science and artistic expression. Select food-grade products exclusively, ensuring your creations maintain both visual brilliance and unwavering safety standards. Your finished cake’ll showcase professional-grade sophistication that reflects your technical precision.
Plating and Display Techniques
Presenting your decorated cake requires strategic consideration of placement, lighting, and surrounding elements that amplify its visual impact.
You’ll want to master plate arrangement by positioning your cake off-center, allowing negative space to enhance its prominence.
Position cake stands at varying heights to create visual interest and draw the viewer’s eye upward.
Lighting tips prove essential for professional presentation.
You’ll achieve ideal results with soft, directional lighting that highlights texture and color without casting harsh shadows.
Natural diffused light works beautifully, while warm spotlighting emphasizes dimension and detail.
Consider your backdrop carefully—neutral colors complement most designs, while contrasting surfaces make your creation pop.
You’re controlling the entire visual narrative through these strategic choices, transforming your cake from simple dessert into a statement piece that commands attention.
Frequently Asked Questions
How Long Can a Decorated Cake Sit Before Serving Without Frosting Melting?
You’ll keep your decorated cake fresh for 2-4 hours at room temperature before frosting degrades. Humidity Effects substantially impact this timeline—high moisture accelerates melting.
You’re wise to factor in Sugar Content in your frosting; higher concentrations provide better stability.
Store your cake in a cool environment below 72°F, away from direct sunlight and heat sources.
If you’re facing extended wait times, refrigerate your creation at 35-40°F, where you’ll gain 24-48 hours of protection.
What’s the Best Way to Transport a Decorated Cake to an Event Safely?
You’ll transport your decorated cake safely by securing it on non-slip mats inside your vehicle, preventing any sliding during transit.
Position the cake low and centered for ideal stability.
Use vehicle stabilization techniques—drive smoothly at moderate speeds, avoiding sharp turns and sudden braking.
Keep the cake away from heat sources and direct sunlight.
You’re in complete control of the journey’s success when you prioritize these fundamental transport protocols.
Can I Decorate a Cake the Day Before Serving It?
Yes, you can decorate your cake the day before. This approach actually enhances flavor development, allowing frosting and fillings to meld thoroughly.
Strategic schedule planning guarantees ideal results: refrigerate decorated cakes at 40°F to preserve structural integrity and prevent frosting degradation.
You’ll maintain complete control over your preparation timeline, avoiding last-minute stress.
Most buttercream and fondant decorations remain stable overnight under proper conditions, giving you the freedom to focus on other event details.
How Do I Fix Mistakes in Frosting or Piping Without Starting Over?
You’ve got options for Buttercream Rescue. Smooth over mistakes with a warm, damp offset spatula for minor frosting flaws.
For Piping Patches, you’ll reload your bag and pipe over errors, blending edges carefully.
If you’re working with buttercream, you can scrape away problem sections and refrost.
For significant piping mistakes, consider repositioning decorative elements—flowers, sprinkles, or borders—to strategically cover mishaps. You’re not locked into perfection; take control and adapt your approach mid-decoration.
What Temperature Should My Kitchen Be for Optimal Cake Decorating Conditions?
You’ll achieve ideal cake decorating conditions when you maintain a temperature range between 65-70°F. This sweet spot prevents frosting from melting while keeping it workable.
Humidity control’s equally critical—you’re looking for 40-50% humidity to avoid sticky conditions that’ll sabotage your piping work. These precise environmental parameters give you the freedom to execute intricate designs without fighting against your surroundings. Keep your workspace cool, controlled, and you’ll master professional-quality decorating consistently.


Leave a Comment