Key Takeaways
- Use wire racks elevated at least 0.5 inches off countertops to ensure proper airflow and even cooling.
- Space baked goods minimum 1 inch apart and avoid stacking to prevent trapped heat and uneven cooling.
- Cool cakes 15–30 minutes in pan, then 1–3 hours on racks before frosting or stacking.
- Apply glazes and frostings only when items cool to approximately 110°F for proper adherence without melting.
- Move cooled items to airtight containers only after reaching room temperature to prevent condensation and sogginess.
Why Cooling Is Essential for Baked Goods

When you remove baked goods from the oven, they’re still actively cooking as residual heat continues to set the crumb structure and evaporate excess moisture.
Baked goods continue cooking after removal, as residual heat sets crumb structure and evaporates excess moisture.
This cooling phase is non-negotiable for achieving your desired texture and taste.
During cooling, starch crystallization occurs, stabilizing the internal matrix and preventing a gummy center.
You’re also allowing flavor maturation to develop fully—those complex notes simply won’t emerge while internal temperatures remain elevated.
Cooling prevents structural collapse too.
Remove items prematurely, and you risk dense, sunken results.
Temperature also affects moisture distribution; gradual cooling lets steam escape evenly rather than creating soggy spots.
You need cooling racks that promote air circulation, preventing steam trapping underneath.
Don’t rush this stage.
Proper cooling takes freedom from guesswork—it’s thermodynamics delivering predictable, superior results.
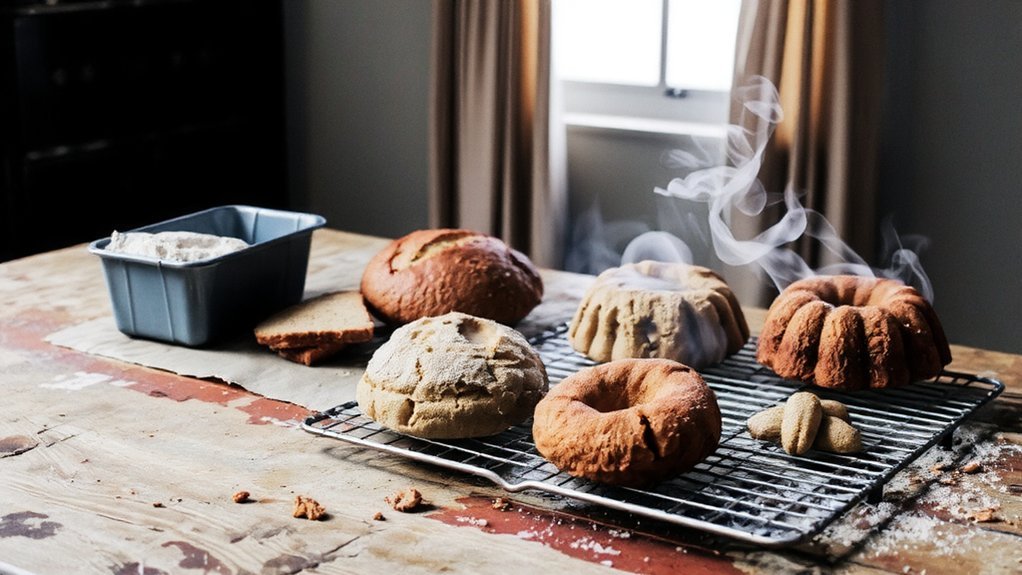
The Wire Rack Method for Even Cooling
Because air circulation directly determines how quickly and evenly your baked goods cool, you’ll want to invest in proper wire cooling racks that elevate your items at least half an inch off the counter surface. Stainless steel and chrome-plated steel racks offer superior heat dissipation compared to plastic alternatives.
| Rack Material | Heat Conductivity | Durability |
|---|---|---|
| Stainless Steel | Excellent | High |
| Chrome-Plated Steel | Very Good | High |
| Plastic | Poor | Low |
Position your racks in areas with natural air circulation, avoiding enclosed spaces. Never stack hot baked goods directly; this traps residual heat and creates uneven cooling. Space items one inch apart minimum. Monitor internal temperatures—most items reach safe cooling stages between 110°F and 140°F. This method grants you complete control over your final product’s texture and structure.
Room Temperature vs. Cold Storage Cooling
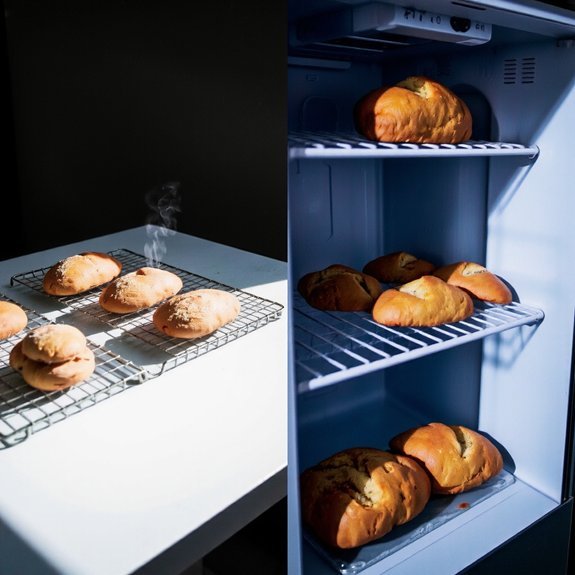
You’ll want to cool most baked goods at room temperature first to prevent condensation and preserve texture.
Then move them to cold storage only after they’ve reached ambient temperature.
For refrigerator storage, you’re working against moisture retention and staling acceleration.
So reserve this method for items with fillings or frostings that require stabilization.
Freezer preservation works best when you’ve wrapped your baked goods airtight to block freezer burn.
This allows you to extend shelf life by weeks or months depending on the item’s fat and moisture content.
Counter Cooling Best Practices
The moisture content and crumb structure of your baked goods will determine whether counter cooling or cold storage’s the right choice.
You’ll maximize your freedom to achieve ideal texture by following these counter cooling practices:
- Maintain counter hygiene by clearing debris and sanitizing surfaces before placing items
- Use wire racks to promote proper air circulation underneath, preventing moisture accumulation
- Provide surface insulation with parchment paper to shield delicate crusts from dust and contaminants
Position your baked goods away from direct sunlight and heat sources.
Monitor ambient temperature—ideally 65-72°F—to prevent premature staling or unwanted fermentation.
You’re controlling evaporation rates and preserving crumb structure by managing environmental factors precisely.
This method works best for items consumed within 24-48 hours, keeping your baked goods at peak quality without refrigeration’s detrimental effects on texture and moisture retention.
Refrigerator Storage Guidelines
While counter cooling works well for short-term storage, refrigeration becomes necessary when you’re extending shelf life beyond 48 hours or dealing with moisture-rich crumbs that’d otherwise spoil quickly.
Set your refrigerator between 35-40°F for ideal preservation.
You’ll want airtight containers to manage humidity control effectively—excess moisture degrades texture and promotes mold growth. Wrap individual items in parchment before containerizing to prevent odor transfer from neighboring foods, which can compromise your baked goods’ flavor profile.
Store baked items on dedicated shelves away from strong-smelling ingredients. This strategy maintains crumb structure and frosting integrity while protecting against bacterial contamination.
Most refrigerated baked goods remain fresh for 5-7 days, though dense items like pound cake extend to two weeks.
Freezer Preservation Techniques
For baked goods you’re planning to store beyond a week, freezing offers superior preservation compared to refrigeration’s limited timeline.
You’ll maximize shelf life by controlling moisture loss and microbial growth through sustained cold temperatures.
Implement these freezer preservation strategies:
- Vacuum sealing — Remove air entirely before freezing to prevent freezer burn and ice recrystallization that degrades texture and flavor compounds
- Temperature maintenance — Keep your freezer at 0°F (-18°C) or below; fluctuations cause crystalline structure breakdown
- Layered wrapping — Use parchment paper beneath plastic wrap for additional moisture barrier protection
You’re free from time constraints when you freeze properly.
Most baked goods remain stable for 2-3 months.
Thaw at room temperature to restore original crumb structure without compromising ingredient integrity.
This method preserves your baked creations’ quality far longer than any cold storage alternative.
Cooling Times for Different Baked Items

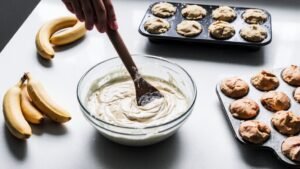
You’ll find that cakes demand extended cooling periods—typically 15-30 minutes in the pan and another 1-2 hours on a wire rack—because their dense crumb structure retains residual heat that can cause structural collapse if removed prematurely.
Cookies, conversely, cool rapidly on the baking sheet within 2-5 minutes due to their thin profile and high sugar content, which sets quickly as temperature drops.
Bread requires the most patient cooling approach, needing 45 minutes to several hours on a rack to allow internal steam to escape gradually and prevent a soggy crust.
Cakes Need Extended Time
Because cakes contain higher moisture content and denser crumb structures than most baked goods, they’ll require substantially longer cooling periods—typically 15 to 30 minutes in the pan before turning out onto a wire rack.
You’ll want to prioritize crumb consolidation and layer stabilization during this critical window.
Here’s your cooling protocol:
- In-pan cooling (15-30 minutes): Allow residual heat to set the structure without shock from temperature fluctuation
- Wire rack transfer: Move cakes to promote air circulation, preventing moisture entrapment that weakens structural integrity
- Complete cooling (1-3 hours): Make sure internal temperature equalizes to room temperature before frosting or stacking
You’re maintaining your baked good’s structural independence by respecting these timing parameters.
Rushing this process compromises both texture and handling stability, undermining your baking investment.
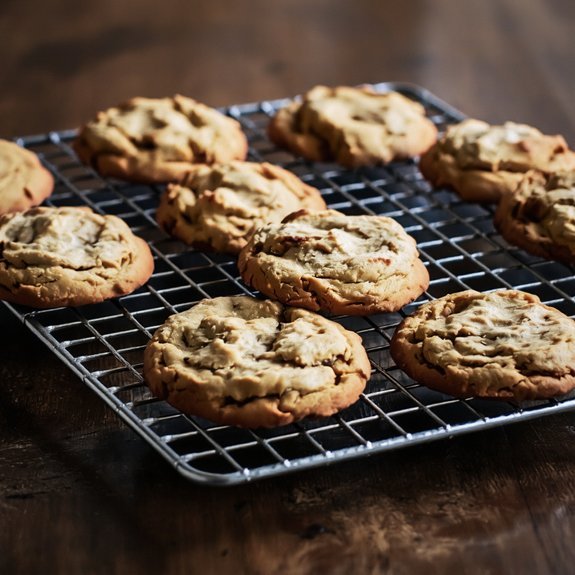
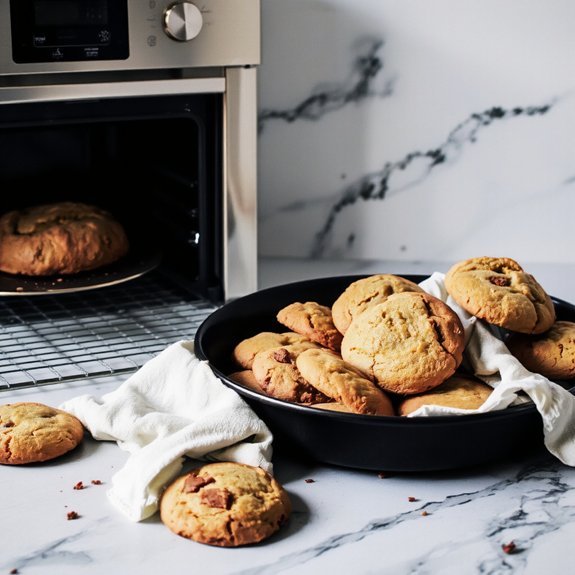
Cookies Cool Quickly
Unlike cakes, cookies feature lower moisture content and thinner structures that cool rapidly on the baking sheet—typically within 2 to 5 minutes depending on thickness and composition. You’ll leverage baking chemistry principles to optimize your batch timing, removing cookies at peak structural integrity before they become brittle.
| Cookie Type | Cooling Time |
|---|---|
| Thin sugar cookies | 2-3 minutes |
| Chocolate chip | 3-4 minutes |
| Oatmeal | 4-5 minutes |
| Thumbprint | 3-4 minutes |
| Shortbread | 2-3 minutes |
You’ll transfer cookies to cooling racks once they’ve set enough to handle without deformation. This technique prevents residual heat from overcooking their bottoms. Your precise timing directly impacts texture—you’re controlling the Maillard reaction’s final stages, ensuring ideal crispness or chewiness based on your desired outcome.
Bread Requires Patient Cooling
Bread’s dense crumb structure and substantial moisture content demand considerably longer cooling periods than cookies—typically 1 to 3 hours depending on loaf size, crust thickness, and internal temperature.
You’ll want to monitor these critical factors:
- Crumb Setting: Interior starches require time to fully set and stabilize, preventing a gummy texture and ensuring ideal slicing capability.
- Crust Tightening: As exterior moisture evaporates, your crust hardens and develops its final texture and acoustic properties.
- Temperature Equilibration: Core temperature must drop to room temperature, allowing gluten networks to contract properly without steam damage.
Place your bread on wire racks for unrestricted airflow.
You’re not rushing this process—you’re building structural integrity and guaranteeing superior eating experience.
Common Cooling Mistakes to Avoid
While you’re impatient to enjoy your freshly baked goods, rushing the cooling process can compromise texture, structure, and moisture retention. Don’t place hot baked items directly into storage containers—trapped steam creates condensation, resulting in sogginess and potential mold growth. You’ll want to avoid stacking items before they’ve reached room temperature, as this causes uneven cooling and structural collapse.
Never skip the cooling rack entirely. You’re risking soggy bottoms if you cool directly on countertops.
Additionally, you must prevent cross-contamination during cooling. If you’re handling multiple batches with different ingredients, labeling errors and allergen risks emerge when you don’t maintain separate cooling spaces.
Temperature matters too. Don’t refrigerate warm goods immediately; allow them to cool completely first. You’ll preserve ideal crumb structure and moisture balance this way.
Using Glazes and Frostings on Warm Baked Goods
Because you’ve just learned the importance of proper cooling, understanding when and how to apply glazes and frostings requires equally precise timing.
Applying these toppings to warm goods risks compromising their structural integrity and appearance.
Here’s your application strategy:
- Cool to 110°F – Allow baked goods to reach this temperature for ideal glaze adherence without melting
- Test density – Press gently; if your finger leaves an impression, the item’s still too warm
- Apply thin layers – Use room-temperature glazes to achieve a glossy finish while maximizing flavor infusion
You’ll gain superior results by respecting these temperature thresholds.
Warm surfaces cause glazes to slide off unevenly, while cooler bases accept coatings uniformly.
This disciplined approach guarantees you maintain complete control over your final product’s appearance and taste profile.
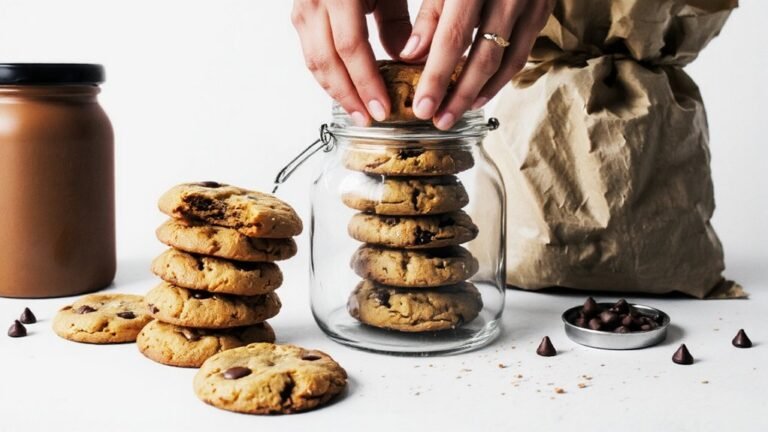
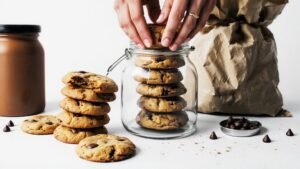
Storing Your Cooled Baked Goods Properly
Once your baked goods have cooled completely and you’ve applied your glazes and frostings, proper storage becomes your next critical control point. You’ll want to use airtight containers that prevent moisture loss and contamination.
Proper storage in airtight containers prevents moisture loss and contamination, becoming your critical control point for baked goods.
For maximum shelf life, maintain temperatures between 65-70°F in a dark location away from direct sunlight, which degrades quality rapidly.
Implement labeling dates on all containers so you’re tracking freshness accurately. This practice gives you freedom to bake in batches without guessing product age. Consider odor barriers—activated charcoal or specialized storage boxes—to prevent flavor absorption from surrounding environments.
Refrigerate items with cream fillings or perishable frostings at 40°F or below. Freeze unfrosted goods for extended storage, wrapping them tightly to minimize freezer burn. Your systematic approach guarantees consistent quality and eliminates waste.
Frequently Asked Questions
Can I Use a Fan to Speed up the Cooling Process for Baked Goods?
You can absolutely use a fan to accelerate cooling, but you’ve got to position it strategically. Place your fan at a distance—don’t blast hot baked goods directly, as intense airflow’ll create uneven cooling and surface cracks. Position it to circulate ambient air around your goods. This method gives you freedom from lengthy cooling times while maintaining structural integrity.
Control moisture loss by monitoring your baked goods’ internal temperature, ensuring you’re hitting ideal cooling zones without overdrying.
Is It Safe to Cool Baked Goods Directly on a Cold Kitchen Counter?
You shouldn’t cool baked goods directly on cold countertops.
You’ll risk surface contamination from dust, bacteria, and residue.
Additionally, direct counter contact causes rapid moisture absorption from the cool surface, compromising your crust’s texture and structural integrity.
Instead, you’re free to use wire cooling racks that allow air circulation underneath, maintaining ideal temperature gradients while protecting your baked goods from environmental contaminants and unwanted moisture transfer.
Why Do Some Baked Goods Crack or Shrink While Cooling?
Your baked goods crack or shrink because you’re not managing moisture and gluten contraction properly. When you cool too rapidly, steam escape becomes uneven, causing surface tension stress that creates cracks.
Simultaneously, gluten strands contract at different rates depending on temperature gradients throughout your item. You’ll minimize this by cooling gradually at room temperature first, allowing steam to escape uniformly while gluten contracts evenly. This methodical approach gives you control over your final product’s structural integrity.
Can I Stack Baked Goods on Top of Each Other While Cooling?
You shouldn’t stack baked goods while they’re cooling.
Stacking creates airflow obstruction, trapping steam and preventing proper moisture transfer from your items’ surfaces. This trapped heat and humidity soften crusts, promote condensation, and risk structural collapse.
You’re free to arrange them single-layer on wire racks instead, allowing circulating air to evaporate residual moisture uniformly. This method preserves texture, maintains your desired crumb structure, and guarantees ideal cooling temperatures throughout.
How Do I Know When a Baked Good Is Completely Cooled?
You’ll know your baked good’s completely cooled when you can comfortably hold it without heat transferring to your hand—the touch test.
Check the internal temperature using a thermometer; it should match room temperature, typically 70-75°F.
Don’t rush this process. You’re free to move forward with frosting, glazing, or storage once both external and internal temperatures stabilize. Patience guarantees you won’t compromise your final product’s structure or texture.


Leave a Comment