
Key Takeaways
- Sprinkle baking soda on wet sheets, add vinegar, let fizz 15 minutes, then scrub with non-abrasive sponge and rinse thoroughly.
- Soak burnt-on residue in equal parts vinegar and water for 30 minutes to 2 hours before gentle scrubbing.
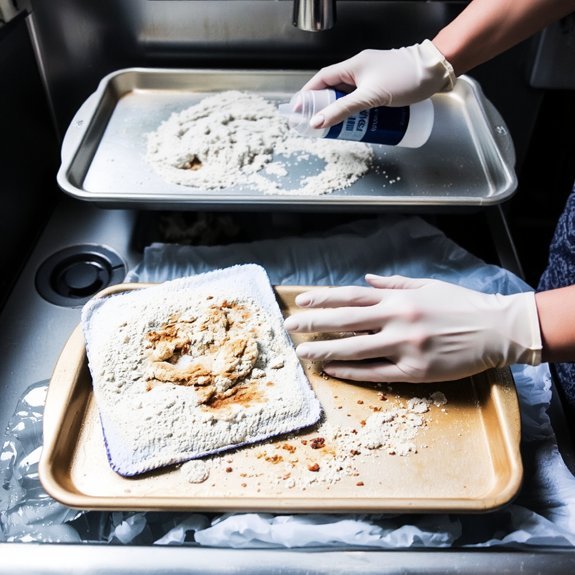
- Use Bar Keepers Friend paste on dampened sheets; spot test first, scrub gently for 3 minutes, then rinse completely.
- Line sheets with parchment paper or silicone mats before baking to prevent stubborn residue and minimize cleaning effort.
- Soak sheets immediately after baking while hot to loosen debris before it hardens, reducing cleanup time significantly.
The Baking Soda and Vinegar Method
One of the most effective ways to clean stubborn, baked-on residue from baking sheets involves combining baking soda and vinegar.
You’ll create a powerful reaction chemistry that breaks down carbonized food deposits without requiring excessive scrubbing.
Start by sprinkling baking soda generously across the wet sheet’s surface.
Pour white vinegar over it and let the fizzing reaction work for fifteen minutes.
This chemical process loosens debris effectively.
Next, you’ll scrub the sheet with a non-abrasive sponge, using circular motions to lift remaining particles.
The reaction chemistry continues working, enhancing your cleaning efficiency.
Rinse thoroughly with hot water.
Before using any sheet, verify surface compatibility with your cookware type—this method works universally on aluminum and stainless steel without causing damage.
This approach gives you complete control over your cleaning process while achieving professional results efficiently.
Using Bar Keepers Friend for Tough Stains

When baked-on residue resists standard methods, Bar Keepers Friend delivers superior results through its oxalic acid formulation, which dissolves mineral deposits and carbonized food without aggressive scrubbing.
| Application Step | Procedure | Duration |
|---|---|---|
| Spot Testing | Apply to inconspicuous area first | 2 minutes |
| Preparation | Dampen sheet; don protective gloves | Immediate |
| Application | Sprinkle powder; create paste with water | 1 minute |
| Removal | Scrub gently; rinse thoroughly | 3 minutes |
You’ll achieve professional-grade results by following this systematic approach. The alkaline compound breaks down stubborn deposits efficiently without compromising your sheet’s integrity. Always prioritize spot testing to verify compatibility with your specific cookware finish. Protective gloves shield your hands from chemical exposure while maximizing your cleaning independence. This method outperforms conventional approaches, freeing you from extended soaking times and excessive elbow grease.
The Cream of Tartar and Lemon Paste Approach

Combining cream of tartar with fresh lemon juice creates a natural abrasive paste that rivals commercial cleaners for moderate baking sheet soils. This acid chemistry approach effectively breaks down baked-on residue without harsh chemicals.
Here’s your application technique:
- Mix three parts cream of tartar with one part fresh lemon juice until you’ve achieved a spreadable consistency
- Apply the paste directly to soiled areas and let it sit for fifteen minutes
- Scrub with a non-abrasive sponge using circular motions to lift stubborn debris
- Rinse thoroughly with hot water and dry immediately
You’ll appreciate this method’s simplicity and effectiveness.
The tartaric acid naturally dissolves mineral deposits and carbonized food particles.
This approach gives you control over ingredient strength without relying on commercial products, making it ideal for maintaining your baking sheets efficiently.
Soaking Techniques for Burnt-On Residue
When you’re faced with stubborn burnt-on residue, you’ll find that soaking techniques offer efficient removal without excessive scrubbing.
You can leverage water and baking soda combinations, vinegar soaks, or overnight soaking strategies to break down carbonized buildup and restore your baking sheets.
Each method targets different levels of baked-on debris, allowing you to select the approach that best suits your sheet’s condition and your timeline.
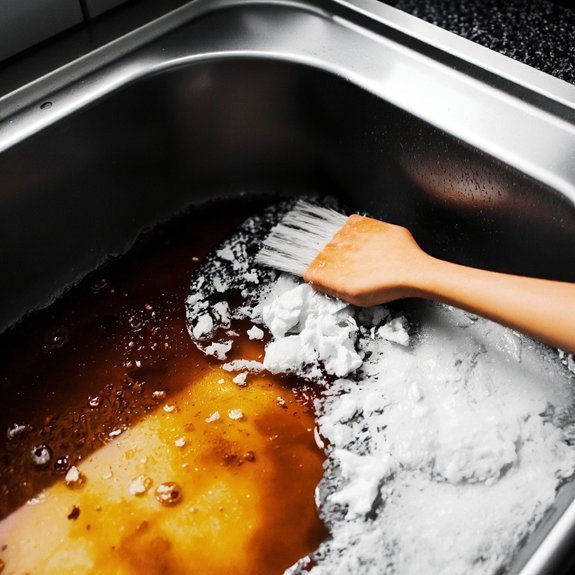
Water and Baking Soda
Because baking soda’s mild abrasive properties and alkaline composition effectively break down carbonized food particles, you’ll find it’s one of the most efficient solutions for stubborn, burnt-on debris.
This powerhouse ingredient won’t damage your sheets while delivering results.
Create a paste consistency by mixing baking soda with minimal water, then apply directly to affected areas. Let it sit for 15-30 minutes to allow chemical breakdown.
- Use circular scrubbing techniques with a non-abrasive sponge
- Apply moderate pressure to avoid surface scratching
- Rinse thoroughly with hot water
- Repeat if necessary for heavily carbonized sections
You’ll appreciate this method’s simplicity and cost-effectiveness.
The paste tackles burnt residue without harsh chemicals, giving you complete control over your cleaning process.
Vinegar Soak Method
For stubborn burnt-on residue that resists surface scrubbing, the vinegar soak method offers an efficient alternative that leverages acetic acid’s dissolving properties.
You’ll fill your sink or large container with equal parts white vinegar and water, then submerge your baking sheet for 30 minutes to two hours depending on buildup severity.
The acidity benefits work by breaking down carbonized food particles and mineral deposits without requiring excessive scrubbing.
After soaking, you’ll use a non-abrasive sponge to wipe away loosened residue effortlessly.
This method simultaneously addresses odor removal, as vinegar’s antimicrobial properties neutralize cooking odors trapped in the sheet’s surface.
Rinse thoroughly with hot water and dry completely to prevent water spots.
You’ve now reclaimed your baking sheet’s functionality with minimal effort and chemical-free results.
Overnight Soaking Strategy
If you’re dealing with extremely carbonized buildup that resists shorter soaking periods, an overnight soak extends the acetic acid’s contact time to break down the most stubborn residue.
Here’s your efficient approach:
- Select a container size that fully submerges your sheet without wasting vinegar solution
- Maintain room temperature control—you don’t need heat for overnight soaking; time does the work
- Fill the container with equal parts white vinegar and water for ideal chemical penetration
- Let the sheet sit undisturbed for 12-16 hours, allowing acetic acid to dissolve baked-on deposits
After soaking, you’ll find the residue lifts effortlessly with minimal scrubbing.
This method demands patience rather than elbow grease, giving you freedom from aggressive scrubbing techniques. Simply rinse thoroughly and dry completely before your next baking session.
Commercial Oven Cleaner as a Last Resort

When you’ve exhausted gentler methods like baking soda pastes and vinegar soaks, commercial oven cleaner becomes your final option for heavily carbonized baking sheets. Apply the product in a well-ventilated area—adequate ventilation requirements protect your respiratory health and guarantee effective chemical dispersion.
Follow manufacturer instructions precisely; most formulations require 12-24 hours of contact time for ideal results.
Before using commercial cleaners, check your sheet’s warranty concerns, as harsh chemicals may void coverage on premium cookware.
Wear protective gloves and eyewear throughout application. Scrub with a non-abrasive sponge to avoid surface damage, then rinse thoroughly under hot running water multiple times until all chemical residue disappears.
This approach delivers maximum cleaning power when nothing else works, restoring your sheets’ functionality efficiently.
Preventative Measures to Keep Sheets Cleaner Longer
You’ll greatly extend your baking sheets’ cleanliness by lining them with parchment paper or silicone mats before each use, which creates a protective barrier against stubborn residue.
Seasoning your sheets with a light oil coating builds a naturally non-stick surface that resists food buildup and simplifies subsequent cleaning.
Soaking your sheets immediately after baking, while residual heat loosens debris, prevents baked-on particles from hardening and requiring aggressive scrubbing.
Line Sheets Before Baking
By lining your baking sheets with parchment paper, silicone mats, or aluminum foil, you’ll dramatically reduce cleanup time and extend the lifespan of your cookware.
This preventative approach eliminates direct contact between food and metal surfaces, minimizing stubborn residue accumulation.
Consider these lining options for maximum efficiency:
- Parchment paper – Disposable, heat-resistant to 420°F, ideal for most baking applications
- Silicone mats – Reusable, durable, and non-stick; reduces waste while maintaining consistent results
- Aluminum foil – Budget-friendly for messy recipes; creates a protective barrier against grease
- Unlined sheets – Reserve for recipes requiring direct metal contact for browning or crisping
Select your lining based on your specific baking needs and environmental preferences. This simple practice keeps your sheets pristine, saves you time, and preserves your equipment’s functionality for years to come.
Season Your Baking Sheets
While lining your sheets prevents immediate buildup, seasoning them creates a long-term protective layer that resists sticking and oxidation. You’ll develop a naturally non-stick surface that improves with use, reducing your dependence on commercial sprays and liners.
| Oil Choice | Application Method | Heat Curing Temperature |
|---|---|---|
| Grapeseed oil | Thin, even coat | 400°F |
| Avocado oil | Cloth application | 450°F |
| Canola oil | Spray method | 375°F |
| Coconut oil | Brush application | 350°F |
| Flaxseed oil | Buffed finish | 425°F |
You’ll apply your chosen oil choice sparingly across the sheet’s surface, then perform heat curing in your oven at the specified temperature for fifteen minutes. This polymerization process bonds the oil molecularly to the metal, creating durable protection that liberates you from constant re-seasoning while maximizing your baking sheet’s lifespan.
Immediate Post-Bake Soaking
The moment your baking sheet exits the oven, soaking it in hot water prevents debris from bonding permanently to the surface.
You’ll dramatically reduce your cleaning workload by acting fast.
- Fill your sink with hot water immediately after the cooling period begins
- Submerge the sheet completely to loosen baked-on residue
- Let it soak for 10-15 minutes while particles soften
- Perform a quick rinse under running water to assess remaining buildup
This proactive approach saves you from scrubbing stubborn, calcified food particles later.
Hot water breaks down grease and weakens adhesive bonds between debris and metal.
You’re effectively giving yourself an effortless head start.
The sheet’s residual heat accelerates the soaking process, making your intervention remarkably efficient.
You’ll reclaim valuable time while maintaining your baking equipment in ideal condition.
Frequently Asked Questions
How Often Should I Replace My Baking Sheets if They Become Permanently Discolored?
You don’t need to replace permanently discolored baking sheets unless safety indicators appear. Discoloration alone won’t compromise your baking results or your health.
Monitor your replacement timeline based on functional performance—warping, rust, or deteriorating non-stick coatings demand replacement.
You’re free to use discolored sheets indefinitely if they remain structurally sound. Inspect them regularly for damage rather than relying on appearance to determine when retirement’s necessary.
Can I Use These Cleaning Methods on Non-Stick or Silicone-Coated Baking Sheets Safely?
You’ll want to prioritize manufacturer guidelines before applying any cleaning method to non-stick or silicone-coated sheets.
Select mild soap and avoid abrasive scrubbers that’ll degrade the coating’s integrity.
Hand-wash exclusively—dishwashers compromise these surfaces.
Use soft sponges with lukewarm water for ideal results.
You’re responsible for maintaining your cookware’s condition, so respect those specifications to preserve functionality and extend your sheets’ lifespan effectively.
What’s the Best Way to Dry Baking Sheets to Prevent Water Spots and Rust?
You’ll prevent water spots and rust by immediately towel-drying sheets with microfiber cloths after rinsing. Microfiber absorbs moisture efficiently without leaving lint residue. Don’t let sheets air-dry, as standing water causes spotting and oxidation.
Store sheets upright in a dry, well-ventilated space rather than stacking them flat. This positioning promotes complete evaporation and eliminates moisture pockets.
You’ll maintain your sheets’ integrity and appearance through proper post-wash handling.
Are There Any Homemade Cleaning Solutions I Should Avoid Using on Baking Sheets?
You’ll want to avoid acidic mixtures and ammonia solutions on your baking sheets.
Acidic cleaners can corrode aluminum surfaces, while ammonia solutions may damage non-stick coatings irreversibly.
These aggressive compounds compromise your sheet’s integrity and lifespan.
Instead, opt for mild dish soap and warm water—they’re effective without degrading materials.
Stick with proven, gentler approaches that preserve functionality while delivering professional-grade cleanliness and maintaining your equipment’s longevity efficiently.
How Can I Remove Stubborn Metallic Marks or Scratches From My Baking Sheets?
You’ll want to employ gentle abrasive alternatives like baking soda paste or cream of tartar to minimize further damage.
Apply these polishing techniques using soft cloths in circular motions—they’re effective without compromising your sheet’s integrity.
For deeper scratches, you can try Bar Keeper’s Friend, a specialized cleanser that removes marks efficiently.
Avoid steel wool or harsh scouring pads; they’ll worsen the problem.
You’ve got the autonomy to choose methods that preserve your cookware’s longevity.
Leave a Comment