
Key Takeaways
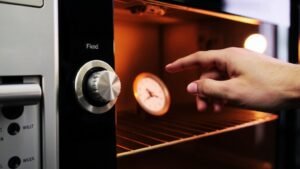
- Use an accurate oven thermometer placed on the center rack to identify temperature variance between dial reading and actual internal temperature.
- Locate the calibration mechanism—typically a screw or linkage behind the control knob—and consult your manual before making adjustments.
- Make small incremental adjustments of 5–10°F, then retest at 350°F after 15-minute preheat to verify alignment between thermometer and display.
- Test calibration consistency across multiple temperatures (250°F, 350°F, 450°F) using an independent thermometer; professional service needed if variance exceeds ±25°F.
- Verify results with a practice bake using a simple recipe, observing browning uniformity and texture to confirm consistent cooking performance.
Understanding Oven Temperature Drift
If you’ve noticed that your baked goods aren’t turning out quite right despite following recipes precisely, your oven’s temperature likely isn’t what the dial indicates. This phenomenon, called temperature drift, occurs when your oven fails to maintain its set temperature accurately.
Two primary culprits cause this problem.
Insulation degradation allows heat to escape inconsistently, forcing your heating element to work irregularly.
Sensor hysteresis—where the temperature sensor responds slowly to changes—creates lag time between actual temperature fluctuations and thermostat adjustments.
You’ll notice drift through burnt bottoms, undercooked centers, or inconsistent browning.
These variations signal that your oven’s internal temperature deviates from displayed readings.
Understanding these mechanical failures empowers you to take corrective action, ensuring you retain control over your cooking results and achieve consistent outcomes.
Gathering Your Calibration Tools

Before you test your oven’s temperature accuracy, you’ll need to gather specific tools that provide reliable measurements and guarantee consistent results.
You’ll select an appropriate thermometer—whether analog, digital, or infrared—based on your oven type and desired precision level.
Your preparation involves positioning equipment correctly, establishing baseline conditions, and documenting your setup to capture accurate calibration data.
Essential Equipment Checklist
You’ll need several precision instruments to calibrate your oven accurately.
Start with an oven thermometer—choose either a dial or digital model for reliable temperature readings. You’ll want oven mitts to safely handle hot equipment without compromising your measurements.
Grab baking sheets made from aluminum or steel; these conduct heat uniformly and help you assess temperature distribution across your oven’s interior.
Include a notebook to document temperature readings at different rack positions and time intervals. A reliable timer guarantees you’re measuring heating accuracy precisely.
Consider obtaining a temperature probe for deeper internal assessments if you’re calibrating commercial-grade ovens.
These tools work together to give you objective data about your oven’s actual performance versus its displayed settings, enabling you to make accurate adjustments and eliminate temperature guesswork from your cooking.
Thermometer Selection Guide
Why does thermometer choice matter so much when calibrating your oven?
Your measurement accuracy depends entirely on your instrument’s reliability.
You’ll want an oven thermometer that delivers precise readings without compromise.
Select a dial or digital thermometer with clear, readable markings.
Digital models offer faster response times and eliminate guesswork.
Check the temperature range—you’ll need coverage from at least 200°F to 500°F for most cooking applications.
Consider color options that suit your kitchen aesthetic without sacrificing functionality.
The unboxing experience should include calibration documentation and battery information if applicable.
Verify NSF certification or equivalent standards.
Avoid cheap alternatives; they’ll skew your results and waste your time.
Invest in a quality thermometer that you can trust for accurate calibration every single time.
Preparation Before Testing
Once you’ve selected your thermometer, gathering the remaining calibration tools facilitates a smooth, accurate testing process.
Before you begin testing, conduct a thorough safety inspection of your oven’s interior and exterior.
Check for visible damage, loose components, or debris that could compromise results or create hazards.
Perform a ventilation check to confirm proper airflow around your oven.
Clear the surrounding area of obstructions that might impede heat circulation or interfere with accurate temperature readings.
Assemble these essential items:
- Heat-resistant gloves to protect your hands during testing
- Oven rack to position your thermometer at the center
- Notebook and pen to document temperature readings
Your preparation determines testing accuracy and safety compliance.
Taking time now prevents measurement errors and guarantees you’re working with a properly functioning appliance.
Taking Your First Temperature Reading
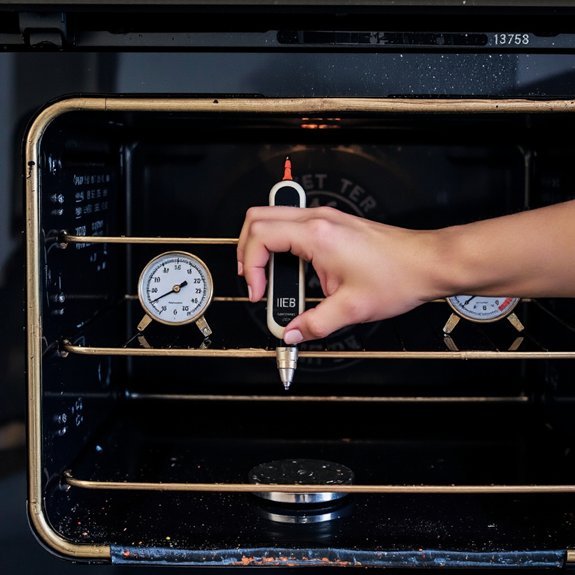
You’ll need an oven thermometer that reads accurately across your oven’s temperature range, so select either a dial or digital model designed for high-heat environments.
Position your thermometer on the center rack, away from walls and heating elements, ensuring it sits level for an unobstructed temperature reading.
Record the thermometer’s reading after allowing your oven to preheat for at least 15 minutes, noting any variance between your oven’s display and the actual temperature.
Gathering Your Thermometer Tools
Before taking your first temperature reading, you’ll need to gather the proper thermometer tools.
Having the right equipment guarantees accurate calibration without compromise.
- An oven-safe thermometer rated for temperatures exceeding 500°F, allowing you complete control over your measurement process
- A secondary backup thermometer for verification, giving you independent confirmation of your oven’s actual temperature
- A protective case for organization and sanitization steps between uses, maintaining your tools’ integrity
Select thermometers with clear, easy-to-read displays.
Digital models offer precision; analog versions provide mechanical reliability without electronic dependencies.
Verify each tool’s calibration range matches your oven’s specifications.
Store thermometers in your case organization system immediately after sanitization steps. This protects your investment and maintains consistent accuracy for future readings.
You’re now prepared to take dependable measurements.
Positioning the Thermometer Correctly
Where you place your thermometer dramatically affects the accuracy of your reading.
You’ll want to position your probe in the oven’s center, roughly halfway between the top and bottom heating elements.
This rack placement guarantees you’re measuring the true cooking environment, not anomalous hot or cold spots.
For probe orientation, keep the thermometer’s sensor pointing sideways, never directly toward heating elements.
This prevents radiant heat from skewing your results.
Avoid placing it against the oven walls, as they’ll give inflated readings.
Let your thermometer sit undisturbed for at least 15 minutes after preheating.
This stabilization period allows the internal temperature to equalize.
You’re now ready to take your first accurate reading and determine whether calibration’s necessary.
Recording Accurate Temperature Readings
Once your thermometer’s stabilized, record the displayed temperature without opening the oven door.
You’ll capture accurate readings by following this straightforward process:
- Note the exact temperature shown on your thermometer’s display, whether digital or analog
- Document the time stamp alongside your reading to track temperature fluctuations over your calibration window
- Write down environmental factors—room temperature, oven settings—that influence your results
Use consistent reading formats throughout your calibration session.
Whether you’re documenting digital numerals or analog needle positions, maintain the same notation method for all entries.
Time stamping each measurement lets you identify patterns and verify your oven’s heating consistency.
Record at least three separate readings at five-minute intervals.
This data set gives you the empirical evidence needed to determine your oven’s true temperature variance.
You’re building a factual record that grants you complete control over your cooking precision and independence from guesswork.
Identifying the Calibration Adjustment Mechanism

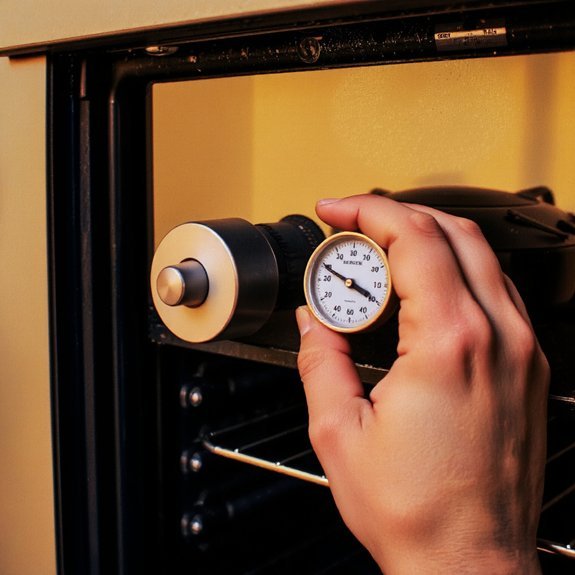
To adjust your oven’s temperature accuracy, you’ll first need to locate the calibration mechanism, which varies depending on your model’s design and age.
Locating your oven’s calibration mechanism is the essential first step, varying by model design and age.
Most ovens feature an access panel located behind the control knob or within the storage drawer below the heating chamber.
You’ll need to remove this panel to expose the control linkage—a metal rod or screw that connects your temperature dial to the thermostat sensor.
Consult your oven’s manual to identify your specific adjustment point.
Some models use a simple screw, while others employ a more complex linkage system.
Take photos before disassembling anything, ensuring you can reassemble components accurately.
Identify whether your mechanism uses a mechanical or electronic adjustment system.
Modern ovens may require a digital calibration menu accessible through the display panel instead.
Understanding your particular mechanism prevents costly mistakes and maintains your oven’s integrity.
Making Temperature Adjustments
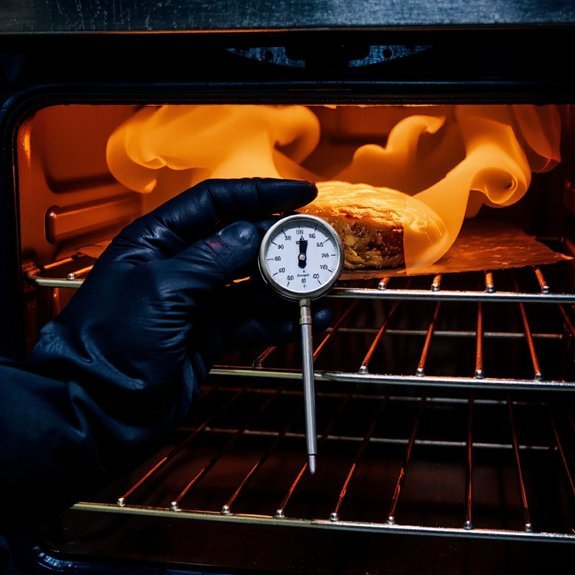
After you’ve located your calibration mechanism, you’ll need to test your oven’s actual temperature against its displayed setting.
Place an oven thermometer on the middle rack and preheat to 350°F.
After fifteen minutes, compare the thermometer reading to your oven’s display.
Calculate the difference between the two temperatures.
This variance determines your adjustment offset.
Most ovens allow you to modify settings via a calibration dial or digital menu.
- Adjust the mechanism incrementally—typically 5-10°F increments—until readings align precisely
- Account for altitude adjustments if you’re above 3,000 feet elevation, as air density affects heating
- Document your recipe offsets in a kitchen notebook for consistent results
Retest multiple times at different temperatures to confirm accuracy.
Your independent kitchen control demands precision, and proper calibration delivers it.
Verifying Your Calibration Accuracy
How can you confident your calibration adjustments are actually working? You’ll need to verify through systematic testing.
Use an independent thermometer—preferably an oven thermometer with established traceability documentation—to cross-check your oven’s displayed temperature against actual internal heat. Place it in your oven’s center and preheat to 350°F, then compare readings after 15 minutes.
Document your findings meticulously. Record the displayed temperature, your independent audit measurement, and any variance.
Run this test at multiple temperature points: 250°F, 350°F, and 450°F. This repetition reveals whether your calibration holds consistently across your oven’s range.
If discrepancies persist beyond ±25°F, your adjustments haven’t sufficiently corrected the problem. You’ll need to recalibrate or contact a professional technician.
Testing With a Practice Bake
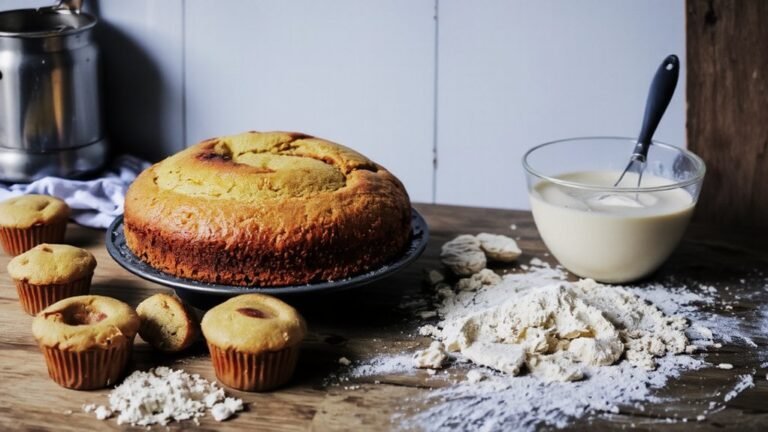
While numerical verification confirms your calibration adjustments, you’ll gain practical assurance through an actual baking trial. Select a straightforward recipe that’ll expose temperature inconsistencies—cookies or simple bread work well.
- Bake your chosen recipe following instructions precisely, noting baking time and visual cues
- Evaluate color uniformity across all surfaces; uneven browning indicates calibration issues
- Document results through sensory evaluation: texture, moisture, and overall doneness
Your sensory evaluation reveals what thermometers can’t. If cookies brown unevenly or bread bakes faster on one side, your calibration needs adjustment.
This hands-on testing grants you independence from guesswork, confirming your oven performs reliably. Recipe selection matters—choose something you’ve baked before, establishing a baseline for comparison.
This practical validation confirms your calibration delivers consistent, predictable results you can trust.
Maintaining Your Oven’s Calibration
Preserving your oven’s calibration requires periodic verification and timely adjustments.
You’ll maintain accuracy by rechecking temperature monthly using an oven thermometer, guaranteeing consistent baking results without dependency on guesswork.
Monthly temperature verification with an oven thermometer ensures consistent results, eliminating guesswork from your baking.
Your usage habits directly impact calibration stability.
Frequent door openings, prolonged cooking sessions, and uneven rack loading can shift internal temperatures.
Standardize your practices to minimize fluctuations.
Seal replacement prevents heat loss that compromises calibration.
Inspect door gaskets quarterly for cracks or deterioration.
A failing seal forces your oven to work harder, creating temperature inconsistencies you can’t calibrate away.
Document your calibration adjustments in a maintenance log.
Track when you’ve verified settings and what corrections you’ve made.
This record protects your investment and guarantees you catch drift early, keeping your oven performing reliably for years.
Frequently Asked Questions
How Often Should I Calibrate My Oven for Optimal Cooking Results?
You should calibrate your oven every three to six months for ideal cooking results. Conduct monthly checks to verify accuracy and catch temperature drift early.
Before holiday prep, recalibrate to make certain consistent baking and roasting performance. Regular calibration prevents costly cooking failures and guarantees you’ve got complete control over your kitchen’s precision.
Don’t let temperature variance compromise your culinary independence—stay proactive with systematic maintenance checks.
Can I Calibrate My Oven Myself, or Do I Need Professional Help?
You can calibrate your oven yourself with proper safety precautions and required tools.
You’ll need an oven thermometer and possibly a multimeter for electrical models.
Disconnect power before accessing internal components.
Follow your manufacturer’s manual precisely—don’t skip steps.
If you’re uncomfortable working with electrical systems or your oven’s warranty prohibits self-service, hire a professional.
Your independence in maintaining appliances depends on understanding your limitations and capabilities.
What’s the Cost of Professional Oven Calibration Services?
Professional oven calibration typically costs $150–$300, depending on your region and service provider.
You’ll find regional pricing varies considerably—urban areas generally charge more than rural locations.
Service inclusions usually encompass thermostat recalibration, temperature verification across multiple settings, and a detailed report documenting adjustments made.
Some technicians offer warranty guarantees on their work.
You’re entitled to transparent pricing quotes before committing, so shop around and compare what different providers include in their packages.
Will Calibrating My Oven Affect Its Warranty Coverage?
Calibrating your oven yourself won’t void your warranty if you’re simply adjusting temperature settings. However, you’ll want to review your specific warranty clauses carefully—some manufacturers require Authorized Service for internal modifications.
If you’re disassembling components or altering factory settings beyond calibration, you’re risking coverage loss. Stick to manufacturer-approved calibration methods to maintain your warranty protection and preserve your freedom to service your appliance independently.
Why Does My Oven Temperature Drift Over Time?
Your oven’s temperature drifts due to thermostat wear and insulation degradation.
Over time, the heating element and thermostat lose precision, causing inconsistent temperature maintenance.
Insulation breaks down from repeated heating cycles, allowing heat escape that throws off calibration.
You’re not locked into accepting this drift—regular calibration checks let you reclaim accurate baking results and regain control over your cooking outcomes.


Leave a Comment