Key Takeaways
- Combine flour, salt, yeast, water, and sugar; knead for 8–10 minutes until dough is smooth and elastic.
- Bulk ferment at 75–80°F for 4–6 hours until dough increases 50–75% in volume with visible bubbling.
- Shape into boule or batard, then final proof 2–4 hours at room temperature or 8–16 hours cold.
- Score surface at 45 degrees with confident cuts approximately 1/4 inch deep before baking for controlled expansion.
- Bake at 450°F covered for 20 minutes, uncover and bake 25–30 minutes until internal temperature reaches 205–210°F.
Gather Your Ingredients
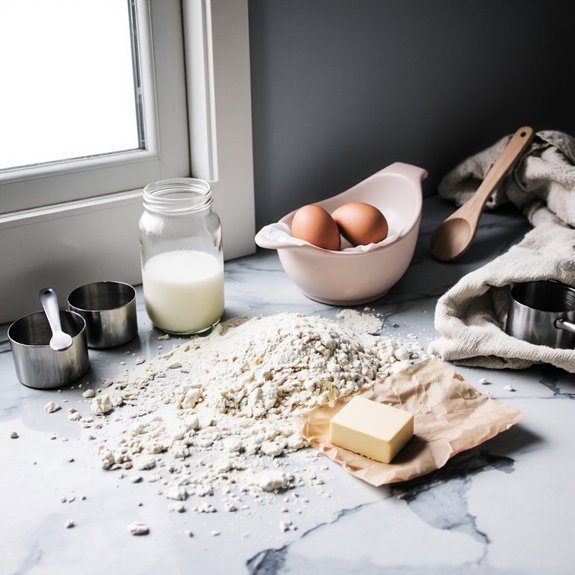
Before you begin mixing, gather all your ingredients: 500g bread flour, 10g salt, 7g instant yeast, 350ml lukewarm water, and 10g sugar.
Gather 500g bread flour, 10g salt, 7g instant yeast, 350ml lukewarm water, and 10g sugar before mixing begins.
These pantry staples form your foundation for quality white bread.
Measure precisely using a kitchen scale rather than cups for consistency.
You’ll find all these items readily available at any grocery store.
If you prefer ingredient substitutions, you can replace instant yeast with active dry yeast at a 1:1 ratio, though you may need slightly longer rising times.
Alternatively, use bread flour’s higher protein content for superior structure, though all-purpose flour works if necessary.
Keep your water temperature between 40-46°C—too hot kills yeast; too cold slows fermentation.
Position all ingredients within arm’s reach before starting.
This preparation eliminates interruptions and makes certain you won’t miss critical timing during the mixing process.
Mix the Dough
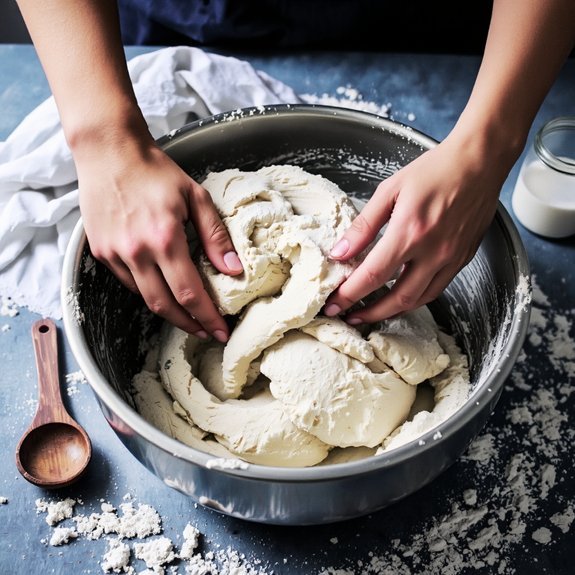
With your ingredients assembled and within reach, combine the flour, salt, and yeast in a large mixing bowl. Create a well in the center and pour in your water and oil. Use your hands or a sturdy wooden spoon to integrate everything thoroughly until no dry flour remains.
| Step | Action |
|---|---|
| 1 | Combine dry ingredients in bowl |
| 2 | Form well in flour mixture |
| 3 | Add liquids gradually |
| 4 | Mix until shaggy dough forms |
| 5 | Knead for 8-10 minutes |
Your tool selection—whether mixer or hands—depends on batch scaling preferences. Smaller batches work well with hand mixing, while larger quantities benefit from stand mixers. Mix until the dough’s consistency becomes smooth and elastic. You’ll know you’re done when the dough pulls away from bowl sides cleanly.
Knead for Perfect Texture
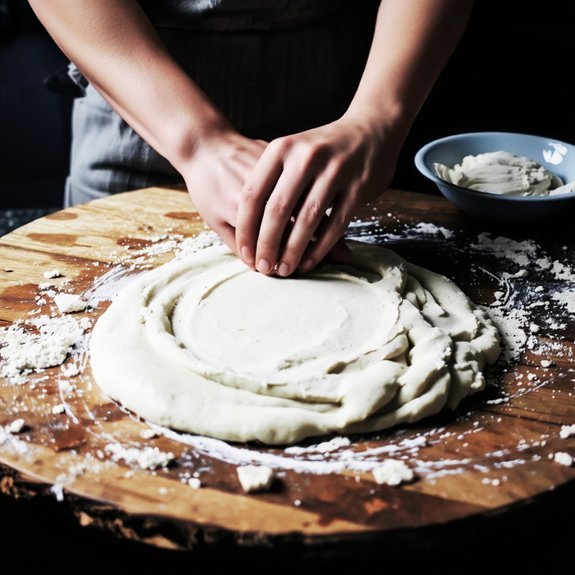
Kneading develops gluten strands that give your bread its structure and chew, so you’ll want to work the dough thoroughly on a lightly floured surface for 8–10 minutes until it’s smooth, elastic, and springs back when poked. Use controlled wrist motion to push the dough away from you, then fold it back over itself repeatedly.
Vary your pressure—apply firm force during initial stages to activate gluten, then ease up as the dough becomes supple. You’ll know you’re done when the dough resists tearing and holds its shape without sticking excessively.
Don’t overwork it; proper kneading creates an ideal network without degrading gluten strands. This foundational step guarantees your bread rises evenly and achieves the perfect crumb structure.
First Rise and Bulk Fermentation

You’ll manage your dough’s first rise by maintaining a temperature between 75–80°F for 4–6 hours, though cooler temperatures extend fermentation and develop better flavor.
Watch for visible signs of dough development: you’re looking for the dough to increase 50–75% in volume, develop a smooth surface, and show slight bubbling at the edges.
These indicators tell you when bulk fermentation is complete and your dough is ready for shaping.
Temperature and Time Management
Once you’ve mixed your dough, the first rise—also called bulk fermentation—becomes critical to developing flavor and structure.
You’ll want to maintain a temperature between 75-78°F for ideal fermentation. This range balances energy efficiency with proper yeast activity, letting you skip unnecessary heating costs while achieving excellent results.
Time varies based on your kitchen’s temperature. At 75°F, expect 4-5 hours; cooler conditions require 6-8 hours. You control this timeline through kitchen scheduling—plan around your day rather than rushing the process.
Check your dough’s progress by observing volume increase and surface bubbling rather than watching the clock. Properly fermented dough should increase by 50-75%, indicating readiness for shaping. This disciplined approach gives you consistent, flavorful bread without micromanaging every minute.
Dough Development Signs
Rather than relying solely on elapsed time, you’ll recognize fermentation completion through observable physical changes in your dough.
Monitor these key indicators during bulk fermentation:
- Volume increase: Your dough should rise 50-75% in size, filling roughly three-quarters of your container
- Surface texture: Look for a slightly domed top with visible bubbles breaking through the surface
- Windowpane test: Gently stretch a small dough portion; it’ll thin without tearing when properly developed
- Tackiness level: The dough maintains slight stickiness but pulls away cleanly from bowl sides
- Jiggle response: When you gently shake the container, the dough moves with visible momentum, indicating gas retention
You’ll achieve complete dough development between 4-6 hours at room temperature, depending on your environment.
Don’t rush fermentation—underdeveloped dough yields dense bread, while overdeveloped dough collapses during shaping. Trust these physical markers over timers for superior results and genuine control over your baking process.
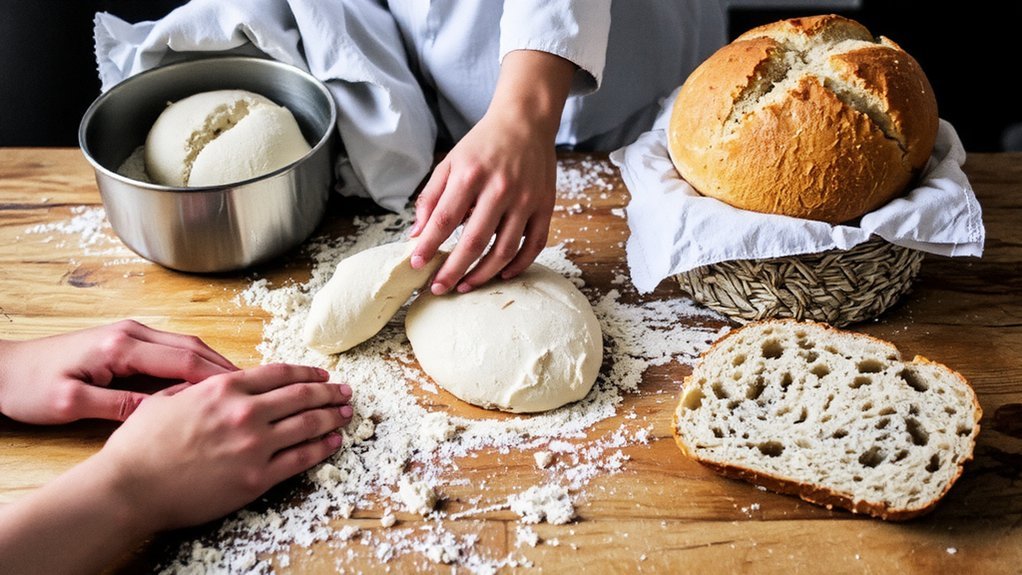
Shape Your Loaf

You’ll shape your dough by choosing between a round boule or an oval batard, each requiring specific tension techniques to build surface strength and promote proper rise.
Apply firm, consistent pressure as you fold and roll the dough, creating enough tension to seal the seams without degassing the interior. Once shaped, you’ll place your loaf seam-side up in a floured banneton or seam-side down directly on a baking sheet, depending on your preferred proofing method and final presentation.
Round vs. Oval Shapes
After your dough’s bulk fermentation completes, you’ll need to decide between a round boule or an oval batard shape, as each affects baking performance differently.
Your choice impacts both function and presentation:
- Round boules distribute heat evenly, creating uniform browning and crispy crusts
- Oval batards fit standard loaf pans, offering convenient portion control
- Serving aesthetics differ notably—rounds showcase artisanal appeal; ovals provide familiar slicing
- Cultural preferences influence selection; European bakers favor boules while American traditions embrace batards
- Oven spring varies by shape, affecting final loaf height and structure
Consider your baking vessel, audience expectations, and desired crust characteristics.
Boules require Dutch ovens for steam retention, while batards work in conventional pans.
Your freedom to choose shapes means experimenting with both to determine which aligns with your baking goals and presentation standards.
Proper Tension Techniques
Creating proper tension in your dough is essential for achieving a well-structured loaf with strong oven spring and an attractive crumb structure. You’ll control tension through deliberate hand movements and wrist positioning.
Cup your hands around the dough’s sides, pulling it toward you with consistent, confident strokes. Your wrist positioning determines the angle of pressure—keep your wrists firm but not rigid, allowing smooth, controlled motion.
Utilize bench friction strategically by working on a lightly floured surface. The friction between dough and bench creates resistance that builds tension without overworking the gluten.
Rotate your dough ninety degrees between passes, repeating four to six times until the surface appears taut and smooth.
This tension prevents spreading during proofing and baking, delivering superior results.
Pan Placement Methods
Shaping your dough transforms a loose mass into a structured loaf ready for its final proof and bake.
You’ll want to master proper pan placement to guarantee even heat distribution and ideal crust development.
Here’s what you need to control:
- Rack positioning: Place your rack in the lower-middle section for even browning
- Oven centering: Position pans equidistant from oven walls to prevent hot spots
- Pan spacing: Leave minimum 2-inch clearance between loaves for air circulation
- Thermal stability: Avoid placing pans near oven door or heating elements
- Steam retention: Use covered Dutch ovens or steam pans for superior crust
You’re not bound by convention—experiment with rack heights and pan arrangements.
Monitor your results closely. Adjust positioning based on your oven’s unique heat patterns. This flexibility gives you complete control over your final loaf’s quality.
Second Rise and Final Proofing
Once you’ve shaped your dough, you’ll place it seam-side up in a floured banneton or bowl lined with a kitchen towel for the second rise, also called the final proof.
You’ve got two options: a warm room temperature proof lasting 2-4 hours, or cold proofing through retarding. Retarding benefits include enhanced flavor development, improved crust quality, and greater scheduling flexibility. Cold proofing typically runs 8-16 hours in your refrigerator, allowing you to bake on your own timeline.
During either method, your dough should increase 50-75% in volume. Test readiness with the poke test: press your finger gently into the dough. If the indentation slowly springs back halfway, you’re ready to score and bake. This final proof stage critically determines your bread’s oven spring and crumb structure.
Score and Prepare for Baking
Before you transfer your proofed dough to the oven, you’ll need to score the surface with a sharp blade or lame to control where the bread expands during baking.
Scoring technique essentials:
- Hold your blade at a 45-degree blade angle for ideal depth and expansion control
- Make decisive, confident cuts rather than hesitant sawing motions
- Space scores ¼ inch deep and 4-6 inches apart across the loaf’s surface
- Apply flour dusting to the dough before scoring for better visibility and blade glide
- Create a single slash or cross-hatch pattern depending on your desired crumb structure
These cuts direct steam release and prevent uncontrolled splitting.
Position your oven rack in the lower third and preheat to 450°F with a Dutch oven inside. You’ll transfer your scored dough directly onto the preheated surface for best oven spring and crust development.
Bake and Cool Your Bread
Carefully transfer your scored dough onto the preheated Dutch oven, then cover it with the lid to trap steam during the initial baking phase.
Bake at 450°F for 20 minutes with the lid on, which creates the ideal environment for oven spring and crust development.
Remove the lid and continue baking for 25-30 minutes until you achieve a deep golden-brown crust sheen.
The bread’s internal temperature should reach 205-210°F when measured with an instant-read thermometer inserted into the center.
Transfer your loaf immediately to a cooling rack, allowing air circulation underneath.
This prevents moisture from condensing on the bottom crust, which’d result in sogginess.
Cool completely—at least two hours—before slicing.
This resting period lets the interior set properly, ensuring clean cuts and desired texture.
Your freedom to bake starts with patience.
Frequently Asked Questions
Why Does My Bread Have a Dense Crumb Instead of an Airy, Open Structure?
You’re likely adding excess flour, which collapses your dough’s structure. Weak gluten development also prevents proper gas retention.
You’ll strengthen your dough through vigorous kneading—aim for 10-12 minutes by hand. Measure flour by weight, not volume, to avoid overloading your mix. Provide adequate fermentation time so yeast generates sufficient gas. Proper hydration and technique directly control your crumb’s openness and airiness.
Can I Use Whole Wheat Flour Instead of All-Purpose Flour for White Bread?
You can substitute whole wheat flour, but you’ll encounter nutrition tradeoffs and texture changes.
Whole wheat absorbs more water, requiring hydration adjustments—increase liquid by 2-3 tablespoons per cup of flour.
You’ll get denser crumb and nuttier flavor instead of white bread’s light structure. Start with 25% whole wheat blended with all-purpose flour to ease the switch while maintaining your desired rise and openness.
Gradually increase whole wheat if you prefer bolder taste.
How Do I Know if My Dough Has Risen Enough During Fermentation?
You’ll know your dough’s risen enough when you’ve got proper aroma development—that distinctive yeasty smell signals fermentation’s progressing well.
Apply the finger test: poke the dough gently. If it springs back slowly and leaves a slight indent, you’re golden. If it bounces back immediately, it needs more time.
Trust your instincts and don’t rush the process—your bread’s quality depends on complete fermentation.
What Should I Do if My Bread Browns Too Quickly During Baking?
You’ll want to reduce your oven’s temperature by 25°F if your crust’s darkening too fast.
Drape a foil tent loosely over your loaf once it’s reached your desired color—this shields it from excess heat while you’re completing the bake.
You’re controlling the browning rate independently, giving you full command over your final product’s appearance and texture without sacrificing that perfectly baked interior you’re after.
How Long Can I Store Homemade White Bread Before It Goes Stale?
You’ll maintain your homemade white bread’s quality for 2-3 days at room temperature before staleness sets in.
For extended shelf life, you’ve got freedom to choose freezer storage—wrap it tightly and freeze for up to three months.
Thaw at room temperature when you’re ready to eat it.
This method preserves your bread’s texture and taste far better than leaving it exposed to air degradation.


Leave a Comment