Key Takeaways
- Cream softened butter and sugar for 3–4 minutes until pale and fluffy, then add egg and vanilla extract.
- Combine flour, baking powder, and salt; whisk thoroughly to distribute leavening evenly for consistent cookie texture.
- Chill dough at least 30 minutes, portion into 1-inch balls, and create ¼-inch deep indentations with thumb.
- Bake at 350°F for 10–16 minutes until edges are golden; cool on sheet 5–10 minutes before transferring.
- Fill cooled indentations with jam, ganache, or caramel; store in airtight containers up to 7 days.
Gathering Your Ingredients and Equipment
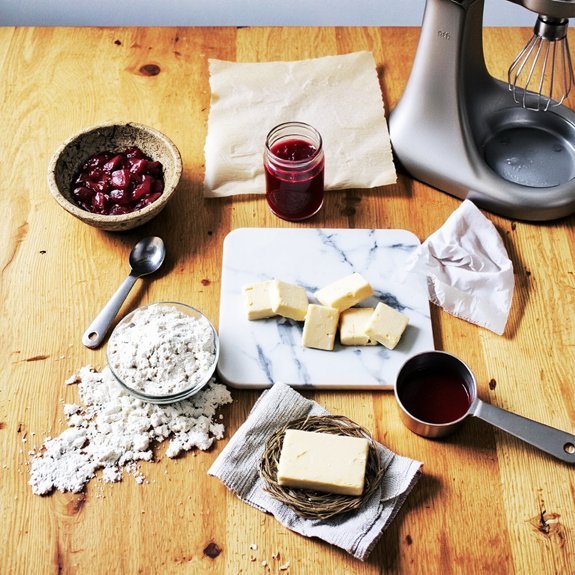
Before you begin mixing your dough, you’ll need to gather several essential ingredients: two cups of all-purpose flour, one cup of unsalted butter (softened to 65-70°F), three-quarters cup of granulated sugar, one large egg, two teaspoons of vanilla extract, one-half teaspoon of salt, and one-half teaspoon of baking powder.
For equipment, you’ll need a stand mixer or hand mixer, measuring cups and spoons, mixing bowls, a baking sheet, and parchment paper.
Organize your workspace with kitchen ergonomics in mind—position your mixer at elbow height and arrange ingredients within arm’s reach to minimize unnecessary movement.
Budget planning allows you to source quality ingredients without overspending.
Purchase butter and flour in bulk when prices drop, and invest in reliable measuring tools for consistent results.
This approach guarantees you’re prepared for multiple baking sessions while maintaining precise measurements that thumbprint cookies demand.
Preparing the Cookie Dough
You’ll start by combining 2 cups all-purpose flour, 1 teaspoon baking powder, and ½ teaspoon salt in a bowl.
Next, cream together 1 cup softened butter and ¾ cup granulated sugar until the mixture reaches a light, fluffy consistency—approximately 2-3 minutes of beating.
Finally, you’ll whisk 1 large egg and 1 teaspoon vanilla extract in a separate bowl, then incorporate these wet ingredients into your butter mixture until fully combined.
Gather Your Dry Ingredients
Since thumbprint cookies require a tender crumb structure, you’ll need to combine 2 cups all-purpose flour, 1/4 teaspoon salt, and 1/4 teaspoon baking powder in a medium bowl.
| Ingredient | Measurement | Notes |
|---|---|---|
| All-purpose flour | 2 cups | Consider organic sourcing for superior flavor |
| Salt | 1/4 teaspoon | Enhances sweetness and balances flavors |
| Baking powder | 1/4 teaspoon | Provides subtle lift without density |
Whisk these dry components thoroughly to distribute the leavening agent evenly throughout the flour matrix. This vital step prevents density variations and guarantees consistent texture across all cookies. Review allergen awareness protocols if you’re using commercial flour or baking powder, as cross-contamination risks vary by manufacturer. Organic sourcing options provide cleaner ingredient profiles for health-conscious bakers. Store your combined dry ingredients in an airtight container until you’re ready to incorporate them into your wet mixture.
Cream Butter and Sugar
With your dry ingredients properly whisked and set aside, it’s time to build the foundation of your dough by creaming together 1/2 cup (115 grams) softened unsalted butter and 3/4 cup (150 grams) granulated sugar.
Using an electric mixer on medium speed, beat for 3-4 minutes until the mixture turns pale and fluffy.
This creaming process incorporates air throughout the butter-sugar combination, creating aeration benefits that promote an even crumb structure and tender cookies.
Temperature effects matter notably here; guarantee your butter registers 65-68°F for ideal incorporation without becoming greasy or separating.
The transformation from dense mixture to light, voluminous paste indicates proper emulsification.
Scrape the bowl’s sides periodically to guarantee uniform blending.
Stop mixing once you’ve achieved a ribbon-like consistency—overworking at this stage compromises your final texture.
Mix Wet Ingredients Together
Adding your wet ingredients to the creamed butter-sugar base requires careful sequencing to maintain proper emulsification. You’ll incorporate one large egg, then one teaspoon of vanilla extract, beating each addition for thirty seconds at medium speed.
Your emulsifier choices substantially impact dough stability. Eggs act as primary emulsifiers, binding fat and flour components. You’ll notice viscosity adjustments occurring as you mix—the batter should reach a smooth, uniform consistency without separation.
| Ingredient | Amount | Temperature | Mixing Time |
|---|---|---|---|
| Egg | 1 large | Room temp | 30 seconds |
| Vanilla extract | 1 tsp | Room temp | 30 seconds |
| Combined mixture | Total | 68-72°F | 1 minute |
This methodical approach prevents overmixing while ensuring proper incorporation. You’re now ready for dry ingredients.
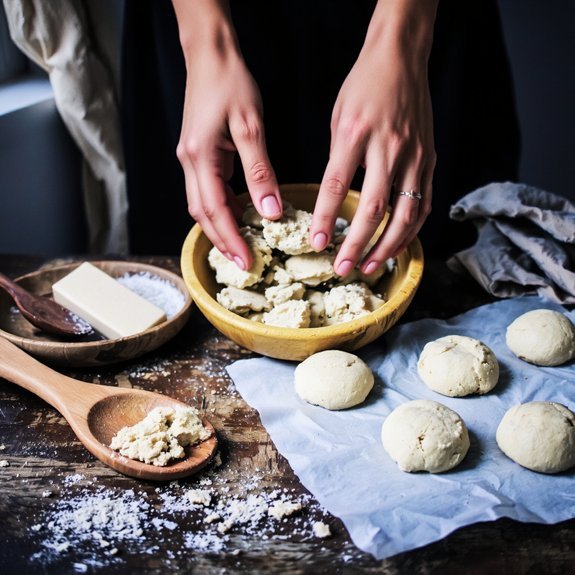
Chilling and Shaping Your Dough
You’ll want to refrigerate your dough for at least 30 minutes—this firms the butter and prevents spreading during baking.
Roll tablespoon-sized portions between your palms into uniform 1-inch balls, working quickly to minimize warmth transfer.
If your dough becomes sticky, dust it lightly with flour or briefly chill your hands under cold water.
Why Chilling Matters
After combining your ingredients, refrigerating the dough for at least 30 minutes—though 2 hours is ideal—allows the flour to fully hydrate and the fats to solidify, which prevents excessive spreading during baking.
Chilled dough delivers superior results through several mechanisms:
- Butter crystallization creates a stable fat structure that resists melting during initial oven exposure
- Gluten relaxation reduces shrinkage and maintains defined cookie shape
- Flavor maturation develops deeper, more complex taste profiles as ingredients meld
- Moisture equilibration guarantees even baking throughout the dough mass
You’ll notice chilled dough handles more responsively when shaping thumbprints. The firmer consistency allows you to create deeper, more uniform indentations without dough sticking to your thumb. This technique prevents cookie collapse and guarantees your jam filling sits properly within each depression during baking.
Shaping Perfect Balls
Portioning your chilled dough into uniform spheres is essential for even baking and consistent cookie appearance. You’ll want to use a cookie scoop or scale to achieve uniform sizing across all your cookies, ensuring they bake at identical rates and present visual symmetry on your finished product.
| Dough Ball Size | Scoop Number | Baking Time |
|---|---|---|
| Small (0.5 oz) | #70 | 10-12 minutes |
| Medium (1 oz) | #40 | 12-14 minutes |
| Large (1.5 oz) | #24 | 14-16 minutes |
Roll each portion between your palms using gentle, consistent pressure. This technique prevents cracking and maintains structural integrity. Work quickly to prevent dough from warming excessively. Space balls two inches apart on your prepared baking sheet for proper heat circulation and expansion during baking.
Preventing Dough Stickiness
While rolling dough balls guarantees uniform baking, managing moisture content and temperature throughout the shaping process directly impacts your ability to achieve those perfect spheres.
You’ll maintain ideal dough consistency by implementing strategic techniques that prevent stickiness without compromising texture.
Control your shaping environment through these methods:
- Refrigerate dough at 40°F for 30-minute intervals between batches
- Use nonstick mats to eliminate surface adhesion issues
- Apply light oil misting to your hands rather than flour, preserving dough structure
- Work quickly in a cool kitchen below 72°F
These approaches preserve your dough’s integrity while eliminating the frustration of sticky surfaces.
Temperature control remains paramount—warm dough becomes unmanageable, while properly chilled dough rolls smoothly into uniform 1.5-inch spheres.
You’ll achieve consistent results by respecting these thermodynamic principles throughout your shaping process.
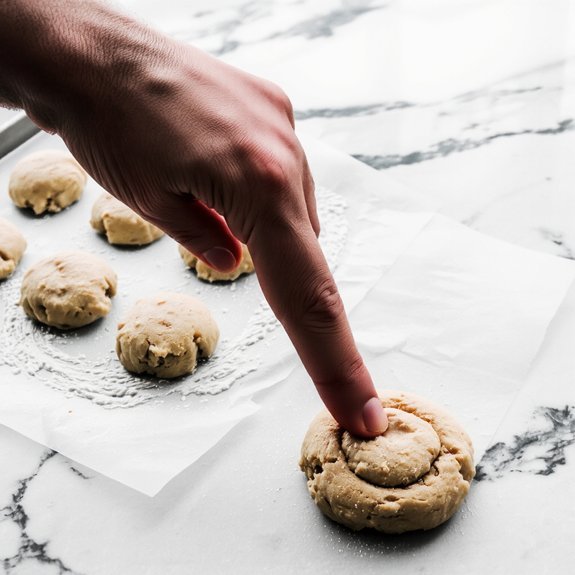
Creating the Perfect Thumbprint Indentation
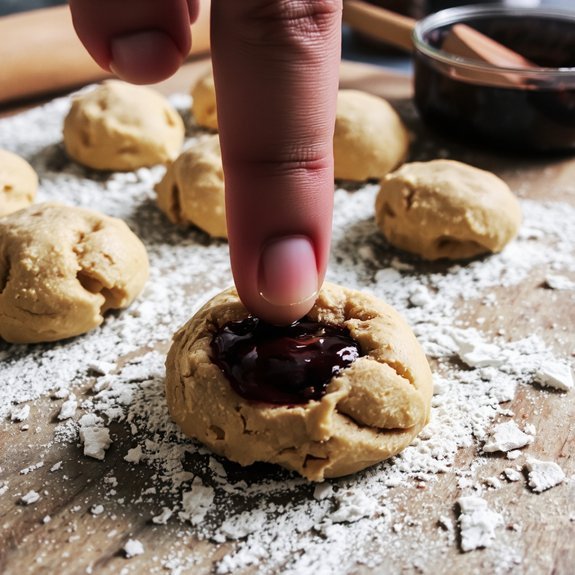
Once you’ve portioned your dough into 1-inch balls and arranged them on your baking sheet, you’ll want to create a uniform indentation in each cookie’s center. Use your thumb or the back of a measuring spoon to press down gently, maintaining consistent indentation depth—approximately ¼ inch works best. You’re aiming for a clean depression without cracking the surface texture.
Press at a slight angle rather than straight down to prevent the dough from springing back. Work methodically across your sheet, ensuring each indent matches its neighbors. If you find the dough’s resistance uncomfortable, let it rest briefly at room temperature. This uniformity guarantees even baking and professional-looking results that showcase your jam or filling beautifully.
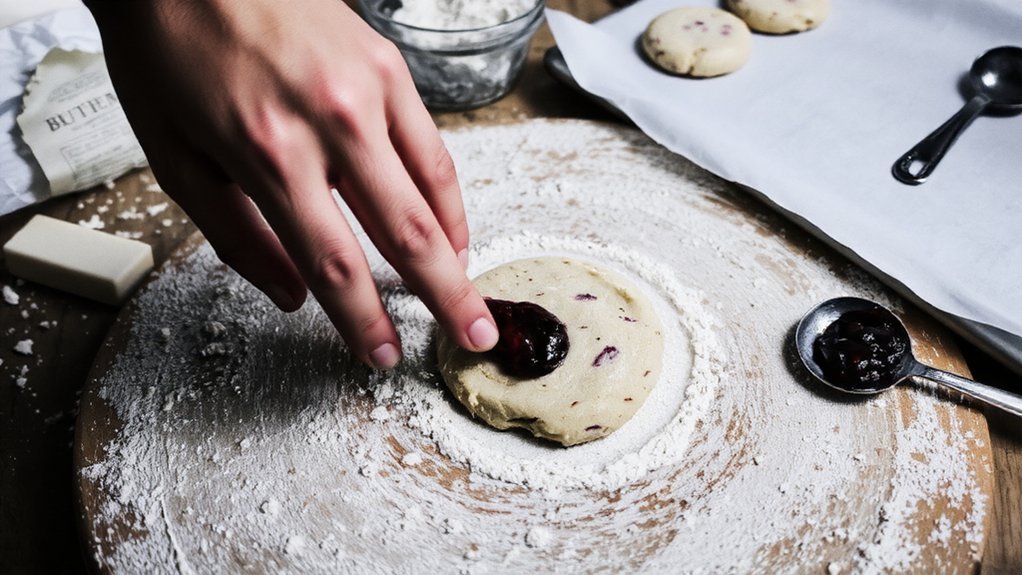
Choosing and Adding Your Fillings
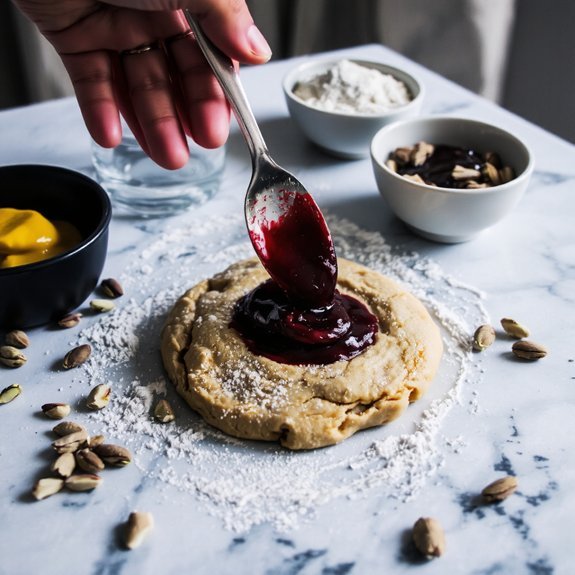
Your filling choice dramatically impacts both flavor and texture, so you’ll want to select options that’ll hold their consistency throughout baking.
Consider these proven filling options:
- Jam or preserves (1-2 teaspoons per indentation)
- Chocolate ganache (cooled to 60°F)
- Nut butters with cocoa powder
- Dulce de leche or caramel sauce
Balance texture by pairing thick fillings with tender dough.
Apply fillings after baking when cookies cool slightly—this prevents seeping.
Spoon your chosen filling directly into each thumbprint, filling approximately three-quarters full.
Overfilling causes overflow; underfilling diminishes impact.
Flavor pairings matter equally.
Almond dough pairs excellently with raspberry preserves or dark chocolate.
Butter-based cookies accommodate salted caramel beautifully.
Your filling-to-dough ratio determines the final result’s success.
Cool completely before serving to allow fillings to set properly.
Baking to Golden-Brown Perfection
Before you place your filled cookies in the oven, preheat it to 350°F and allow it to reach full temperature for at least 15 minutes.
Position your baking sheet on the center rack to guarantee proper air circulation around each cookie. This promotes even heat distribution and consistent browning through the Maillard reaction, creating that desirable golden exterior.
| Baking Time | Internal Temperature | Visual Cue |
|---|---|---|
| 10-12 minutes | 165°F center | Light golden edges |
| 12-14 minutes | 170°F center | Medium golden brown |
| 14-16 minutes | 175°F center | Deep golden brown |
Monitor your cookies closely during the final minutes. They’ll continue cooking slightly after removal due to residual heat. Don’t overbake—underbaked cookies remain tender while overbaked ones turn brittle. Remove them when edges are set but centers yield slightly to gentle pressure.
Storage and Serving Tips
Allow your thumbprint cookies to cool completely on the baking sheet for 5-10 minutes before transferring them to a wire rack, where they’ll firm up to their ideal texture.
Once fully cooled to room temperature, you can store them strategically for maximum freshness and enjoyment.
For best preservation, you’ll want to:
- Place cooled cookies in air tight containers with parchment paper between layers
- Store at room temperature for up to 7 days
- Freeze in air tight containers for up to 3 months
- Include gift packaging materials when presenting as homemade gifts
Your thumbprint cookies maintain their structural integrity and flavor profile when properly sealed against air exposure.
This approach gives you complete control over your cookie inventory, whether you’re enjoying them immediately or preserving them for future occasions.
Frequently Asked Questions
Can I Freeze Thumbprint Cookie Dough Before Baking Them?
Yes, you can freeze thumbprint cookie dough effectively.
Use the flash-freezing method: portion dough into balls, freeze on a baking sheet for two hours, then transfer to airtight containers for up to three months.
For thawing tips, let dough sit at room temperature for 15-20 minutes before baking, or bake directly from frozen, adding 2-3 minutes to your baking time.
This approach gives you complete flexibility over your baking schedule.
How Do I Prevent My Thumbprints From Filling in During Baking?
You’ll prevent filling from closing by using the proper indent technique.
First, chill your dough to 45°F for at least 30 minutes—this stabilizes the structure.
Create your thumbprints ¼-inch deep using firm, deliberate pressure.
Don’t second-guess yourself; commit fully to each indent.
Bake at 350°F for 10-12 minutes before adding filling, allowing edges to set.
This approach gives you complete control over your cookie’s final appearance and texture.
What Are Some Creative Filling Alternatives Beyond Jam?
You’ll find exciting possibilities beyond traditional jam. Nut butter—specifically almond or peanut varieties—delivers rich, protein-packed depth when you pipe 0.5 teaspoons into each indent.
Salted caramel offers sophisticated contrast; use 1 tablespoon per cookie, allowing proper setting time. Consider dark chocolate ganache, cream cheese mixtures, or dulce de leche.
You’re liberated from convention here—experiment with tahini, mascarpone, or even bourbon-infused fillings. These alternatives won’t compromise your thumbprint structure if you maintain proper batter consistency and precise baking temperatures.
Why Did My Cookies Spread Too Much While Baking?
Your cookies spread excessively due to warm dough and excess butter.
You’ll want to chill your dough at 40°F for minimum two hours before portioning. Verify you’re not using more than 113 grams butter per dozen cookies.
Additionally, confirm your oven reaches precise 350°F temperature. Don’t skip the resting period—it’s non-negotiable for maintaining shape integrity during baking.
How Long Do Baked Thumbprint Cookies Stay Fresh?
You’ll maintain peak freshness for 5-7 days when you store baked thumbprint cookies in an airtight container at room temperature.
Refrigeration effects extend shelf life to 10-14 days, though you’ll notice slight texture changes.
For maximum preservation, you can freeze them up to three months.
Don’t let anyone dictate your storage method—choose what works best for your schedule and taste preferences.


Leave a Comment