Key Takeaways
- Use a 2:1 flour-to-butter ratio for crust; chill dough 30 minutes before shaping to prevent shrinkage.
- Press dough firmly into mold, dock the bottom, and blind bake 12–15 minutes until lightly golden.
- Prepare fillings in advance, cool completely, and thicken to 220°F to prevent soggy crusts.
- Layer a thin chocolate or pastry cream barrier before adding filling for moisture protection.
- Preheat oven to 375°F, bake filled tarts 25–35 minutes until golden edges appear, then cool completely.
Essential Ingredients for Tart Making
You’ll need four foundational components to craft a quality tart: flour, butter, sugar, and eggs.
The foundation of any quality tart rests on four essential components: flour, butter, sugar, and eggs.
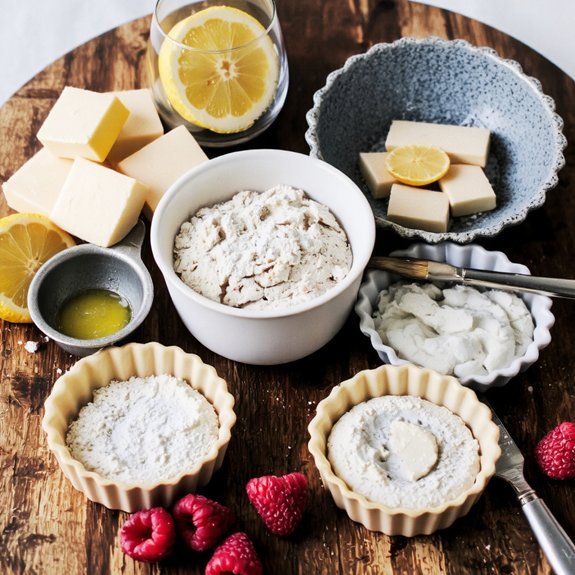
Select all-purpose flour or pastry flour for ideal texture.
Choose unsalted butter to control sodium levels and maintain flavor integrity.
Use granulated sugar unless your recipe specifies alternatives.
Beyond these basics, you’ll want vanilla extract, salt, and baking powder.
Your filling ingredients depend on your tart variety—fresh fruits, custard, or chocolate ganache require different specifications.
When purchasing ingredients, prioritize label reading to verify quality standards and ingredient sourcing.
Check expiration dates and storage guidelines on all packages.
Store flour and sugar in airtight containers away from moisture and heat.
Refrigerate butter to preserve its structure and prevent rancidity.
Quality ingredients directly impact your final product’s success.
Crafting the Perfect Tart Crust
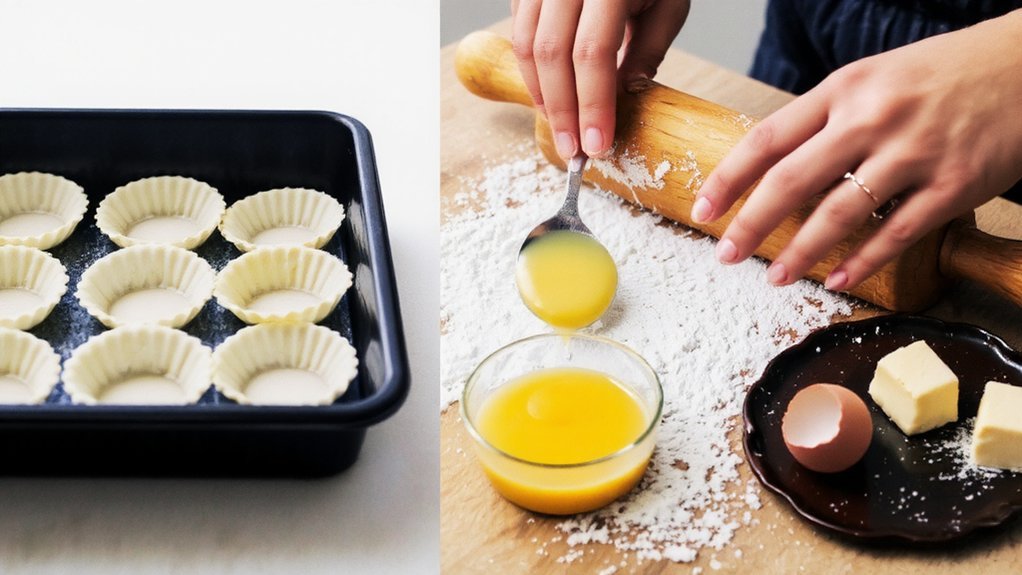
You’ll achieve a superior tart crust by maintaining precise ingredient ratios—typically 2 parts flour to 1 part cold butter and a pinch of salt—which guarantees ideal texture and structure.
Your mixing and chilling techniques directly impact the final product; work the butter into the flour until the mixture resembles coarse breadcrumbs, then refrigerate for at least 30 minutes to prevent shrinkage during baking.
These foundational steps determine whether you’ll produce a crisp, flaky crust or a dense, tough shell.
Ingredient Selection and Ratios
The foundation of any exceptional tart rests on precise ingredient ratios that balance flour, fat, and liquid to create a structure that’s simultaneously tender and sturdy. You’ll want to maintain a 3:2:1 ratio—three parts flour to two parts fat to one part liquid—as your baseline for consistent results.
| Ingredient | Standard | Organic Alternative |
|---|---|---|
| All-purpose flour | 2 cups | Spelt or einkorn flour |
| Butter | 1.33 cups | Coconut oil or grass-fed butter |
| Ice water | ⅔ cup | Cold vegetable broth |
Your choice of fat directly impacts flavor and texture. Butter delivers richness, while organic substitutes offer flexibility based on seasonal produce availability and dietary preferences. Temperature control proves critical—you’re choosing your ingredients’ freedom from compromise, ensuring ideal crust development through proper hydration and fat distribution.
Mixing and Chilling Techniques
Once you’ve selected your ingredients with precision, proper mixing and chilling become the techniques that transform those components into an exemplary crust.
Control your speed variation when combining flour, butter, and salt—start low to avoid overworking the dough, then increase gradually for uniform distribution.
Incorporate cold water minimally, mixing until the dough just comes together.
Chill placement is critical for success.
Wrap your dough and refrigerate for at least thirty minutes before rolling.
This resting period allows gluten to relax and butter to firm, preventing shrinkage during baking.
If your kitchen runs warm, extend chilling time or chill again after shaping.
These techniques aren’t optional—they’re foundational.
They give you complete control over your crust’s texture, ensuring the flaky, tender result you’re after.
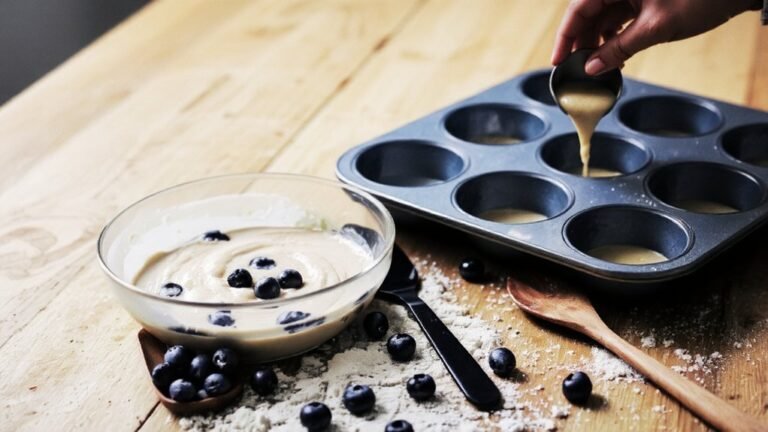
Preparing Your Fillings
Before assembling your tarts, you’ll want to prepare fillings that’re properly cooked, cooled, and thickened to the correct consistency.
Achieving the right texture prevents soggy crusts and guarantees structural integrity during baking.
For fruit fillings, cook your mixture until it reaches the desired viscosity—typically 220°F on a candy thermometer.
Add cornstarch or tapioca as thickening agents, avoiding excess liquid that’ll compromise your tart’s foundation.
Cool all fillings completely before filling your shells.
This critical step prevents crust deterioration and allows flavors to develop fully.
Makeahead tips save valuable time: prepare fillings up to two days prior and store them in airtight containers at proper temperatures.
Maintain strict food safety protocols by refrigerating custard-based fillings below 40°F.
This approach gives you flexibility while preserving quality and safety throughout your baking process.
Assembling Your Tart
You’ll start by positioning your blind-baked tart shell on a clean, flat surface and ensuring it’s completely cooled before adding your filling.
Next, you’ll apply your prepared filling using proper layering techniques that distribute it evenly and prevent sogginess or overflow.
Finally, you’ll crimp and seal the edges with precision to create both a professional appearance and a secure seal that holds your filling intact during baking.
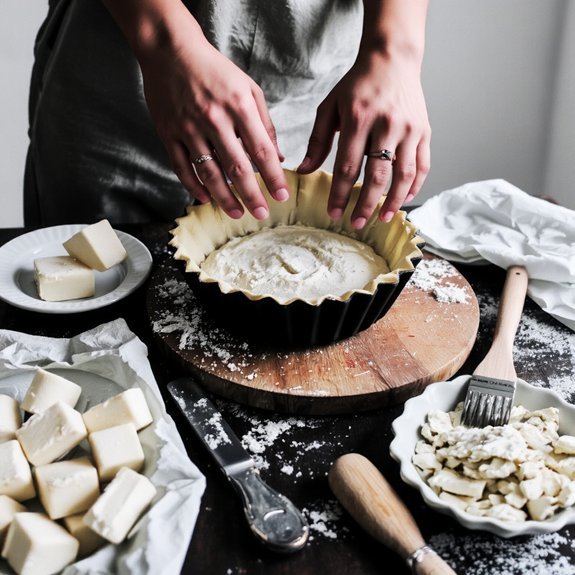
Preparing Your Tart Shell
Assembling your tart shell requires precision and attention to detail to guarantee structural integrity and even baking.
Start by selecting an appropriate mold that matches your desired tart size and depth.
Your mold selection directly impacts how your tart bakes and releases.
Apply release agents generously to your mold’s interior surfaces.
You can use butter, cooking spray, or specialized release compounds.
This prevents sticking and allows clean removal after baking.
Press your dough firmly into the mold’s bottom and sides, eliminating air pockets that cause uneven baking.
Work methodically along the edges, achieving uniform thickness throughout.
Trim excess dough flush with the mold’s rim using a sharp knife.
Dock the bottom with a fork to prevent puffing during blind baking.
Chill your prepared shell for thirty minutes before baking.
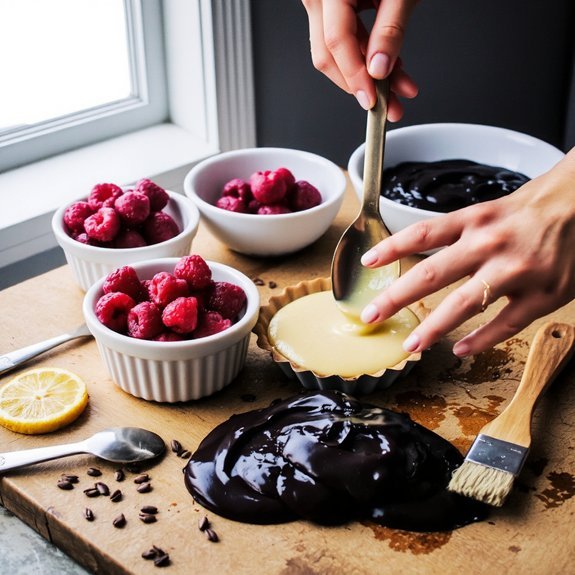
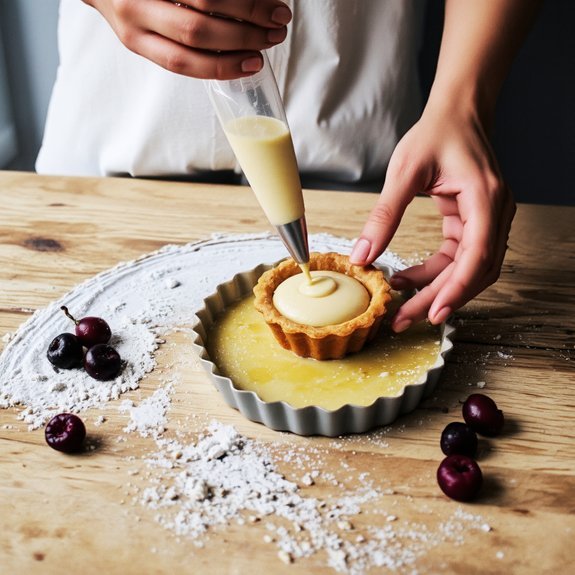
Filling and Layering Techniques
Once your chilled shell emerges from the refrigerator, you’re ready to construct your tart’s flavor profile through strategic filling and layering.
Begin by applying a thin barrier layer—typically chocolate or pastry cream—to prevent sogginess and seal the shell’s integrity.
Next, distribute your primary filling evenly, using an offset spatula for precision.
Create texture contrast by alternating between creamy and firm components; this interplay elevates the eating experience and prevents monotonous mouthfeel.
Layer fruits or garnishes thoughtfully to establish visual gradients that guide the eye across your creation.
Arrange darker elements toward the perimeter, shifting lighter components toward the center, or vice versa.
This deliberate composition transforms your tart from merely functional to visually commanding while maintaining structural stability throughout assembly and service.
Crimping Edges for Finish
Finishing your tart’s perimeter through crimp techniques transforms the shell’s raw edge into a refined, structurally sound border that frames your composition.
You’ll create decorative crimps using your thumb and forefinger, pinching the dough at consistent intervals around the rim.
This technique seals the edge while adding visual appeal.
For fancy fluting, you’ll employ a fork or specialized crimper tool, pressing it at angles to produce uniform ridges.
You can alternate directions for intricate patterns that showcase your craftsmanship.
Work deliberately, maintaining even pressure to prevent cracks or irregularities.
Your crimped edge serves dual purposes: it aesthetically elevates the tart’s presentation while reinforcing structural integrity.
These finished borders prevent shrinkage during baking and guarantee your tart emerges as a polished, professional creation.
Baking Temperatures and Times

You’ll achieve ideal results by preheating your oven to 375°F (190°C) for most tart recipes, though individual variations may require adjustments between 350°F and 425°F depending on your crust type and filling composition.
Verify your oven calibration using an independent thermometer to eliminate temperature discrepancies that compromise final results.
Bake blind crusts for 12-15 minutes until lightly golden, then remove weights for additional crisping.
Filled tarts typically require 25-35 minutes.
Altitude adjustments demand consideration—higher elevations necessitate slightly increased temperatures and extended baking times due to lower atmospheric pressure affecting moisture evaporation rates.
Watch for visual cues: golden-brown edges and set fillings indicate doneness.
Rotate your tart halfway through baking for uniform browning.
Cool completely before serving to allow structural integrity.
Troubleshooting Common Tart Problems
Why don’t your tarts turn out as expected? Understanding common failures empowers you to make independent adjustments and perfect your craft.
Equipment calibration directly impacts your results.
Verify your oven’s actual temperature with a reliable thermometer—many run hot or cold.
Transport protection prevents structural collapse; use rigid containers and flat surfaces during movement.
Address these typical issues:
- Soggy crusts: Pre-bake shells longer or use egg wash as a moisture barrier
- Uneven browning: Rotate tarts halfway through baking; check equipment calibration
- Filling leakage: Maintain adequate crust thickness and proper sealing at edges
- Cracked surfaces: Reduce oven temperature by 25°F; bake slower
- Collapsed sides: Cool tarts completely before unmolding to prevent structural failure
Master these troubleshooting techniques, and you’ll consistently produce superior tarts with professional-quality results.
Frequently Asked Questions
Can I Make Tart Dough Ahead of Time and Freeze It for Later Use?
Yes, you can freeze tart dough effectively.
Wrap your dough tightly in plastic wrap, then place it in freezer bags—this prevents freezer burn.
For flash freezing tips, freeze unwrapped dough on a baking sheet first, then bag it. You’ll maintain complete control over your baking schedule.
Thawing methods include refrigerating overnight or leaving it at room temperature for 30 minutes. Properly frozen dough stays viable for three months, giving you ultimate flexibility in your kitchen operations.
What’s the Best Way to Prevent the Tart Shell From Shrinking During Baking?
You’ll prevent shrinkage by thoroughly chilling your dough before baking—ideally for at least 30 minutes.
When you’re crimping edges, press firmly to secure the dough against the pan’s sides.
Additionally, you’ve got the freedom to dock the bottom with a fork, which releases steam and reduces puffing.
Blind baking with weights further stabilizes your shell.
These techniques work together to keep your tart shell’s shape intact.
How Do I Remove a Baked Tart From Its Pan Without Breaking It?
You’ll achieve clean removal by using the Invert Method: place a flat plate atop your cooled tart, then flip both together.
Loosen Edges carefully with a thin knife around the pan’s perimeter first. If resistance occurs, don’t force it—gently tap the pan’s bottom.
You’re liberating your masterpiece from its constraints, ensuring your independence from conventional plating limitations.
This technique guarantees an intact, beautifully presented tart every time.
Can I Substitute Ingredients in Tart Recipes for Dietary Restrictions or Allergies?
You can absolutely substitute ingredients for dietary restrictions.
For eggs, you’ll use egg substitutes like flax eggs, appleseed, or commercial binders that maintain structural integrity.
Dairy alternatives such as coconut oil, nut butters, or plant-based creams work effectively in fillings and crusts.
You’re free to experiment with gluten-free flours and sugar alternatives.
However, precision matters—maintain proper ratios and understand how substitutions affect texture, binding, and baking time for successful results.
What’s the Difference Between Blind Baking and Regular Baking for Tart Shells?
You’ll achieve superior crust textures through blind baking by pre-baking your shell with weights before adding filling.
This technique provides exceptional moisture control, preventing soggy bottoms that plague regular baking methods.
You’re fundamentally setting the crust’s structure while eliminating excess steam.
Regular baking exposes your shell to direct filling moisture, compromising structural integrity.
Blind baking demands more effort, but you’re guaranteed crisp, professionally finished tarts that maintain their integrity throughout serving.


Leave a Comment