Key Takeaways
- Cream room-temperature butter and sugar for 2–3 minutes until pale and fluffy for proper rise and texture.
- Add eggs one at a time, beating thoroughly between additions to ensure complete emulsification and even distribution.
- Sift and whisk dry ingredients together to aerate flour and eliminate lumps for uniform baking results.
- Chill shaped dough at least 2 hours before baking at 350°F for 10–12 minutes until edges firm.
- Cool completely on wire racks, then store in airtight containers at room temperature for up to one week.
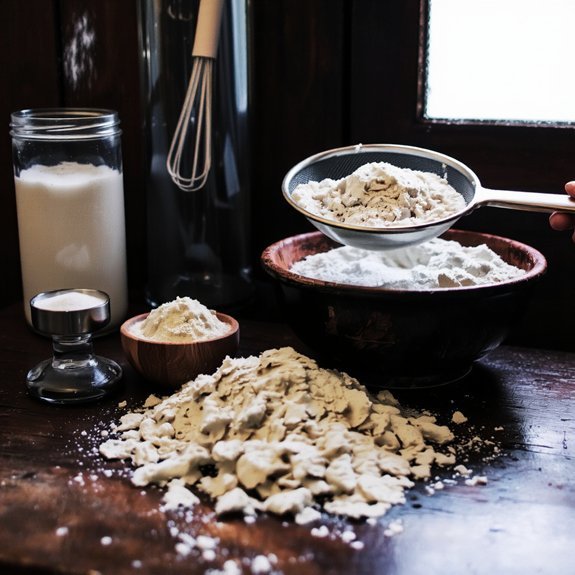
Gathering Your Ingredients and Supplies
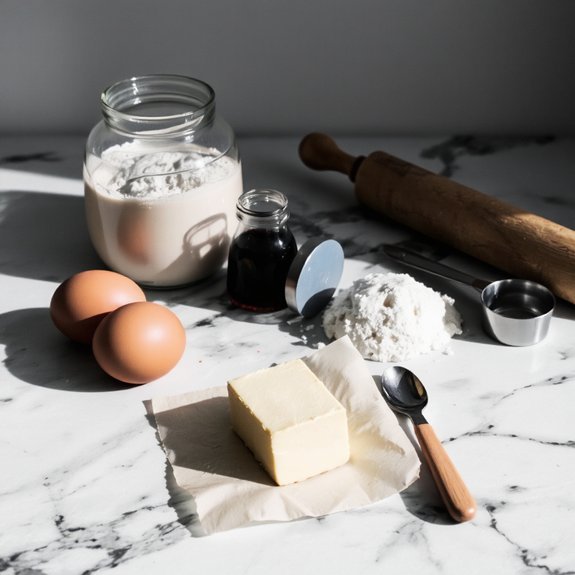
Before you mix your first batch, you’ll need to assemble the essential ingredients and equipment.
Gather all-purpose flour, granulated sugar, butter, eggs, vanilla extract, baking powder, and salt.
For your kitchen setup, arrange these items on a clean, organized workspace.
Consider allergen alternatives upfront if you’re accommodating dietary restrictions.
Substitute regular flour with gluten-free blends, use dairy-free butter, or replace eggs with appropriate binders.
Have these options prepared before starting.
Stock your equipment essentials: measuring cups and spoons, mixing bowls, an electric mixer, baking sheets, parchment paper, and a rolling pin.
You’ll also need a spatula and cooling racks.
Verify your oven thermometer reads accurately.
Pre-measure dry ingredients into separate containers for efficiency.
This preparation method—mise en place—streamlines your baking process and prevents mistakes.
You’re now ready to proceed confidently toward mixing and baking.
Creaming Butter and Sugar Together
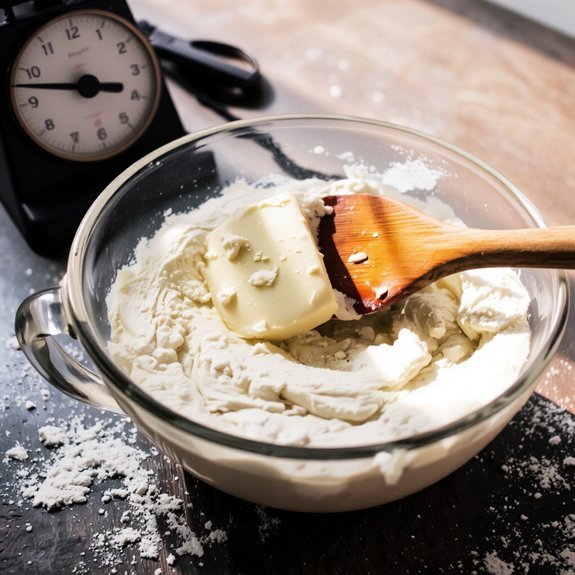
You’ll want to make sure your butter’s at room temperature—around 65-70°F—so it creams properly without becoming greasy or remaining lumpy.
As you beat the butter and sugar together, you’re looking for a light, fluffy mixture that’s pale in color and takes on a mousselike consistency, which typically takes 2-3 minutes with an electric mixer.
This proper creaming incorporates air into your dough, which is essential for achieving the right texture in your finished cookies.
Room Temperature Importance
Why does butter temperature matter so much when creaming?
You’ll achieve ideal results when your butter reaches precisely 65-68°F.
Cold butter won’t incorporate air effectively, limiting volume and texture.
Conversely, warm butter separates, creating a greasy mixture rather than a fluffy base.
Room temperature butter allows you to control the creaming process independently, without external constraints.
You’re not fighting against butter’s natural state—you’re working with it.
This temperature promotes proper emulsification with sugar, creating the tiny air pockets that generate light, tender cookies.
Additionally, maintaining proper creaming temperatures supports food safety by guaranteeing consistent baking results.
Your finished cookies reach the ideal serving temperature when baked thoroughly from this stable foundation.
Start your baking session by removing butter from refrigeration 30-45 minutes beforehand.
Achieving Proper Consistency
Combining softened butter and sugar creates the foundation for properly textured cookies. You’ll need an electric mixer calibrated to medium speed for ideal equipment calibration. Begin by creaming room-temperature butter with granulated sugar for approximately two minutes until the mixture becomes pale and fluffy.
This process incorporates air into your dough, which directly affects your cookies’ rise and crumb structure. You’re aerating the butter, creating tiny pockets that’ll expand during baking.
The hydration level of your dough depends on this creaming stage—insufficient mixing results in dense, flat cookies.
Beat until you’ve achieved a light, whipped texture. You’ll notice the mixture transform from grainy and compact to smooth and voluminous. Don’t rush this step; proper creaming guarantees your cookies achieve the ideal balance between crispy edges and tender centers, giving you complete control over your final product.
Mixing in Eggs and Vanilla Extract
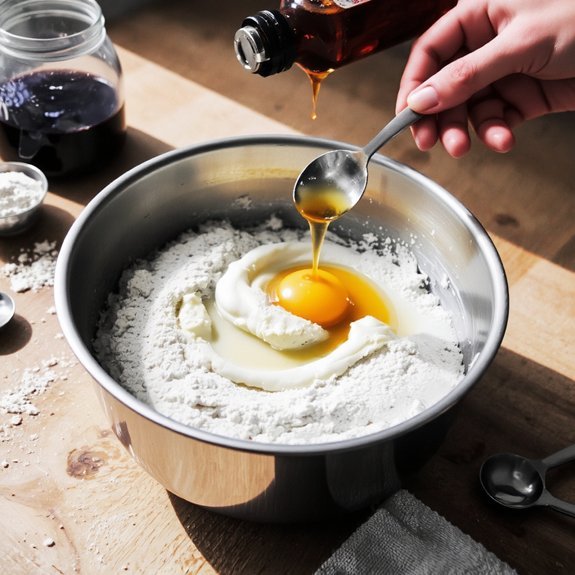
Once your creamed butter and sugar mixture reaches the proper consistency, it’s time to incorporate the eggs and vanilla extract.
Add eggs one at a time, beating thoroughly after each addition to achieve complete emulsification. This prevents separation and creates a stable base for your dough.
Add eggs one at a time, beating thoroughly after each addition to achieve complete emulsification and create a stable dough base.
Next, add your vanilla extract. You’ll find various extract varieties available—pure vanilla, Madagascar, and Tahitian options each offer distinct flavor profiles. If you’re accommodating allergies or preferences, consider allergy substitutions like almond extract or maple syrup, adjusting quantities accordingly.
Beat the mixture until fully combined, approximately one to two minutes. The batter should appear light, fluffy, and homogeneous. Scrape down your bowl’s sides periodically to guarantee even ingredient distribution.
This stage is essential; proper incorporation determines your cookies’ final texture and flavor development. Proceed to your next ingredient additions.
Combining Dry Ingredients
While your wet ingredients develop their light, fluffy consistency, you’ll want to prepare your dry components separately.
Precision in this phase directly impacts your final product’s texture and rise.
Start by gathering your dry ingredients:
- Flour (all-purpose works best for standard sugar cookies)
- Baking soda and salt (leavening agents that control spread and flavor)
- Optional additions like cornstarch (enhances tenderness and reduces spread)
Employ proper sifting techniques to aerate your flour and eliminate lumps, which make certain even distribution throughout your dough.
Measure accuracy demands using a scale rather than volume measurements—this eliminates variables that compromise consistency batch to batch.
Whisk your sifted dry ingredients together thoroughly, breaking up any stubborn clumps.
This integration prevents dense pockets in your baked cookies and guarantees uniform rise and browning across all cookies.
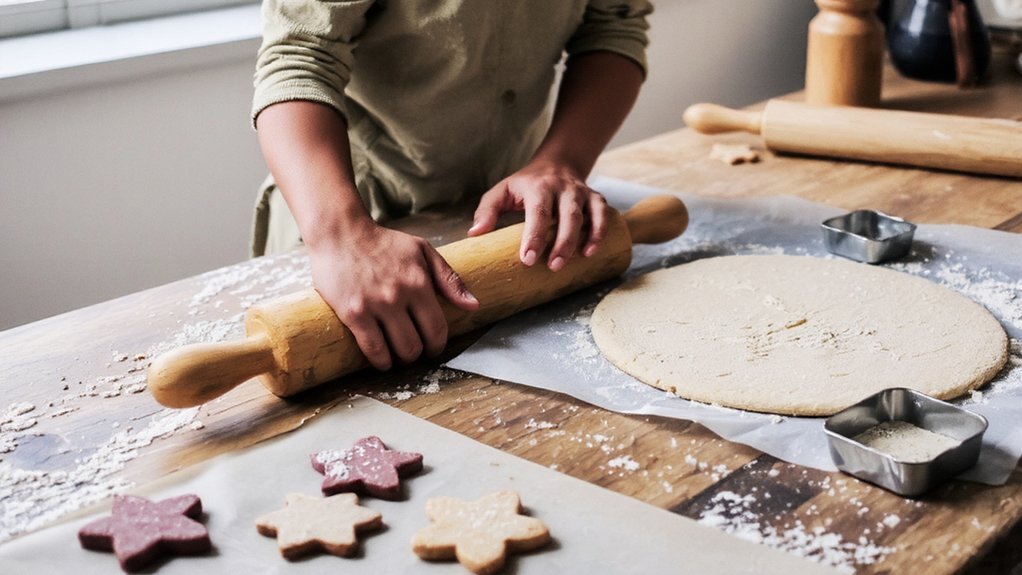
Shaping and Chilling Your Dough
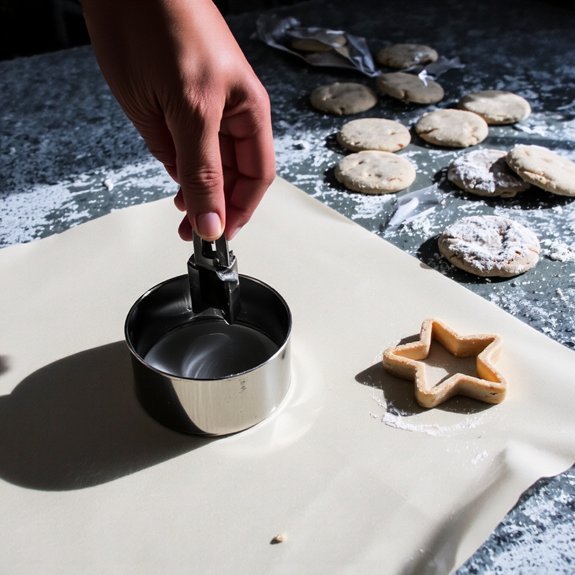
Now that your dough’s come together, you’ll shape and chill it to achieve ideal texture and consistent baking results.
Shape and chill your dough to achieve ideal texture and ensure consistent, professional baking results every time.
You have two primary options: rolling and cutting individual cookies or utilizing slab chilling for batch efficiency.
For slab chilling, press your dough between parchment sheets to uniform thickness—typically one-quarter inch.
This method maximizes yield and guarantees even baking.
You can apply pattern embossing before chilling to customize your cookies’ appearance without additional decorating steps.
Refrigerate your shaped dough for at least two hours, preferably overnight.
This resting period allows gluten to relax and flavors to develop fully, preventing excessive spreading during baking.
If using slab chilling, cut shapes after the dough firms completely.
Transfer portions to your baking sheet, maintaining proper spacing for heat circulation and browning.
Baking and Decorating Your Cookies
You’ll bake your cookies at 350°F for 10-12 minutes until the edges are set but the centers remain slightly soft.
Once cooled, you can frost them with royal icing, buttercream, or glaze, then top with sprinkles, edible pearls, or other decorative elements.
Store your finished cookies in an airtight container at room temperature for up to one week to maintain their texture and taste.
Oven Temperature and Timing
Since sugar cookies are prone to browning quickly, preheating your oven to 350°F (175°C) promotes even baking and prevents over-browning on the edges.
Your preheat strategies substantially impact results.
Consider these essential practices:
- Allow 15-20 minutes for complete preheating before placing cookies in the oven
- Use an oven thermometer to verify actual temperature, as many ovens run hot or cold
- Calibrate your thermometer regularly for accuracy, ensuring precise heat distribution
Bake your cookies for 10-12 minutes until the edges firm up while centers remain slightly soft.
They’ll continue cooking on the hot baking sheet after removal. This timing prevents dry, brittle cookies while achieving the desired texture.
Monitor your first batch closely.
Every oven behaves differently, so thermometer calibration proves critical for consistent success across multiple batches.
Frosting and Topping Ideas
What transforms a plain sugar cookie into a showstopper? Strategic frosting and topping selections.
You’ve got complete creative control here.
Royal icing provides a glossy, professional finish ideal for intricate designs.
Buttercream offers versatility for flavor pairings—pairing cream cheese varieties with lemon or almond extracts elevates your cookies beyond standard options.
Consider seasonal themes when planning your decorations.
Winter calls for metallic accents and snowflake patterns, while spring suggests pastel hues and floral motifs.
Summer welcomes bright colors and fruit-inspired designs.
Layer your toppings for visual interest and texture contrast.
Sprinkles, edible glitter, and crushed candies add dimension.
Don’t overlook simple options like cinnamon sugar or cocoa powder—sometimes restraint creates impact.
Your frosting thickness and application technique directly affect your final product’s appearance and taste integration.
Precision matters.
Cooling and Storage Methods
Proper cooling and storage directly impact your cookies’ texture, appearance, and longevity. You’ll want to follow these essential practices:
- Cool completely on wire racks before transferring to airtight containers to prevent condensation and softening
- Use airtight containers for room-temperature storage, keeping cookies fresh for up to one week
- Employ freezer storage for extended preservation, maintaining quality for up to three months when properly sealed
You’re free to customize storage based on your preferences.
For softer cookies, add a slice of bread to your container—replace it every two days.
Hard cookies benefit from cooler, drier environments.
Layer cookies with parchment paper in airtight containers to prevent sticking.
Thaw frozen cookies at room temperature for thirty minutes before serving.
This straightforward approach guarantees your sugar cookies maintain ideal freshness and quality.
Frequently Asked Questions
Can I Use Margarine Instead of Butter for Sugar Cookies?
Yes, you can substitute margarine for butter in sugar cookies. However, you’ll notice flavor differences—margarine produces a less rich, more neutral taste than butter’s distinctive dairy notes.
Consider the health tradeoffs: margarine contains trans fats and additives, while butter offers a more natural option.
For ideal results, use a high-fat margarine (80% fat content) and expect slightly different texture and crumb structure than traditional butter-based cookies.
How Long Will Sugar Cookie Dough Keep in the Refrigerator?
You’ll keep your sugar cookie dough refrigerated for up to five days while maintaining proper refrigeration safety. Beyond this window, you’ll risk bacterial growth and compromised quality.
You’ll notice texture changes occurring—the dough becomes drier and loses its workability.
For extended storage, you’re free to freeze your dough up to three months. This approach preserves your dough’s integrity and guarantees you maintain complete control over your baking schedule without sacrificing results.
What’s the Best Way to Prevent Cookies From Spreading Too Much?
You’ll prevent excessive spreading by chilling your dough thoroughly before baking. A proper flour ratio—typically one part fat to two parts flour—creates structure that resists movement.
You’ve got control here: refrigerate your dough for at least thirty minutes, or freeze it longer. This solidifies the butter, slowing spread during initial baking.
Additionally, you’ll strengthen your dough’s integrity by measuring flour accurately and avoiding over-mixing, which develops gluten and maintains your cookies’ shape.
Can I Freeze Sugar Cookie Dough Before Baking?
You can absolutely freeze sugar cookie dough before baking.
For ideal results, you’ll want to use flash freezing—spread portioned dough balls on a baking sheet until solid, then transfer them to freezer bags.
This portioning tips approach prevents clumping and gives you control over your baking schedule.
You’re free to bake directly from frozen, though you’ll need to add a few extra minutes to your baking time.
Your dough maintains quality for up to three months.
How Do I Achieve Perfectly Crispy Versus Chewy Sugar Cookies?
You’ll control your cookie’s texture by adjusting baking temperature and ingredient ratios.
For crispy cookies, you’re lowering your butter-to-flour ratio and baking at higher temperatures—around 375°F.
For chewy results, you’re increasing butter content and removing cookies earlier, around 11-12 minutes.
You’re fundamentally manipulating moisture evaporation rates through heat intensity and fat content.
These technical adjustments give you complete command over your final product’s texture.


Leave a Comment