Key Takeaways
- Cream butter and sugar 3–4 minutes until fluffy, then alternate wet and dry ingredients to avoid overmixing and dense texture.
- Preheat oven to 350°F, bake two 9-inch greased and floured pans for 30–35 minutes until a toothpick emerges with minimal crumbs.
- Cool cake layers in pans 10–15 minutes, then invert onto wire racks and cool completely 1–3 hours at room temperature.
- Soften cream cheese to 65–70°F, beat with butter two minutes, then gradually add powdered sugar in three additions for smooth frosting.
- Insert 4–6 dowels through bottom layer for support, apply crumb coat and chill thirty minutes, then finish with final frosting layer.
Gathering Your Ingredients and Equipment
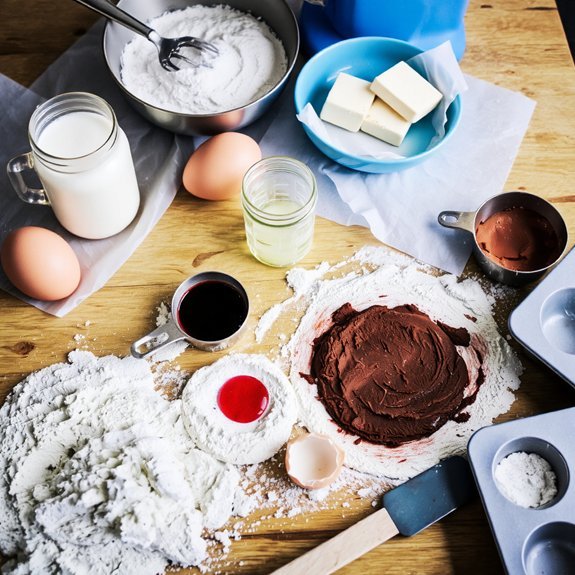
Before you’ll need to gather the essential ingredients and equipment for your red velvet cake. You’ll require 2¼ cups all-purpose flour, 1 teaspoon baking soda, 1 teaspoon salt, ½ cup unsalted butter, 1½ cups granulated sugar, 2 large eggs, 1 cup buttermilk, 1 tablespoon white vinegar, 1-2 tablespoons red food coloring, 1 teaspoon vanilla extract, and 8 ounces cream cheese for frosting.
For equipment, gather two 9-inch round cake pans, mixing bowls, measuring cups and spoons, an electric mixer, and a rubber spatula.
Prioritize tool sanitation by washing all equipment thoroughly before use to prevent contamination. Your ingredient sourcing matters greatly—source premium cocoa powder and quality buttermilk for ideal flavor.
Tool sanitation and premium ingredient sourcing are essential for achieving ideal flavor in your red velvet cake.
Make sure all utensils are completely dry before beginning your preparation.
2. Preparing Your Cake Pans
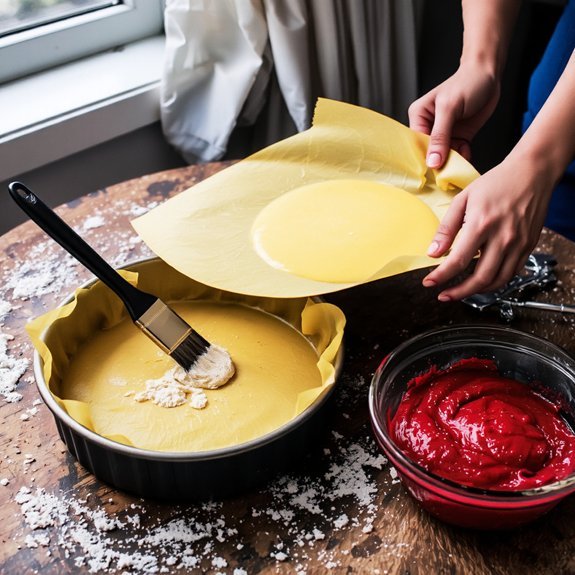
To make sure your cake releases cleanly from the pans, you’ll need to prepare them properly with butter, parchment paper, and flour.
Start with two 9-inch round cake pans. Use effective greasing techniques: apply softened butter evenly across all interior surfaces, including the bottom and sides.
For ideal results, employ parchment lining by cutting two circles of parchment paper to fit each pan’s base. Press the parchment firmly against the buttered surface.
Next, dust the buttered pans with all-purpose flour, rotating them to coat thoroughly. Tap out excess flour.
This dual-barrier method—butter plus parchment plus flour—ensures complete protection against sticking.
You’re now ready to pour your batter without worrying about adherence issues. Proper pan preparation takes just minutes but greatly impacts your final product’s presentation and structural integrity.
3. Mixing the Perfect Batter
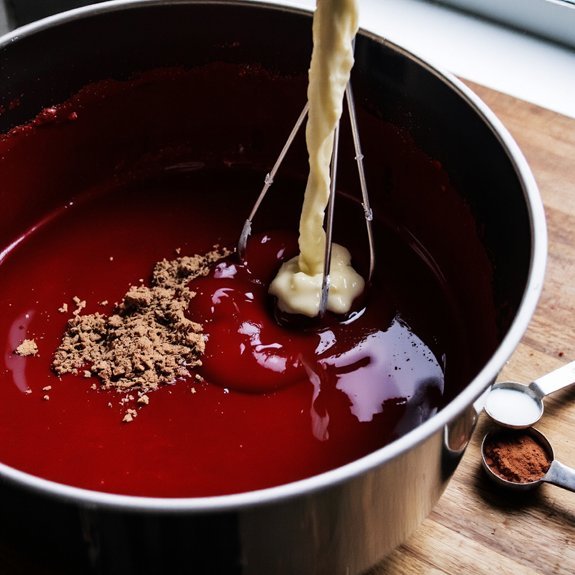
Combining your dry ingredients properly sets the foundation for a tender, evenly textured crumb. You’ll want to whisk together flour, cocoa powder, baking soda, and salt to guarantee even distribution and ideal aeration control. This whisking process incorporates air into your dry mixture, promoting lift during baking.
Next, you’ll cream butter and sugar together until light and fluffy—approximately 3-4 minutes. This step creates air pockets essential for texture.
Gradually add eggs, then alternate between wet and dry ingredients, starting and ending with dry components. This technique minimizes gluten development while maintaining structural integrity.
Alternate wet and dry ingredients starting and ending with dry to minimize gluten development while preserving structural integrity.
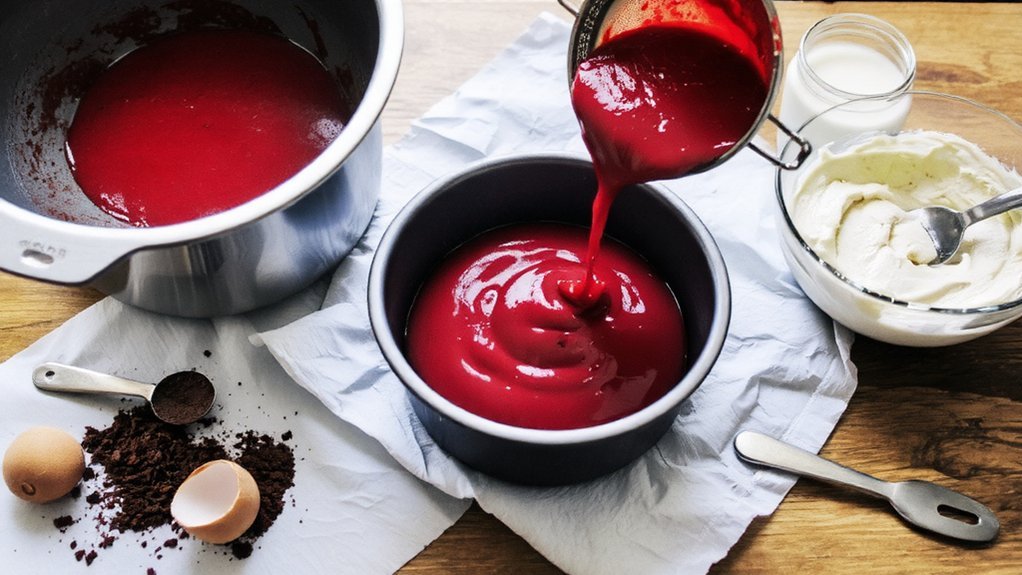
Add your buttermilk mixture and red food coloring last. Mix on low speed until just combined; overworking activates gluten development, resulting in a dense, tough cake.
Your batter should be smooth, homogeneous, and free from streaks.
4. Baking and Cooling Your Layers

You’ll want to preheat your oven to 350°F and maintain that temperature throughout the baking cycle to guarantee even heat distribution across your cake layers.
Your red velvet layers typically require 30-35 minutes of baking time; you can verify doneness by inserting a toothpick into the center, which should emerge with minimal crumbs.
Once you’ve removed the pans from the oven, you’ll let them cool at room temperature for 10 minutes before turning them out onto wire racks for complete cooling, which usually takes 1-2 hours before frosting.
Oven Temperature Matters
Proper oven calibration’s essential for achieving evenly baked layers with the ideal crumb structure.
You’ll want to preheat your oven to 350°F, allowing at least fifteen minutes for stabilization.
Use an independent oven thermometer to verify accuracy, as many built-in gauges drift substantially over time.
Convection differences matter considerably.
Standard ovens circulate heat passively, while convection models use fans for active air movement, reducing bake time by roughly twenty-five percent.
If you’re using convection, decrease your temperature to 325°F to prevent over-browning.
Position your racks in the center third, ensuring adequate airflow around each layer.
This placement maximizes energy efficiency while promoting uniform heat distribution.
Avoid opening the oven door during baking, as temperature fluctuations compromise your cake’s rise and texture.
Consistent heat maintains your desired crumb.
Timing Your Bake
Once your oven’s stabilized at the correct temperature, timing becomes your next critical control variable.
You’ll bake your red velvet layers for 30-35 minutes, depending on your pan dimensions and oven’s actual temperature variance.
Insert a wooden pick into the cake’s center—it should emerge with minimal crumbs, not wet batter.
Your timeline planning requires precision.
Remove layers immediately upon completion; allow them 10-15 minutes cooling in their pans before inverting onto wire racks.
This prevents structural collapse while promoting proper heat dissipation.
Complete cooling takes approximately two hours at room temperature.
This step’s essential—warm cake layers resist frosting application and compromise structural integrity.
Planning your serve timing backward guarantees peak freshness.
You can prepare layers 24 hours ahead, refrigerating them wrapped tightly, then frost immediately before service.
Cooling Process Essentials
Allowing your cake layers to cool properly guarantees structural stability and ideal frosting adhesion.
You’ll want to leave your red velvet cakes in their pans for 10-15 minutes after removal from the oven.
This initial cooling phase prevents structural collapse.
Next, you’ll invert the layers onto wire racks for complete cooling, which typically requires 2-3 hours at room temperature.
Proper airflow management during this stage is critical—position your racks away from direct sunlight and drafts to promote even cooling.
You must address condensation control by avoiding plastic covers.
Instead, allow ambient air circulation around your layers.
This prevents moisture accumulation that’d compromise your cake’s crumb structure and create frosting adhesion issues.
Don’t refrigerate or frost your layers until they’ve reached room temperature completely.
5. Making Cream Cheese Frosting
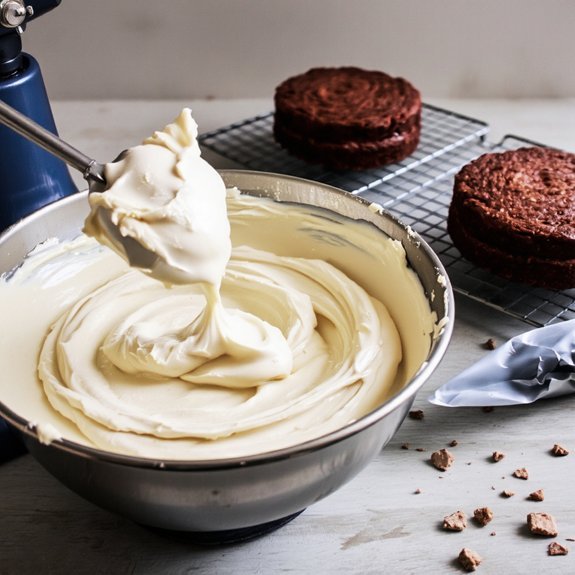
You’ll need to bring your cream cheese to 65-70°F before mixing to guarantee smooth incorporation and prevent lumps in your frosting.
Balance the tangy flavor profile by adjusting your powdered sugar ratios—typically 1 part cream cheese to 2-3 parts sugar—while tasting as you go.
Achieve the ideal consistency of 90-95 durometer hardness by controlling your mixing speed and duration; overworking will cause separation and deflate your frosting’s structure.
Softening Cream Cheese Properly
How should you approach softening cream cheese for ideal frosting consistency?
You’ll achieve excellent results by choosing one of these methods:
- Room temperature method: Remove cream cheese from refrigeration 30-45 minutes before use, allowing it to reach 68-70°F for smooth incorporation without graininess.
- Microwave technique: Cut cream cheese into cubes and microwave at 50% power for 10-15 second intervals, checking texture between pulses to prevent overheating and separation.
- Water bath approach: Submerge sealed cream cheese in 100°F water for 5-10 minutes, achieving uniform softness without compromising structural integrity.
Each method requires precision monitoring.
Properly softened cream cheese maintains its chemical stability, ensuring your frosting achieves the ideal spreadable consistency without becoming greasy or breaking.
This foundation liberates you to create professional results independently, without limitations or compromise on quality.
Balancing Sweetness and Tanginess
Once your cream cheese reaches ideal softness, the critical next step is balancing the tang of the cheese with sweetened components to achieve the signature red velvet frosting profile. You’ll manipulate palate psychology through precise ratios that complement the cake’s subtle spice contrasts.
| Ingredient | Ratio |
|---|---|
| Softened cream cheese | 8 oz |
| Unsalted butter | 4 oz |
| Powdered sugar | 2.5 cups |
Incorporate butter first, beating until homogeneous. Gradually add powdered sugar, maintaining a smooth consistency. The fat content from butter reduces perceived tanginess while enhancing mouthfeel. Your proportions should yield a frosting with acidic brightness balanced against sweetness—neither dominating. This equilibrium elevates the nuanced flavor profile that distinguishes red velvet from competing cake varieties, giving you complete control over the final sensory experience.
Achieving Perfect Frosting Consistency
Attaining the ideal frosting consistency requires meticulous temperature control and sequential incorporation of ingredients.
You’ll achieve superior results by maintaining your cream cheese and butter at 65-70°F before combining them.
Follow these critical steps:
- Blend softened cream cheese and butter for two minutes until you’ve achieved a homogeneous base
- Gradually incorporate powdered sugar in three additions, beating thirty seconds between each
- Add vanilla extract and perform stability testing by observing the frosting’s hold on your spatula
Room humidity directly impacts your frosting’s texture—higher moisture demands increased powdered sugar ratios.
You’ll notice the frosting reaching desired consistency when it holds stiff peaks yet remains spreadable.
This precision prevents sliding layers and guarantees your cake maintains structural integrity throughout display and consumption, giving you complete control over your baking outcome.
6. Assembling and Decorating Your Cake
The foundation of an aesthetically polished red velvet cake relies on proper assembly technique and strategic frosting application. You’ll want to insert cake dowels vertically through your bottom layer to prevent structural collapse when stacking. Apply a crumb coat first—a thin frosting layer that seals loose particles—then chill for thirty minutes before your final coat.
| Technique | Application |
|---|---|
| Dowel Placement | Insert 4-6 dowels, evenly spaced, trimmed flush with cake surface |
| Frosting Spread | Use offset spatula at 45-degree angle for smooth, even coverage |
| Fondant Smoothing | Warm smoothing tool slightly; work in circular motions to eliminate imperfections |
| Final Details | Pipe borders, add fresh berries, or apply metallic accents for visual impact |
You’re free to customize your design while maintaining structural integrity and visual balance.
Frequently Asked Questions
What’s the Difference Between Red Velvet and Chocolate Cake?
You’ll notice red velvet’s color origin stems from cocoa’s acidic reaction with buttermilk and vinegar, creating its distinctive crimson hue.
While chocolate cake relies on cocoa solids for robust flavor, red velvet achieves a delicate flavor balance through minimal cocoa content combined with cream cheese frosting.
The technical distinction lies in red velvet’s lower cocoa percentage—typically 1-2 tablespoons versus chocolate cake’s substantial cocoa measurements.
This precision differentiates the two desserts fundamentally.
Can I Make Red Velvet Cake Without Buttermilk?
You can absolutely substitute buttermilk in your red velvet cake recipe.
Mix one cup of whole milk with one tablespoon of white vinegar, then let it sit for five minutes to create sour milk.
Alternatively, you’ll achieve excellent results using plain yogurt as your yogurt substitute—use equal parts by volume.
Both methods provide the acidic component necessary for proper chemical reactions with baking soda, ensuring your cake rises correctly and develops that signature tender crumb structure you’re pursuing.
How Long Does Red Velvet Cake Stay Fresh?
You’ll find your red velvet cake maintains ideal freshness for 3-4 days when stored properly.
Refrigerator storage extends shelf life considerably compared to room temperature.
You should place your cake in an airtight container to prevent moisture loss and flavor degradation.
For maximum longevity, you can freeze unfrosted layers up to 30 days.
Frosted cakes require refrigeration and’ll stay fresh approximately 5 days when sealed properly.
Why Did My Cake Turn Out Dry?
Your red velvet cake turned out dry because you’ve likely overmixed the batter, which develops excessive gluten strands that trap moisture unevenly.
Additionally, your oven temperature may’ve been too high, causing rapid moisture evaporation before the crumb structure properly set.
You’ll want to mix until just combined and verify accurate oven calibration with a thermometer.
These factors critically impact final texture.
Can I Freeze Red Velvet Cake Layers?
You can absolutely freeze red velvet cake layers.
Wrap each layer tightly in plastic wrap, then aluminum foil to prevent freezer burn.
Store at 0°F for up to three months.
For best results, thaw layers at room temperature for two hours before frosting.
This wrapping method preserves moisture and flavor integrity.
Avoid thawing in the refrigerator, as condensation’ll compromise your cake’s texture.
Your frozen layers maintain professional-quality results when you follow these precise techniques.


Leave a Comment