Key Takeaways
- Prepare a shortbread base by combining flour, sugar, and salt, then cutting in cold butter until breadcrumb texture forms before pre-baking.
- Select ripe raspberries, pat them dry, and distribute evenly across the pre-baked base, pressing gently for consistent spacing and even flavor.
- Create a streusel topping by mixing flour, oats, brown sugar, and cold butter until resembling coarse breadcrumbs, maintaining a 1:1 flour-to-oats ratio.
- Bake until the streusel turns light golden-brown (25–30 minutes), with the filling setting while retaining slight moisture underneath for optimal texture.
- Cool completely for at least two hours, refrigerate for one additional hour, then cut into 2-inch squares using a hot knife for clean edges.
Gathering Your Ingredients
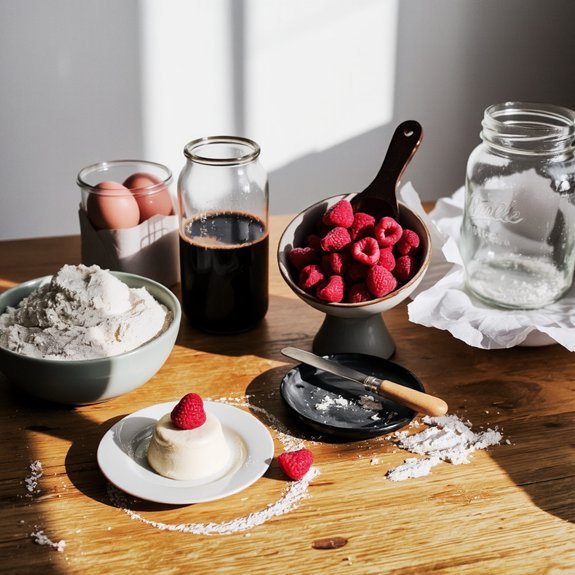
Before you start mixing, gather your ingredients: two cups all-purpose flour, one cup granulated sugar, one half cup unsalted butter (softened), two large eggs,
Gather your ingredients: two cups flour, one cup sugar, half cup softened butter, and two large eggs.
one teaspoon vanilla extract, one and one half teaspoons baking powder, one quarter teaspoon salt, and two cups fresh or frozen raspberries.
You’ll achieve superior results through budget shopping at farmers’ markets or discount bulk retailers. Consider organic sourcing for butter and eggs—you’re investing in quality fats and proteins that directly impact texture and flavor. Select firm raspberries without mushiness; frozen berries work equally well if you’re prioritizing cost-effectiveness.
Ensure your butter’s truly softened to room temperature for proper creaming. Room-temperature eggs incorporate more smoothly into your batter. Measure your dry ingredients separately using the spoon-and-level method for accuracy. Having everything prepped before mixing guarantees efficient, mistake-free baking.
2. Preparing Your Baking Pan
You’ll want to select a 9×13-inch baking pan, as this size guarantees even baking and proper bar thickness for your raspberry filling.
Line your pan with parchment paper, allowing the edges to extend slightly over the sides for easy removal, then lightly grease the paper with butter or cooking spray.
These preparation steps prevent sticking and create clean, defined edges on your finished bars.
Choosing the Right Pan
Since raspberry bars require even baking and clean edges, an 8×8-inch or 9×9-inch square metal baking pan is essential for ideal results.
Metal conducts heat more efficiently than glass or ceramic, ensuring uniform browning on all sides.
When considering material comparison, you’ll find that dark metal pans bake faster than light-colored ones, potentially requiring temperature adjustments.
Glass pans heat more slowly but retain warmth longer, which can affect your bars’ texture.
For size selection, avoid oversized pans that spread your batter too thin, compromising moisture and structure.
The standard square dimensions you’ve chosen provide appropriate depth for layered raspberry bars with firm bases and moist filling.
Line your chosen pan with parchment paper for effortless removal and clean presentation.
Lining and Greasing Techniques
Proper pan preparation sets the foundation for successful removal and presentation of your bars.
You’ll want to choose between parchment paper or silicone liners for ideal lining sustainability—both options eliminate waste while ensuring easy extraction.
For parchment, cut sheets to fit your pan’s dimensions, allowing slight overhang on two sides for convenient lifting.
Grease chemistry matters when you’re skipping liners.
Use butter or neutral oil, applying a thin, even coat across all surfaces.
This prevents sticking without adding excess fat that compromises texture.
For maximum control, combine methods: line your pan first, then lightly grease the parchment.
This dual approach guarantees your raspberry bars release cleanly, maintaining their structural integrity while giving you complete freedom in your baking process.
3. Making the Shortbread Base
You’ll start by combining your dry ingredients—flour, sugar, and salt—in a medium bowl, whisking them together until evenly distributed.
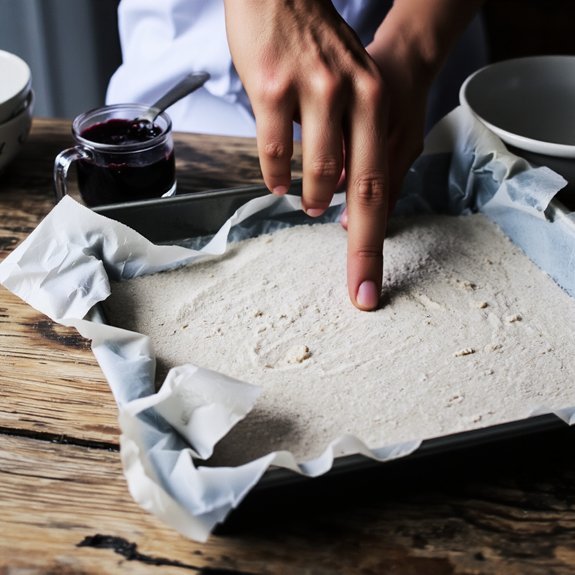
Press this mixture firmly and evenly into your prepared pan, working from the center outward to create a compact, uniform base layer. Use the bottom of a measuring cup or your fingertips to guarantee consistent density throughout, as this foundation supports your raspberry topping.
Mixing Dry Ingredients
Combine 2 cups all-purpose flour, ¾ cup granulated sugar, and ½ teaspoon salt in a medium bowl. These ingredient ratios create the perfect balance for your shortbread base.
Use the sifting technique to aerate your flour before measuring. This prevents compaction and promotes even distribution throughout your mixture. You’ll want to:
- Sift flour directly into your bowl to eliminate lumps and incorporate air
- Whisk together sugar and salt separately, breaking up any clumps
- Fold dry ingredients together using a spatula with deliberate, gentle strokes
The precision of your dry ingredient preparation determines your bars’ texture and structure. Don’t rush this step—proper mixing develops the foundation for a buttery, crumbly shortbread that holds up beautifully when topped with raspberries.
Your attention to detail here guarantees superior results.
Pressing Into Pan
With your dry ingredients properly mixed, it’s time to incorporate the butter and press this foundation into your baking pan.
Cut the cold butter into small cubes and work it into the flour mixture using your fingertips until the texture resembles coarse breadcrumbs.
This technique guarantees even fat distribution for ideal shortbread structure.
Transfer the mixture into your greased 9×13-inch pan.
Using proper hand ergonomics, position your palms flat and apply consistent pressure patterns across the entire surface.
Work methodically from the center outward, pressing firmly to create an even, compact layer approximately one-quarter inch thick.
Pay particular attention to the corners and edges, maintaining uniform density throughout.
Your base must be level and well-compacted to support the raspberry filling and topping layers effectively.
4. Baking the Foundation Layer
Pressing your buttery crust mixture firmly into the prepared pan creates an even, compact base that’ll support the raspberry filling without shifting during baking.
Bake this foundation layer at 350°F for 12-15 minutes until it achieves light golden color.
Oven calibration matters here—verify your temperature with an independent thermometer to guarantee proper Maillard reaction development.
The texture science behind this step is critical:
- The butter melts completely, binding flour and sugar into structural integrity
- Heat causes starches to gelatinize, creating a firm, non-crumbly foundation
- Browning develops nutty flavors that complement tart raspberries
This pre-baking step prevents soggy bottoms by setting the crust’s crumb structure before moisture from the filling penetrates.
Remove when edges show color but the center remains pale—overcooking sacrifices tender crumb for hardness.
Your timing directly impacts the final bar’s textural balance.
5. Selecting and Preparing the Raspberries
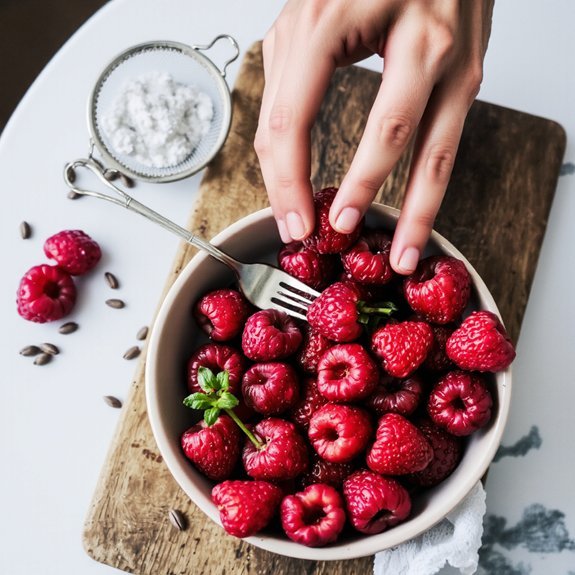
Selecting raspberries at peak ripeness—when they’re deeply colored, fragrant, and yield slightly to gentle pressure—determines your bars’ flavor intensity and texture. You’ll want to inspect each berry for ripeness indicators like uniform pigmentation and a subtle give when squeezed.
| Variety | Flavor Profile | Best Use |
|---|---|---|
| Red | Bright, tart | Traditional bars |
| Black | Deep, earthy | Rich depth |
| Golden | Sweet, mild | Subtle notes |
Varietal differences markedly impact your final product’s character. You’re not bound by convention—experiment with any combination that appeals to you. Gently rinse your selected berries and pat them completely dry to prevent excess moisture from compromising your bars’ structure. You’ll achieve ideal results when you prioritize quality fruit selection and proper preparation techniques.
6. Spreading the Raspberry Filling
Once your raspberries are prepped and dried, you’re ready to distribute them evenly across your base layer.
You’ll want to work quickly to maintain ideal texture and prevent juice from saturating your crust prematurely.
Apply your filling with deliberate precision:
- Press raspberries gently into the base, maintaining consistent spacing for layer symmetry
- Use swirl techniques with a spatula to distribute any berry juices across the surface uniformly
- Reserve the finest berries for the top layer to achieve visual appeal and professional presentation
Work methodically across the entire surface, ensuring no bare patches remain.
Your goal is achieving both structural integrity and aesthetic balance.
The even distribution prevents soggy spots while guaranteeing that every bite delivers consistent raspberry flavor.
This preparation step determines your final bars’ quality, so don’t rush the process.
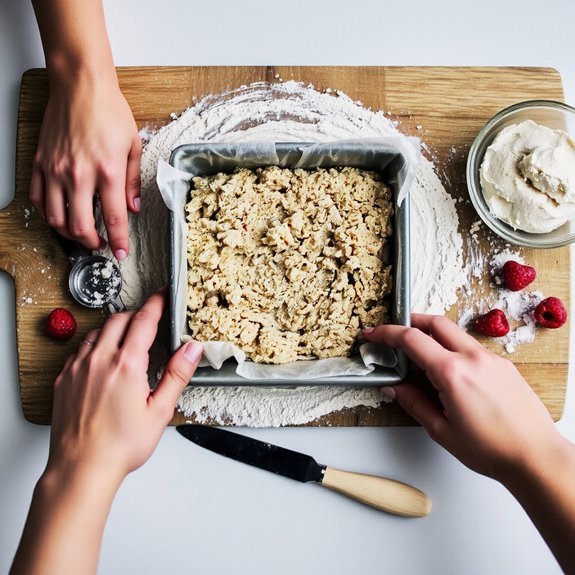
7. Creating the Streusel Topping
Layering your crumb topping requires combining flour, oats, brown sugar, butter, and a pinch of salt into a cohesive mixture that’ll bake into golden, crispy clusters.
Use a 1:1 ratio of flour to oats for ideal texture, ensuring your butter’s cold so it creates distinct crumbles rather than a paste.
Consider spice variations like cinnamon or nutmeg to complement your raspberry filling’s tartness.
For fat substitutions, coconut oil or refined coconut butter work effectively, though they’ll produce slightly different browning patterns than traditional butter.
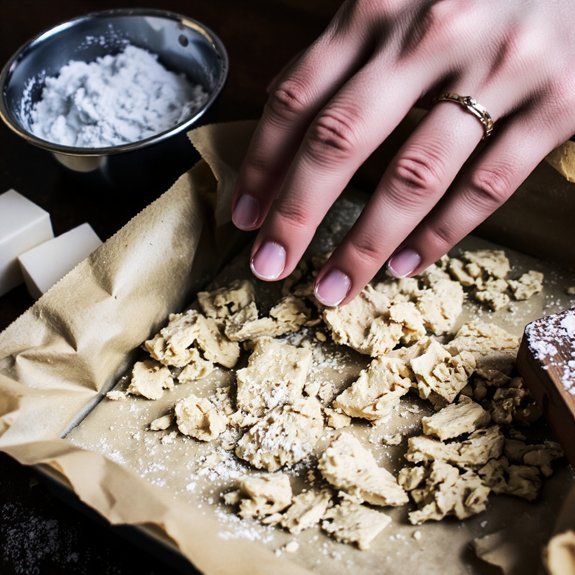
Cut your cold butter into quarter-inch cubes and distribute evenly throughout your dry ingredients.
Using your fingertips, work the mixture until it resembles coarse breadcrumbs—roughly two to three minutes.
Avoid overworking; you’re building texture, not dough. Scatter this topping evenly across your raspberry layer before baking.
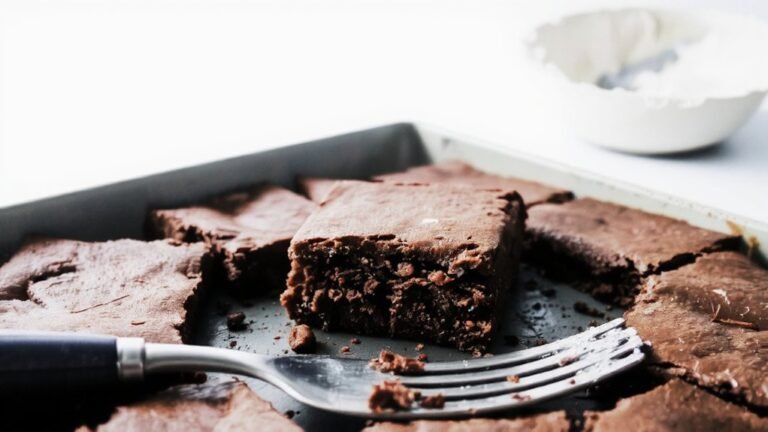
8. Baking Until Golden
You’ll want to monitor the top layer closely during the final minutes of baking, watching for a light golden-brown color that indicates the streusel’s butter and oats are properly caramelized. Test for doneness by inserting a toothpick into the raspberry filling—it should meet slight resistance but emerge mostly clean, ensuring the cake base has set without overbaking.
Once golden, you’ll transfer the pan to a cooling rack where the bars must rest for at least two hours before cutting, allowing the filling to firm up and the structure to stabilize.
Monitoring the Top Layer
As the bars bake, the topping’s color transformation signals their readiness for removal from the oven.
You’ll want to watch for specific visual cues that indicate perfect doneness.
Monitor these indicators:
- Golden-brown hue: The raspberry and streusel topping should shift from pale to warm golden brown, typically around 25-30 minutes
- Surface texture: The topping firms up noticeably, losing its wet appearance while maintaining slight moisture beneath
- Edge browning: The bars’ perimeter darkens slightly before the center, signaling even heat distribution
You’re aiming for a delicate balance—a crispy exterior protecting the jammy filling underneath.
Don’t overbake, as this dries out your bars.
Trust your visual assessment over timing alone, since oven variations matter.
Remove them when the surface feels set but yields slightly to gentle pressure.
Testing for Doneness
How do you know when your raspberry bars have reached perfect doneness?
Watch for key appearance cues: the edges should turn golden brown and pull slightly from the pan’s sides, while the center maintains a light golden hue.
The topping shouldn’t appear wet or glossy.
Aroma indicators matter equally.
When fully baked, you’ll detect a rich, toasted butter fragrance mingling with warm raspberries—a signal that the filling’s sugars have caramelized properly and the crust has developed its nutty complexity.
Insert a toothpick into the center; it should emerge with just a few moist crumbs clinging to it, not wet batter.
The bars should feel set yet slightly yielding when you gently press the surface.
Remove them from the oven immediately upon achieving these markers to prevent overbaking, which compromises texture and flavor complexity.
Cooling on the Rack
Once you’ve removed the raspberry bars from the oven, resist the urge to cut into them immediately.
You’re in control here—patience yields superior results.
Let your bars cool on the wire rack for at least 30 minutes.
This critical step allows the filling to set properly and prevents a crumbly mess.
Optimize your cooling process:
- Position the rack in a well-ventilated area to promote even airflow tips and accelerate cooling
- Avoid condensation by keeping the bars uncovered during this phase
- Maintain ambient room temperature; don’t refrigerate prematurely
The raspberry filling needs time to firm up completely.
You’ll notice the bars becoming more structured as they cool.
Once thoroughly cooled, you’ll achieve clean cuts with minimal filling leakage.
This disciplined approach guarantees professional-quality results—bars that look as impressive as they taste.
9. Cooling and Setting
After you’ve removed the raspberry bars from the oven, they’ll require patience to set properly—don’t cut them while they’re still hot, as the filling won’t have firmed enough to yield clean edges.
Let the bars cool completely on the rack for at least two hours.
This chill time allows the raspberry layer to gel and the buttery crust to solidify.
Once cooled, perform a firmness check by gently pressing the surface with your finger.
You’ll notice resistance when the filling’s properly set.
For best results, refrigerate the entire pan for an additional hour before cutting.
Use a sharp knife dipped in hot water, wiping between each slice, to guarantee clean, professional-looking portions that showcase the distinct layers you’ve carefully constructed.
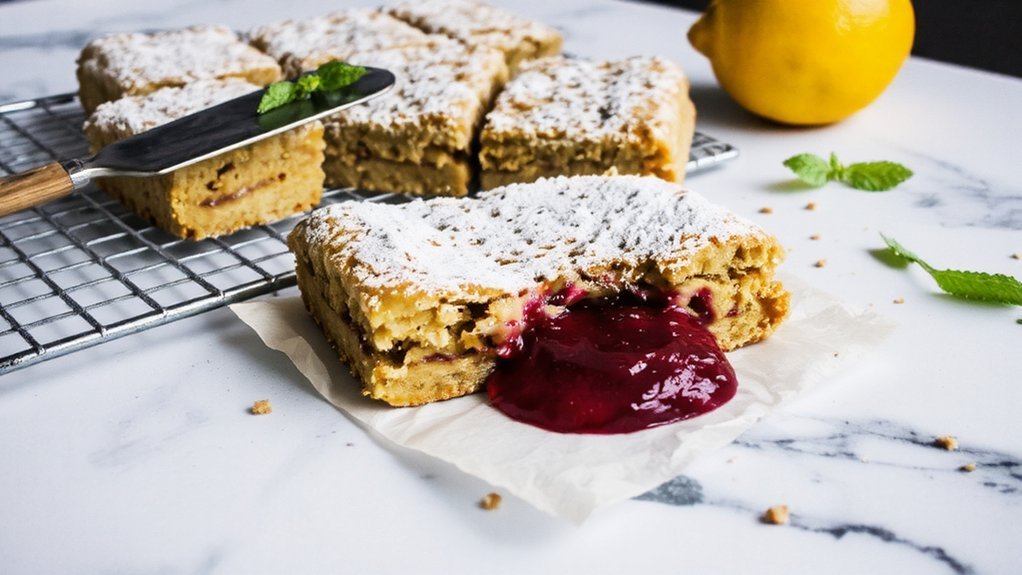
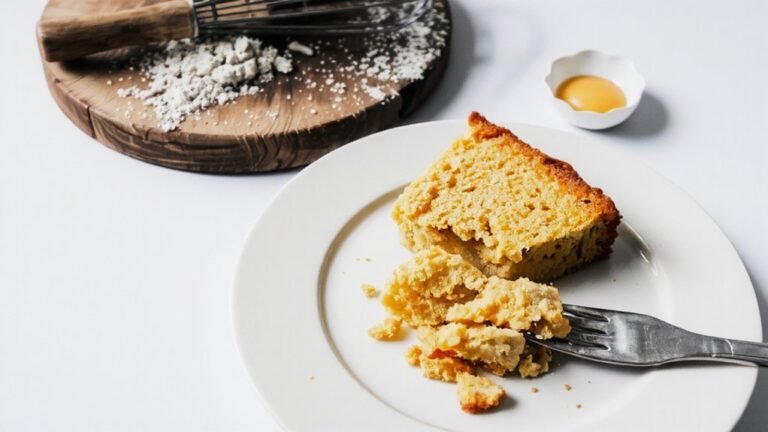
10. Cutting and Serving Your Bars
With your raspberry bars now fully set and chilled, you’re ready to transform them into individual servings.
Use a sharp knife dipped in hot water between cuts for clean edges that showcase the distinct layers.
For ideal plating presentation:
- Cut bars into 2-inch squares, wiping your blade between each cut
- Arrange on white ceramic plates to highlight the vibrant raspberry filling
- Dust lightly with powdered sugar for visual contrast
Your bars pair beautifully with beverage pairings like Earl Grey tea, which complements the tartness of raspberries, or cold milk for a classic approach.
Serve immediately after cutting to preserve the crust’s structural integrity and the filling’s fresh flavor profile.
Store remaining bars refrigerated in an airtight container for up to five days.
Frequently Asked Questions
Can I Substitute Frozen Raspberries for Fresh Raspberries in This Recipe?
You can absolutely substitute frozen raspberries for fresh ones.
Thaw them completely and drain excess liquid to prevent soggy bars. You’ll notice texture differences—frozen berries break down more easily, creating a slightly softer filling.
Pat them dry with paper towels before adding to your batter. This substitution won’t compromise your bars’ integrity; you’ll maintain excellent flavor while gaining convenience and year-round availability.
How Long Do Raspberry Bars Stay Fresh When Stored in an Airtight Container?
You’ll keep your raspberry bars fresh for up to five days in an airtight container at room temperature.
For extended storage duration, refrigerate them for up to two weeks. Check freshness indicators like texture and aroma—they’ll lose their crispy crust quality and become softer over time.
You’re free to freeze them for three months, which preserves the precise raspberry flavor and structural integrity. Thaw at room temperature before serving for best results.
Can I Make Raspberry Bars Ahead of Time and Freeze Them?
Yes, you can absolutely freeze your raspberry bars for future enjoyment. Wrap them individually in parchment paper, then place them in airtight freezer containers or heavy-duty freezer bags.
Use clear labeling tips—mark the contents and freezing date for easy identification. This packaging method protects against freezer burn and maintains texture.
They’ll stay fresh frozen for up to three months. Thaw at room temperature before serving for best flavor and consistency.
What’s the Best Way to Prevent the Bars From Becoming Too Soggy?
You’ll prevent sogginess by blind baking your crust until it’s golden—this creates a moisture barrier.
Coat your raspberries lightly with flour before layering; it absorbs excess juice.
Don’t overfill with berries, and make sure your filling’s consistency isn’t too wet.
Cool the bars completely before cutting and storing. These techniques give you crisp, structurally sound bars that won’t deteriorate, maintaining the independence of each layer’s texture and integrity.
Can I Use a Different Type of Berry Instead of Raspberries?
You can absolutely make berry substitutions in your bars. Blackberries, blueberries, and strawberries all work well.
Consider your flavor pairings carefully—blackberries pair beautifully with vanilla or almond, while blueberries complement lemon. Strawberries shine with orange zest.
You’ll want to match the berry’s moisture content to your recipe; adjust liquid ingredients accordingly. This flexibility lets you create customized bars that suit your taste preferences and seasonal availability perfectly.


Leave a Comment