Key Takeaways
- Select pure pumpkin puree (single ingredient), combine with sugar, eggs, cream, and toasted spices for filling.
- Prepare pie crust by mixing flour, butter, and shortening; refrigerate dough disk at least one hour before rolling.
- Preheat oven to 425°F for 15 minutes, then reduce to 350°F and bake 40–50 minutes until center wobbles slightly.
- Check doneness with instant-read thermometer (170–175°F) and knife test one inch from edge for clean emergence.
- Cool pie on wire rack for two hours minimum; refrigerate before serving to set custard fully.
Selecting Quality Pumpkin Puree

Start by examining the ingredient label on canned pumpkin to verify you’re buying pure pumpkin puree, not pumpkin pie filling, which contains added sugars and spices.
Look for a single ingredient: pumpkin.
This label reading guarantees you maintain complete control over your pie’s flavor profile.
Consider farm sourcing when possible.
Local farmers’ markets and specialty grocers often stock pure pumpkin puree from transparent sources, giving you confidence in quality and freshness.
Check the texture—quality puree should be dense and smooth, without separation or excess liquid.
Avoid cans with dents or signs of damage, which compromise product integrity.
Store unopened cans in cool, dark conditions.
Once opened, transfer unused puree to airtight containers and refrigerate for up to five days, or freeze for extended use.
Gathering Your Ingredients and Tools
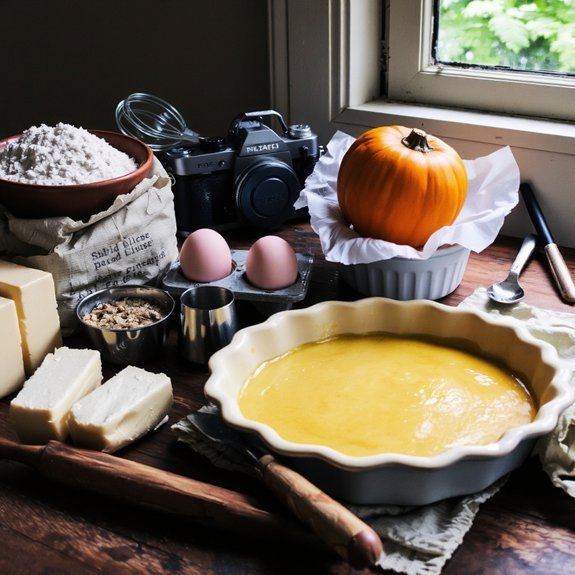
You’ll need to gather your essential pumpkin pie ingredients—pumpkin puree, eggs, sweetened condensed milk, cinnamon, nutmeg, ginger, and cloves—along with your pie crust and a mixing bowl.
Assemble your baking equipment, including a 9-inch pie dish, measuring cups and spoons, a whisk or electric mixer, and a baking sheet for the oven rack.
Clear and organize your workspace so you can move efficiently between ingredient prep, mixing, and transferring your filling to the crust.
Essential Pumpkin Pie Ingredients
Several key ingredients form the foundation of a successful pumpkin pie: one 15-ounce can of pumpkin puree (or 1¾ cups fresh pumpkin puree), ¾ cup granulated sugar, 1 teaspoon ground cinnamon, ½ teaspoon ground ginger, ¼ teaspoon ground cloves, ½ teaspoon salt, 2 large eggs, and 1 cup heavy cream or evaporated milk.
You’ll also need a 9-inch unbaked pie crust.
Understanding ingredient origins enhances your baking knowledge. Pumpkin puree comes from sugar pumpkins, while spices derive from various global sources.
Consider allergen alternatives: replace eggs with flax or aquafaba for binding, use coconut cream instead of dairy, and substitute cane sugar with coconut sugar.
These substitutions maintain the pie’s structural integrity and flavor profile while accommodating dietary restrictions.
Gather all ingredients before beginning your preparation process.
Baking Equipment You’ll Need
Before mixing your filling, assemble the essential tools that’ll streamline your baking process: a 9-inch pie dish (glass or ceramic preferred for even heat distribution), a mixing bowl large enough for combining all ingredients without splashing, a whisk or electric mixer for incorporating eggs and cream smoothly, measuring cups and spoons for precise quantities.
A rubber spatula for scraping bowl sides, and a fork or pastry cutter for pricking the pie crust’s bottom.
- Dough docker – creates uniform perforations across your crust, preventing air pockets and bubbling
- Pastry torch – delivers controlled heat for finishing crust edges with golden-brown perfection
- Instant-read thermometer – guarantees your filling reaches 170°F for proper set
- Oven thermometer – verifies accurate baking temperature for consistent results
You’ll take command of your baking outcome by having these instruments ready before you begin.
Preparing Your Workspace
Gathering your ingredients and tools creates the foundation for seamless baking, so organize everything within arm’s reach of your workspace.
Arrange your pumpkin puree, eggs, condensed milk, sugar, spices, and pie crust on your dominant side.
Position your mixing bowls, measuring cups, and whisk nearby for immediate access.
Check your lighting setup so you’ll spot lumps or inconsistencies in your filling.
Wipe down your counter with a clean cloth to prevent contamination.
Review your safety checklist: confirm your oven rack’s position, verify your oven temperature’s accuracy, and make sure pot holders are accessible.
Remove any clutter from your baking area to avoid accidents and spills.
This preparation eliminates mid-bake scrambling and lets you focus entirely on executing your pumpkin pie with precision and confidence.
Preparing the Perfect Pie Crust
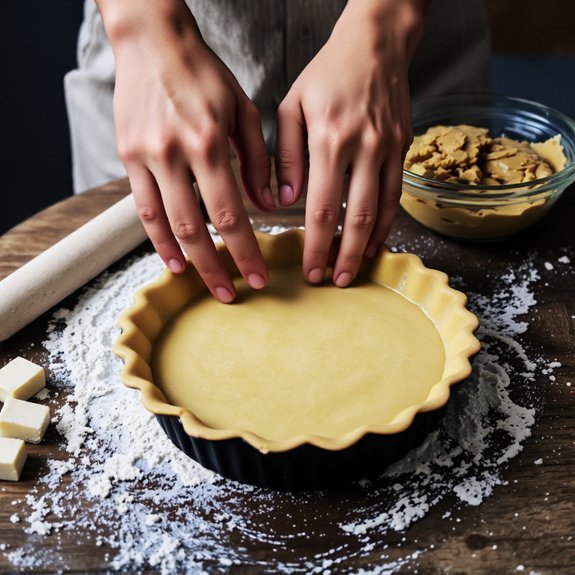
Making a reliable pie crust starts with combining 1¼ cups all-purpose flour, ½ teaspoon salt, and 1 tablespoon sugar in a medium bowl.
You’re building on centuries of baking tradition; historical origins trace back to medieval European pastry-making, with regional styles varying from buttery French versions to American all-shortening crusts.
Follow these steps for ideal results:
- Cut 6 tablespoons cold unsalted butter and 2 tablespoons vegetable shortening into pea-sized pieces
- Work the fat into your flour mixture using a pastry cutter until it resembles coarse breadcrumbs
- Add 3-4 tablespoons ice water gradually, mixing until the dough just holds together
- Form a disk, wrap in plastic, and refrigerate for at least one hour
This hands-on approach gives you complete control over your crust’s texture and flavor.
Creating the Ideal Filling Consistency
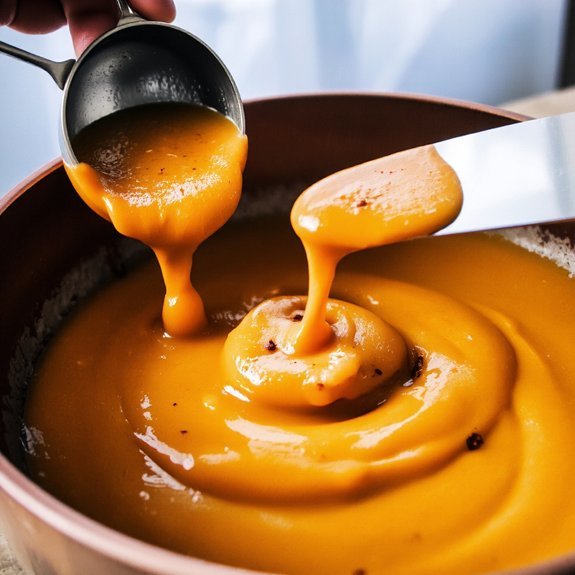
You’ll need to balance the pumpkin puree, eggs, and cream to achieve the right density—too much liquid creates a soupy filling, while too little yields a dense, dry result.
Control your filling’s temperature by whisking eggs and spices together before combining them with warm pumpkin puree, which prevents curdling and guarantees even cooking. Once you’ve mixed all ingredients, strain the filling through a fine-mesh sieve to eliminate lumps and create that silky, uniform consistency that bakes into a perfect custard-like texture.
Balancing Moisture and Density
Because pumpkin purée contains roughly 90% water, achieving the right filling consistency requires precise ingredient ratios and careful technique.
You’ll control moisture through strategic ingredient selection and heat management.
- Reduce water content — Simmer pumpkin purée on low heat for 10-15 minutes to trigger evaporation kinetics, concentrating flavor and thickening texture without burning.
- Balance eggs strategically — Use 2-3 eggs per cup of purée; protein denaturation during baking creates structural stability and prevents a soggy pie.
- Incorporate binders — Add cornstarch or tapioca starch (1-2 tablespoons) to absorb excess moisture while maintaining density.
- Adjust cream ratios — Use evaporated milk instead of heavy cream; it’s pre-concentrated and won’t oversaturate your filling.
These methods give you complete control over your pie’s final texture.
Temperature Control Techniques
How do temperature fluctuations during baking transform your filling’s texture? Precise oven calibration guarantees your pumpkin custard sets perfectly without cracking. You’ll need an oven thermometer to verify actual temperatures, as many ovens run 25°F off.
Probe placement matters critically—insert your thermometer into the pie’s center, avoiding the crust. Bake at 425°F for 15 minutes, then reduce to 350°F for 40-50 minutes until the filling reaches 175°F internally.
| Temperature (°F) | Texture Result | Baking Time |
|---|---|---|
| 325°F | Custard-soft | 55+ minutes |
| 350°F | Ideal creamy | 40-50 minutes |
| 375°F | Slightly firm | 35-40 minutes |
| 400°F | Dense, rubbery | 30-35 minutes |
| 425°F | Initial crust set | 15 minutes |
Your vigilance prevents overcooked, separated filling. Remove the pie when the center jiggles slightly—carryover cooking finishes it perfectly.
Mastering the Spice Blend

The foundation of authentic pumpkin pie lies in balancing cinnamon, nutmeg, ginger, and cloves—each spice contributing distinct warmth and complexity.
You’ll control your flavor profile by customizing ratios to suit your preferences.
- Toast whole spices in a dry skillet for 2-3 minutes to release volatile oils and deepen their character
- Grind toasted spices immediately using a dedicated spice grinder for maximum potency
- Combine 1.5 teaspoons cinnamon, 0.75 teaspoons nutmeg, 0.25 teaspoons ginger, and 0.125 teaspoons cloves as your baseline
- Adjust ratios based on your taste—increase ginger for heat, reduce cloves to avoid overpowering earthiness
This methodology guarantees you’re not bound by rigid recipes. You’ll create a spice blend that reflects your individual palate while maintaining the structural integrity your pie demands.
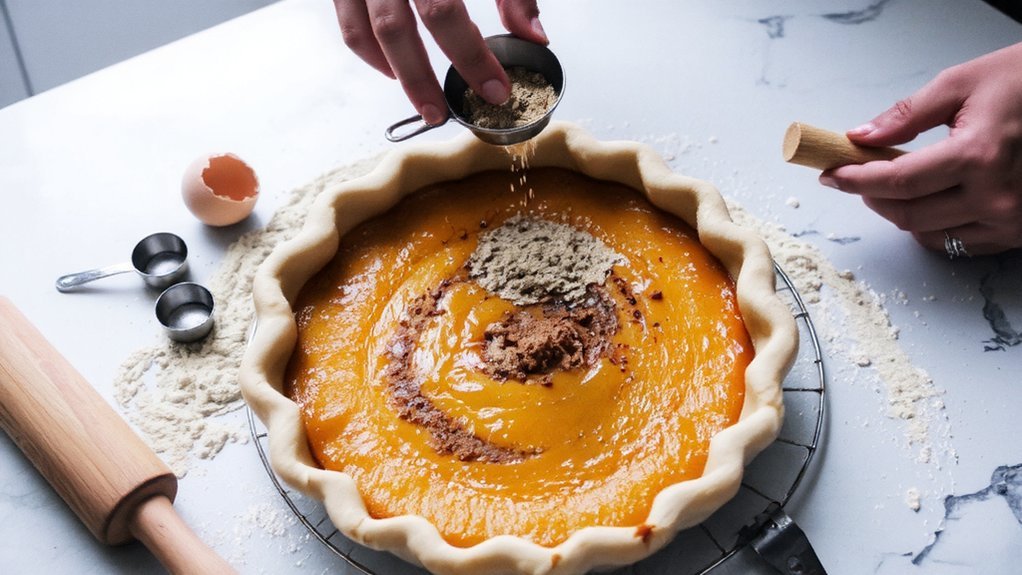
Assembling Your Pie
With your custom spice blend ready, you’ll now focus on combining ingredients and building your pie’s structural layers.
Start by whisking one 15-ounce can of pumpkin puree with three-quarters cup granulated sugar and your prepared spices.
Incorporate one teaspoon vanilla extract and one-half teaspoon salt.
Stir in one 12-ounce can evaporated milk until smooth.
Pour this filling into your unbaked pie crust.
Your assembly timeline should allocate ten minutes for mixing and five minutes for pouring.
Bake at 425°F for fifteen minutes, then reduce heat to 350°F for forty minutes until a knife inserted near the center comes out clean.
Cool completely before adding decorative stenciling with whipped cream or cinnamon dust for visual appeal.
Baking Techniques for Success
Once you’ve poured your filling into the crust, proper oven management becomes critical to achieving an evenly set pie.
Proper oven management is critical once your filling is poured into the crust for achieving an evenly set pie.
- Preheat your oven to 425°F, then reduce heat to 350°F after 15 minutes to prevent over-browning
- Position your rack in the lower third to guarantee the bottom crust bakes thoroughly without burning
- Watch for visual cues: the filling should jiggle slightly when gently shaken, not slosh around
- Use a pie shield or foil to protect edges if browning too quickly
Monitor your pie’s progress by checking the center—it should reach 165°F internally.
If your filling cracks extensively, troubleshooting tips include lowering oven temperature by 25°F for slower, gentler cooking.
Avoid opening the oven door frequently, as temperature fluctuations compromise your custard’s texture.
You’ll achieve ideal results through steady, attentive baking.
Testing for Doneness
Because your pumpkin pie’s custard continues cooking after you’ve removed it from the oven, you’ll need to pull it out while it still appears slightly underdone. Use visual cues to guide your timing: the filling should jiggle slightly when you gently shake the pie, with about a 2-inch circle of wobble at the center.
The edges’ll be set and firm to the touch.
Around 50-55 minutes, conduct aroma checks. You’ll detect a rich pumpkin fragrance intensifying—this indicates proper custard development.
Insert a knife one inch from the edge; it should emerge clean, confirming the outer custard’s set. The very center remaining soft ensures you’ll achieve creamy texture as residual heat completes the cooking process. Remove immediately when these indicators align. Let it cool completely before serving.
Cooling and Serving Your Masterpiece
After you’ve removed your pumpkin pie from the oven, resist the urge to slice it immediately—the custard’s internal temperature will continue rising as residual heat penetrates the filling, completing the cooking process you’ve carefully controlled.
You’re in command of the final steps:
- Cool on a wire rack for 2 hours at room temperature
- Refrigerate for at least 4 hours to set the custard completely
- Use a sharp knife dipped in hot water for clean slice technique between cuts
- Wipe your blade between slices to prevent dragging filling
For garnish ideas, consider whipped cream, candied pecans, or a cinnamon-sugar dusting.
You can serve chilled or at room temperature.
Store covered in your refrigerator for up to four days, maintaining the custard’s integrity and flavor profile.
Frequently Asked Questions
Can I Make Pumpkin Pie Ahead of Time, and How Should I Store It?
You’ve got two storage options.
Refrigerate your cooled pie up to four days in an airtight container.
For freezing instructions, wrap it tightly in plastic wrap and foil, storing it up to three months.
When reheating tips matter most, thaw overnight in your fridge, then warm at 350°F for fifteen minutes.
Skip reheating if you prefer it cold—your pie maintains its custard-pumpkin integrity either way, giving you complete control over your dessert timing.
What’s the Best Way to Prevent My Pie Crust From Becoming Soggy?
You’ll prevent sogginess by blind baking your crust first.
Prick the bottom with a fork, line it with parchment, and fill with pie weights.
Bake at 375°F for 12-15 minutes until set.
Then brush an egg wash coating across the entire interior—this creates a moisture barrier.
Let it cool slightly before pouring your pumpkin filling.
This two-step approach guarantees you’ll enjoy a crisp, structurally sound crust.
How Do I Fix a Pie Filling That’s Too Thick or Too Thin?
You’ll fix a thick filling by whisking in small cream increments until you’ve reached your desired consistency.
For thinning methods, gradually add whole milk or evaporated milk while stirring.
If your filling’s too thin, employ thickening techniques: mix cornstarch with cold water into a slurry, then whisk it in slowly over low heat.
Alternatively, simmer your filling uncovered for five to ten minutes, allowing excess moisture to evaporate naturally.
Can I Substitute Fresh Pumpkin Puree for Canned Pumpkin Puree Successfully?
Yes, you can substitute fresh pumpkin puree for canned, but you’ll need proper technique.
Select sugar pumpkin varieties—they’re sweeter than carving types.
Roast halved pumpkins at 350°F for 45-60 minutes until tender.
Scoop flesh, blend until smooth, then strain through cheesecloth to remove excess moisture.
Fresh puree contains more water than canned, so you’ll need to reduce it further or add extra thickening agents to achieve the right consistency for your pie filling.
Why Did My Pumpkin Pie Crack on Top During Baking?
Your pumpkin pie cracked because you’ve likely experienced oven hotspots causing uneven heating.
You’re overbaking the filling—it shouldn’t jiggle slightly at center when done.
Rapid cooling after removal intensifies cracking.
Prevent this by baking at precise 425°F for 15 minutes, then 350°F for 40-50 minutes. Let your pie cool gradually on the counter before refrigerating.
You’ll master this technique.


Leave a Comment