Key Takeaways
- Preheat oven to 400–450°F and verify temperature with an independent thermometer for accurate baking.
- Cut laminated dough into uniform portions by weight using a sharp knife on a cold surface.
- Apply egg wash (one egg whisked with water) and chill shaped pastries 30 minutes before baking.
- Place pastries on middle oven rack and avoid opening the door during the first 15 minutes.
- Bake at 400°F for 20–25 minutes (light golden) or 425°F for 15–20 minutes (deep golden).
Understanding Laminated Dough
Mastering puff pastry starts with understanding laminated dough, a technique that creates hundreds of delicate, flaky layers through strategic folding and butter incorporation.
Laminated dough creates hundreds of delicate, flaky layers through strategic folding and butter incorporation.
You’ll discover that dough microstructure depends on precise temperature control and methodical folding sequences.
Cold butter remains distinct from the dough rather than blending, ensuring those signature separations that puff during baking.
You’re working with a delicate balance—too warm and your butter melts prematurely; too cold and it cracks instead of laminating.
The process demands patience and precision.
Regional variations reflect local traditions and available ingredients.
French pâte feuilletée emphasizes European butter’s higher fat content, while other traditions adapt techniques to their climate and resources.
Understanding these fundamentals empowers you to manipulate the dough confidently and troubleshoot issues independently.
2. Gathering Your Ingredients
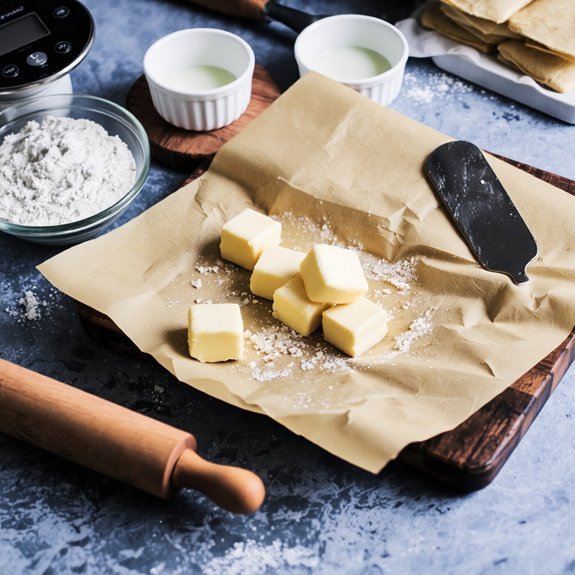
Before you fold your first batch of dough, you’ll need to gather just four essential ingredients: all-purpose flour, cold butter, salt, and water.
Measuring accuracy is non-negotiable—use a kitchen scale rather than cups to guarantee consistent results.
You’ll need 250 grams of flour, 200 grams of cold butter, 5 grams of salt, and 125 milliliters of water.
For allergen alternatives, you can substitute all-purpose flour with a gluten-free blend formulated for laminated doughs, though results may vary slightly.
Vegan bakers can replace butter with coconut oil or specialized vegan butter, maintaining the same cold-temperature requirements.
Keep all ingredients cold before starting. Your butter must be firm, straight from the refrigerator. This temperature control determines whether you’ll achieve those gorgeous, flaky layers that define exceptional puff pastry.
3. Making the Dough Base
Now that you’ve assembled your ingredients, you’ll combine them to create the foundational dough. Start by combining flour and salt distribution carefully—uneven salt creates weak spots in your lamination. Use your mixer’s low setting initially to blend dry ingredients thoroughly, then switch to medium speed when incorporating water and butter. This prevents overworking the gluten network while ensuring proper hydration.
| Step | Action | Mixer Setting |
|---|---|---|
| 1 | Combine flour and salt | Low |
| 2 | Add cold water gradually | Medium |
| 3 | Incorporate butter pieces | Medium |
| 4 | Mix until shaggy texture | Medium |
| 5 | Rest dough 30 minutes | Off |
You’ll notice the dough becoming cohesive without developing excessive elasticity. This restraint preserves your freedom to laminate effectively later. Cool the dough before proceeding—temperature control determines your final pastry’s quality and crispness.
4. Preparing the Butter Block
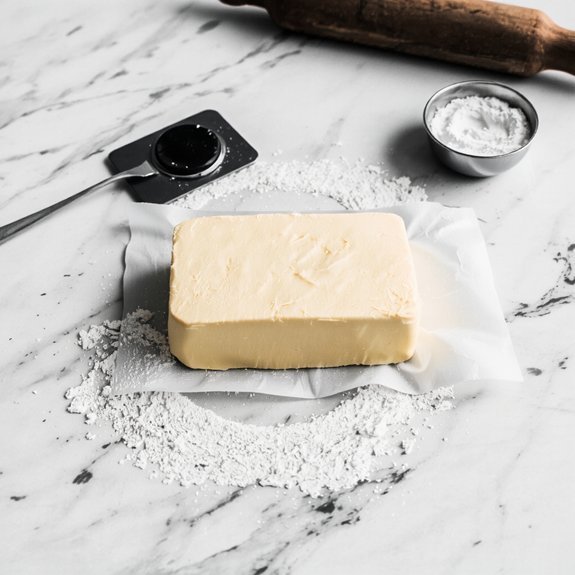
While your dough rests and cools, you’ll prepare the butter block that’ll create those signature flaky layers.
Start by selecting high-quality butter—European-style works best due to its higher fat content and lower water percentage.
You’ll need cold butter, ideally around 65-68°F, the same temperature as your dough for proper lamination.
For block assembly, pound softened butter between parchment sheets until you’ve formed a uniform square approximately ¼-inch thick.
This guarantees even distribution during folding.
The butter quality directly determines your pastry’s texture and rise; inferior butter won’t laminate properly, compromising those distinct layers you’re after.
Keep your butter block cold but pliable—too hard and it’ll crack; too soft and it’ll merge with the dough rather than create distinct sheets.
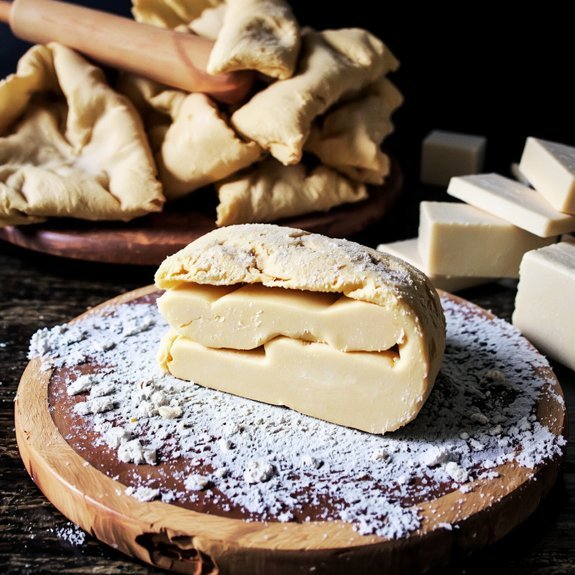
5. The Lamination Process
Once your butter block and dough reach the same temperature, you’ll begin the lamination process—the technique that creates puff pastry’s signature flaky layers.
The lamination process creates puff pastry’s signature flaky layers once butter and dough reach the same temperature.
You’ll fold the dough around the butter block, then repeatedly roll and fold it to create distinct layers.
Each fold doubles your layer count, so you’ll achieve hundreds of delicate sheets through successive turns.
You’ll control butter migration—the movement of butter into the dough—by maintaining consistent temperatures throughout.
Cold butter stays intact, creating separation; warm butter bleeds into dough, compromising layers.
Between folds, you’ll rest the dough in the refrigerator to relax gluten and reset butter firmness.
Many professionals now use machine lamination for consistency and efficiency.
Laminating machines maintain precise pressure and thickness, eliminating human variables.
Whether folding by hand or using equipment, you’ll complete four to six turns before final shaping.
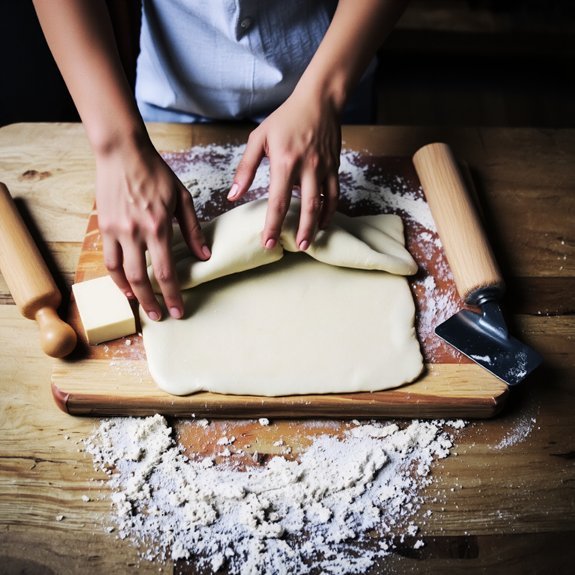
6. Folding and Turning Techniques
Mastering the fold determines your pastry’s success, as improper technique will trap air unevenly and create dense, uneven layers.
You’ll execute precise turns using controlled wrist motion to maintain consistent thickness throughout your dough.
Follow these essential folding techniques:
- Book Fold: Fold both edges toward the center, then fold in half—creating four layers. Make sure edge alignment remains exact to prevent uneven expansion.
- Letter Fold: Divide your dough into thirds, folding one section over the middle, then the opposite end on top. This generates six layers with proper lamination.
- Single Turn: Fold one edge to the center, then fold again in half. This creates four layers with minimal stress on your dough.
Rotate your dough ninety degrees between turns. Chill thoroughly between folds to maintain butter integrity and prevent sticking.
7. Resting and Chilling
You’ll find that resting allows your dough’s gluten to relax and the butter layers to firm up, which prevents shrinkage and guarantees proper separation during baking.
Maintain your dough between 35-40°F throughout the chilling process, as temperatures above 40°F soften the butter too much while colder temperatures make the dough brittle and difficult to fold.
Between each fold, you’ll need to chill your dough for at least 20-30 minutes—or longer if your kitchen’s warm—so the layers set before you perform the next turn.
Why Resting Matters
Because puff pastry’s characteristic flakiness depends entirely on the structural integrity of its butter layers, resting periods aren’t optional—they’re essential to the baking process.
You’ll find that adequate rest time directly impacts your final product’s quality and performance in the oven.
Resting serves three critical functions:
- Gluten relaxation – You’re allowing the dough’s gluten network to unwind, preventing shrinkage during baking and maintaining your desired shape.
- Flavor maturation – You’re permitting enzymatic activity that develops complex, nuanced tastes beyond raw dough’s one-dimensional profile.
- Moisture equilibration – You’re ensuring uniform hydration distribution throughout the laminated layers, guaranteeing consistent rise and texture.
You’ll achieve superior puff pastry by respecting these resting intervals.
Rushing this process compromises the structural engineering you’ve carefully built into your dough, undermining all previous efforts.
Optimal Chilling Temperatures
How do temperature fluctuations compromise the lamination you’ve meticulously constructed? Inconsistent chilling undermines your entire process.
You’ll want to maintain your fridge at precisely 35-40°F to keep butter firm without freezing it solid. Warmer temperatures cause butter to soften excessively, collapsing your delicate layers. Colder settings risk brittleness.
Check your fridge calibration regularly—don’t trust its dial. Use a dedicated appliance thermometer for accuracy.
Position sensor placement at eye level on a middle shelf, away from vents and exterior walls where temperature swings occur. This placement gives you the most reliable reading of your actual working environment.
Your dough needs consistency. Between folds, chill for 20-30 minutes. This discipline separates amateur results from professional-grade pastry.
Timing Between Folds
The resting periods between folds aren’t arbitrary—they’re essential intervals where gluten relaxes and butter solidifies back into distinct layers.
You’ll want to chill your dough for 20-30 minutes between each fold cycle.
- Monitor humidity effects closely—damp environments require longer rest periods, while dry conditions may necessitate shorter intervals to prevent over-drying
- Use clock alternatives like observing butter firmness through the dough’s surface rather than relying solely on timers
- Track your progress by checking the dough’s temperature with a probe thermometer, ensuring it stays between 50-60°F
This disciplined approach prevents butter from bleeding into the dough, which compromises those coveted flaky layers.
Don’t rush these intervals—they’re where your lamination succeeds or fails.
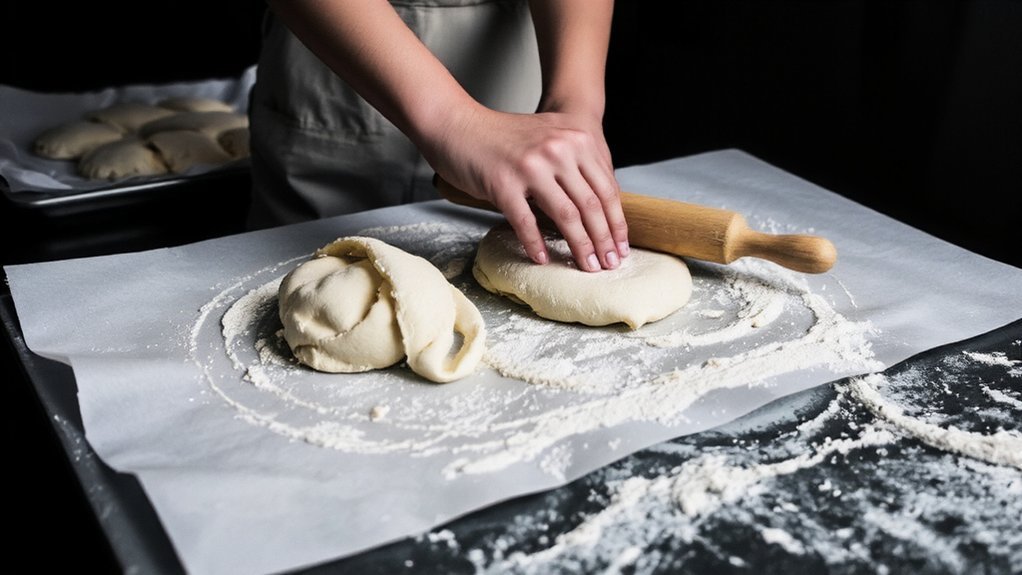
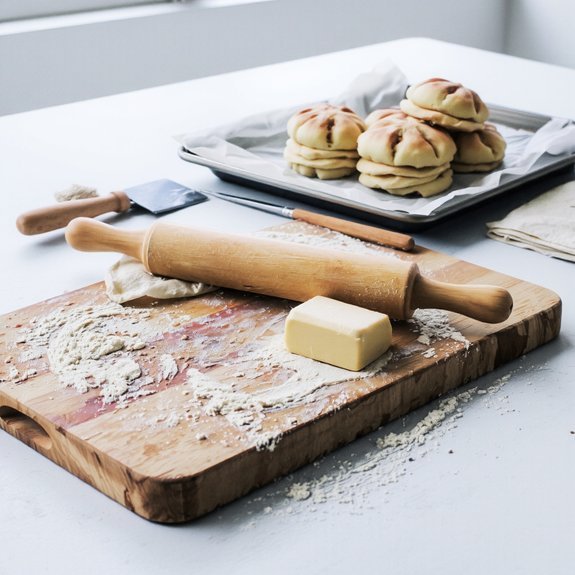
8. Shaping and Preparing for Baking
Now that you’ve adequately rested your dough, you’ll cut and portion it into your desired shapes—whether squares, rectangles, or triangles—using a sharp knife or pastry cutter to guarantee clean edges that promote even puffing.
You’ll then employ rolling and layering techniques, carefully folding and turning the dough to reinforce lamination, or simply arrange your portions on parchment-lined baking sheets depending on your recipe’s requirements.
Finally, you’ll apply a thin egg wash to the surface, which creates that signature golden-brown sheen, and optionally add finishing touches like coarse sugar, seeds, or herbs before transferring to the oven.
Cutting and Portioning Dough
Portioning your laminated dough requires precision and the right tools to guarantee even baking and consistent results.
Measurement consistency directly impacts how your pastries rise and brown uniformly throughout the batch.
- Use a sharp knife or pastry wheel to cut clean edges without compressing layers, preserving the lamination structure that creates flaky texture.
- Measure portions by weight rather than sight—this guarantees uniform sizing and prevents waste minimization concerns from uneven pieces baking at different rates.
- Work quickly on a cold surface to maintain dough temperature, preventing butter from softening and compromising your carefully built layers.
Mark your cutting guide with a ruler beforehand.
Chill the dough between cuts if it begins warming.
Your freedom to create consistent, professional-quality pastries depends on this foundational precision.
Rolling and Layering Techniques
Mastering lamination through proper rolling and layering techniques guarantees you’ll achieve those signature flaky, delicate layers that define exceptional puff pastry.
You’ll maintain consistent rolling direction—always forward, never sideways—to preserve your butter distribution and prevent tearing. Work on a cool surface texture to prevent sticking and butter breakdown. Each turn requires precise pressure: moderate force flattens dough uniformly without compressing your delicate layers.
| Technique | Purpose | Result |
|---|---|---|
| Four-fold turn | Maximum layering efficiency | 256+ layers per cycle |
| Book fold | Controlled lamination | Even butter integration |
| Quarter-turn rest | Gluten relaxation | Prevents shrinkage |
You’ll rotate your dough ninety degrees between turns, chilling thoroughly after each fold. Monitor your surface texture—it’ll tell you when butter’s beginning to seep through. Stop immediately if you notice spotting. This disciplined approach gives you complete control over your pastry’s final structure and rise.
Egg Wash and Final Touches
Once you’ve completed your lamination cycles and your dough’s rested properly.
You’ll shape your puff pastry into your desired forms—whether that’s vol-au-vents, palmiers, or Danish pastries.
Before baking, you’ll apply finishing touches that elevate both appearance and flavor:
- Herb eggwash application: Whisk one egg with a tablespoon of water, then brush evenly across your shaped dough using a pastry brush. This creates that signature golden-brown exterior while allowing you to incorporate fresh herbs like thyme or rosemary directly into the wash.
- Seed topping placement: Sprinkle sesame, poppy, or flax seeds immediately after applying eggwash while it’s still tacky, ensuring superior adhesion and textural contrast.
- Temperature precision: Chill your prepared pastries for thirty minutes before baking, allowing the dough to set and preventing unwanted spreading in the oven.
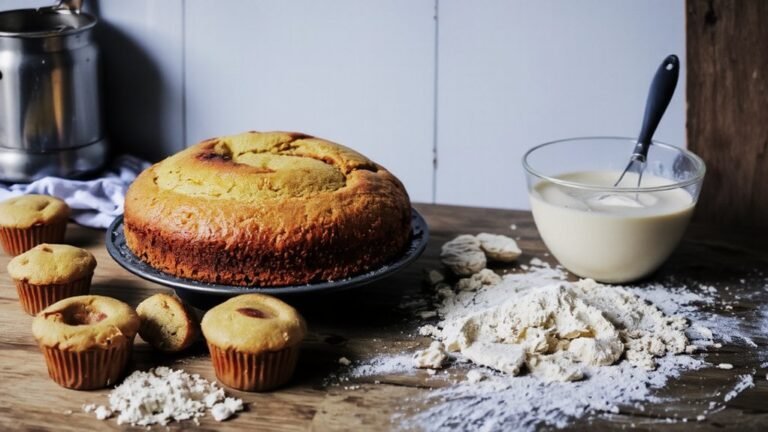
9. Baking to Golden Perfection
To achieve that coveted golden-brown exterior, you’ll need to monitor your oven temperature closely and time your bake precisely. Oven calibration is essential—use an independent thermometer to verify your oven’s actual temperature, as many units run hot or cold. Rack positioning matters considerably; place your pastry on the middle rack for even heat distribution and consistent browning.
| Temperature | Time | Result |
|---|---|---|
| 400°F | 20-25 min | Light golden |
| 425°F | 15-20 min | Deep golden |
| 450°F | 12-18 min | Dark caramelized |
Bake until the pastry achieves that crispy, flaky texture you’re after. Don’t open the oven door during the first 15 minutes—this releases steam critical for proper puffing. You’ve earned the freedom to enjoy perfectly baked, professional-quality pastry.
Frequently Asked Questions
Can I Make Puff Pastry Ahead and Freeze It for Later Use?
Yes, you can freeze puff pastry for later use. You’ll want to flash freeze your unbaked sheets on a baking tray for two hours, then vacuum seal them in airtight bags.
This prevents freezer burn and maintains quality. Store at zero degrees Fahrenheit for up to three months. When you’re ready to bake, you don’t need thawing—bake directly from frozen, adding a few extra minutes to your cooking time for ideal results.
What’s the Best Way to Prevent Puff Pastry From Shrinking During Baking?
You’ll prevent shrinkage by applying the docking technique—piercing your pastry with a fork to release steam evenly.
Don’t skip the chill technique; refrigerate your shaped dough for at least 30 minutes before baking.
You’ve got the freedom to work independently when you respect these foundational rules.
Cold dough maintains its structure, and proper docking promotes controlled expansion rather than chaotic shrinking during your bake.
How Do I Fix Puff Pastry That Didn’t Rise Properly?
You can rescue underdeveloped puff pastry by reintroducing steam during baking. Increase your oven’s humidity by placing a water-filled pan on the lower rack, boosting rise potential.
If the damage’s done, dough rework remains your best option—carefully separate layers, relaminate with cold butter, and chill thoroughly before rebaking. This technical approach restores proper stratification and lift, giving you complete control over your results.
Can I Substitute Butter With Margarine or Coconut Oil?
You can substitute butter with margarine or coconut oil, though you’ll experience significant trade-offs. Margarine compromises flavor impact and lamination quality since you’re sacrificing butter’s superior plasticity.
Coconut oil creates greasier results with health considerations favoring neither option. Butter’s precise melting point and water content structure puff pastry’s flaky layers.
If you’re seeking alternatives, you’re ultimately accepting diminished performance and taste that won’t rival traditional butter-based results.
Why Did My Puff Pastry Turn Out Greasy Instead of Flaky?
Your puff pastry turned greasy because you’ve likely overworked the dough, which broke down the butter layers and released excess fat.
Improper laminations—rushing folds, uneven thickness, or insufficient chilling between turns—prevent proper steam separation during baking.
You’re also probably using too much butter or not maintaining cold temperatures.
Control your technique: work quickly, chill thoroughly between folds, and keep ingredients cold.
These adjustments’ll give you that crispy, flaky texture you’re after.


Leave a Comment