Key Takeaways
- Preheat cast-iron skillet, melt butter with brown sugar until deep amber, then arrange pineapple rings in caramel.
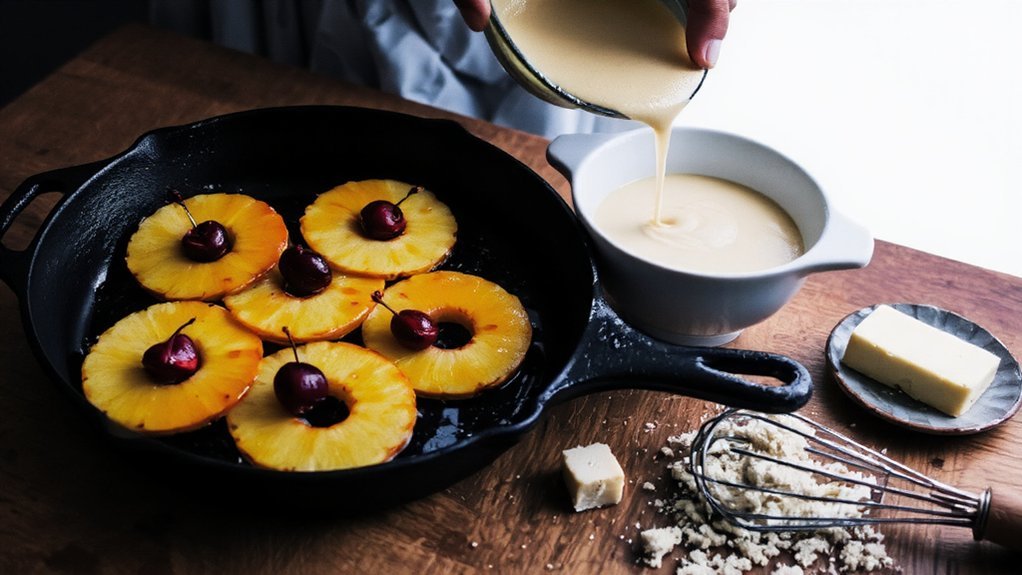
- Combine flour, baking powder, and salt; whisk eggs with sugar and vanilla, then fold wet into dry ingredients gently.
- Pour batter carefully over pineapple without disturbing fruit arrangement, then bake at 350°F for 35–40 minutes until golden.
- Cool for 5 minutes, loosen edges with knife, flip onto serving plate, then wait 5 minutes before removing pan.
- Serve at room temperature with sharp serrated knife; store covered at room temperature for 2 days or refrigerate 5 days.
Gathering Your Ingredients and Equipment
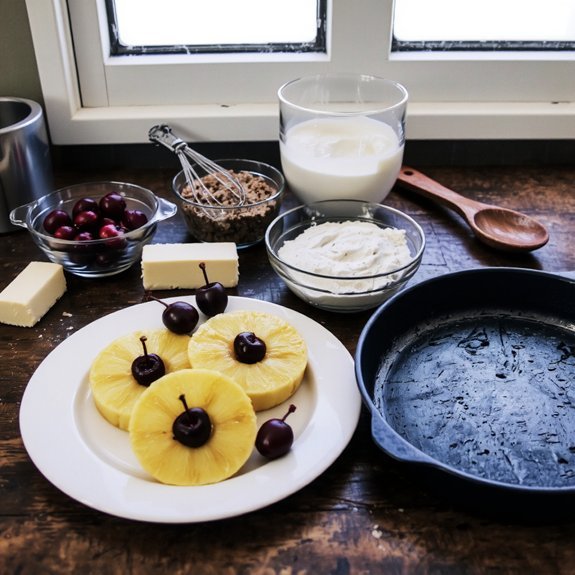
Before you’ll need to gather specific ingredients and equipment to guarantee your pineapple upside down cake turns out perfectly.
Start with your equipment checklist: a 9-inch cast iron skillet or round cake pan, mixing bowls, measuring cups and spoons, a whisk, and an electric mixer.
You’ll also need parchment paper and a cooling rack.
For ingredient sourcing, procure unsalted butter, brown sugar, fresh pineapple rings, maraschino cherries, all-purpose flour, baking powder, salt, eggs, granulated sugar, vanilla extract, and buttermilk.
Select quality pineapple—either fresh or canned in juice, not syrup.
Source your butter from reputable suppliers to secure excellent flavor and baking performance.
Organize all components before starting.
This preparation eliminates interruptions and guarantees you won’t scramble mid-process.
You’re now ready to execute your baking project with precision and confidence.
3. Preparing Your Skillet and Caramel Base
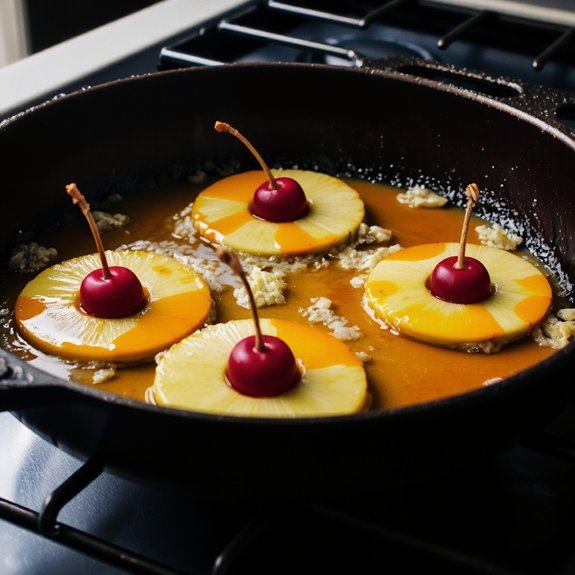
Once your equipment’s assembled and ingredients are measured, you’ll create the caramel foundation that defines this dessert’s character. Preheat your cast-iron skillet to medium heat, ensuring even pan seasoning that prevents sticking.
Combine butter and brown sugar, stirring constantly until the mixture reaches deep amber—roughly 2-3 minutes. Your heat control determines whether you’ll achieve caramelization or burnt bitterness.
Your heat control determines whether you’ll achieve caramelization or burnt bitterness—watch carefully as butter and brown sugar reach deep amber.
- Maintain consistent medium temperature throughout the process
- Watch for color changes indicating proper caramelization
- Stir continuously to distribute heat evenly
- Remove from heat immediately at target color
- Arrange pineapple rings while caramel’s still warm
Pour the caramel into your prepared skillet immediately. Arrange pineapple rings in concentric circles, positioning maraschino cherries in the center of each. This foundation sets the stage for your cake layer.
4. Arranging the Pineapple Rings
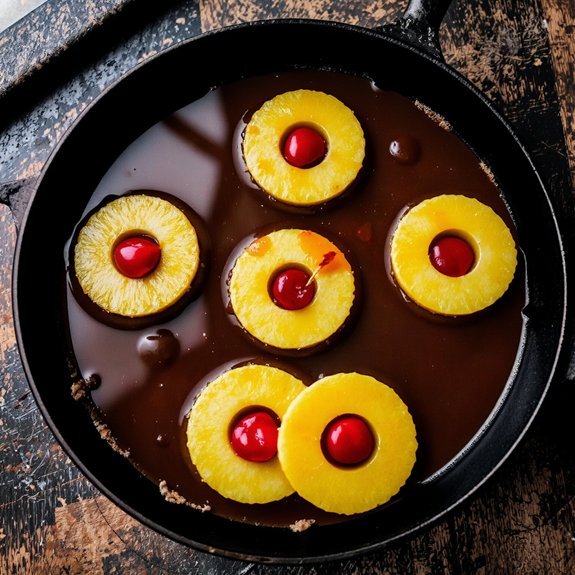
You’ll arrange your pineapple rings in a visually appealing pattern, spacing them evenly across the caramel base to guarantee consistent browning and aesthetic appeal.
Press each ring gently into the caramel to secure it in place, using the wooden spoon handle or your fingertip to nestle the fruit firmly against the pan’s surface.
Position any remaining pineapple pieces or maraschino cherries in the gaps between rings to create a cohesive design that’ll remain intact when you invert the finished cake.
Pattern and Spacing Techniques
Arranging pineapple rings with intentional spacing creates both visual appeal and structural integrity for your cake. You’ll want to establish visual symmetry by positioning rings equidistantly from your cake’s center outward.
Strategic negative space prevents overcrowding and allows heat to circulate properly during baking.
Consider these spacing techniques:
- Center a single ring, then radiate outward in concentric circles
- Maintain ¾-inch gaps between ring edges for even cooking
- Offset alternating rows to maximize visual impact
- Leave negative space near cake edges for caramelization
- Use maraschino cherries to anchor ring placement and guide spacing
You’re creating a structural foundation that’ll withstand batter pressure while delivering restaurant-quality presentation. Precise spacing prevents rings from shifting during the baking process, ensuring your final flip reveals a professional, uniform pattern.
Securing Rings to Pan
By positioning each ring deliberately into the caramelized sugar base, you’ll create an adhesive bond that locks them in place during baking.
Press each pineapple ring firmly so the sugar grips the fruit’s surface, preventing movement or shifting.
For maximum stability, arrange rings in a pattern that distributes weight evenly across the pan.
You’ll want to use pan clamps if your cake pan’s design allows, securing the sides to eliminate potential warping.
A silicone gasket placed between the clamp and pan prevents damage.
Don’t overcrowd your arrangement—leave adequate space between rings for batter circulation.
This spacing promotes even cooking and maintains structural integrity throughout the baking process.
Your disciplined placement strategy guarantees a professional result when you invert the finished cake.
5. Mixing Your Cake Batter
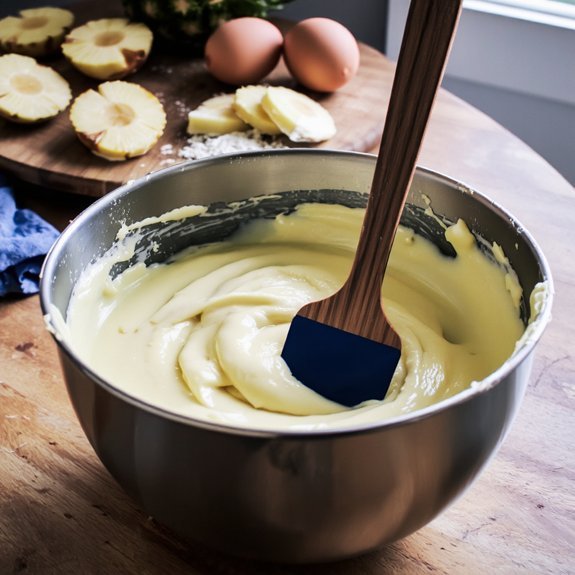
You’ll begin by combining your dry ingredients—flour, baking powder, and salt—in a separate bowl to guarantee even distribution.
In another bowl, you’ll blend your wet ingredients together: eggs, sugar, vanilla extract, and buttermilk, whisking until fully incorporated.
Finally, you’ll fold the wet mixture into the dry ingredients until just combined, being careful not to overmix, which would develop gluten and result in a dense crumb.
Dry Ingredients Combined First
Combining your dry ingredients before introducing any wet components promotes even distribution of leavening agents and salt throughout the batter.
You’ll achieve superior results by taking control of this critical step.
Sifting benefits include:
- Breaking up flour clumps that’d otherwise create dense pockets
- Aerating dry ingredients for lighter cake texture
- Ensuring baking powder and baking soda distribute uniformly
- Removing impurities that compromise your final product
- Establishing consistent leavening distribution throughout your batter
Whisk your flour, baking powder, baking soda, and salt together in a separate bowl.
This method guarantees that every portion of your batter contains identical proportions of leavening agents.
You’re not dependent on random mixing; you’re commanding precise chemical reactions.
This approach liberates you from guesswork, delivering reliable, professional-quality results every time you bake.
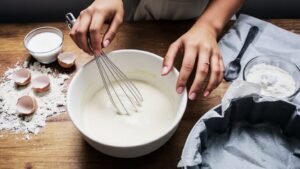
Wet Ingredients Blended Together
Properly emulsifying your wet ingredients establishes the foundation for a tender, moist crumb structure.
You’ll combine eggs, oil, and buttermilk using a deliberate emulsification technique that binds these components into a cohesive mixture.
Start by whisking your eggs until they’re slightly frothy, then gradually incorporate oil while maintaining consistent whisking speed.
This prevents separation and guarantees uniform fat distribution throughout your batter.
Temperature impact directly affects emulsification success.
Room-temperature ingredients blend more efficiently than cold ones, reducing the risk of curdling or lumpy texture.
You’ll want your buttermilk and eggs at approximately 68-72°F for ideal results.
Add your wet mixture to your previously combined dry ingredients using controlled folding motions.
This approach prevents overdevelopment of gluten while maintaining your carefully achieved emulsification.
Blend until you’ve just incorporated all visible flour streaks—no more.
Fold Until Just Combined
Overworking your batter develops gluten strands that toughen the cake’s crumb structure, so restraint is critical at this stage.
You’ll fold the wet ingredients into your dry mixture using deliberate, controlled motions. Use a spatula to cut down the center, sweep across the bottom, and turn the bowl slightly—repeat until you’re achieving gentle aeration without overmixing.
Stop when you see minimal flour streaks. The streak test confirms you’ve reached the ideal point: a few white lines remaining means you’re done. Overmixing creates a dense, rubbery texture that undermines your cake’s delicate structure.
- Cuts gluten development markedly
- Preserves light, tender crumb
- Maintains moisture retention
- Guarantees proper rise during baking
- Delivers superior final texture
Your restraint here directly determines whether you’ll achieve that coveted, fluffy interior.
6. Pouring and Baking

Once you’ve prepared your batter, pour it evenly over the caramelized pineapple and butter mixture, taking care not to disturb the fruit arrangement.
Pour batter evenly over caramelized pineapple, carefully preserving the fruit arrangement beneath.
Spread it smoothly to the edges, ensuring uniform coverage.
Bake at 350°F for 35-40 minutes until a toothpick inserted in the center emerges clean.
Watch for proper oven spring as the cake rises—you’ll notice it puffing up around the 20-minute mark.
Monitor crust browning carefully; the top should develop a light golden-brown color without burning.
You’ll know it’s done when the edges pull slightly from the pan and the cake feels firm to gentle pressure.
Remove it from the oven and let it cool for 5 minutes. This brief rest allows the cake to set slightly, making inversion easier.
Don’t skip this critical step.
7. The Crucial Cooling and Flipping Process
After the cake’s edges pull from the pan, you’re at the most critical juncture of the entire process. You’ve earned complete control over the outcome—don’t surrender it now.
Let the cake cool for exactly ten minutes. Use a thermometer to verify internal temperature drops to 140°F, ensuring structural integrity. Manage steam by cracking the oven door slightly, allowing moisture to escape gradually.
- Loosen edges with a thin knife around all sides
- Place your serving plate directly over the pan’s top
- Flip with confident, decisive motion
- Steam management prevents soggy bottoms
- Allow five additional minutes before plate removal
This window between baking and serving demands your full attention. You’ve invested effort into this creation—respect that commitment by executing this final step with precision and authority.
8. Serving and Storage Tips
Your perfectly flipped pineapple upside down cake now demands proper handling to preserve its caramelized beauty and moist crumb.
| Storage Method | Duration |
|---|---|
| Room temperature, covered | 2 days |
| Refrigerator | 5 days |
| Freezer storage | 3 months |
| Wrapped individual slices | 1 week |
| Airtight container | 4 days |
For ideal slice presentation, use a sharp, serrated knife and wipe it between cuts. Serve at room temperature to enhance the caramelized fruit’s flavor profile. You’ll want to store your cake in an airtight container to maintain moisture and prevent oxidation. For extended preservation, freezer storage works exceptionally well—wrap it tightly in plastic wrap, then aluminum foil. Thaw completely before serving to restore texture quality.
9. Variations and Creative Twists
While the classic pineapple upside down cake remains timeless.
You can elevate this dessert by experimenting with different fruits, spices, and flavor combinations that complement the caramelized sugar base.
You’re free to explore tropical twists and savory variations that challenge conventional baking norms:
- Substitute pineapple with mango, passion fruit, or papaya for authentic tropical profiles
- Incorporate cardamom, ginger, or black pepper into your batter for sophisticated depth
- Layer rum or coconut liqueur for enhanced complexity
- Experiment with savory variations using rosemary, olive oil, and sea salt
- Top with candied jalapeños or prosciutto for unexpected flavor contrasts
These modifications won’t compromise structural integrity while delivering distinctive results.
You’ll discover that strategic ingredient substitutions transform this classic into something entirely yours, maintaining the essential caramelization that defines the cake’s character.
Frequently Asked Questions
Can I Use Canned Pineapple Instead of Fresh Pineapple for This Recipe?
Yes, you can substitute canned pineapple for fresh fruit. You’ll need to drain the canned rings thoroughly and reserve the juice for your caramel base—this juice substitution maintains proper moisture levels.
However, expect a flavor comparison showing less intensity; canned pineapple delivers milder sweetness than fresh. The texture will be softer, creating a more delicate crumb structure.
For ideal results, choose pineapple packed in juice rather than syrup, giving you better control over your cake’s sweetness profile and final outcome.
What Should I Do if My Cake Sticks to the Skillet After Baking?
If your cake sticks, you’ll need proper greasing techniques and appropriate pan materials to prevent this issue.
Use cast iron or steel skillets—they’re superior conductors.
Before baking, thoroughly butter and flour your pan’s bottom and sides.
Don’t rely on cooking spray alone.
Immediately after removing the cake from heat, run a thin knife around the edges, then invert onto a serving plate within two minutes.
This timing’s critical for success.
How Long Does Pineapple Upside Down Cake Stay Fresh at Room Temperature?
You’ll maintain best room longevity for your pineapple upside-down cake by storing it properly for 1-2 days at room temperature.
Cover it loosely with foil or place it in an airtight container to prevent drying.
For extended food safety, refrigerate it up to five days.
The pineapple topping’s moisture content affects shelf life—more syrup extends freshness.
You can freeze it up to three months, wrapped securely.
Can I Make the Cake Ahead and Freeze It for Later Use?
Yes, you can freeze your pineapple upside down cake. Wrap the cooled cake tightly in plastic wrap and aluminum foil to prevent freezer burn.
Store it for up to three months. For your freezing technique, keep it in an airtight container.
When you’re ready, use proper thawing methods by letting it sit at room temperature for two to three hours. This approach gives you complete control over your baking schedule and dessert preparation timeline.
Why Does My Cake Sometimes Sink in the Middle During Baking?
Your cake sinks because you’re likely overmixing the batter, which deflates air pockets needed for structure.
You might also be underbaking the center—it won’t set properly if you pull it too early. Use a toothpick test: it should come out clean, not wet.
Mix just until ingredients combine, don’t overwork it. Verify your oven temperature’s accurate with a thermometer.
These adjustments’ll give you the stable, level cake you’re after.


Leave a Comment