Key Takeaways
- Prepare a 9-inch pie shell by rolling dough to 1/8-inch thickness, crimping edges, and refrigerating for 30 minutes before blind baking.
- Whisk eggs, melted butter, and brown sugar together, then add corn syrup, vanilla extract, salt, and toasted pecans for the filling.
- Preheat oven to 350°F and bake the filled pie for 50–60 minutes until the center has a slight jiggle with clean edges.
- Shield crust edges with foil if browning too quickly; avoid overbaking to prevent the custard from cracking and becoming tough.
- Cool the pie completely on a wire rack for 4–6 hours before slicing with a hot, wet knife for clean portions.
Gathering Your Ingredients

Before you begin mixing, you’ll need to assemble nine essential components: one unbaked nine-inch pie shell, one cup of pecan halves, three-quarters cup of granulated sugar.
one-half cup of packed brown sugar, three large eggs, six tablespoons of unsalted butter (melted).
one-quarter cup of all-purpose flour, one teaspoon of vanilla extract, and one-quarter teaspoon of salt.
When sourcing your ingredients, prioritize freshness indicators.
Prioritize freshness indicators when sourcing ingredients—your attention to quality directly determines your pecan pie’s excellence.
Examine pecans for color vibrancy and aroma—rancid nuts won’t produce ideal results.
Select room-temperature eggs for superior emulsification.
Choose unsalted butter to maintain precise flavor control throughout your filling.
Verify your pie shell’s integrity before assembly.
Source premium vanilla extract rather than imitation variants, as this elevates your final product’s complexity.
Check expiration dates on all dry goods.
Your attention to ingredient quality directly determines your pecan pie’s excellence.
2. Preparing the Pie Crust
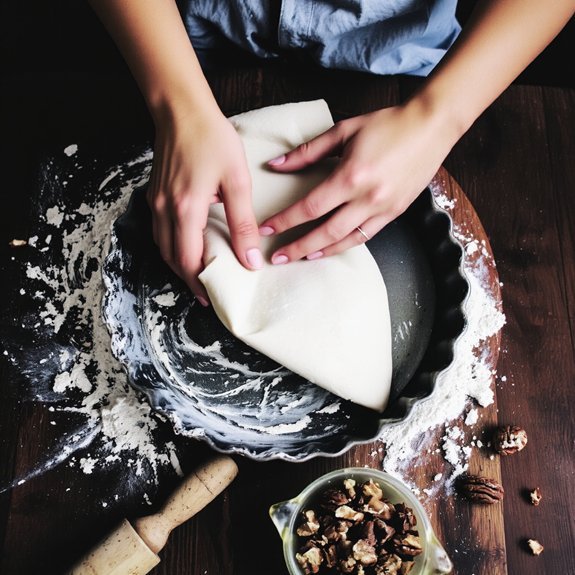
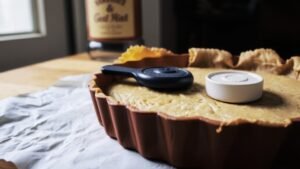
Preparing your pie crust properly guarantees you’ll achieve an even bake and prevent a soggy bottom. Start by rolling your dough between parchment sheets to ⅛-inch thickness. Transfer it into your 9-inch pie pan, allowing slight overhang. Trim excess dough to 1 inch, then fold edges under for edge crimping. Use a fork or your fingers to create a decorative seal around the perimeter.
| Technique | Purpose |
|---|---|
| Dough chilling | Prevents shrinkage during baking |
| Blind baking | Eliminates moisture buildup |
| Edge crimping | Secures crust edges and adds visual appeal |
| Pan positioning | Promotes even heat distribution |
| Temperature control | Achieves golden-brown results |
Refrigerate your prepared crust for at least 30 minutes. This dough chilling step is non-negotiable—it stabilizes your crust and prevents warping. You’ve earned control over your baking destiny through proper preparation.
3. Making the Pecan Filling
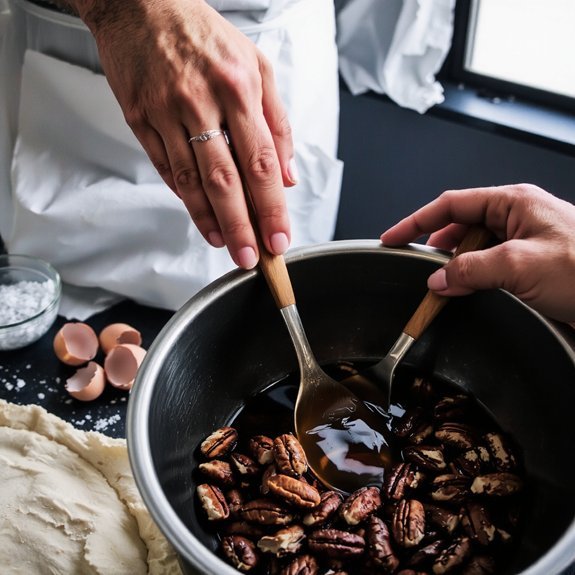
While your crust chills, you’ll combine the filling ingredients that transform pecans into a rich, caramelized custard.
Whisk together eggs, melted butter, and brown sugar until well incorporated. The sugar caramelization process begins here, developing deep flavor complexity.
Whisking eggs, melted butter, and brown sugar begins the sugar caramelization process, developing deep flavor complexity.
Add light corn syrup to achieve the proper syrup consistency—thick yet pourable. Stir in vanilla extract and a pinch of salt to balance sweetness.
Fold in your toasted pecans gently, ensuring even distribution throughout the mixture. Don’t overmix; excessive agitation incorporates unwanted air bubbles that compromise the custard’s dense texture.
The filling should reach a homogeneous state without appearing foamy. Pour your prepared filling into the chilled crust immediately, allowing gravity to distribute the pecans naturally as they bake.
4. Baking and Monitoring Your Pie
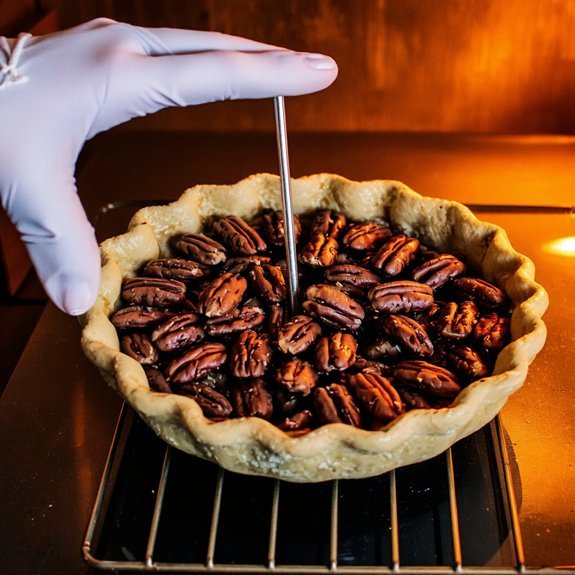
Preheat your oven to 350°F before transferring your filled pie to the center rack, where consistent heat circulation promotes even baking.
Monitor the browning stages closely throughout the 50-60 minute bake time.
The crust edges’ll brown first; shield them with foil if darkening prematurely occurs.
You’re aiming for a set filling with a slight jiggle in the center—this residual heat’ll continue cooking the custard after removal.
Insert a knife near the edge; it should emerge clean while the middle remains slightly soft. Don’t overbake, as this causes the filling to crack and toughen.
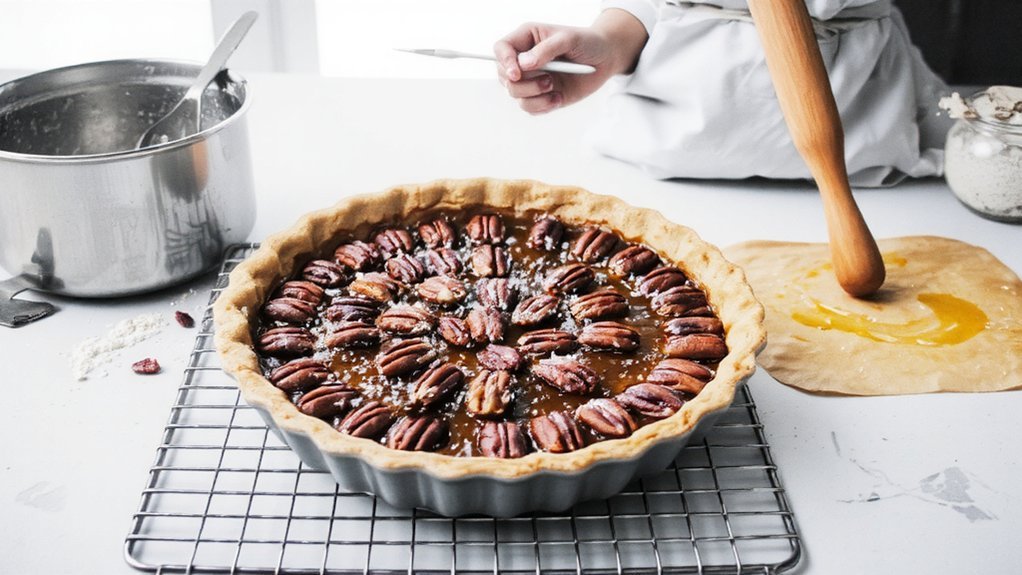
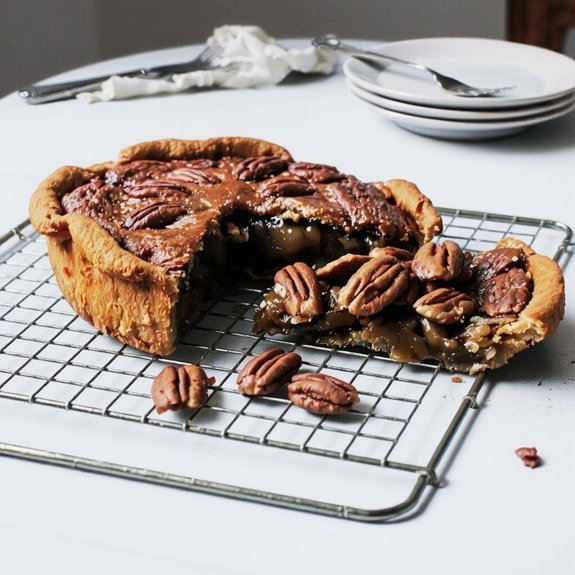
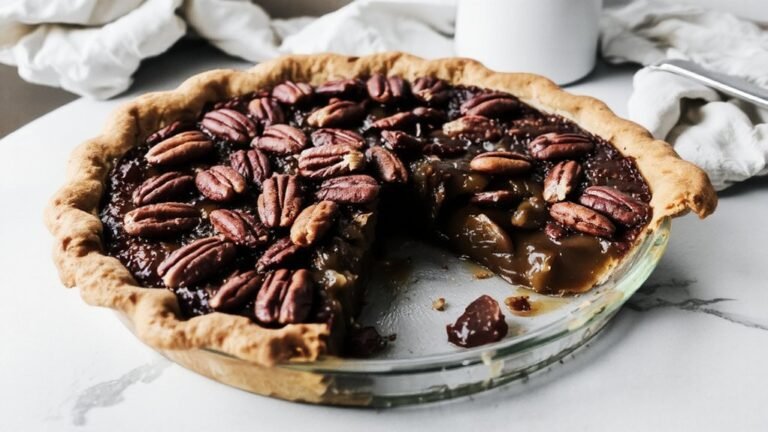
Once the browning stages reach completion, remove your pie and allow it to cool completely on a wire rack for at least four hours before slicing. This cooling period enables proper setting and ideal texture.
5. Cooling and Serving Tips
Once you’ve removed your pie from the oven, resist the temptation to slice immediately—the filling hasn’t fully set, and premature cutting’ll result in a collapsed structure and uneven texture.
Allow adequate resting time—ideally four to six hours at room temperature—enabling the custard to achieve ideal viscosity and structural integrity.
For presentation tips that showcase your work:
- Transfer your cooled pie to a chilled serving plate thirty minutes before presentation for enhanced visual appeal and easier portioning
- Slice with a hot, wet knife, wiping between cuts to maintain clean edges and professional appearance
- Serve with whipped cream or vanilla ice cream, which complements the rich, buttery filling
Your disciplined approach to cooling transforms a well-executed bake into a masterpiece worthy of admiration.
Frequently Asked Questions
Can I Make Pecan Pie Ahead of Time and Freeze It for Later?
Yes, you can freeze your pecan pie successfully. Wrap the cooled pie tightly in plastic wrap and aluminum foil before placing it in freezer storage for up to three months.
When you’re ready to serve it, use proper thawing methods by refrigerating it overnight or leaving it at room temperature for several hours. This approach gives you the autonomy to enjoy homemade pecan pie whenever you desire without sacrificing quality or flavor.
What’s the Best Way to Prevent the Crust From Becoming Soggy?
You’ll prevent soggy crusts by blind baking your shell at 375°F for 10-12 minutes until it’s set but not fully cooked.
Apply an egg wash beforehand—it creates a protective moisture barrier.
Once you’ve achieved that golden, sealed surface, you’re free to pour your filling without worry. This technique guarantees your crust maintains its structural integrity and delivers that satisfying, crisp texture throughout.
How Do I Know if My Pecans Are Fresh Before Baking?
You’ll determine pecan freshness through two critical assessments.
First, perform the smell test—fresh pecans emit a pleasant, nutty aroma, while stale ones smell flat or rancid.
Next, execute the crunch test by biting into a specimen; you’re seeking audible snap and firm texture.
Reject any nuts displaying softness, discoloration, or mold.
Store your pecans in airtight containers at cool temperatures to maintain ideal quality for your baking application.
Can I Substitute Butter for the Oil in the Filling Recipe?
You can substitute butter for oil, but you’ll need to adjust your approach.
Butter’s higher water content alters the filling’s texture, creating a denser, grainier consistency. For ideal Flavor Balance, use clarified butter to minimize moisture interference. Reduce the butter quantity by 25% since it’s denser than oil.
This substitution demands precision—you’re trading fluidity for richness. Melt it completely, cool slightly, then incorporate it methodically into your filling mixture to maintain structural integrity throughout baking.
Why Did My Pie Crack on Top During Baking?
Your pie cracked due to overbaking causes—you’ve likely exceeded the ideal baking window.
High oven temperatures or extended bake times force excessive moisture evaporation from the custard filling, creating surface tension that ruptures.
Rapid cooling amplifies this stress; you’re contracting the filling unevenly.
Next time, bake at precise temperature, monitor doneness meticulously, and cool gradually at room temperature before refrigerating.
You’ll achieve that flawless, unblemished top you’re after.


Leave a Comment