Key Takeaways
- Cream softened butter and sugar for 3–4 minutes until pale and fluffy, then incorporate peanut butter and eggs individually.
- Whisk together 1¾ cups flour, 1 teaspoon baking soda, and ½ teaspoon salt, then fold into wet ingredients until combined.
- Portion dough using a cookie scoop, flatten to ¼-inch thickness, and space 2 inches apart on a parchment-lined baking sheet.
- Bake at 350°F for 10–12 minutes until edges turn golden while centers remain slightly soft; rotate sheet halfway through.
- Cool cookies on baking sheet for 5 minutes before transferring to a cooling rack to prevent breakage and ensure proper texture.
Gathering Your Ingredients
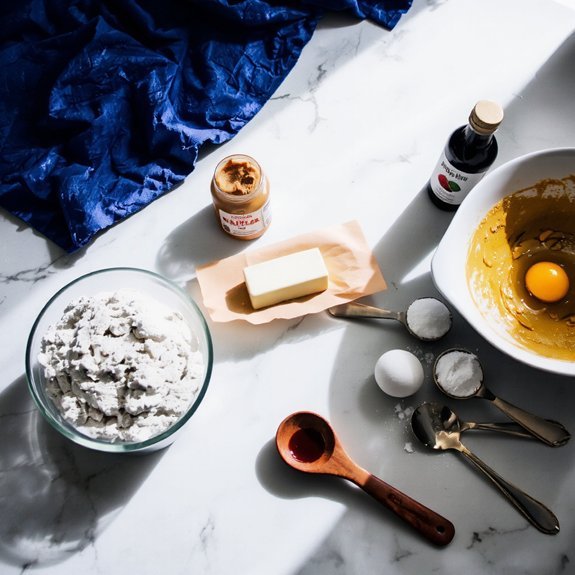
Before you start mixing, you’ll need to gather your ingredients: 1 cup of creamy peanut butter, 1/2 cup of unsalted butter (softened to room temperature), 3/4 cup of granulated sugar, 3/4 cup of packed brown sugar, 1 large egg, 1 teaspoon of vanilla extract, 1 1/4 cups of all-purpose flour, 1/2 teaspoon of baking soda, and 1/2 teaspoon of salt.
Verify freshness checks on each component before proceeding.
Make sure your peanut butter doesn’t contain added oils or sugars unless you’re making deliberate ingredient substitutions.
Confirm your butter’s softness—it shouldn’t be melted.
Check your egg’s expiration date and your flour’s storage condition for ideal texture.
You’re now prepared to begin the mixing process with confidence.
Essential Equipment and Tools
You’ll need a mixing bowl (at least 3-quart capacity), an electric mixer or sturdy whisk, measuring cups and spoons for precise ingredient portions, a rubber spatula for scraping bowl sides, a baking sheet, parchment paper or silicone baking mat, a cookie scoop or tablespoon for uniform sizing, and a cooling rack.
Essential baking equipment includes a 3-quart mixing bowl, electric mixer, measuring tools, rubber spatula, baking sheet, parchment paper, cookie scoop, and cooling rack.
Select equipment with material durability to withstand repeated use and temperature fluctuations.
Choose tools with ergonomic handles that reduce hand fatigue during mixing and scooping.
Your mixing bowl should resist warping under mixer vibrations.
The baking sheet needs even heat distribution properties.
Parchment paper prevents sticking without chemical coatings.
A cookie scoop guarantees consistent portion sizes, controlling bake time uniformity.
Position your cooling rack away from direct heat sources to facilitate proper temperature reduction.
Quality equipment streamlines your process and produces reliable results.
Preparing Your Workspace
Since you’ve gathered your equipment, it’s time to organize your baking station for maximum efficiency.
Arrange your workspace strategically to eliminate unnecessary movement.
Position your mixing bowls, measuring cups, and peanut butter within arm’s reach.
This workflow layout minimizes interruptions and keeps you in control of your process.
Surface sanitation is non-negotiable.
Wipe down your countertop with food-safe sanitizer, eliminating contaminants that compromise your batch.
Make certain your mixing bowls and utensils are thoroughly cleaned and dried.
Key organizational steps:
- Arrange ingredients in order of use from left to right
- Position your mixer at counter height for comfortable access
- Clear clutter to maintain a 36-inch minimum workspace radius
This deliberate setup respects your autonomy, allowing you to work without restrictions or distractions.
You’ll execute each step confidently, maintaining complete command over your baking environment.
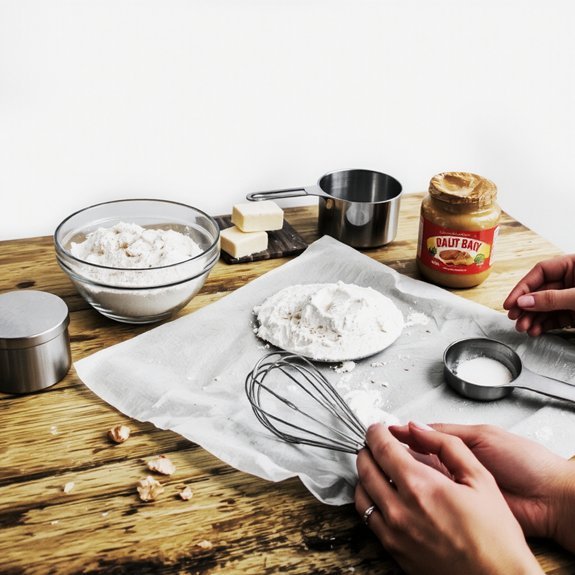
Mixing the Dry Ingredients
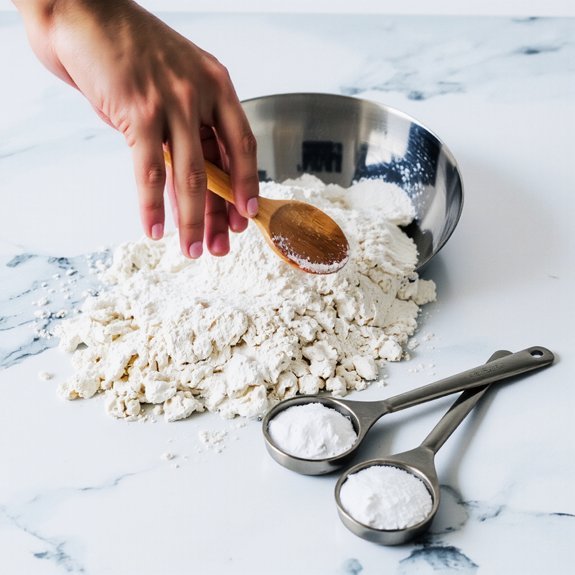
Combining your dry ingredients creates the foundation for proper texture and rise in your peanut butter cookies.
You’ll want to whisk together 1¾ cups all-purpose flour, 1 teaspoon baking soda, and ½ teaspoon salt in a medium bowl.
Whisking promotes even distribution of leavening agents throughout your dry mixture, preventing clump prevention issues that compromise cookie consistency.
Use deliberate, circular motions for 30 seconds to fully integrate all components.
Next, sift the mixture back into your bowl if you’ve detected any lumps.
This technique eliminates air pockets and guarantees uniform texture.
Your dry ingredients are now ready to combine with your wet components.
Don’t skip this critical step—proper dry ingredient preparation directly impacts your final product’s structure and flavor profile.
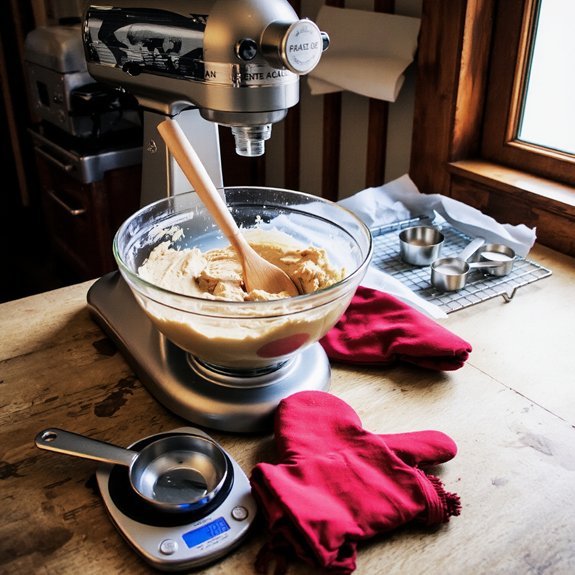
Creaming Butter and Sugar Together
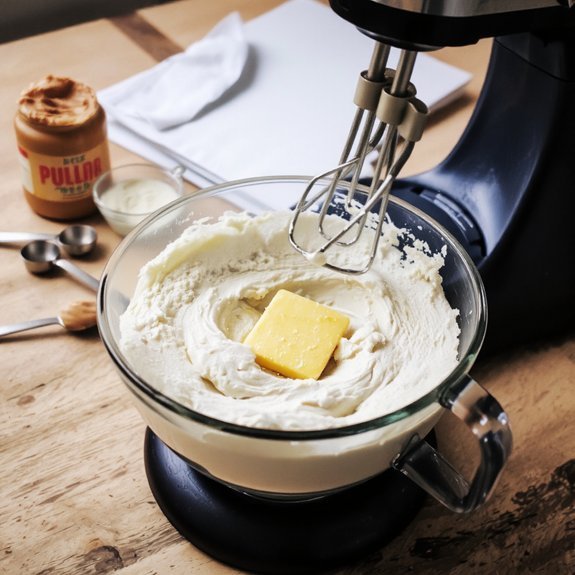
Creaming butter and sugar together develops the structure that’ll give your cookies their characteristic texture and crumb.
Creaming butter and sugar develops the structure that gives your cookies their characteristic texture and tender crumb.
This critical step incorporates air into your dough through mechanical aeration techniques.
Key Steps for Success:
- Use room-temperature butter (68-70°F) for ideal incorporation and aeration
- Beat for 3-4 minutes until the mixture reaches a pale, fluffy consistency
- Maintain consistent speed to control temperature and prevent butter breakdown
Start with softened butter and granulated sugar in your mixing bowl.
Using an electric mixer on medium speed, beat until the mixture transforms from dense to light and creamy.
This aeration process creates tiny air pockets essential for cookie rise and texture. Temperature control prevents over-softening, which compromises structure.
Once you’ve achieved the proper consistency—light, fluffy, and pale—you’re ready to incorporate your eggs and continue building your dough’s foundation.
Incorporating Eggs and Peanut Butter
With your butter-sugar mixture properly creamed, you’ll now add two large eggs one at a time, beating on medium speed for 30-45 seconds after each addition until fully incorporated.
Next, add one cup of creamy peanut butter, mixing on medium speed for 60 seconds. This incorporation creates proper emulsion stability, ensuring a uniform texture throughout your dough.
For those with peanut allergies, you’re free to substitute sunflower seed butter or tahini at a 1:1 ratio without compromising results.
Finally, add one teaspoon of vanilla extract and beat for 15 seconds. Your mixture should appear smooth and homogeneous. Don’t overmix beyond this point, as excessive beating can develop gluten strands, resulting in tough cookies rather than the tender texture you’re after.
Combining Wet and Dry Mixtures
Once you’ve achieved that smooth, homogeneous wet mixture, you’ll combine it with your dry ingredients.
Create a hydration balance by gradually folding your dry mixture into the wet components.
This controlled approach prevents overmixing and excessive gluten development, which’d toughen your cookies.
Use a spatula to incorporate ingredients with deliberate, downward strokes rather than aggressive stirring.
- Fold in thirds to maintain ideal texture and structure
- Stop mixing immediately when streaks of flour disappear
- Monitor consistency—your dough should hold together without being dense
Don’t let fear of imperfection paralyze you.
A few flour specks won’t ruin your batch.
The goal’s a cohesive dough with minimal gluten activation.
You’re in control here—trust your instincts and proceed with confidence.
Your freedom to bake without overthinking yields superior results.
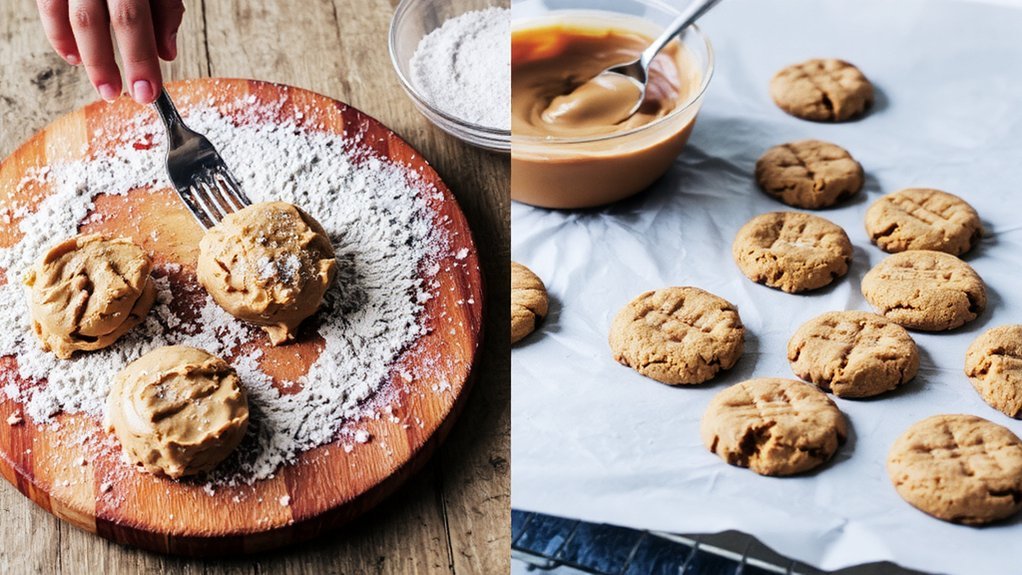
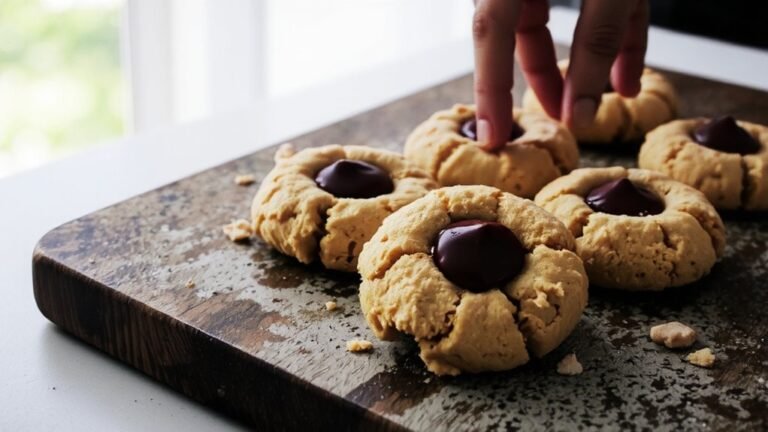
Shaping and Sizing Your Cookies
Your dough’s ready once you’ve achieved that cohesive consistency, and now you’ll transform it into individual cookies through deliberate shaping and sizing.
Use a cookie scoop or tablespoon to establish consistent portion sizes—typically 1 to 1.5 tablespoons per cookie.
This standardization guarantees uniform thickness and even baking throughout your batch.
Place each portion on your prepared baking sheet, spacing them 2 inches apart.
Gently flatten each ball using the bottom of a glass or your palm, pressing to approximately ¼-inch thickness.
You can create the traditional crosshatch pattern by pressing with a fork—once horizontally, once vertically.
Maintain uniform thickness across all cookies to prevent uneven browning.
Your disciplined approach to portioning and sizing grants you complete control over your final product’s quality and consistency.
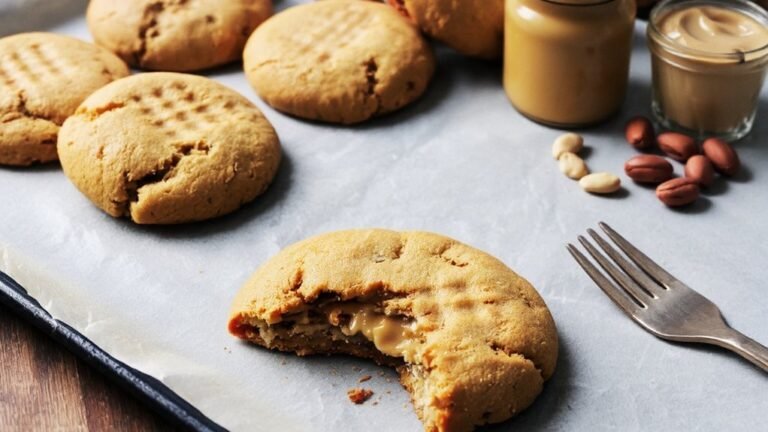
Baking to Perfection
Before you place your shaped cookies into the oven, preheat it to 350°F.
Allow it to reach full temperature—this guarantees immediate, consistent heat exposure.
Verify your oven calibration with a thermometer to eliminate temperature variables.
Bake for 10-12 minutes until edges firm while centers remain slightly soft.
Monitor humidity management carefully; high moisture environments extend baking times and affect texture.
Key baking considerations:
- Insert an oven thermometer on the middle rack to confirm accurate temperature
- Rotate your baking sheet halfway through for even browning and consistent results
- Remove cookies when edges appear golden but centers still yield slightly to touch
Allow cookies to cool on the baking sheet for 5 minutes before transferring to a wire rack.
This cooling period sets their structure without creating brittleness, giving you the freedom to achieve your ideal cookie texture consistently.
Cooling and Storing Your Cookies
After the cookies have cooled completely on the wire rack—typically 30-45 minutes depending on thickness and room temperature—you’ll want to store them properly to maintain their texture and flavor.
Place cooled cookies in an airtight container, separating layers with parchment paper to prevent sticking. Store at room temperature for up to five days.
For extended preservation, use freezer storage by placing cookies in a freezer-safe container with parchment between layers; they’ll remain fresh for up to three months. When you’re ready to enjoy frozen cookies, thaw them at room temperature for 15-20 minutes before serving. This method prevents moisture loss and preserves the cookies’ structural integrity, ensuring you retain complete control over your baking results.
Frequently Asked Questions
Can I Substitute Peanut Butter With Almond Butter or Other Nut Butters?
You can substitute almond butter or other nut butters for peanut butter.
However, you’ll encounter Flavor Differences—almond butter’s milder taste won’t replicate peanut butter’s boldness.
Measure identical quantities (1:1 ratio) since viscosity remains consistent.
Consider Allergy Considerations; almond butter serves those with peanut allergies but creates cross-contamination risks for tree nut allergies.
Adjust baking time slightly—alternative nut butters may brown faster.
Test your first batch at 350°F for precise results.
How Do I Prevent My Peanut Butter Cookies From Spreading Too Much?
You’ll prevent excessive spreading by chilling your dough for at least 30 minutes before baking.
Set your oven temperature to 350°F—this moderate heat allows cookies to set properly without flattening.
Use parchment paper on your baking sheets for better control.
Space dough balls two inches apart.
Don’t overbake; remove cookies when edges firm up but centers stay slightly soft.
You’ve got the freedom to adjust baking time based on your preferred texture.
What Should I Do if My Dough Is Too Dry or Crumbly?
If your dough’s too dry or crumbly, you’ve got control over the fix.
Add liquid incrementally—one tablespoon of milk or water at a time.
Mix gently with a spatula, folding rather than stirring aggressively to maintain structural integrity.
Check consistency after each addition. Your dough should hold together when squeezed without becoming sticky. This methodical approach prevents overdoing it and guarantees ideal cookie texture without compromising your baking autonomy.
Can I Freeze Peanut Butter Cookie Dough Before Baking?
You can absolutely freeze your peanut butter cookie dough.
Shape it into balls and store them in airtight containers for up to three months—that’s your freezing duration.
When you’re ready to bake, you’ve got two thawing techniques: refrigerate overnight for gradual thawing, or bake directly from frozen, adding two to three minutes to your baking time.
Both methods preserve your dough’s integrity and give you complete control over your baking schedule.
Why Are My Cookies Cake-Like Instead of Chewy?
Your cookies’re turning cake-like because you’re overmixing your dough and using an improper sugar ratio.
You’ve got to control your mixing technique—blend ingredients just until combined, avoiding overdevelopment of gluten.
Increase your brown sugar ratio relative to white sugar; brown sugar contains molasses, which creates chewiness.
Don’t overbake either; pull them from the oven when edges set but centers still look slightly underdone.
You’ll achieve that perfect chewy texture you’re after.


Leave a Comment