Key Takeaways
- Cream softened butter with granulated and brown sugar for 3–5 minutes until pale and fluffy for proper structure.
- Fold oat–flour blend into wet mixture for 15–20 seconds to prevent overmixing and achieve consistent texture.
- Bake at 350°F for 10–12 minutes until edges turn light golden brown while centers remain slightly soft.
- Transfer cookies to wire rack after 2 minutes on baking sheet to allow proper cooling and carryover baking.
- Store in airtight containers at room temperature up to seven days or freeze up to three months.
Gather Your Ingredients
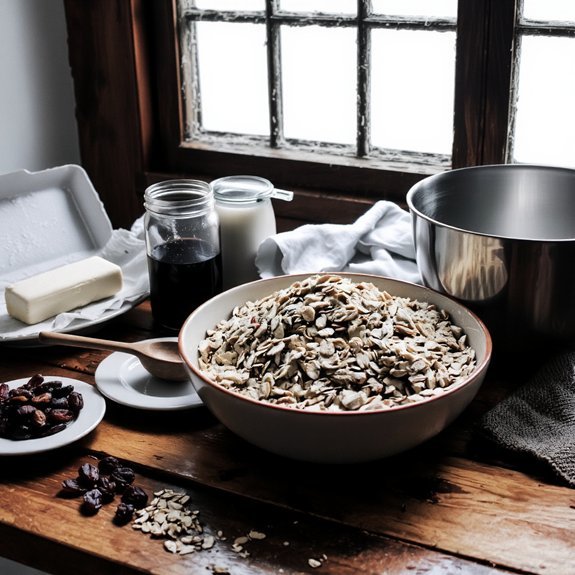
Before you start mixing, you’ll need to assemble 1 cup of rolled oats, 1 cup of all-purpose flour, ¾ cup of unsalted butter (softened to 65-70°F), ¾ cup of granulated sugar, ¼ cup of packed brown sugar, 1 large egg, 1 teaspoon of vanilla extract, 1 teaspoon of baking soda, ½ teaspoon of salt, and 1 teaspoon of ground cinnamon.
Assemble rolled oats, all-purpose flour, softened butter, sugars, egg, vanilla extract, baking soda, salt, and cinnamon before mixing.
For ingredient sourcing, purchase your oats and flour from bulk bins to control quality and quantity.
Source organic butter for superior flavor development.
Regarding seasonal substitutions, you can replace vanilla extract with almond extract during fall months or incorporate maple extract for winter variations.
Adjust brown sugar ratios based on humidity levels in your kitchen.
This precision guarantees ideal texture and rise, giving you complete control over your baking outcomes.
Prepare Your Baking Equipment
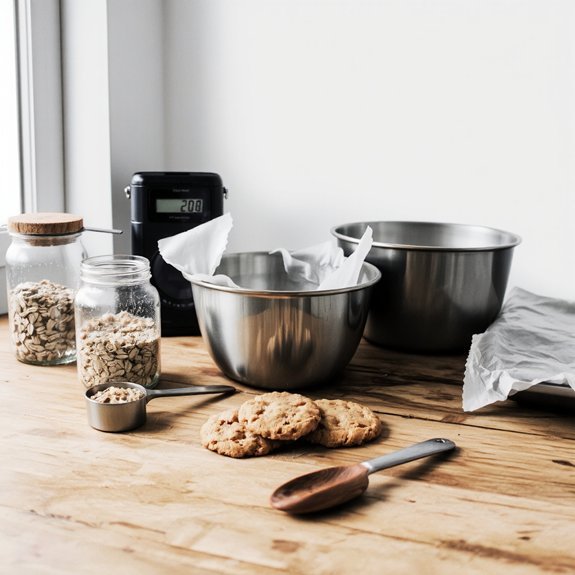
You’ll need to gather your essential baking tools: measuring cups, measuring spoons, mixing bowls, a whisk, baking sheets, and parchment paper.
Arrange your workspace by positioning your oven rack to the middle position and preheating your oven to 350°F, then lay out all equipment within arm’s reach of your work surface.
This setup guarantees you’re ready to proceed efficiently through each step of the cookie-baking process.
Gather Your Essential Tools
To make sure your baking process runs smoothly, gather these essential tools before mixing your ingredients: a stand mixer or hand mixer for combining wet and dry components, measuring cups and spoons for accurate ingredient portions, a mixing bowl large enough to accommodate all your dough, a wooden spoon or spatula for folding ingredients, baking sheets lined with parchment paper, and an oven thermometer to verify your oven’s temperature accuracy.
Consider budget planning when selecting equipment—you’ll find quality mixers at various price points. Brand comparison matters; research options that offer durability without overspending. You’ll also need a cooling rack for post-bake cooling and a cookie scoop for consistent sizing.
Organize these tools within arm’s reach of your workspace. This setup eliminates interruptions and guarantees you’re not scrambling mid-recipe, giving you the freedom to focus entirely on executing perfect oatmeal cookies.
Organize Your Workspace Setup
Once you’ve assembled your tools, arrange them strategically around your work surface to maximize efficiency and minimize movement during baking.
Position your mixing bowls, measuring cups, and dry ingredients on your dominant side for quick access.
Place your oven thermometer and timer within arm’s reach of your baking station.
Create an ergonomic layout by positioning your scale at elbow height to reduce strain during precise measurements.
Ensure lighting optimization by positioning your workspace directly under bright, natural light or high-intensity bulbs.
This illumination allows you to accurately monitor dough consistency and cookie browning.
Clear your counter of unnecessary items, maintaining at least 24 inches of unobstructed workspace.
Arrange ingredients in sequential order—matching your recipe’s instructions.
This streamlined setup eliminates wasted motion and keeps you in complete control throughout your baking process.
Mix Your Dry Ingredients
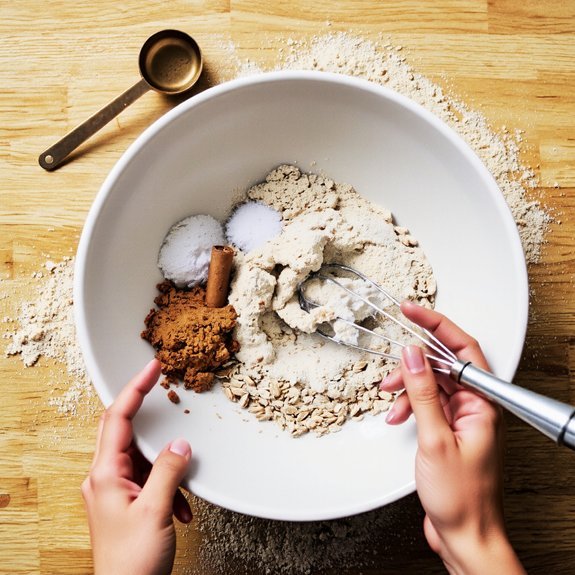
You’ll start by measuring your flour accurately using the spoon-and-level method to achieve consistent results.
Next, you’ll combine your oats and spices in a separate bowl, whisking them together thoroughly.
Finally, you’ll sift the mixture to guarantee even distribution of leavening agents and spices throughout your dry ingredients.
Measuring Flour Accurately
Why does precision matter when measuring flour?
Inaccurate measurements compromise your cookie’s texture and rise.
You’ll want to use a kitchen scale for absolute accuracy—it’s your best tool for freedom from guesswork.
Start by calibrating your scale to zero with an empty bowl.
Weigh your flour at approximately 120 grams per cup, though humidity impact can shift this slightly.
Dry conditions require less flour; moist conditions demand more.
Spoon flour into your measuring cup without scooping directly from the bag.
Scoop packs flour down, creating density variations.
Level off excess with a knife.
If you’re without a scale, fluff your flour first, then spoon and level.
This method’s less reliable, but you’ll achieve better results than scooping straight from the container.
Combining Oats and Spices
Combining your dry ingredients requires a medium bowl and systematic layering.
You’ll start by adding two cups of rolled oats to your bowl, then sprinkle in one teaspoon of cinnamon and half a teaspoon of nutmeg.
These spice ratios create balanced flavor pairings that complement the oats without overpowering them.
Next, add a quarter teaspoon of ground cloves and a pinch of salt.
Use a whisk to blend everything thoroughly, breaking up any clumps in the spices.
This guarantees even distribution throughout your mixture.
Don’t skip this step—uneven spice distribution results in inconsistent cookies.
Take thirty seconds to whisk vigorously, making sure the cinnamon and other spices coat every oat.
Your dry ingredient mixture is now ready for combining with your wet ingredients.
Sifting for Even Distribution
After whisking your oats and spices together, sifting takes your dry mixture to the next level by breaking apart any remaining clumps and aerating the ingredients. You’ll want to choose a fine-mesh sifter to guarantee ideal particle uniformity throughout your blend.
Position your sifter over a clean bowl and pour your dry mixture into the sifter’s cup. Press the handle mechanism 8-10 times, allowing gravity to pull ingredients through the mesh. This process achieves essential air incorporation, which promotes even leavening during baking.
Don’t rush this step—controlled, deliberate sifting prevents compacting. If stubborn clumps resist passage, gently press them against the mesh with a spatula.
Once sifted, your dry ingredients won’t require remixing before combining with your wet components. This preparation guarantees consistent texture and flavor distribution across every cookie you bake.
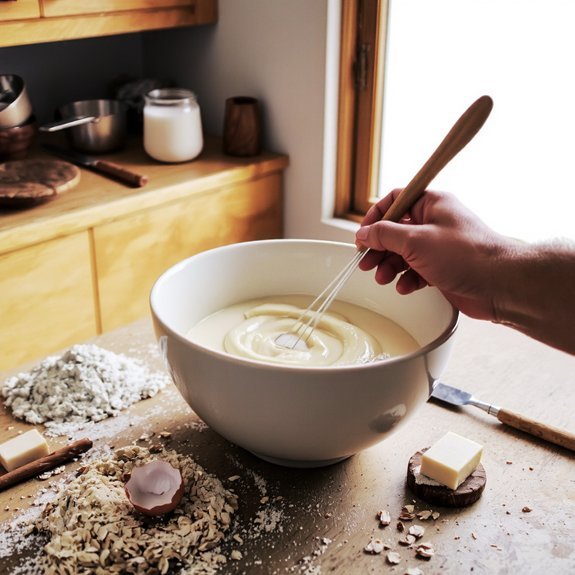
Cream Butter and Sugar Together
Take softened butter—about 1/2 cup (115g) at room temperature—and place it in a mixing bowl. Add 3/4 cup (150g) granulated sugar.
Using an electric mixer on medium speed, beat for 3-5 minutes until the mixture becomes pale and fluffy. This creaming process incorporates air through aeration science, creating tiny pockets that’ll lighten your cookies’ texture.
The emulsification chemistry occurring here bonds the butter’s fat molecules with sugar crystals, forming a stable matrix. You’ll notice the mixture transform from dense and grainy to light and voluminous.
Don’t rush this step—proper creaming’s essential for structure.
Stop occasionally to scrape bowl sides, ensuring uniform incorporation. When finished, your butter-sugar base should resemble fluffy clouds.
This foundation gives you control over your cookies’ final crumb and rise, freeing you from dense, disappointing results.
Combine Wet and Dry Ingredients
You’ll fold your creamed butter and sugar mixture into the beaten eggs and vanilla until fully incorporated.
Next, you’ll sift together your oats and flour in a separate bowl to promote even distribution.
Finally, you’ll gently combine the wet ingredients with the dry mixture until just blended, being careful not to overmix the batter.
Mixing Butter and Sugar
Creaming softened butter with granulated sugar forms the foundation for your cookie dough.
You’ll want to beat these ingredients together for approximately 2-3 minutes until the mixture becomes light and fluffy, incorporating air that’ll help your cookies rise properly.
If you’re using butter alternatives, adjust your creaming time slightly—they may require an additional 30 seconds to achieve ideal incorporation.
The crystallization control matters here; you’re breaking down sugar crystals into smaller particles, which promotes even distribution throughout your dough.
Use an electric mixer on medium speed to maintain consistent texture.
You’ll know you’re finished when the mixture resembles wet sand and has noticeably increased in volume.
This creamed base guarantees your oatmeal cookies develop the right structure and texture.
Don’t skip this critical step.
Adding Eggs and Vanilla
Once your butter-sugar mixture reaches that light, fluffy consistency, it’s time to incorporate the wet ingredients that’ll bind everything together.
- Add two large eggs individually, beating 30 seconds between each addition
- Pour in one teaspoon of vanilla extract and mix for 15 seconds
- Scrape bowl sides to guarantee complete incorporation
- Continue beating until the mixture becomes pale and creamy
This step’s aroma chemistry transforms your base into an emulsified foundation. The egg proteins create structure while lecithin acts as a natural binder.
If you’re using allergy substitutes like flax eggs or appleseed puree, increase beating time to 45 seconds per addition for proper emulsification.
The vanilla extract’s volatile compounds’ll enhance your cookies’ flavor profile. Your mixture should now appear glossy and hold peaks briefly when the beater’s lifted.
You’re ready for the dry ingredients.
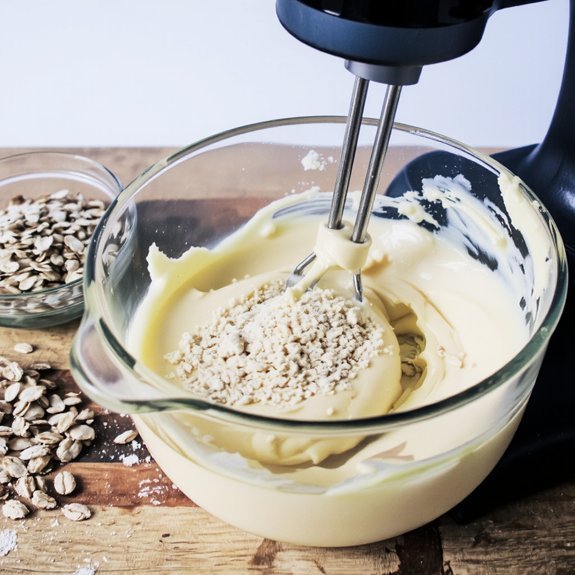
Blending Oats and Flour
Combining your wet and dry components requires a methodical approach to avoid overmixing, which’ll toughen your cookies. Fold your oat-flour blend into the wet mixture using a spatula with deliberate, controlled motions. This technique preserves the desired crumb structure and texture variations that distinguish quality cookies.
| Ingredient | Ratio | Function |
|---|---|---|
| Rolled Oats | 1.5 cups | Provides chewiness and texture |
| All-Purpose Flour | 1.25 cups | Creates structural integrity |
| Baking Soda | 1 tsp | Activates leavening action |
Incorporate ingredients until just combined—roughly 15-20 seconds of folding. Overmixing develops gluten, compromising your cookie’s tender crumb. The nutritional impact of whole oats remains optimized when you avoid excessive mixing. This measured approach grants you control over your final product’s character, ensuring cookies that satisfy your specific texture preferences without sacrificing structural integrity.
Add Oats and Mix Well
Fold 3 cups of old-fashioned rolled oats into your wet and dry mixture until you’ve fully incorporated them throughout the batter.
Fold 3 cups of old-fashioned rolled oats into your mixture until fully incorporated throughout the batter.
These oats, originating from ancient grain cultures, deliver substantial nutritional benefits including fiber and protein.
Follow these sequential steps:
- Use a sturdy spatula to fold oats in gradually, rotating your bowl with each fold
- Mix for approximately 2 minutes until oats distribute evenly without dry pockets
- Verify the consistency—your batter should hold together without excess moisture
- Let the mixture rest for 1 minute to allow oat hydration
This technique makes certain your cookies develop proper texture and structural integrity.
Don’t overmix, as aggressive stirring compromises cookie tenderness.
Your evenly-distributed oats guarantee consistent baking results and superior taste in every bite.
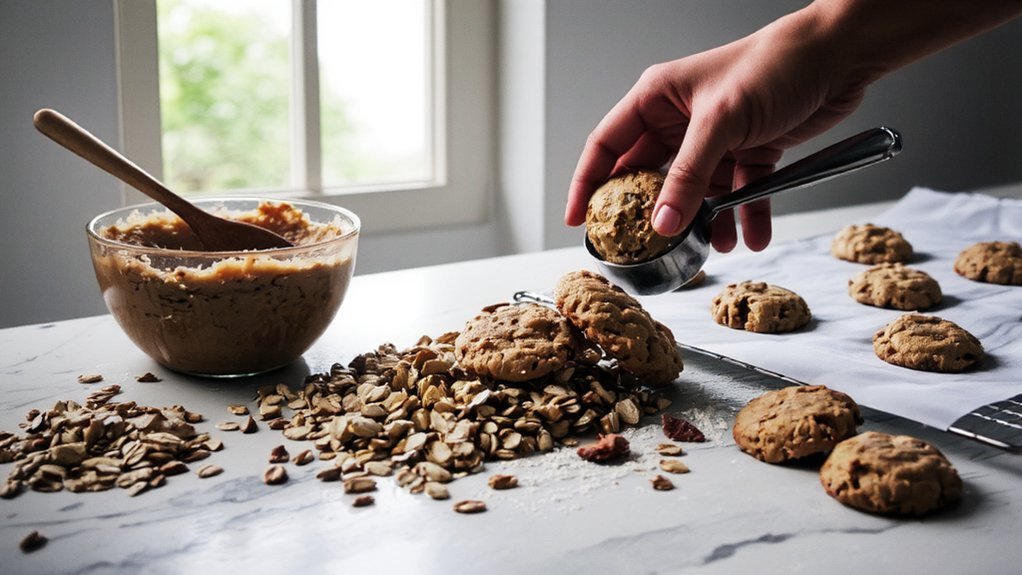
Scoop Cookie Dough Onto Baking Sheets
Portioning your dough guarantees uniform baking and consistent cookie size throughout your batch.
You’ll want to use a standard cookie scoop—typically a 2-tablespoon measure—for precision and efficiency.
Drop rounded portions onto your baking sheets using consistent scoop techniques to guarantee even cooking times.
Maintain proper spacing patterns by positioning each cookie approximately 2 inches apart.
This distance allows adequate heat circulation and prevents cookies from merging during baking.
You’re free to arrange them in rows or stagger them across the sheet based on your preference.
Press dough gently onto the sheet’s surface, creating slight contact without flattening.
If your dough proves sticky, refrigerate it briefly for easier handling.
This straightforward approach eliminates guesswork and delivers predictable, professional results every time you bake.
Bake Until Golden Brown
Preheat your oven to 350°F and bake your cookies for 10-12 minutes, watching carefully for the edges to turn light golden brown while the centers remain slightly soft.
Preheat to 350°F and bake 10-12 minutes until edges turn golden brown while centers stay soft.
Proper oven calibration guarantees consistent results across batches.
Monitor these visual indicators for ideal doneness:
- Edges display a light golden-brown hue while centers appear pale
- Cookies begin pulling away slightly from baking sheet perimeters
- Surfaces show minimal moisture and feel set when lightly touched
- No raw dough remains visible on the top layer
Remove your cookies immediately when these conditions’re met.
Overbaking creates hard, brittle textures that compromise quality. Your freedom to bake perfectly hinges on precise timing and attention.
Let cookies cool on the baking sheet for two minutes before transferring to wire racks, allowing carryover baking to complete the process.
Cool Your Cookies Properly
Once you’ve removed your cookies from the oven, you’ll transfer them to a wire cooling rack after they’ve set on the baking sheet for approximately two minutes.
This brief resting period allows the cookies to firm up sufficiently for safe handling.
Position your rack placement strategically to maximize airflow control around each cookie.
Space them evenly across the rack’s surface, ensuring they’re not touching.
Proper airflow control prevents moisture from accumulating underneath, which’d otherwise create soggy bottoms.
Allow your cookies to cool completely at room temperature, typically fifteen to twenty minutes depending on thickness.
Don’t stack them prematurely.
Once fully cooled, you’ll achieve ideal texture—crispy edges with chewy centers.
Store cooled cookies in airtight containers to maintain freshness and preserve the quality you’ve worked to develop throughout the baking process.
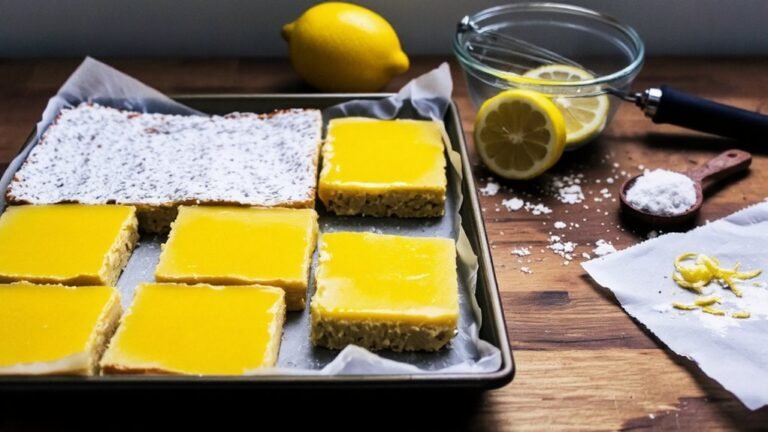
Store and Serve Your Oatmeal Cookies
To preserve your oatmeal cookies’ quality, you’ll store them in airtight containers within two hours of cooling—any longer and they’ll begin absorbing ambient moisture.
Follow these storage protocols:
- Maintain room temperature storage (68-72°F) for up to seven days in sealed containers
- Layer parchment paper between cookies to prevent adhesion and degradation
- Utilize freezer storage for extended preservation—vacuum-seal portions in freezer bags for up to three months
- Thaw frozen cookies at room temperature for 30 minutes before serving
When serving, pair beverages strategically: cold milk complements vanilla-forward profiles, while black coffee cuts through sweetness effectively.
Hot tea enhances spiced varieties.
Remove cookies from storage 15 minutes before serving to optimize texture and flavor intensity.
Your independence in timing guarantees you’ll experience peak sensory satisfaction every time.
Frequently Asked Questions
Can I Substitute Butter With Oil or Applesauce in Oatmeal Cookies?
You can substitute butter with oil or applesauce, but you’ll experience different results. Oil maintains binding properties while reducing flavor impact compared to butter’s richness.
Use 3/4 cup oil per 1 cup butter. Applesauce works similarly at equal ratios, though it’ll alter texture and moisture content.
Applesauce adds sweetness, so reduce sugar by 1/4 cup. Both substitutions require you to adjust your recipe’s liquid ratios accordingly for ideal cookie consistency.
What Type of Oats Work Best—Rolled, Steel-Cut, or Instant Oatmeal?
You’ll want rolled oats for best results—they’re your best choice.
Steel-cut oats won’t soften adequately during baking, creating a gritty texture comparison that undermines your cookies. Instant oats absorb too much moisture, compromising structure. Rolled oats provide superior absorption rates, yielding chewy-textured cookies with balanced consistency.
Use precisely 1.5 cups rolled oats per standard batch. Mix them directly into your wet ingredients first, allowing 2-3 minutes for proper hydration before combining with dry components. This sequence guarantees even distribution.
How Do I Prevent My Oatmeal Cookies From Spreading Too Much?
You’ll prevent excessive spreading by chilling your dough for at least 30 minutes before baking.
Maintain your oven temperature at precisely 350°F—use an oven thermometer to verify accuracy.
Don’t skip dough chilling; it solidifies the fat, reducing flow during baking.
Shape cookies uniformly and space them two inches apart on parchment paper.
This methodology gives you complete control over your final product’s structure and consistency.
Can I Add Nuts, Raisins, or Chocolate Chips to This Recipe?
You’ll absolutely customize your batch with mix-ins ratios of 1:3 (mix-ins to oats).
Incorporate nuts, raisins, or chocolate chips—you’re in control.
Apply complementary flavor pairings: walnuts with raisins, dark chocolate with cranberries.
Add mix-ins after creaming butter and sugar, before folding in oats.
Don’t exceed total mix-in volume; excess moisture causes spreading.
Distribute evenly for consistent results throughout your cookies.
Why Did My Cookies Turn Out Too Cake-Like Instead of Chewy?
You’ve likely overmixed your dough, developing excess gluten that creates cake-like texture.
Additionally, excess leavening agents—baking soda or powder—generate too much lift.
Reduce leavening by 25%, mixing only until ingredients combine.
Use precise measurements: 1/4 teaspoon baking soda per cup flour.
Don’t overwork the dough; fold in oats gently.
Bake at 350°F for 10-12 minutes, underbaking slightly for chewiness.
This approach gives you control over your cookie’s final structure.


Leave a Comment