
Key Takeaways
- Gather essential ingredients: all-purpose flour, baking powder, sugar, eggs, butter, milk, salt, and vanilla extract for basic muffins.
- Whisk dry ingredients together, blend wet ingredients separately, then gently fold wet into dry with minimal strokes to avoid overdevelopment.
- Fill muffin cups two-thirds full using an ice cream scoop for uniform portioning and consistent baking results across the batch.
- Preheat oven to 375–400°F, bake on center rack for 18–22 minutes until golden brown and internal temperature reaches 205–210°F.
- Position rack in lower-middle position and tent foil over muffins during final 5–7 minutes if tops brown too quickly.
Essential Ingredients and Pantry Staples
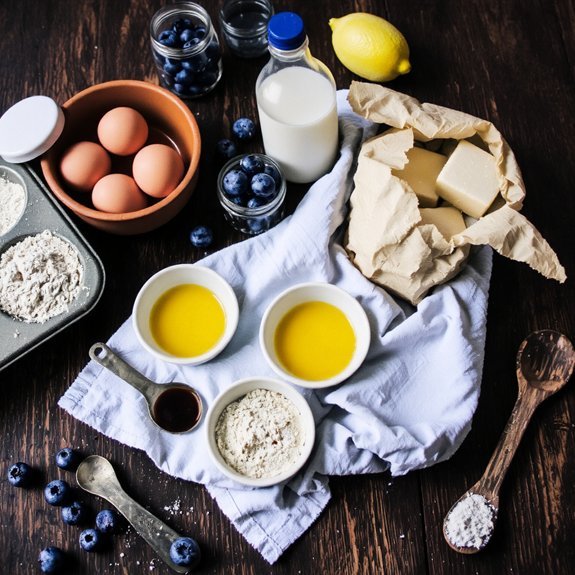
You’ll need to stock several foundational ingredients before you begin any muffin recipe. Your pantry requires all-purpose flour as your dry base, though you can substitute alternative flours for dietary preferences.
Leavening varieties like baking powder and baking soda create rise and texture—use baking powder for most recipes and baking soda when acidic ingredients are present.
Sweetener alternatives give you control over your final product. Beyond granulated sugar, consider honey, maple syrup, or coconut sugar for distinct flavor profiles.
You’ll also need eggs as your binding agent and fat—butter, oil, or applesauce—for moisture and structure.
Salt enhances flavors while vanilla extract adds depth. These essentials form your foundation, allowing you complete freedom to customize recipes according to your preferences and dietary requirements.
Gathering Your Baking Equipment
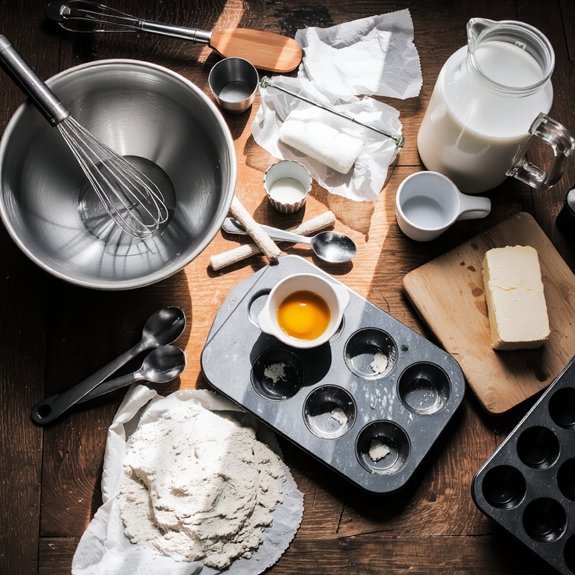
Before mixing your batter, assemble the specialized tools that’ll guarantee consistent, professional results. You’ll need precise measuring tools—a digital scale for accuracy and graduated measuring cups for dry ingredients. A liquid measuring cup with a pouring spout promotes proper hydration ratios in your formulation.
Precise measuring tools—digital scale, graduated cups, and liquid measuring cup—guarantee consistent, professional muffin results.
Invest in quality specialty pans, specifically a standard muffin tin with twelve cups or a mini muffin pan depending on your desired yield. Silicone liners or parchment paper prevents sticking and simplifies cleanup.
Additional essential equipment includes a large mixing bowl, whisk, spatula, and wooden spoon for incorporation techniques. A stand mixer accelerates your workflow, though hand mixing remains viable. Preheat your oven with an oven thermometer to verify calibration accuracy.
These tools empower you to achieve consistent texture, uniform rise, and professional-quality muffins independently.
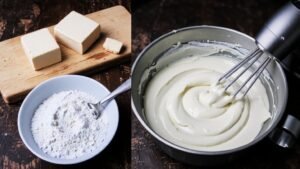
Mixing Techniques for Perfect Muffin Batter
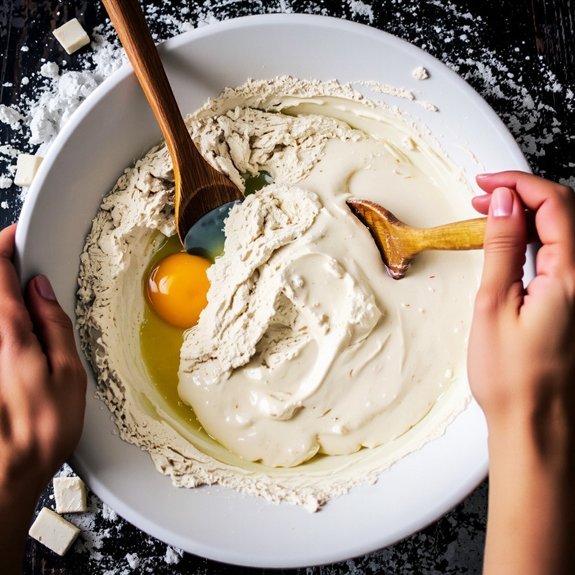
Once you’ve assembled your equipment, understanding proper mixing methodology becomes critical to achieving ideal muffin structure.
Master these essential techniques:
- Dry ingredient combination – Whisk flour, leavening agents, and salt at medium mixing speed to distribute uniformly and incorporate air
- Wet ingredient preparation – Blend eggs, oil, and milk separately before introducing to dry components
- Gentle folding method – Use a spatula with deliberate, minimal strokes to combine wet and dry mixtures, preserving air pockets
- Avoid overmixing – Stop folding immediately when streaks of flour disappear; excessive mixing develops gluten, producing dense, tough muffins
You’ll maintain structural integrity by respecting this methodology.
Don’t rush the process.
Precise timing and controlled mixing speed directly determine your muffins’ crumb quality and rise.
Practice these techniques consistently for reproducible, professional results every time.
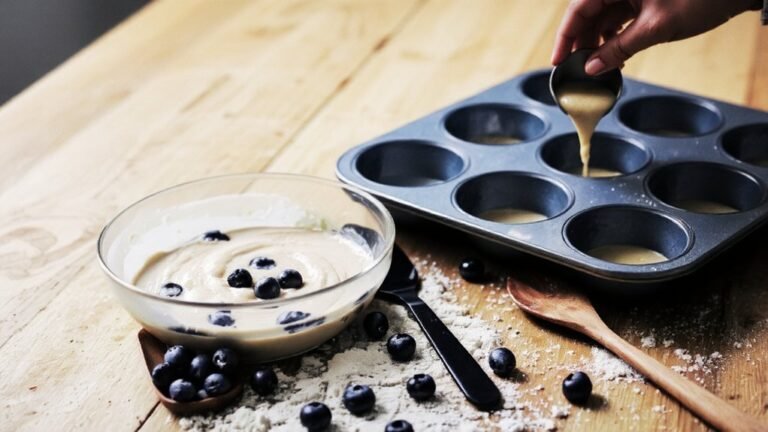
Filling Your Muffin Cups and Preparing for Baking

With your batter properly mixed and resting briefly, it’s time to transfer it into prepared muffin cups. You’ll want to use an ice cream scoop or standardized measuring tool to distribute uniform portions across each cup, filling them approximately two-thirds full.
This technique promotes consistent baking times and even browning throughout your batch.
Position your muffin tray alignment carefully on the center oven rack, allowing adequate airflow circulation. Check that your oven has reached the precise temperature specified in your recipe—typically 375-400°F for standard muffins.
Level placement prevents uneven rising and guarantees professional results.
Before inserting the tray, verify that your oven racks are properly positioned. This preparation prevents adjustments mid-bake, which compromises structure.
Your setup determines the quality of your final product, so precision at this stage is non-negotiable.
Baking Times and Temperature Guidelines

As your oven reaches the target temperature, you’ll insert your prepared muffin tray and set a timer for 18-22 minutes, depending on your recipe’s specifications and muffin size.
Insert your prepared muffin tray once preheated, setting a timer for 18-22 minutes based on recipe specifications and muffin size.
Standard baking requires these considerations:
- Preheat duration of 15-20 minutes guarantees even heat distribution and consistent rise
- Standard convection settings circulate air for uniform browning and reduced baking time
- Internal temperature should reach 205-210°F for ideal moisture retention and crumb structure
- Cool muffins in the pan for 5 minutes before transferring to racks
You’ll recognize doneness when golden-brown tops spring back under gentle pressure.
Avoid opening your oven door prematurely, as temperature fluctuations compromise rise and texture.
Convection settings accelerate cooking by 25%, so reduce your time accordingly.
Monitor your batch closely during the final minutes for perfect results.
Troubleshooting Common Muffin Problems
You’ll encounter three primary issues when baking muffins: moisture loss that yields dry crumb structure, uneven rise caused by inconsistent oven temperature or batter distribution, and over-browning of the muffin tops due to excessive heat exposure.
Addressing dry muffins requires you to reduce baking time by 2-3 minutes, increase fat content by 10-15%, or lower oven temperature by 25°F.
You’ll solve uneven rising and burnt tops by calibrating your oven temperature with an independent thermometer, filling cups uniformly to the two-thirds mark, and positioning your rack in the center of the oven cavity.
Dry Muffins Solutions
Dry muffins commonly result from overbaking, excessive flour, or insufficient fat and moisture in the batter. You’ll want to recalibrate your approach to achieve ideal texture.
- Reduce oven time by 2-3 minutes and monitor internal temperature (205-210°F at center)
- Incorporate moisture add-ins like yogurt, sour cream, or applesauce to increase hydration levels
- Measure flour by weight rather than volume to prevent compaction errors
- Implement proper storage techniques using airtight containers to maintain moisture retention
You should also increase fat content slightly—add an extra tablespoon of butter or oil per dozen muffins.
Use the toothpick test: it should have moist crumbs, not come out clean.
These adjustments’ll give you consistently tender, moist muffins with superior crumb structure.
Uneven Rising Issues
While moisture and texture adjustments resolve density issues, uneven rising presents a distinct set of challenges that affects muffin appearance and crumb architecture. Rise asymmetry occurs when batter distributes unevenly or temperature fluctuates during baking, compromising your final product’s structural integrity.
| Cause | Solution |
|---|---|
| Uneven pan heat distribution | Rotate pans halfway through baking at 12-15 minutes |
| Inconsistent batter density | Fold dry ingredients uniformly; use consistent scooping technique |
| Oven temperature variance | Calibrate oven; use oven thermometer for accuracy |
You’ll eliminate rise asymmetry by ensuring uniform batter consistency and maintaining precise 350-375°F temperatures. Distribute batter evenly into prepared cups at identical heights. Position racks centrally to optimize air circulation. These technical adjustments guarantee predictable, professional-quality results and prevent you from wasting ingredients or effort on substandard batches.
Burnt Tops Prevention
Burnt tops commonly result from excessive top-shelf positioning or prolonged exposure to direct heat, causing the muffin crown to brown too rapidly while the interior remains underbaked.
You’ll prevent this issue by implementing these strategies:
- Position your rack in the lower-middle position, typically 6-8 inches from the heating element
- Tent foil loosely over muffins during the final 5-7 minutes if browning accelerates prematurely
- Reduce oven temperature by 25°F and extend baking time by 3-5 minutes
- Use an oven thermometer to verify actual temperature, as calibration errors frequently occur
You’re free to experiment with rack placement based on your specific oven’s heat distribution.
Monitor your first batch closely, documenting results for consistent future success.
These adjustments guarantee even browning while allowing complete interior development, giving you control over your baking outcomes.
Frequently Asked Questions
Can I Make Muffins in a Regular Cake Pan Instead of a Muffin Tin?
Yes, you can substitute a regular cake pan for a muffin tin.
You’ll need to adjust your baking time substantially—expect 25-35 minutes instead of 18-22 minutes, depending on pan depth.
Shallower pans require less time; deeper ones need more.
Monitor your muffin’s internal temperature, targeting 205°F for ideal doneness.
Guarantee even heat distribution by positioning your pan centrally in the oven.
You’ll sacrifice individual portions but maintain identical flavor and texture.
How Far in Advance Can I Prepare Muffin Batter Before Baking?
You can prepare muffin batter up to 24 hours in advance using cold fermentation techniques.
Store your mixed batter in an airtight container at 4°C for overnight resting, which actually enhances flavor development and crumb structure through enzymatic activity.
This method gives you scheduling flexibility without compromising quality. However, don’t add leavening agents until you’re ready to bake—incorporate baking powder and baking soda immediately before portioning into your pan to maximize rise potential.
What’s the Best Way to Store Baked Muffins for Maximum Freshness?
You’ll maximize freshness by storing baked muffins in airtight packaging at room temperature for up to two days.
For extended preservation, freezer storage is your ideal solution—place cooled muffins in freezer-grade containers or vacuum-sealed bags for up to three months. This method maintains structural integrity and flavor profile.
You can thaw individual muffins at room temperature within thirty minutes, preserving your autonomy over consumption timing and portion control.
Can I Substitute Ingredients Like Eggs or Dairy in Muffin Recipes?
You can absolutely substitute eggs and dairy in your muffin formulations.
For eggs, you’ll use a Flax Egg—one tablespoon ground flaxseed mixed with three tablespoons water per large egg.
Aquafaba Tips: three tablespoons aquafaba replaces one egg effectively.
Substitute dairy milk with almond, oat, or coconut alternatives at 1:1 ratios.
Replace butter with coconut oil or applesauce using equivalent measurements.
These modifications maintain structural integrity and moisture content in your final product.
How Do I Know When Muffins Are Completely Cooled Before Storing?
You’ll know your muffins are completely cooled when you can comfortably hold them without discomfort—the touch test confirms internal temperature stabilization.
For precise verification, use a thermometer to confirm they’ve reached ambient temperature, typically 68-72°F.
This cooling period generally requires 60-90 minutes at room temperature. You’re free to store them once they’ve reached this state, preventing condensation that compromises texture and encourages mold growth during storage.


Leave a Comment