Key Takeaways
- Whip three room-temperature egg whites with cream of tartar to stiff peaks, then gradually incorporate sugar for glossy, stable meringue.
- Use a grease-free copper or stainless steel bowl and ensure all equipment is completely clean to prevent foam collapse.
- Pipe meringue onto parchment-lined baking sheets at 45 degrees, spacing cookies 1.5 inches apart for even heat circulation.
- Bake at 200°F for 1.5–2 hours without opening the oven door; extend time 15–30 minutes on humid days.
- Store cooled meringues in an airtight container away from humidity to maintain crispness and prevent moisture absorption.
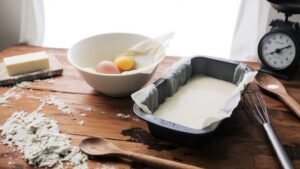
Gathering Your Ingredients and Equipment
Before you begin mixing, gather three egg whites (room temperature, around 70°F), 1/4 teaspoon cream of tartar, 1/4 teaspoon salt, 3/4 cup superfine granulated sugar, and 1 teaspoon vanilla extract.
Gather three room-temperature egg whites, cream of tartar, salt, superfine sugar, and vanilla extract before mixing begins.
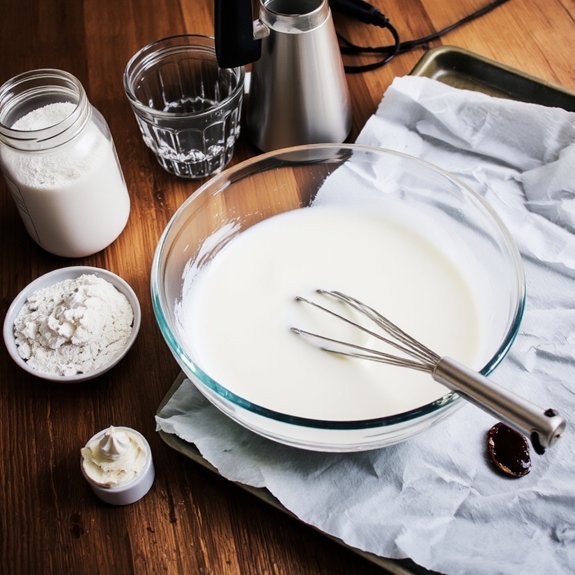
You’ll also need a clean, dry mixing bowl—any moisture compromises your meringue’s structure.
For equipment, grab an electric mixer with whisk attachment, measuring cups, measuring spoons, and a rubber spatula. A baking sheet lined with parchment paper completes your setup.
Smart pantry organization saves you time and money. Buy cream of tartar and superfine sugar in bulk during budget shopping trips; they’re shelf-stable staples.
Store them in airtight containers away from humidity.
Ensure your mixing bowl and beaters are completely grease-free. Even trace amounts of oil prevent proper whipping.
Room-temperature egg whites whip faster and achieve greater volume—this temperature precision matters critically for successful meringue.
Understanding Egg Whites and Meringue Basics
You’ll find that egg whites contain proteins and water that transform dramatically when you whip them, trapping air bubbles that create meringue’s characteristic structure.
As you beat the whites, the proteins unfold and stabilize around each air pocket, progressing from foamy to soft peaks to stiff peaks—a process that typically takes 3-5 minutes with an electric mixer.
Temperature matters considerably; room-temperature egg whites whip faster and incorporate more air than cold ones, yielding a more voluminous, stable meringue.
Egg White Properties
Why do egg whites transform from clear liquid into stiff peaks? You’re witnessing protein denaturation.
Egg whites contain approximately 90% water and 10% proteins, primarily ovalbumin.
When you whip them, you’re incorporating air and unfolding these protein molecules, which then trap moisture and create foam structure.
Understanding their allergen profile matters—eggs rank among the top food allergens.
Nutritionally, egg whites offer roughly 17 calories and 3.6 grams of protein per large egg, with negligible fat.
Temperature control’s critical.
You’ll achieve ideal results when whites reach room temperature before whipping, typically 70°F.
Cold whites require longer beating; warm ones risk deflating.
Room-temperature whites whip faster and hold their structure better, giving you the control you need for perfectly peaked meringues.
Meringue Formation Process
Creating meringue requires transforming room-temperature egg whites into a stable foam through precise whisking.
You’re manipulating surface tension to trap air bubbles, which creates the structure you need for successful cookies.
As you whisk, you’re breaking down proteins that naturally surround each bubble.
These proteins stabilize the bubble dynamics, preventing collapse.
You’ll notice the mixture progresses from foamy to soft peaks—this stage requires about three minutes of vigorous whisking.
Continue beating until stiff peaks form, typically five to seven minutes total.
At this point, you’ve achieved maximum volume and stability.
The proteins have fully unfolded and create a tight network around countless microscopic bubbles.
Temperature matters critically here.
Room-temperature egg whites whisk faster and incorporate air more efficiently than cold ones.
This efficiency directly impacts your meringue’s final texture and your cookies’ quality.
Whipping Egg Whites to Stiff Peaks

You’ll need to bring your eggs to room temperature before you start, as they’ll whip to greater volume and stability than cold eggs.
Select a completely clean, grease-free bowl—even trace amounts of fat will prevent your whites from reaching stiff peaks.
Once you’ve got the right conditions, you’ll beat your whites until they form peaks that stand straight up without curling over at the tips.
Room Temperature Matters Most
Because egg proteins respond differently at various temperatures, room-temperature whites—ideally between 68°F and 72°F—will whip more efficiently than cold ones.
You’ll notice that warmer proteins denature faster, creating smaller, more stable air bubbles essential for meringue structure.
Before separating your eggs, remove them from refrigeration thirty minutes prior.
This temperature adjustment dramatically reduces whipping time and prevents overbeating, which degrades your foam’s integrity.
Monitor your kitchen humidity closely; excessive moisture interferes with meringue stability.
You’ll achieve the best results in controlled environments below 60% humidity.
Implement draft prevention by closing windows and doors during preparation.
Air currents destabilize your whipping process and compromise peak formation.
These conditions—precise temperature, controlled humidity, and still air—give you complete control over your meringue’s success.
Choosing the Right Bowl
Why does bowl selection matter so dramatically when whipping egg whites? The bowl’s material conductivity directly affects temperature stability during whipping.
You’ll want to use either copper or stainless steel bowls—copper naturally interacts with egg whites’ proteins, stabilizing foam formation, while stainless steel maintains consistent coolness.
Avoid glass and plastic entirely. Glass conducts heat unpredictably, destabilizing your peaks, while plastic retains residual oils that sabotage volume.
The bowl’s surface texture matters equally. You need microscopic roughness that grips egg white proteins, creating friction for ideal incorporation.
Smooth surfaces let proteins slip, preventing stiff peak formation.
Clean your chosen bowl thoroughly with vinegar or lemon juice beforehand, eliminating any fat traces. Temperature control through proper bowl selection gives you complete command over your meringue’s success.
This fundamental choice determines whether you’ll achieve gloriously stiff peaks or disappointing, weeping failures.
Achieving Perfect Peak Formation
Separate your eggs meticulously, ensuring not even a trace of yolk contaminates the whites—even 0.1% fat content dramatically reduces foam stability and volume.
Room-temperature whites whip faster and achieve greater volume than cold eggs, so let yours sit for 30 minutes beforehand.
Start beating at medium speed, gradually increasing to high.
You’ll progress through foamy, soft peaks, and finally stiff peaks—the stage you’re after.
Stiff peaks hold their shape without drooping when you lift the beaters.
Account for humidity control; dry environments accelerate whipping, while moisture extends timing.
Altitude adjustments matter too—higher elevations require slightly longer beating due to decreased air pressure.
Add cream of tartar (⅛ teaspoon per egg white) to stabilize your foam and prevent overbeating, which can cause graininess and collapse.
Adding Sugar and Achieving the Perfect Consistency

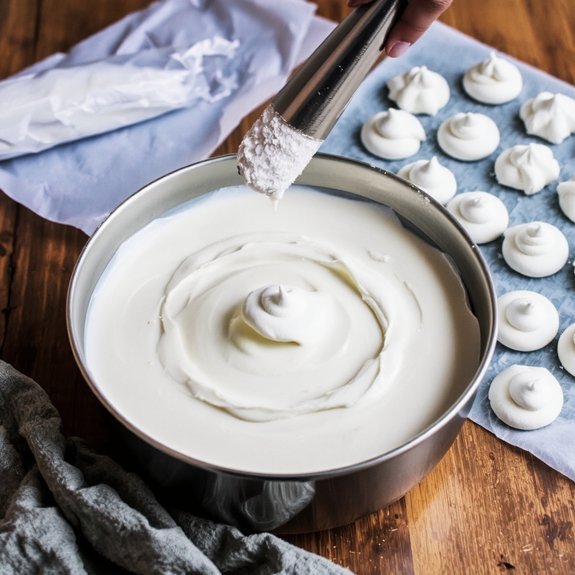
Once your egg whites have reached stiff peaks, you’ll gradually add your granulated sugar—typically ¼ cup per egg white—in small increments of about one tablespoon at a time.
This sugar ratio guarantees proper incorporation without deflating your meringue. Addition timing matters critically; rushing this process risks compromising your peaks.
Between each tablespoon addition, beat for approximately 30 seconds at medium-high speed. You’re dissolving the sugar completely into the egg whites, creating a glossy, thick paste. The meringue should transform from grainy to silky smooth as you progress.
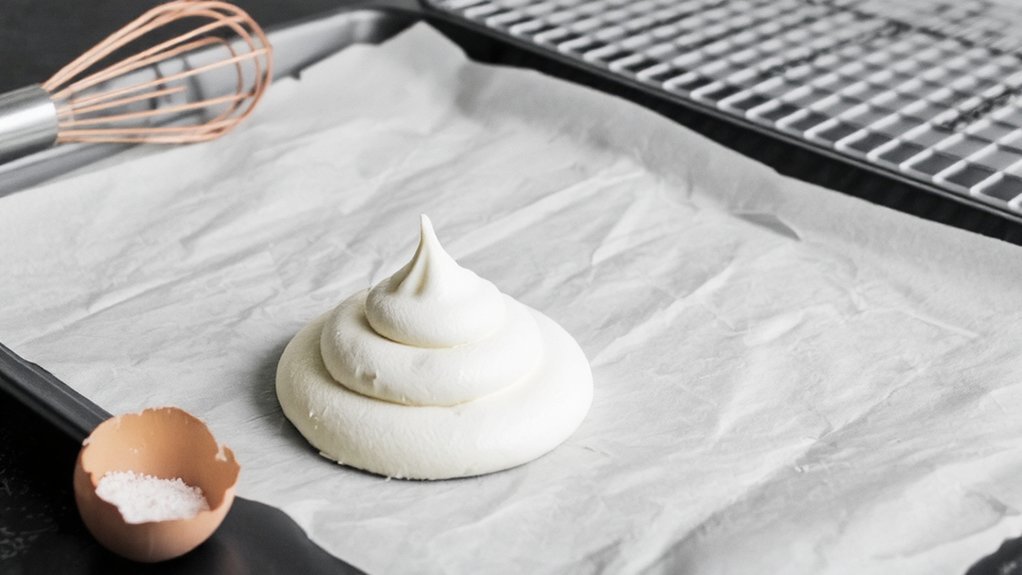
Your finished meringue reaches ideal consistency when it holds stiff, glossy peaks that don’t weep or collapse. The mixture should feel velvety, never gritty. This precision determines your cookies’ final texture and structural integrity during baking.
Flavoring and Coloring Your Meringue
How’ll you transform your glossy meringue into a signature creation?
Your flavor choices determine the final product’s character, so choose deliberately.
- Citrus zests brighten meringue with vibrant notes—add lemon, lime, or orange zest at peak stiff peaks to preserve volatile oils and prevent deflation.
- Herb infusions like lavender or rosemary demand precision; steep dried herbs in a small amount of water, strain completely, then incorporate slowly while maintaining structure.
- Extract additions—vanilla, almond, or peppermint—require restraint; use ½ teaspoon per batch to avoid moisture interference with meringue stability.
- Gel food colorants won’t compromise your foam’s integrity like liquid dyes do; fold in drops gradually for consistent, vibrant hues.
Temperature stability matters throughout.
Keep your meringue cool and work efficiently to preserve your carefully achieved peaks.
Preparing Your Baking Sheets and Piping Bags
Readying your equipment isn’t optional—it’s foundational to piping success.
Readying your equipment isn’t optional—it’s foundational to piping success.
Line your baking sheets with parchment paper or silicone mats—they’ll prevent sticking and promote even heat distribution during baking.
For kit organization, gather your piping bags and fitted tips before you start.
You’ll want various tip sizes for different cookie shapes.
Fill each bag halfway with meringue to maintain control and prevent overflow.
Consider labeling bags with a permanent marker if you’re using multiple flavors or colors simultaneously—this eliminates confusion and keeps your workflow efficient.
Position your bags in tall glasses or containers to stabilize them while filling.
This hands-free setup frees you to focus on achieving consistent piping pressure and shape uniformity, ultimately delivering professional-quality results you’ll truly be proud of.
Shaping and Piping Your Cookies
With your equipment properly staged, you’re ready to pipe meringue onto your prepared sheets. Control matters here—your piping technique directly impacts cookie texture and appearance.
- Hold the bag at 45 degrees to create consistent peaks without deflating your meringue’s air structure
- Maintain steady pressure to prevent temperature fluctuations that compromise meringue stability
- Experiment with swirl variations—rosettes, kisses, and waves offer distinct presentation plating options
- Space cookies 1.5 inches apart to allow even heat circulation during baking
Precision piping guarantees uniform baking times.
Your meringue’s temperature sensitive nature demands controlled movements—no squeezing or hesitation.
Each cookie’s shape affects surface area exposure, influencing crispness levels.
Master consistent sizing now, and you’ll achieve professional results that honor your ingredient investment and baking freedom.
Baking at the Right Temperature and Time
Because meringue’s delicate protein structure demands precise thermal control, you’ll need to set your oven to 200°F—a low temperature that dries rather than bakes your cookies.
Meringue’s delicate protein structure requires precise thermal control at 200°F to dry rather than bake your cookies.
Proper oven calibration is critical; invest in an oven thermometer to verify your temperature, as many ovens run hotter than their settings indicate.
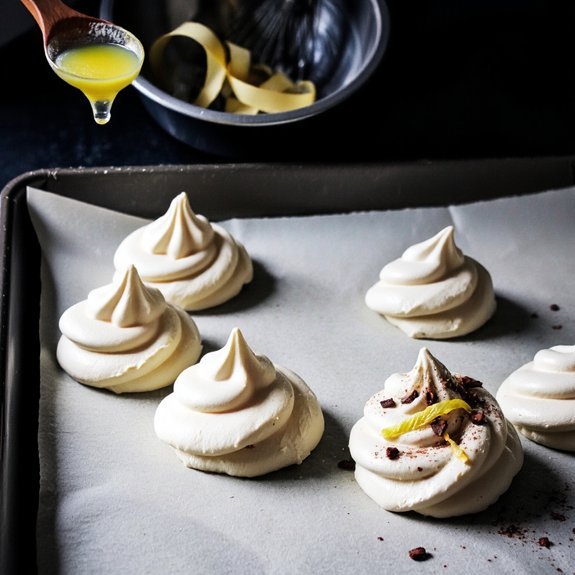
Bake for 1.5 to 2 hours, depending on cookie size.
Your meringues should be dry and crisp throughout, not soft or sticky.
Don’t crack the oven door during baking.
Humidity effects substantially impact drying time.
On humid days, extend your baking duration by 15-30 minutes.
Conversely, dry conditions allow shorter baking periods.
Choose low-humidity days when possible for ideal results and maximum control over your baking process.
Storing and Troubleshooting Common Issues
Once your meringues have cooled completely, you’ll store them in an airtight container with parchment paper between layers to prevent sticking and moisture absorption.
Humidity control is critical—maintain storage below 50% relative humidity, or they’ll become tacky and collapse.
Common issues and solutions:
- Weeping (sticky bottoms)—caused by underbaking; increase oven time by 10-15 minutes next batch
- Browning edges—reduce oven temperature by 25°F and extend baking duration
- Cracking—ensure room-temperature eggs and gradual sugar incorporation during beating
- Loss of crispness—use recrisping methods by heating at 250°F for 10 minutes, then cooling in the oven
Your meringues’ll stay fresh up to two weeks in ideal conditions.
Control your environment, and you’ll master consistent, superior results every time.
Frequently Asked Questions
Can I Make Meringue Cookies Without Using a Stand Mixer or Electric Beater?
You can absolutely make meringue cookies through hand whisking—it’ll take elbow grease, but you’ll gain complete control. Use a copper bowl, which chemically stabilizes egg whites and accelerates incorporation.
Whisk vigorously at room temperature (68-72°F) for 10-15 minutes until stiff peaks form. You’re not bound by machinery; your technique dictates results.
Maintain consistent whisking speed and angle. This method demands patience but delivers superior texture and independence from electrical equipment.
What’s the Best Way to Fix Meringue Cookies That Turned Out Chewy Instead of Crispy?
You’ve got chewy cookies because moisture got trapped inside.
Here’s your fix: reheat them in a 200°F oven for 10-15 minutes to drive out that moisture.
Next time, try adding a tablespoon of cornstarch per egg white—it’ll lock in crispness.
You can also store them in an airtight container with silica packets.
Control your oven temperature precisely; too low causes chewiness.
These adjustments give you the crispy texture you’re after.
How Do I Prevent Meringue Cookies From Browning or Yellowing During Baking?
You’ll prevent browning by adding acid—cream of tartar or lemon juice—to stabilize your egg whites and maintain their pristine color.
Keep your oven temperature at a low 200-225°F; higher heat accelerates yellowing.
Position your rack in the upper-middle section, away from direct heat sources.
You’ve got control here: bake longer at lower temperatures rather than risking color degradation. This method gives you crispy, white cookies that’ll stay that way.
Can I Prepare Meringue Cookie Batter in Advance or Does It Need Baking Immediately?
You can’t prepare meringue batter in advance—it’ll collapse.
Fresh egg whites whipped immediately yield ideal volume and stability.
However, you can pipe onto baking sheets thirty minutes prior, allowing surface drying.
If you’re working with aged eggs, whip them fresh right before piping for maximum structure.
Temperature matters: keep ingredients cool throughout.
Your batter demands immediate baking once prepared for peak results and that crispy, light texture you’re after.
Why Did My Meringue Cookies Crack or Weep Moisture After Baking Successfully?
Your meringue cookies cracked or wept because you didn’t account for humidity effects on egg white proteins. High moisture environments cause structural collapse of the delicate foam matrix.
You’ve got to bake them in low-humidity conditions—aim for 30-40% relative humidity.
Additionally, make sure your oven temperature’s accurate; you’re looking for gentle heat around 200-225°F. Underbaking leaves residual moisture; overbaking causes rapid moisture loss and crazing.
Store cooled cookies immediately in airtight containers with desiccants.


Leave a Comment