Key Takeaways
- Cream softened butter with sugar for 3–5 minutes, then fold in sifted flour until just combined to prevent overdevelopment.
- Prebake the shortbread crust at 350°F for 12–15 minutes until lightly golden and firm before adding the filling layer.
- Whisk eggs and granulated sugar until pale and thick, then gently fold in sifted flour, baking powder, lemon zest, and juice.
- Bake the filled bars at 350°F for 20–25 minutes until edges set and center jiggles slightly; avoid overbaking for custard-like consistency.
- Cool completely at room temperature for 30 minutes, refrigerate minimum 2 hours, then cut with a hot knife and dust with powdered sugar.
Gather Your Ingredients
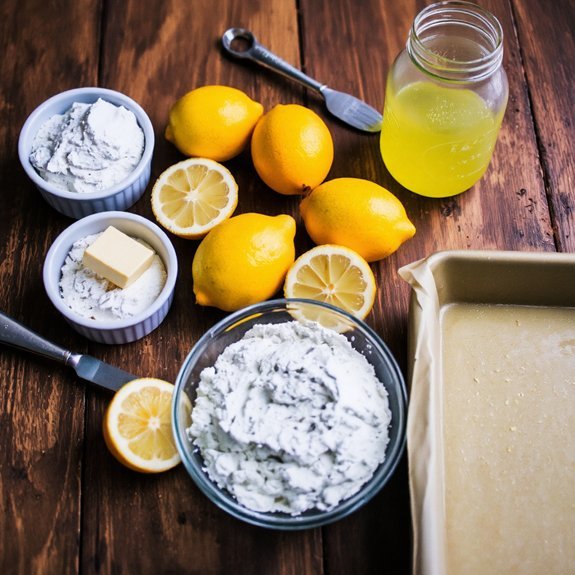
Before you start mixing, you’ll need to gather all your ingredients to guarantee a smooth baking process.
For the shortbread crust, collect two cups all-purpose flour, half a cup powdered sugar, and one cup butter.
The filling requires four large eggs, one and a half cups granulated sugar, three tablespoons flour, and half a cup fresh lemon juice.
Consider ingredient substitutions if needed: use coconut flour for a portion of all-purpose flour, or replace butter with coconut oil for dietary preferences.
Almond flour works well for texture variation.
Storage tips matter greatly.
Keep butter and eggs refrigerated until use.
Store lemon juice in airtight containers for up to three weeks.
Pre-sift your flour and powdered sugar into separate bowls to streamline your mixing process and prevent lumps in your final product.
Prepare Your Baking Pan
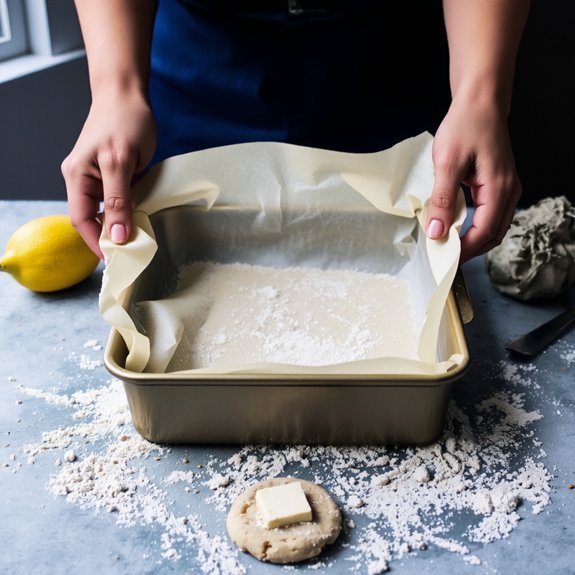
You’ll need a 9×13-inch baking pan, which provides the ideal surface area for even baking and proper thickness of your lemon bars.
Line your pan with parchment paper, allowing the edges to extend slightly beyond the rim so you can easily lift out the baked bars for cutting.
Press the parchment firmly into all corners and edges to prevent shifting during the baking process.
Choose the Right Size
For lemon bars, you’ll need a 9×13-inch rectangular baking pan—this standard size provides proper depth and surface area for even baking and consistent bar dimensions. This pan yields approximately 24 bars, making it ideal for portion planning at gatherings or family meals.
You’re not locked into this exact size, though; an 8×8-inch square pan works if you prefer thicker bars, while a 9×9-inch square produces medium-thickness results. Consider event matching when selecting your pan size. Smaller events benefit from concentrated batches, whereas larger gatherings demand the full 9×13-inch capacity.
Make sure your pan is metal rather than glass—metal conducts heat more evenly, preventing over-browning edges. Verify the pan’s condition; dents or warping compromises baking performance and bar consistency.
Line With Parchment Paper
Parchment paper serves as your essential release layer, preventing the lemon bars from sticking to the pan’s surface while enabling easy removal and clean slicing.
You’ll find two primary parchment types: bleached and unbleached.
Both withstand the heat limits required for baking lemon bars, typically up to 420°F, though unbleached offers a more natural option without chemical processing.
Cut your parchment to size, allowing it to extend slightly beyond the pan’s edges—this creates convenient handles for lifting the entire batch out after baking.
Press it firmly into corners and against sides, smoothing out wrinkles that could create impressions in your bars.
This preparation step takes mere minutes but eliminates frustration during removal, ensuring your lemon bars maintain their shape and presentation.
Make the Shortbread Crust
You’ll combine softened butter and granulated sugar, creaming them together until the mixture reaches a pale, fluffy consistency that incorporates air throughout.
Fold in your flour using a spatula with a gentle hand to avoid overdeveloping gluten, which would toughen the crust rather than keep it tender and crumbly.
Press this mixture firmly and evenly into your prepared baking pan, using the bottom of a measuring cup to create a compact, level base.
Butter and Sugar Mixture
Combining softened butter with granulated sugar creates the foundation for your shortbread crust.
You’ll use the creaming technique to blend these ingredients thoroughly, which incorporates air and develops the proper texture.
Start with room-temperature butter—approximately 70°F—promoting ideal incorporation without melting.
Beat the butter and sugar together for three to five minutes until the mixture becomes pale and fluffy.
This process aerates the butter, creating a lighter crumb structure in your finished crust.
Temperature control proves critical; cold butter won’t cream properly, while overly warm butter produces a greasy mixture.
Scrape down your bowl’s sides periodically to promote even blending.
The creaming technique you’re executing here directly affects your crust’s final texture and structural integrity.
Don’t rush this step; proper creaming determines your lemon bars’ success.
Flour Incorporation Technique
Once your butter-sugar mixture reaches the proper pale and fluffy consistency, it’s time to incorporate the flour, which’ll bind your ingredients into a cohesive dough.
Sift your all-purpose flour to aerate it and reduce clumping—flour aging naturally increases protein variance, affecting gluten development and crust texture. Add flour gradually, folding it in with a spatula using deliberate, controlled motions rather than aggressive mixing.
Overmixing activates gluten excessively, resulting in a tough, dense crust instead of the tender shortbread you’re targeting. Work until just combined; small flour streaks are acceptable and preferable to overdevelopment.
The mixture should resemble coarse sand with pea-sized butter pieces visible. Press this dough firmly and evenly into your prepared baking pan, creating your foundation for the tart lemon filling.
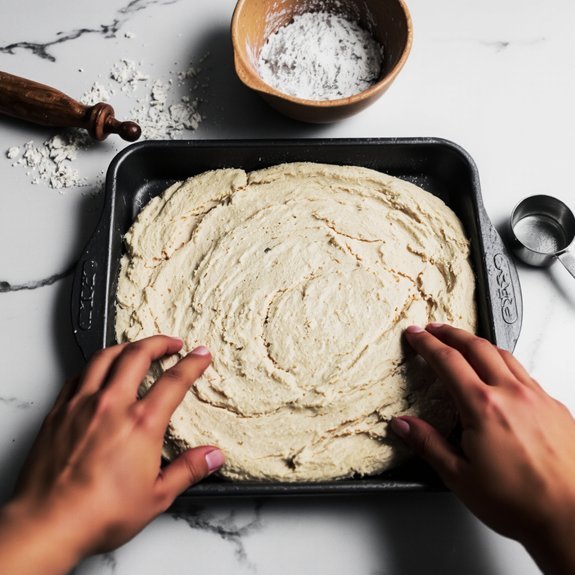
Press Into Pan
Transfer your flour-coated dough mixture directly into your prepared baking pan, then use firm, even pressure to distribute it across the bottom surface.
Your finger technique matters here—press methodically from the center outward, ensuring uniform density throughout. This consistent pressure prevents air pockets that’d compromise your crust’s structural integrity.
Work deliberately toward the edges, maintaining even thickness across the entire base.
Once you’ve achieved a solid foundation layer, focus on edge smoothing. Use your fingertips to refine the perimeter, creating clean lines where the crust meets the pan walls. This technique guarantees even baking and professional presentation.
Don’t rush this step. Your precision now directly influences how your shortbread crust bakes, determining whether you’ll achieve that ideal golden-brown texture with proper crispness that’ll support your lemon filling beautifully.
Bake the Base Layer
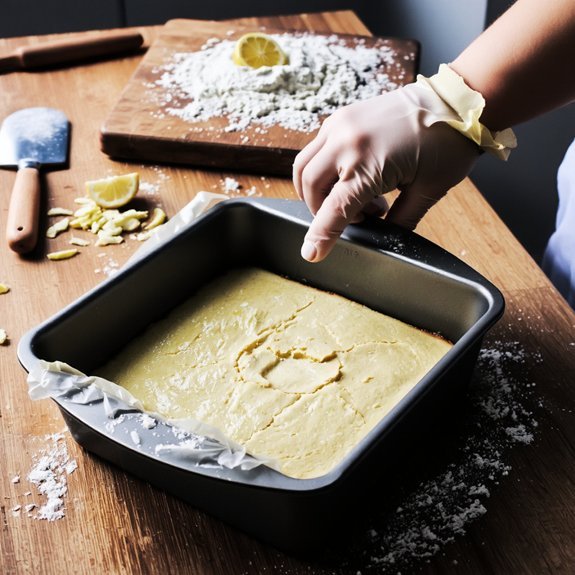
Press your shortbread mixture firmly and evenly into the prepared baking pan, ensuring it’s distributed across the entire bottom with no gaps or thin spots.
This foundation layer must be compact and level for best results.
- Preheat your oven to 350°F, accounting for oven calibration variations that may require adjustments of 25°F either direction depending on your appliance’s accuracy.
- Consider altitude adjustments if you’re baking above 3,000 feet, potentially increasing temperature by 15-25°F to compensate for faster moisture evaporation.
- Bake the base layer for 12-15 minutes until it’s lightly golden and firm to the touch, not soft or undercooked.
You’ll know it’s ready when the edges show subtle browning. This prebaked crust prevents sogginess and creates the structural integrity your lemon bars demand.
Prepare the Lemon Filling
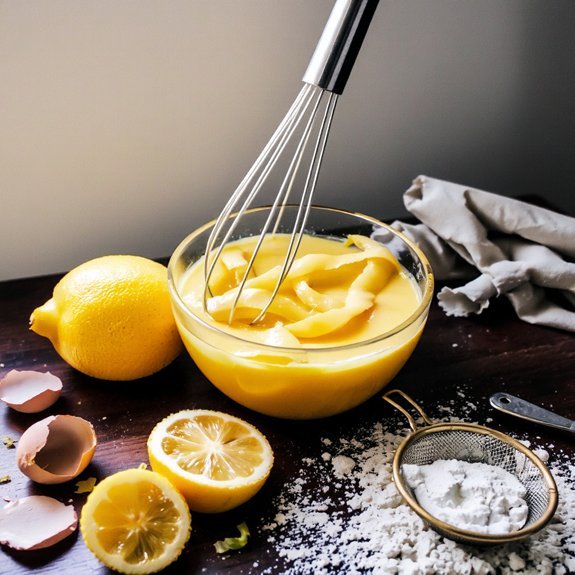
Whisking together your filling ingredients creates the tangy, custard-like layer that defines authentic lemon bars.
You’ll need four eggs, one and a half cups sugar, three tablespoons flour, and half a teaspoon of baking powder.
Fresh zest extraction is essential—use a microplane to capture the oils from two lemons, then juice them to yield half a cup of liquid.
Combine eggs and sugar first, whisking until pale and thick.
Add flour, baking powder, lemon zest, and juice, mixing until smooth.
Your filling should reach curd consistency—thick enough to coat a spoon but still pourable.
This texture guarantees proper setting during baking while maintaining that signature creamy interior.
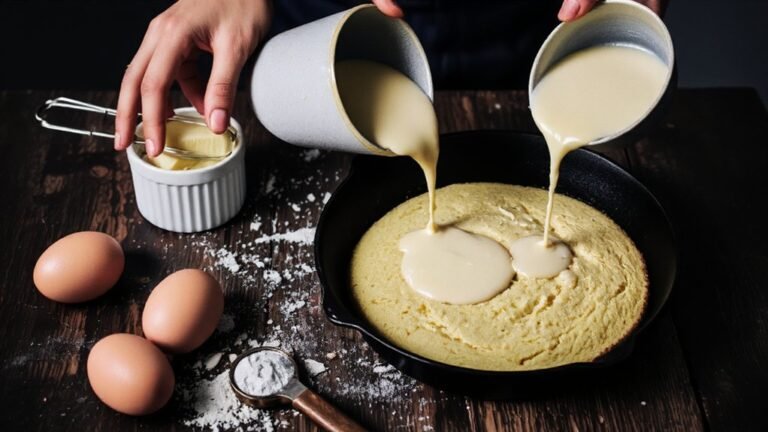
Pour your prepared filling directly onto the warm baked crust.
The contrast between temperatures helps the filling set properly while staying tender and decadent.
Combine Wet and Dry Ingredients
Once you’ve combined your eggs and sugar into a pale, thick mixture, you’ll fold in the dry ingredients—flour and baking powder—along with the lemon zest and juice.
Your emulsifier choice of eggs creates structural integrity, so handle this step deliberately.
Control your mixing speed to maintain the airiness you’ve developed; overmixing deflates the batter and compromises texture.
- Sift flour and baking powder together to eliminate lumps and guarantee even distribution
- Fold dry ingredients gently using a spatula with downward, sweeping motions until just combined
- Add lemon zest and juice last, folding until no streaks of dry mixture remain
Pour this batter directly into your prepared pan.
Don’t delay—the leavening agents activate immediately. Precision at this stage determines your final bars’ structure and crumb.
Pour and Bake the Filling
Your prepared pan now holds the delicate lemon batter you’ve carefully folded together. Preheat your oven to 350°F and position the rack in the center—this guarantees even heat distribution without burning the edges prematurely.
Pour the batter into your prepared crust, spreading it evenly with a spatula. Bake for 20-25 minutes, watching for these doneness indicators: the filling should jiggle slightly when you gently shake the pan, and the edges’ll appear set while the center remains barely soft.
Don’t overbake—you’re after a custard-like consistency, not a solid cake. The residual heat will continue cooking as it cools.
Remove from the oven and let cool completely on a wire rack before refrigerating for at least four hours. This resting period sets the filling properly, giving you clean, distinct bars.
Cool and Chill Your Bars
As the lemon bars emerge from the oven, resist the urge to cut into them immediately—patience here determines whether you’ll achieve clean edges or a crumbly mess.
Your cooling duration directly impacts the final texture and appearance of your bars.
Follow this cooling strategy:
- Room temperature phase: Allow bars to cool on the counter for 30 minutes, permitting the filling to set without becoming brittle.
- Refrigeration: Transfer to your fridge for a minimum of 2 hours, enabling ideal firmness for cutting.
- Freezer option: Chill techniques include freezing for 1 hour if you’re short on time—this accelerates structural stability.
Once fully chilled, your bars’ll cut cleanly with a sharp knife dipped in hot water between cuts,
delivering that professional appearance you’re after.
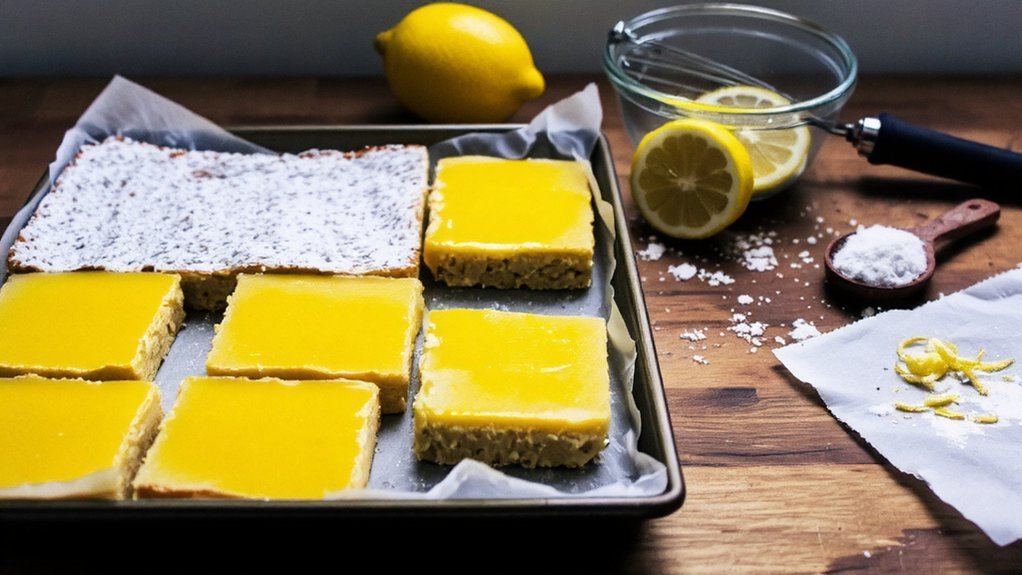
Cut, Dust, and Serve
Now that your lemon bars have achieved ideal firmness, you’ll want to cut them with deliberate precision to showcase those clean, sharp edges. Your slice technique determines presentation quality and structural integrity.
| Cutting Method | Best Result |
|---|---|
| Sharp knife, hot water rinse | Clean edges, minimal crumbling |
| Parchment paper guides | Uniform sizing, consistent portions |
| Gentle sawing motion | Reduced filling displacement |
| Room temperature bars | Best cuttability without brittleness |
| Wiped blade between cuts | Professional appearance, debris-free squares |
Dust your finished bars generously with powdered sugar immediately after cutting—this adheres best to slightly warm surfaces. Your serving suggestions should accommodate occasion and preference: enjoy them standalone, pair with coffee or tea, or serve chilled for summer gatherings. Store uncovered for crispy edges or covered for softer texture. These bars demand no accompaniments; they’re boldly self-sufficient.
Frequently Asked Questions
Can I Make Lemon Bars Ahead of Time, and How Should I Store Them?
You can absolutely prepare lemon bars in advance. After baking, you’ll want to allow overnight chilling to set the filling completely and develop ideal flavor. This make-ahead approach gives you total control over your schedule while maintaining peak quality.
Store your finished bars in airtight containers at room temperature for up to three days, or refrigerate them for up to a week. For extended storage, freeze them in airtight containers for up to three months.
What Is the Best Substitute if I Don’t Have Fresh Lemon Juice?
You’ll want to use bottled lemon juice as your primary substitute—it’s consistently acidic and delivers reliable results.
If you’re out of that, lime juice works acceptably, though it’ll shift your flavor profile slightly.
For maximum control, you can reconstitute citric acid powder with water; you’ll need about 1/2 teaspoon citric acid dissolved in 1 tablespoon water to replace fresh juice.
This approach gives you precision over your bars’ tartness level.
How Do I Prevent My Lemon Bars From Becoming Too Thick or Dense?
You’ll prevent dense lemon bars by carefully measuring your flour—don’t pack it into the cup.
Use a light hand when mixing; you’re not kneading dough.
Combine ingredients until you’ve just incorporated them; overmixing develops gluten, creating that thick texture you’re avoiding.
Keep your mixing technique gentle and deliberate.
Bake until the filling’s set but still slightly jiggly in the center, not completely firm.
This gives you bars with the tender, delicate crumb you’re after.
Can I Freeze Lemon Bars, and for How Long Will They Stay Fresh?
You can freeze lemon bars for up to three months while maintaining quality.
Wrap them individually in parchment paper, then place them in airtight containers for ideal freezer safety.
This method prevents ice crystals from forming on the surface, which’d compromise texture.
Thaw them at room temperature for two hours before serving.
Your bars’ll retain their tangy flavor and structural integrity when you follow this precise freezing protocol, giving you complete control over your dessert preparation timeline.
What Causes Cracks on Top of Lemon Bars, and How Do I Prevent Them?
Cracks form when you’ve overcooked your filling or cooled your bars too quickly.
You’ll prevent cracking by maintaining precise oven temperature—don’t exceed 350°F.
Let your bars cool gradually at room temperature before refrigerating; you’re avoiding thermal shock that causes surface splitting. This methodical cooling process gives you the control you need for flawless results every time.


Leave a Comment