
Key Takeaways
- Mix four cups flour, one teaspoon baking soda, and one-and-a-half teaspoons salt; sift twice for even distribution.
- Combine dry ingredients with buttermilk using gentle folding motions to create a slightly sticky, shaggy dough.
- Knead dough for 30 seconds with minimal handling, then shape into a firm round and score a cross.
- Bake at 450°F for 50–60 minutes until the crust turns deep golden-brown and the loaf sounds hollow when tapped.
- Cool completely on a wire rack for 2–3 hours before slicing; store in an airtight container up to three days.
Understanding the Essential Ingredients

Before you mix anything together, you’ll need to understand what makes Irish soda bread distinctive.
You’re working with four fundamental ingredients: flour, baking soda, salt, and buttermilk.
This simplicity gives you the freedom to experiment with regional variations that suit your preferences.
Flour provides structure—you’ll want all-purpose or bread flour for ideal results.
Baking soda acts as your leavening agent, creating that characteristic crumb without yeast.
Salt enhances flavor and controls fermentation speed.
Buttermilk’s acidity activates the baking soda, producing carbon dioxide bubbles that make the bread rise.
Add in suggestions like whole wheat flour for earthiness or incorporating seeds and dried fruit for texture variation.
Understanding these roles guarantees you’ll achieve authentic results every time you bake.
The Science Behind Baking Soda and Buttermilk
When you combine baking soda with the acidic buttermilk, you’re initiating a chemical reaction that produces carbon dioxide gas, which leavens your bread without requiring yeast.
The acid in buttermilk reacts with the alkaline baking soda, creating carbonic acid that breaks down into water, salt, and those essential gas bubbles that give soda bread its characteristic crumb structure.
You’ll notice this acid-base interaction happens immediately upon mixing, so you must work quickly to get your dough into the oven before the gas escapes.
Chemical Reaction Process
The magic of Irish soda bread happens through an acid-base reaction between baking soda and buttermilk’s lactic acid.
When you combine these ingredients, you’re initiating a chemical process that requires minimal activation energy. The reaction kinetics work quickly—sodium bicarbonate reacts with lactic acid to produce carbon dioxide gas, sodium lactate, and water.
This CO2 releases immediately, creating bubbles throughout your dough. You’ll notice the mixture rising and becoming slightly foamy.
The beauty of this reaction is its simplicity and speed. Unlike yeast-based breads requiring hours of fermentation, you’re getting instant leavening action.
Your dough’s pH shifts, affecting gluten development and crumb structure. The straightforward chemistry means you’ve got one opportunity to work quickly—mix your dry ingredients, add buttermilk, and get your dough into the oven fast.
Timing matters because the reaction’s momentum won’t wait.
Acid-Base Interaction Explained
At its core, Irish soda bread’s rise depends on a straightforward acid-base interaction: baking soda (sodium bicarbonate) is a base, and buttermilk contains lactic acid. You’re initiating a chemical reaction the moment these ingredients combine. The acid neutralizes the base, releasing carbon dioxide gas that creates those desirable air pockets throughout your loaf.
Understanding pH indicators helps you grasp this process. Buttermilk’s acidic nature (pH around 4.5) activates baking soda immediately upon mixing. You’re not waiting for heat activation like you would with baking powder. Buffer systems in your dough stabilize this reaction, ensuring consistent rise during baking.
| Component | pH Level | Function |
|---|---|---|
| Buttermilk | 4.5 | Acid source |
| Baking soda | 8.3 | Base reactant |
| CO₂ gas | N/A | Leavening agent |
| Finished crumb | 6.2 | Neutral result |
You’re controlling chemistry through precise ingredient ratios.
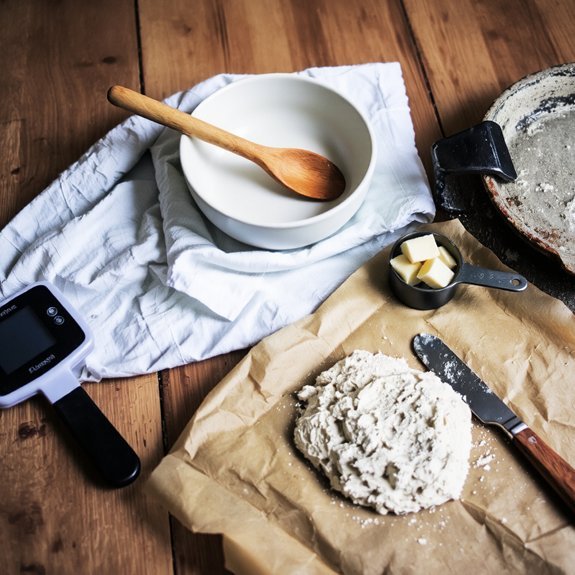
Gathering Your Equipment and Tools
Before you mix your ingredients, you’ll need to gather the essential equipment for baking Irish soda bread.
Organize your workspace layout strategically to maximize efficiency.
Position your tools within arm’s reach for ideal tool accessibility.
You’ll operate more freely when everything’s where you need it.
Assemble these items:
- Large mixing bowl (at least 3-quart capacity) for combining dry ingredients
- Wooden spoon or dough whisk for thorough ingredient integration
- 9-inch round cake pan or cast-iron skillet for baking structure
- Instant-read thermometer for precise internal temperature verification
Ensure your work surface provides adequate space.
Keep your measuring cups and spoons nearby.
This deliberate arrangement eliminates unnecessary movement and reduces preparation time substantially.
You’ll maintain complete control over your baking process when your equipment’s properly positioned and readily accessible.
Measuring and Preparing Your Dry Ingredients
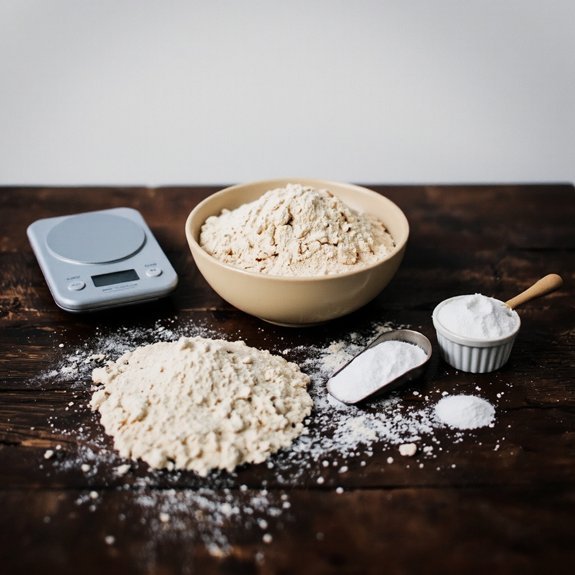
Once you’ve arranged your workspace, you’ll measure out your dry ingredients with precision to guarantee consistent results.
Begin by weighing four cups of all-purpose flour on your kitchen scale for accuracy—volume measurements can vary wildly.
Add one teaspoon of baking soda and one and a half teaspoons of salt to your flour.
Proper sift timing matters considerably.
Sift your combined dry ingredients together twice through a fine-mesh sieve.
This dual-sifting process accomplishes two critical goals: it incorporates air for lift and promotes thorough clump prevention throughout your mixture.
Take your time during this step; rushing creates uneven distribution of leavening agents.
Transfer your sifted mixture into a large mixing bowl, creating a well in the center.
You’re now positioned to incorporate your wet ingredients efficiently.
Combining Wet and Dry Ingredients Properly
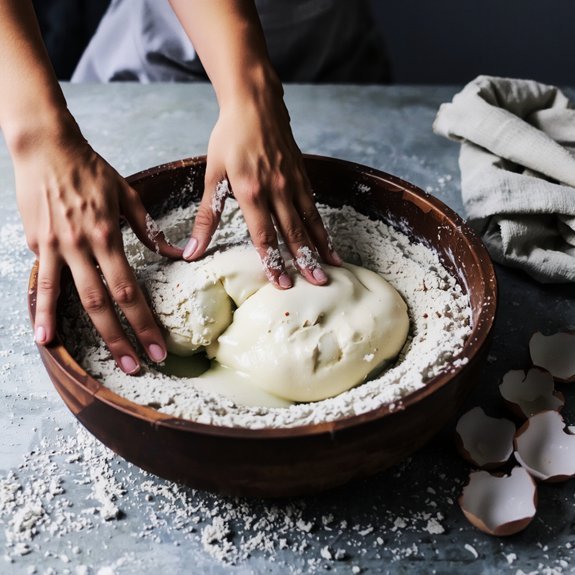
You’ll need to combine your precisely measured dry ingredients with your wet ingredients using a gentle folding technique that prevents overworking the dough.
Create a well in the center of your dry mixture and pour in your wet ingredients, then use a wooden spoon or your hands to fold them together with minimal strokes until just combined. This wet-to-dry mixing method preserves the tender crumb structure that’s essential to authentic Irish soda bread.
Dry Ingredient Measurement Accuracy
Accurate dry ingredient measurements are critical for achieving the proper dough consistency, since Irish soda bread relies on precise flour-to-liquid ratios rather than yeast for rise.
You’ll discover that regional measurements and packaging variability substantially impact your results.
- Weight your flour using a kitchen scale rather than the cup method, which introduces inconsistency
- Account for packaging variability by recognizing that flour density differs between brands and storage conditions
- Adopt regional measurements standard to your location—UK measurements differ from US equivalents
- Spoon and level your dry ingredients if you must use volume measurements, never scoop directly from the bag
You’re taking control of your baking by eliminating guesswork.
This precision guarantees your soda bread rises evenly and achieves the correct crumb structure every time.
Wet-to-Dry Mixing Technique
Because Irish soda bread doesn’t rely on yeast’s slow fermentation, you’ve got a narrow window to combine your wet and dry ingredients before the chemical reaction begins. Create a well in your dry mixture and pour buttermilk into the center. Using a fork, gently incorporate flour from the sides inward, mixing until a shaggy dough forms—don’t overwork it.
Pay attention to sensory cues: the dough should feel slightly sticky but hold together. Cultural variations exist across regions; some bakers add just enough liquid for a stiff dough, while others prefer a looser consistency. Trust your instincts and adjust hydration minimally if needed. Your goal is a cohesive mass ready for shaping within seconds of mixing.
Kneading Techniques for Soda Bread
Unlike yeast breads that benefit from extended kneading, soda bread requires a gentle, minimal touch to avoid developing excess gluten.
Soda bread demands restraint—minimal kneading preserves tender crumb, unlike yeast breads that require extended development.
Excess gluten will result in a tough, dense crumb. Your approach demands precision and restraint.
Kneading Protocol:
- Flour your work surface lightly to prevent sticking without incorporating excess flour
- Turn dough onto the surface and fold it over itself 3-4 times using your fingertips
- Rotate the dough a quarter turn between each fold for even distribution
- Stop immediately when the dough achieves a cohesive, slightly shaggy texture
Short kneading—approximately 30 seconds total—prevents overworking.
Gentle folding integrates ingredients without activating gluten strands.
Handle the dough with deliberate, controlled movements.
Once you’ve achieved uniformity, shape immediately.
Excessive manipulation compromises your bread’s tender crumb and authentic texture, undermining all your prior mixing efforts.
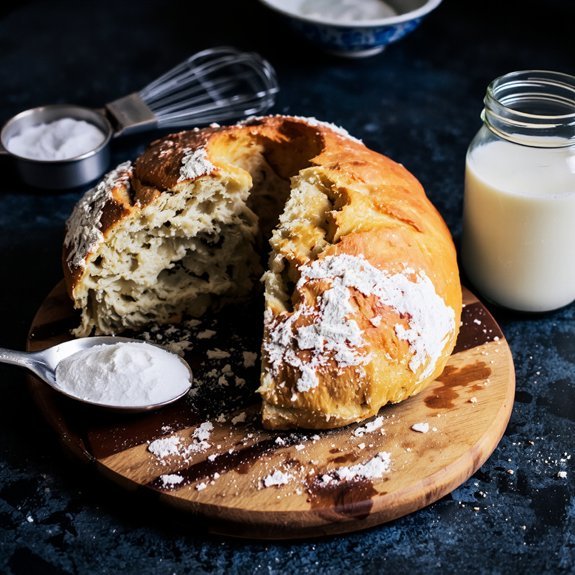
Shaping Your Loaf and Creating the Traditional Cross
Transferring your dough to a baking surface marks the critical shift from mixing to final presentation. You’ll shape your round loaf firmly, creating a cohesive mass that holds its form throughout baking.
| Technique | Purpose | Cultural Symbolism |
|---|---|---|
| Deep cross incision | Heat penetration | Spiritual protection |
| Blade angle (45°) | Even expansion | Traditional authenticity |
| Decorative variations | Personal expression | Individual freedom |
| 1-inch depth | Ideal browning | Ancestral heritage |
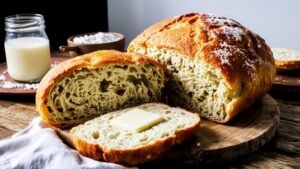
You’ll score a decisive cross atop your loaf using a sharp knife, cutting approximately one inch deep. This distinctive mark serves both functional and symbolic purposes—it allows steam escape while honoring centuries-old Irish tradition. The cross represents protection and blessing, though you’re free to explore decorative variations that reflect your own style. Position your scored loaf directly on your preheated baking surface, ready for the final transformation through heat.
Baking Your Bread to Perfection
Once your scored loaf sits on the preheated baking surface, you’ll bake it at 450°F for approximately 50-60 minutes.
Bake until the crust develops a deep golden-brown color and the loaf sounds hollow when tapped on the bottom.
Bake until your crust turns deep golden-brown and the loaf sounds hollow when tapped on the bottom.
Monitor your bread’s progress through the oven window. You’re looking for:
- A mahogany-hued crust with crispy edges
- Steam rising during the first 15 minutes
- Even browning across the top and sides
- A hollow sound when you knock the bottom
Remove your loaf when fully baked and cool it on a wire rack.
This honors family traditions while respecting your baking expertise.
Practice these serving rituals—slicing warm bread, sharing with others—to establish your own heritage.
You’ve earned this independent accomplishment through precise technique and dedication.
Cooling and Storage Tips
You’ll place your cooled soda bread on a wire rack immediately after removing it from the oven to allow air circulation and prevent moisture buildup on the bottom.
Once the bread reaches room temperature, you’ll store it in an airtight container to maintain its moisture content and extend its shelf life for up to three days.
For longer storage, you can freeze your bread in a sealed freezer bag for up to three months, thawing it at room temperature before serving.
Proper Wire Rack Cooling
Why’s proper cooling so critical to your soda bread’s final texture?
Steam escaping during cooling prevents a dense, soggy crumb structure that undermines your baking effort.
Position your loaf on a wire rack immediately after removal from the oven.
This elevation allows air circulation underneath, preventing moisture from reabsorbing into the bottom crust.
You’ll maintain that desirable crispy exterior you’ve worked to achieve.
For best results, follow these cooling guidelines:
- Cool completely on the rack for 2-3 hours before slicing
- Make sure adequate airflow around all sides of the loaf
- Avoid covering the bread during cooling—this traps steam
- Position your cooled loaf for photography staging and presentation aesthetics once fully set
This patience guarantees superior texture and appearance, giving you complete control over your bread’s final quality and allowing you freedom from substandard results.
Airtight Container Storage Methods
After your soda bread has cooled completely on the wire rack, you’ll need to store it properly to maintain its quality.
Place your loaf in an airtight container to prevent moisture loss and staleness.
Choose food-grade containers with tight-sealing lids that’ll keep your bread fresh for up to three days at room temperature.
For longer preservation, you can freeze your soda bread in airtight freezer bags or containers, extending its shelf life substantially.
This method’s comparable to document archiving—you’re protecting your product from degradation.
Make sure you’ve removed all excess air before sealing, similar to electronics preservation techniques that guard against environmental exposure.
Label your container with the storage date.
When you’re ready to enjoy your bread, thaw it at room temperature without opening the container, preventing condensation that’d compromise texture.
Troubleshooting Common Baking Problems
What causes Irish soda bread to turn out dense, gummy, or unevenly baked?
You’ll likely encounter these issues due to improper mixing, incorrect oven temperature, or environmental factors you haven’t controlled.
To troubleshoot effectively:
- Overmixing your dough develops gluten excessively, creating a dense crumb structure that traps moisture
- Insufficient oven calibration means your bread bakes unevenly; invest in an oven thermometer for accuracy
- High altitude adjustments require you to reduce baking soda by 25% and increase liquid slightly for proper rise
- Underbaking leaves your interior gummy; extend baking time until a skewer emerges clean
You’ll reclaim control over your results by addressing these variables systematically.
Oven calibration proves essential—most home ovens run 25 degrees off. Altitude adjustments demand experimentation. Track your modifications meticulously, empowering yourself to master consistent, exceptional soda bread.
Frequently Asked Questions
Can I Substitute All-Purpose Flour With Whole Wheat or Gluten-Free Flour?
You can substitute all-purpose flour, but you’ll need hydration adjustments. Whole wheat flour absorbs more liquid, so increase your buttermilk slightly.
For gluten-free flour blends, you’ll require even more moisture and should add a binding agent like xanthan gum. Start by replacing 25-50% of all-purpose flour with your alternative, then modify liquid ratios accordingly.
Test your dough’s consistency—it should resemble shaggy breadcrumbs before kneading.
How Long Does Homemade Irish Soda Bread Stay Fresh After Baking?
Your homemade Irish soda bread stays fresh for 1-2 days at Counter Storage in an airtight container.
You’ll extend its shelf life to 4-5 days using Fridge Storage, though the crumb’ll become denser.
For maximum freshness retention, you can freeze it up to three months. Slice before freezing for convenient portioning. Always make sure you’re storing it properly to maintain its quality and prevent staleness or mold development.
What’s the Difference Between Irish Soda Bread and American Soda Bread?
You’ll find Irish soda bread differs fundamentally from American versions in cultural origins and regional variations. Irish versions traditionally use just four ingredients—flour, salt, baking soda, and buttermilk—creating a dense, rustic loaf.
American adaptations typically incorporate sugar, butter, and eggs, yielding sweeter, cake-like results. You’re looking at distinct baking philosophies: Irish bread prioritizes simplicity and authenticity, while American versions embrace enriched formulations reflecting regional preferences and available ingredients.
Can I Freeze Unbaked Soda Bread Dough for Later Baking?
Yes, you can freeze your unbaked soda bread dough for up to three months.
Wrap it tightly in plastic wrap and aluminum foil to prevent freezer burn.
When you’re ready to bake, thaw the dough overnight in your refrigerator—this slow thawing method preserves the dough’s integrity.
Alternatively, you can bake directly from frozen, adding ten to fifteen minutes to your baking time for ideal results.
Why Does My Soda Bread Turn Out Dense Instead of Light and Fluffy?
Your soda bread turns dense when you’ve overmixed dough, which overdevelops gluten and traps excessive CO2 release. Weak leavening—from old baking soda or insufficient buttermilk acidity—also fails to generate proper rise.
You’ll want to mix ingredients minimally, just until combined. Check your baking soda’s freshness and use fresh buttermilk.
Work quickly, handle gently, and bake immediately for ideal lift and crumb structure.


Leave a Comment