
Key Takeaways
- Use high-protein bread flour, European butter with 86% butterfat, and cool water to create a proper laminated dough base.
- Perform 4–6 tri-folds with 30-minute chills between each fold to develop distinct, shatteringly crisp butter layers throughout dough.
- Shape dough into precise isosceles triangles with 4-inch base and 8-inch length, then roll and curve into crescent shapes.
- Proof croissants 12–16 hours at 75–80°F with 70–75% humidity until puffy yet stable without softening butter layers.
- Preheat oven to 400°F, brush with egg wash, inject steam, and bake 18–22 minutes until deep golden-brown with hollow bottoms.
Gathering Your Ingredients and Equipment
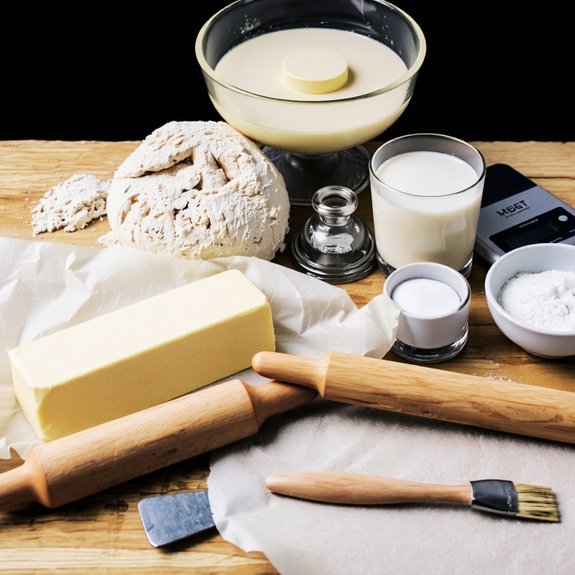
Before you’ve even turned on your oven, you’ll need to assemble the foundational elements that’ll make or break your croissants. Start with your supply checklist: bread flour, unsalted butter, salt, sugar, instant yeast, and water.
You’ll also need a kitchen scale for precise measurements—croissant success demands accuracy.
Your workspace layout matters substantially. Clear a large, cool countertop where you can laminate dough without cramping.
Arrange your equipment strategically: a stand mixer, rolling pin, bench scraper, and pastry brush within arm’s reach. Keep parchment paper, a baking sheet, and a sharp knife nearby.
Don’t overlook climate control. Croissants require cool conditions; if your kitchen’s warm, chill your work surface beforehand.
Gather everything before starting. This preparation guarantees you’ll work efficiently without scrambling mid-process, giving you complete control over your baking outcome.
Preparing the Dough Base
You’ll need high-protein bread flour (12-14% protein content), cold butter, and precise hydration ratios to build the foundational dough that supports lamination.
Your mixing method—whether you’re using the autolyse technique or direct mixing—directly impacts gluten development and dough extensibility, both critical for achieving those signature flaky layers.
Before you begin laminating, you must chill your dough thoroughly and prepare your work surface meticulously to guarantee the butter distributes evenly without tearing through the dough.
Ingredient Selection and Quality
The foundation of exceptional croissants rests on selecting premium ingredients that’ll transform your dough into laminated layers of butter and air. You’ll need high-protein bread flour—ideally sourced from mills prioritizing ingredient provenance and sustainable sourcing practices that align with your values.
Choose European-style butter with at least 86% butterfat; its superior composition creates those distinct, flaky layers you’re after. Your water should be filtered and cool, around 50°F, to maintain dough temperature control during mixing.
Sea salt enhances flavor complexity without overpowering delicate butter notes. Select fresh yeast or reliable instant varieties—quality directly impacts fermentation consistency.
Don’t compromise on ingredient provenance. Seek out suppliers committed to sustainable sourcing, ensuring your croissants reflect both technical excellence and ethical production standards. This commitment elevates your final product substantially.
Mixing and Hydration Techniques
Once you’ve assembled your premium ingredients, proper mixing methodology determines whether they’ll develop into a cohesive dough with ideal gluten structure.
You’ll want to start with a slow mixing speed to incorporate your flour, water, salt, and yeast without overworking the dough initially.
Consider implementing an autolyse phase—letting your flour and water rest for 20-30 minutes before adding salt and yeast.
This technique’s benefits are substantial: it allows flour to fully hydrate naturally, improving extensibility and reducing actual mixing time needed.
Once you’ve incorporated all ingredients, increase your mixing speed gradually.
You’re targeting a smooth, elastic dough that pulls away from the bowl’s sides.
Don’t rush this phase; proper hydration and gluten development now directly impact your lamination success and final croissant structure.
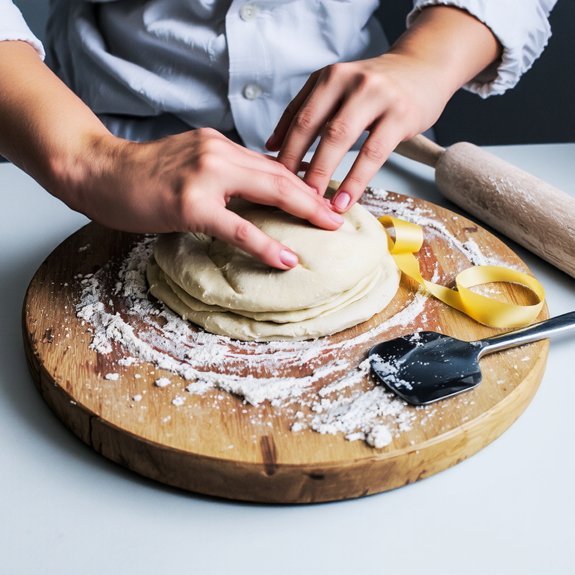
Lamination Preparation Essentials
Before laminating, your dough must complete a bulk fermentation phase that typically spans 1-2 hours at room temperature, allowing yeast activity to generate flavor compounds and improve dough extensibility without over-proofing.
Once fermentation concludes, you’ll laminate by folding butter into the dough through repeated turns.
Your workspace layout determines efficiency—ensure adequate counter space for rolling and folding operations.
Position your workspace away from heat sources to prevent butter softening during work.
Schedule planning matters critically; you’ll need time between turns for butter integration and dough relaxation.
Chill your dough for 20-30 minutes between each turn.
This prevents gluten breakdown and maintains distinct butter layers.
Keep your work surface lightly floured and your rolling pin cool.
These preparations establish the foundation for successful lamination and croissant development.
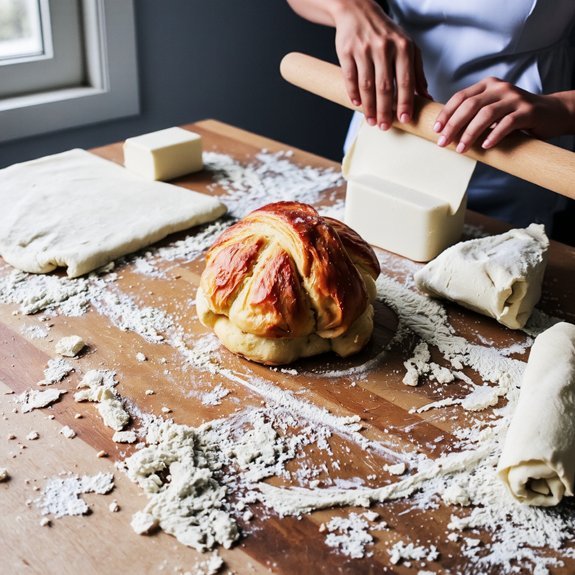
Mastering the Lamination Technique
Creating hundreds of delicate, buttery layers requires you to fold cold butter into your dough with meticulous precision—a process that demands both technique and patience.
You’ll execute this lamination method through strategic folding sequences that trap butter between dough layers.
- Perform tri-folds: Fold your dough into thirds, rotate ninety degrees, then repeat
- Chill between folds: Rest dough for thirty minutes to prevent butter from melting into the crumb
- Conduct sensory assessment: Feel the dough’s resistance and observe how butter integrates—this confirms proper technique
- Maintain cold temperatures: Work in cool environments to preserve distinct layers and prevent cultural origins’ traditional lamination from degrading
You’ll complete four to six folds total, building the signature flaky structure that distinguishes authentic croissants from inferior imitations.
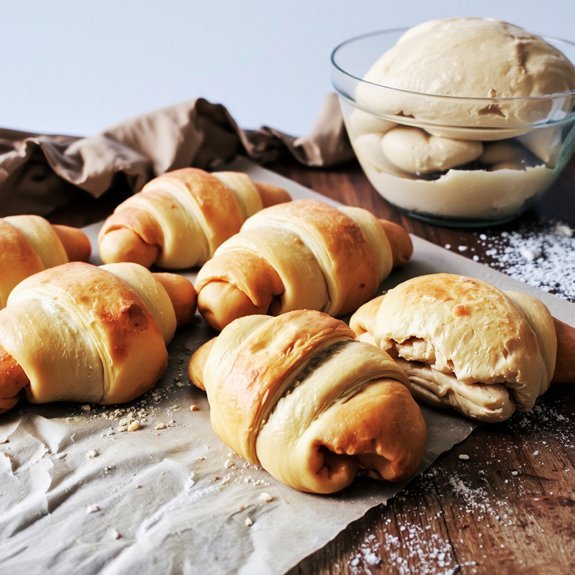
Shaping Your Croissants
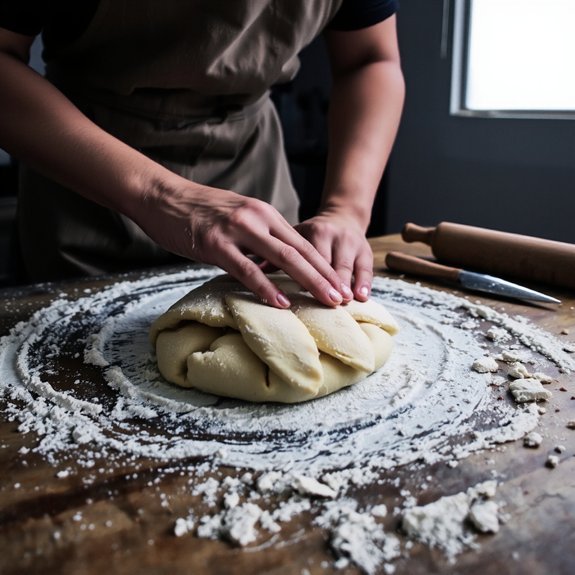
Now that you’ve mastered the lamination technique, you’ll shape your croissants by executing precise rolling and folding methods that maintain your dough’s laminated butter layers.
You’ll cut your dough into exact triangle shapes, which you’ll then roll and curve into the distinctive crescent form that defines a proper croissant.
This shaping stage demands attention to detail, as inconsistent cuts and tension in your rolling will directly affect how your croissants rise and bake.
The Lamination Technique
Layering butter between folds of dough creates the signature flaky texture that defines a proper croissant, and you’ll accomplish this through a series of strategic folds and rests. This technique, rooted in historical origins spanning centuries, relies on butter crystallography to achieve ideal lamination.
You’re building hundreds of thin butter layers that’ll shatter into delicate flakes when baked.
- First fold: Fold your dough in thirds, pressing edges sealed, then rest 30 minutes refrigerated
- Second fold: Rotate 90 degrees, fold again in thirds, rest another 30 minutes
- Third fold: Repeat the process one final time for maximum stratification
- Final rest: Chill overnight before shaping and proofing
Precise temperature control keeps your butter from melting into the dough prematurely, ensuring distinct layer separation during baking.
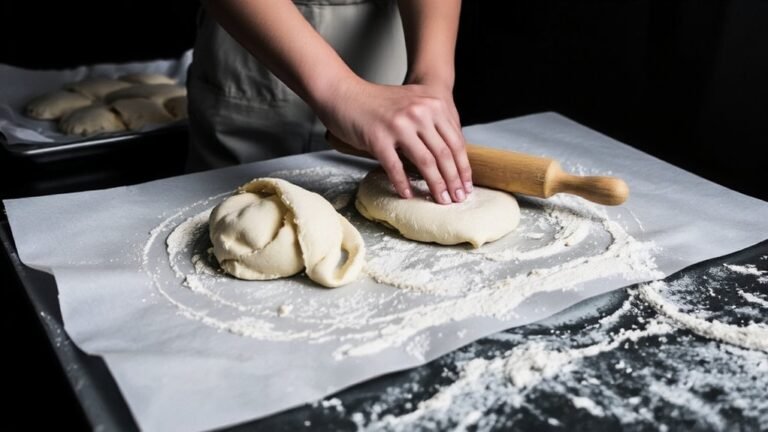
Rolling and Folding Methods
Once you’ve completed your lamination cycles and your dough’s rested overnight, you’ll shape those carefully constructed layers into croissant forms that’ll showcase all your folding work.
Roll your dough to approximately one-quarter inch thickness, maintaining even pressure to preserve the butter-flour stratification you’ve built.
Cut triangles with a 4-inch base and 8-inch length—precision here matters considerably. Using origami techniques, fold the base corners inward slightly before rolling tightly toward the apex, creating that distinctive crescent.
Channel fabric pleating principles by gently curving your rolled dough into shape, ensuring the seam sits underneath. This positioning prevents unraveling during proofing and baking.
Space your formed croissants two inches apart on parchment-lined sheets, maintaining consistent sizing for uniform baking. Your laminated layers’ll create that coveted shatteringly crisp, golden exterior.
Cutting Precise Triangle Shapes
To achieve uniform croissants with ideal rise and structure, you’ll need to cut your laminated dough into precise isosceles triangles with a 4-inch base and 8-inch length.
using a sharp knife or pastry wheel.
- Use angle templates to maintain consistency across all pieces, ensuring each triangle matches your specifications exactly
- Maintain edge alignment by positioning your knife perpendicular to the dough surface, preventing distortion of your laminated layers
- Apply steady downward pressure in one decisive motion rather than sawing, which crushes the delicate butter layers you’ve developed
- Work quickly at room temperature to prevent butter from softening and compromising your fold structure during the cutting process
Precision here directly determines your final product’s appearance and rise potential.
Proofing and Rising
After you’ve completed your final fold, you’ll place your laminated dough in a proofing box or warm, humid environment—ideally between 75–80°F with 70–75% humidity—where the dough undergoes its critical final rise for 12–16 hours.
Ideal temperatures guarantee butter layers remain distinct without melting prematurely, while humidity control prevents surface drying that compromises lamination integrity.
You’ll monitor your croissants closely during this phase.
The dough should expand noticeably but retain its structure.
If you lack professional equipment, you’ll create makeshift conditions using your oven’s warming drawer or a turned-off oven with boiling water inside.
Proper proofing determines whether your croissants develop those desirable, crispy exterior layers and hollow, flaky interiors.
Rushing this stage ruins your laminated work.
You’ll recognize readiness when croissants appear puffy yet stable, ready for egg wash and baking.
Baking to Golden Perfection
Your properly proofed croissants—now visibly puffy and structurally sound—require precise oven conditions to transform into golden, flaky pastries.
You’ll achieve ideal results by following these critical steps:
- Oven calibration: Preheat to 400°F (204°C) for 30 minutes, ensuring your oven maintains consistent heat throughout baking
- Egg wash application: Brush each croissant with beaten egg and milk mixture for even browning control and professional appearance
- Baking duration: Bake for 18-22 minutes until exteriors reach deep golden-brown without burning the delicate laminated layers
- Steam injection: Add water to a preheated pan on the lower rack during the first five minutes to create steam, promoting ideal rise and crust development
Monitor your croissants closely during the final minutes.
You’ll know they’re done when the bottoms sound hollow when tapped.
Remove them immediately to prevent over-browning and preserve the crispy-yet-tender texture you’ve worked to achieve.
Frequently Asked Questions
Can I Make Croissants Without a Stand Mixer or Food Processor?
You can absolutely make croissants through hand mixing, liberating yourself from electrical equipment.
Use your hands to combine flour, salt, sugar, and yeast with water until you’ve achieved a shaggy dough.
Equipment alternatives include a wooden spoon for initial mixing and your palms for kneading.
This tactile approach demands patience and elbow grease, but you’ll gain complete control over your laminated dough’s development, ultimately crafting superior croissants without dependency on machines.
How Far in Advance Can I Prepare Croissant Dough Before Baking?
You can prepare croissant dough up to 72 hours ahead using overnight retardation and extended refrigeration techniques.
After laminating your butter-dough layers, you’ll refrigerate the folded dough between 4-8 hours per fold.
Following final shaping, you’ve got flexibility: proof at room temperature for 2-3 hours, or employ overnight retardation in your refrigerator for superior flavor development and easier handling.
This method gives you complete control over your baking schedule.
What Should I Do if My Butter Tears Through the Dough?
If you’re experiencing butter breakthrough, you’ve got control over this. First, check your butter temperature—it shouldn’t be too cold or soft.
If tears occur, you’ll perform dough patching by pressing torn edges together firmly. Work quickly to seal breaches before laminating further.
You can also dust flour into gaps, then fold carefully. This technique preserves your lamination layers and guarantees proper croissant structure without compromising your final product’s quality.
Why Are My Croissants Not Flaky or Crispy Enough?
You’re likely experiencing insufficient lamination or overproofed dough.
If you didn’t fold your butter layers adequately, you won’t achieve that signature flakiness.
Additionally, overproofing causes dough to collapse during baking, eliminating crispness.
You’ll want to make sure precise fold counts—typically six turns—and proof only until dough’s slightly puffy, not fully risen.
Temperature control matters too; cold butter creates distinct layers that shatter when baked.
Can I Freeze Shaped Croissants Before Proofing and Baking Them?
Yes, you can freeze shaped croissants before proofing.
Use proper freezer packaging—wrap them individually in plastic wrap, then place them in airtight containers to prevent freezer burn and preserve your laminated dough’s integrity.
For thawing methods, transfer them to your refrigerator overnight, allowing gradual temperature adjustment. This slow thawing maintains structural integrity and gluten development. Once thawed, proceed directly to your final proof and bake at standard temperature for ideal flakiness and crispness you’re demanding.


Leave a Comment