Key Takeaways
- Combine water and butter, bring to a boil, then stir in flour and cool before adding eggs one at a time.
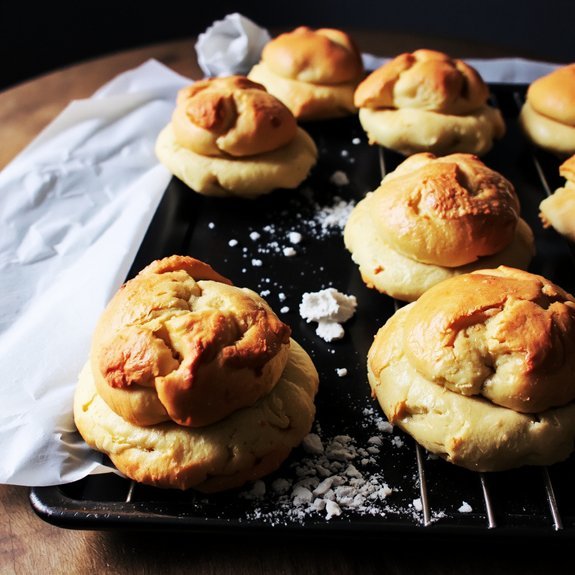
- Transfer choux pastry to a piping bag and pipe 1.5-inch mounds spaced two inches apart on parchment paper.
- Bake at 375°F for 15 minutes, then increase to 400°F for 20 minutes, and finish at 425°F until deep golden.
- Cool puffs completely on a wire rack to allow air circulation and prevent condensation from softening the shells.
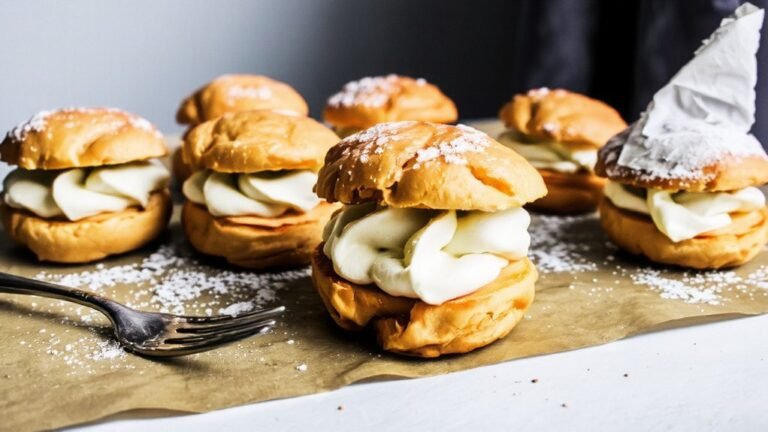
- Slice horizontally, fill with pastry cream or whipped cream mixture, and dust with powdered sugar or chocolate glaze before serving.
Gather Your Ingredients
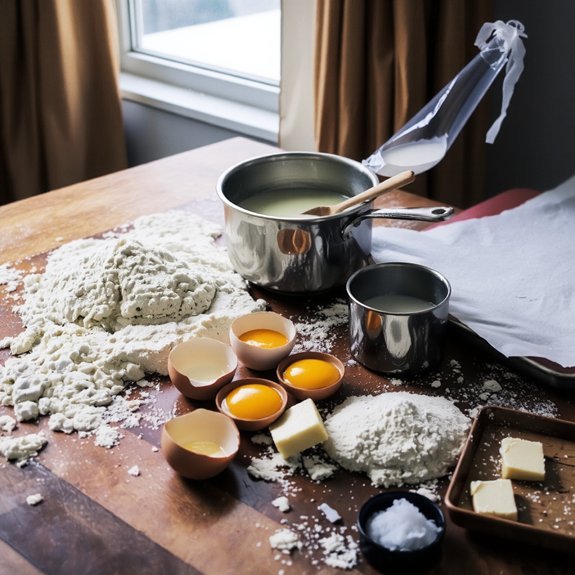
You’ll need several key ingredients to make cream puffs: one cup of water, half a cup of butter, one cup of all-purpose flour, four large eggs, and a pinch of salt.
When sourcing ingredients, prioritize quality butter and fresh eggs—they’re non-negotiable for ideal rise and structure. For flour, unbleached all-purpose varieties work best.
Consider seasonal substitutions when appropriate. In summer, you might use cultured butter for enhanced flavor complexity. Local farmers’ markets often provide superior eggs with deeper yolks, directly improving your puffs’ color and taste.
Measure precisely using weight when possible—grams trump cups for consistency. Room-temperature ingredients blend more effectively, preventing lumps and ensuring even distribution. This foundational step determines your cream puffs’ success, so don’t cut corners on ingredient quality or measurement accuracy.
Prepare the Choux Pastry Dough
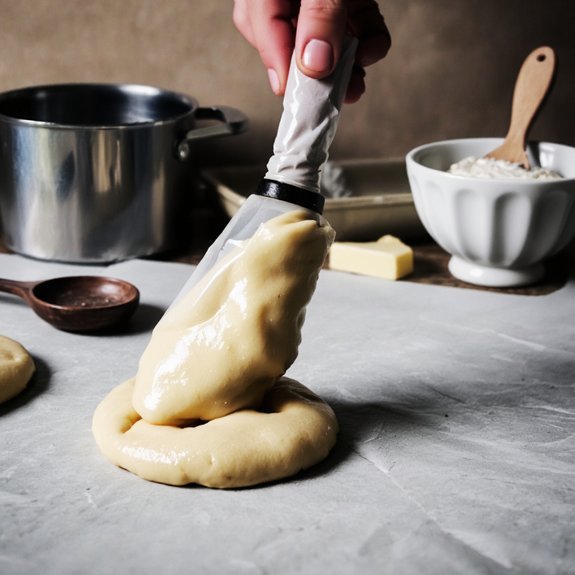
Combine water and butter in a medium saucepan over medium heat, stirring occasionally until the butter melts completely and the mixture reaches a rolling boil.
Remove from heat and stir in your chosen flour variety—all-purpose works reliably, though bread flour yields slightly chewier puffs.
Let the mixture cool for two minutes before beginning egg incorporation.
Add eggs one at a time, beating vigorously after each addition until the dough becomes glossy and smooth.
This process typically requires three to four eggs, depending on their size.
The dough should fall slowly from a wooden spoon, forming a ribbon-like consistency.
You’ve now created choux pastry—a versatile dough that’ll expand dramatically during baking, creating the hollow centers cream puffs demand.
Transfer your prepared dough to a piping bag, ready for shaping.
Pipe Your Cream Puff Shells
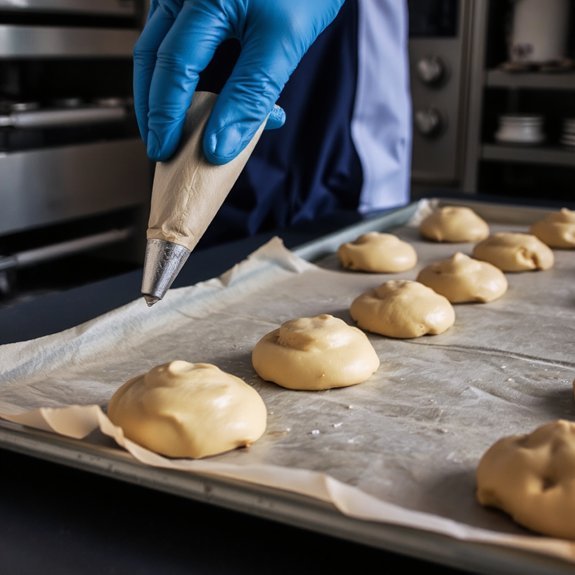
You’ll transfer your choux pastry to a piping bag fitted with a ½-inch round tip, holding it at a 90-degree angle to create uniform shells.
Space each mound about 2 inches apart on your baking sheet to allow for proper expansion without shells merging together during baking.
Consistent pressure and technique will yield evenly-sized, dome-shaped puffs that bake uniformly and develop the characteristic golden exterior.
Proper Piping Bag Technique
Piping the choux pastry requires a steady hand and the right equipment to achieve uniform, professional-looking cream puff shells.
Your nozzle selection determines shell size and shape—typically a large round tip works best for standard cream puffs.
Fill your piping bag three-quarters full to maintain control without excess pressure buildup.
Apply consistent pressure control by gripping the bag firmly near the top while guiding the nozzle with your other hand.
Use smooth, deliberate motions to pipe 1.5-inch mounds onto parchment paper, spacing them two inches apart.
Release pressure before lifting the nozzle to create clean shells without tails.
Practice on parchment first if you’re new to piping—this builds muscle memory without wasting batter.
Keep your movements steady and confident for evenly-sized puffs that bake uniformly.
Spacing and Shell Shape
Why does spacing matter when piping choux pastry?
Uniform spacing guarantees each cream puff bakes evenly without touching, preventing merged shells and uneven browning.
You’ll want at least two inches between piping points on your baking sheet.
For your shell silhouette, maintain consistent pressure on your piping bag.
Hold it at a 90-degree angle and pipe small mounds roughly the size of walnuts.
Release pressure as you lift away to create clean peaks rather than tails.
You’re controlling the final product’s appearance and functionality through deliberate technique.
Irregular spacing compromises your bake’s quality—some shells’ll expand into neighbors while others remain undersized.
Consistent shell shape and proper spacing guarantee professional results you can replicate batch after batch.
Bake Until Golden Brown
Achieving the perfect golden-brown exterior requires careful monitoring of your cream puffs throughout the baking process. You’ll want to verify proper oven calibration beforehand, as inconsistent temperatures prevent the Maillard reaction from developing that desirable caramelized surface.
| Temperature | Time | Color Stage | Action |
|---|---|---|---|
| 375°F | 15 min | Pale | Continue baking |
| 400°F | 20 min | Light golden | Monitor closely |
| 425°F | 25 min | Deep golden | Check for doneness |
| 450°F | 30 min | Dark brown | Remove immediately |
You shouldn’t open your oven door excessively, as temperature fluctuations compromise browning. Rotate your baking sheet halfway through if you’ve noticed uneven coloring. You’ll know they’re ready when they’re firm, hollow-sounding, and uniformly bronze. Trust your instincts—you control the outcome.
Cool Your Puffs Completely
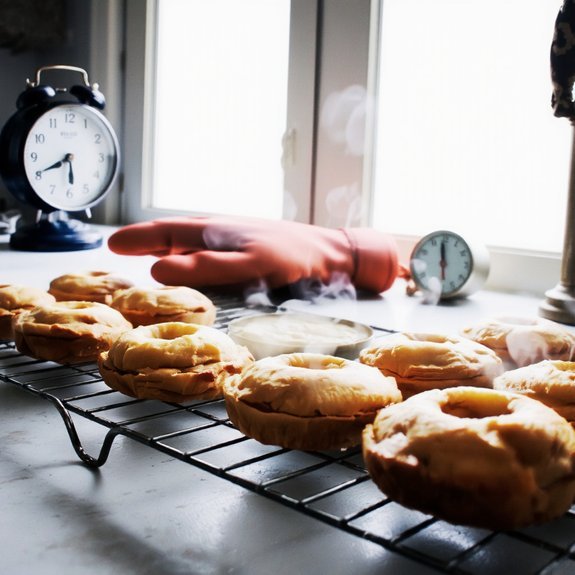
You’ll want to remove your cream puffs from the oven immediately once they’ve achieved a golden brown exterior, as extended heat can cause them to become overly dry and brittle.
Transfer them to a wire rack at room temperature, ensuring adequate air circulation around each puff to prevent moisture from condensing on the bottom and making them soggy.
Store your completely cooled puffs in an airtight container at room temperature for up to two days, or freeze them for extended shelf life.
Remove From Heat Immediately
Once the cream puffs achieve a deep golden-brown exterior, it’s critical that you remove them from the oven without delay. Leaving them inside even briefly risks over-baking and compromises your final product’s quality.
Transfer your puffs to a wire rack immediately upon removal. This action prevents curdling of any residual moisture trapped inside the shells. The rack’s design allows air circulation underneath, promoting even cooling and preventing steam buildup that’d soften your puffs.
Avoid temperature shock by resisting the urge to place hot puffs in a cold environment. Dramatic temperature fluctuations can cause the delicate pastry structure to crack or collapse unexpectedly. You’ll maintain structural integrity and achieve superior results by respecting this critical timing. Your attention to this detail directly determines your cream puffs’ success.
Room Temperature Storage Tips
After your puffs’ve cooled on the wire rack for approximately 30 minutes, they’re ready for storage at room temperature.
Place them in an airtight container to maintain structural integrity and prevent moisture absorption.
You’ll want to prioritize humidity control by storing your container in a cool, dry location away from direct sunlight.
This approach preserves the crispy exterior you’ve worked to achieve.
For best results, you should separate layers with parchment paper to prevent sticking.
Odor prevention becomes essential when storing near aromatic foods, so keep your puffs isolated from strong-smelling items in your pantry or cupboard.
Properly stored unfilled cream puffs remain fresh for up to three days at room temperature.
This storage method gives you flexibility in your baking schedule while maintaining quality without refrigeration constraints.
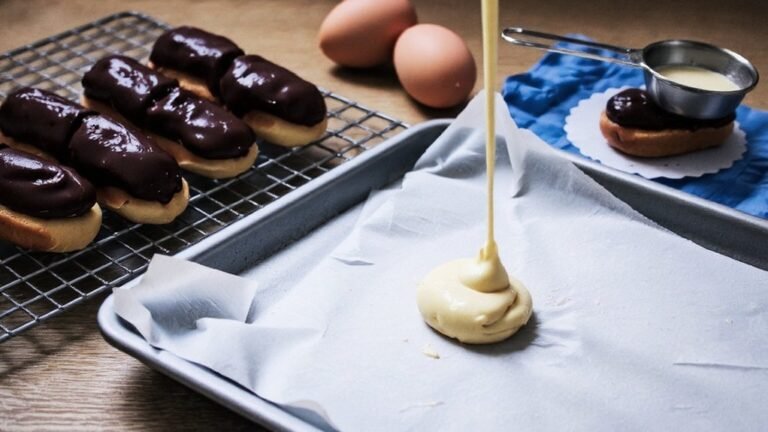
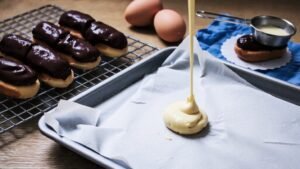
Make Your Filling
Preparing your filling while the cream puffs cool guarantees you’ll have a ready-to-use mixture when you’re set to assemble.
You can craft a classic pastry cream by whisking egg yolks with sugar, then tempering them with hot milk before cooking the mixture until it thickens.
For flavor variations, you’ll want to infuse vanilla, chocolate, or liqueur into your base recipe.
Stability tips include adding cornstarch or gelatin to prevent weeping, and you’re smart to chill your filling thoroughly before piping.
You can also use whipped cream combined with mascarpone for a lighter option, though it won’t hold as long.
Strain your pastry cream through fine mesh to eliminate lumps, ensuring a smooth, professional texture that’ll elevate your finished cream puffs noticeably.
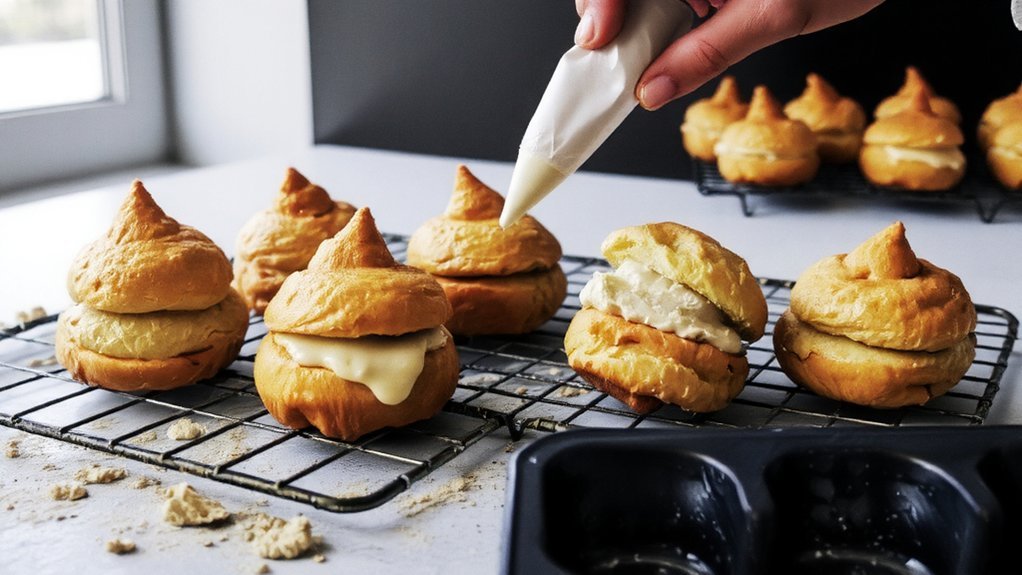
Fill and Assemble Your Cream Puffs
With your filling chilled and ready, you’re prepared to transform those cooled pastry shells into finished cream puffs. You’ll slice each puff horizontally, creating a clean separation between top and bottom halves.
Using layering methods, pipe or spoon your filling into the bottom shell, distributing it evenly to prevent collapsing. Don’t overstuff—restraint guarantees structural integrity.
Position the top shell carefully, pressing gently to establish contact without crushing delicate pastry. For enhanced stability, employ seal techniques by piping a thin filling line along the interior edge before closing.
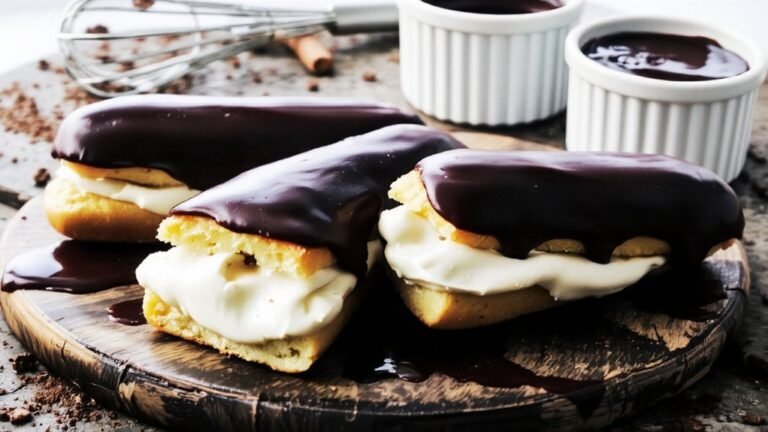
This adhesive layer bonds the halves securely. Dust finished puffs with powdered sugar or drizzle with chocolate glaze immediately. Refrigerate assembled cream puffs until serving, maintaining ideal texture and preventing filling separation during storage.
Store and Serve Your Cream Puffs
Cream puffs demand proper storage to preserve their structural integrity and flavor profile.
You’ll want to refrigerate filled puffs in an airtight container for up to two days, keeping them away from moisture that’ll compromise their crispness.
Unfilled shells can be frozen for three months, allowing you complete flexibility in your preparation schedule.
When serving, you’re free to customize with diverse garnish options—powdered sugar, chocolate drizzle, fresh berries, or edible flowers elevate presentation and flavor complexity.
Temperature matters markedly; serve chilled for ideal texture contrast.
Consider your beverage pairings strategically.
Champagne complements chocolate-filled varieties, while coffee pairs excellently with vanilla or pastry cream fillings.
Light dessert wines work well with fruit-filled options, giving you sophisticated pairing possibilities that enhance the overall dining experience.
Frequently Asked Questions
Can I Make Cream Puffs Ahead of Time, and How Far in Advance?
You can make cream puffs up to two days ahead with proper pre-bake planning.
Store unfilled shells in an airtight container at room temperature.
For ideal freshness during serve scheduling, fill them no more than two hours before serving.
Alternatively, you’ll freeze baked, unfilled shells for up to three months. Thaw completely before filling.
This strategy gives you maximum flexibility in managing your dessert preparation timeline independently.
What’s the Best Way to Prevent Cream Puffs From Deflating After Baking?
You’ll prevent deflation by maintaining consistent oven steam throughout baking—don’t open your oven door prematurely.
Once baked, immediately transfer your puffs to a cooling rack, allowing air circulation underneath. This prevents moisture from trapping underneath and collapsing your shells.
Pierce the puff bottoms with a knife to release interior steam while they’re still warm. You’ve got control over your results by managing temperature consistency and proper cooling technique.
How Do I Fix Cream Puffs That Didn’t Rise Properly During Baking?
You can’t resurrect poorly risen cream puffs, but you’ll prevent future failures through rigorous dough troubleshooting.
Check your egg-to-flour ratios—they’re critical for lift.
Verify oven adjustments: your temperature must be accurate; calibrate with a thermometer.
Make sure you’re not opening the oven door prematurely.
Use room-temperature eggs and don’t skimp on beating.
These variables directly control rise.
You’ve got the freedom to experiment, but nail these fundamentals first.
Can I Freeze Cream Puffs, and What’s the Proper Thawing Method?
You can freeze cream puffs successfully by storing unfilled shells in airtight containers for up to three months. For texture preservation, thaw them at room temperature for 30 minutes, then briefly reheat at 350°F for 5 minutes to restore crispness.
Avoid condensation control issues by keeping them sealed until fully thawed. Don’t freeze filled puffs, as cream fillings separate and become grainy during freezing.
What Are Some Alternative Filling Options Beyond Traditional Pastry Cream?
You’ll find Chocolate Ganache delivers rich, luxurious depth—simply whip cooled ganache to your preferred consistency.
Lemon Curd offers bright, tangy sophistication with natural citrus complexity.
You’ve also got options: stabilized whipped cream for lightness, mascarpone mousse for creaminess, or pastry cream infused with coffee, vanilla, or liqueurs.
Crème diplomat combines pastry cream with whipped cream for airier texture.
Fresh berry compote provides invigorating contrast.
Nutella-based fillings satisfy chocolate-hazelnut cravings.
You’re completely unrestricted—experiment boldly with flavors matching your vision.


Leave a Comment