
Key Takeaways
- Cream softened butter and sugar (65–70°F) for 3–5 minutes until pale and fluffy to incorporate air for rise and tender crumb.
- Add dry ingredients in thirds with gentle folding motions to preserve trapped air; stop when flour streaks disappear.
- Use an oven thermometer to verify accurate temperature; common oven drift reaches up to 25 degrees off dial settings.
- Control texture by adjusting brown sugar ratio (chewy) versus white sugar (crispy) and baking time (underbaked centers stay chewy).
- Cool cookies completely, then store in airtight glass or plastic containers with parchment layers between stacks for 3–5 days peak freshness.
Essential Ingredients and Equipment

You’ll need flour, butter, sugar, eggs, vanilla extract, baking soda, salt, and any mix-ins like chocolate chips or nuts to create most cookie doughs. Your ingredient sourcing matters—choose quality butter and pure vanilla for superior results.
For your equipment checklist, gather mixing bowls, measuring cups and spoons, a whisk, a wooden spoon or electric mixer, baking sheets, parchment paper, and a cooling rack. Don’t overlook a reliable oven thermometer; accurate temperature control determines whether you’ll bake perfect cookies or disappointing ones.
You’ll also want an offset spatula for transferring cookies and a timer to prevent overbaking. These tools give you complete control over your baking process, ensuring consistent, delicious outcomes every time you enter the kitchen.
Understanding the Science Behind Creaming
Because butter’s molecular structure fundamentally transforms during creaming, this step isn’t merely a mixing technique—it’s a chemical process that determines your cookies’ texture.
When you beat softened butter with sugar, you’re deliberately incorporating air into the fat.
This action breaks down fat crystallinity while creating thousands of tiny bubbles.
These bubbles trap air, which expands during baking and gives your cookies their rise and tender crumb.
The bubble stability you’re creating depends on beating time and butter temperature.
Under-creamed dough won’t capture enough air, resulting in dense, flat cookies.
Over-creaming, however, can cause bubble collapse and greasiness.
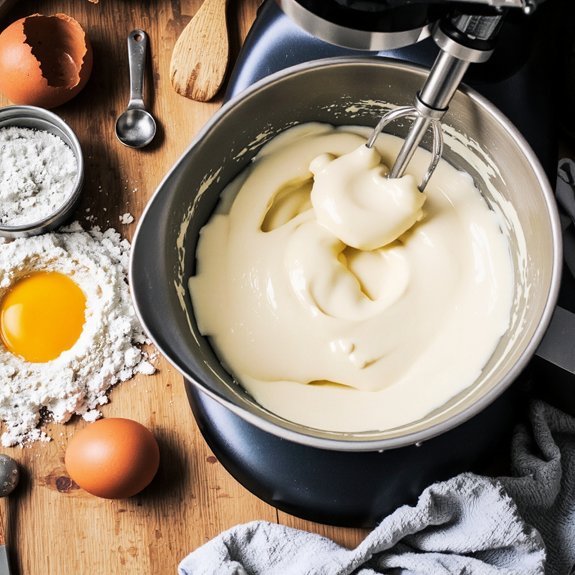
You’ll achieve ideal results when your butter-sugar mixture becomes pale and fluffy—typically three to five minutes of mixing.
This transformation directly impacts your final product’s structure and mouthfeel.
Mixing Techniques for Perfect Texture
You’ll cream your butter and sugar together until you’ve achieved a light, fluffy mixture that incorporates air into your dough—this step is essential for proper rise and texture.
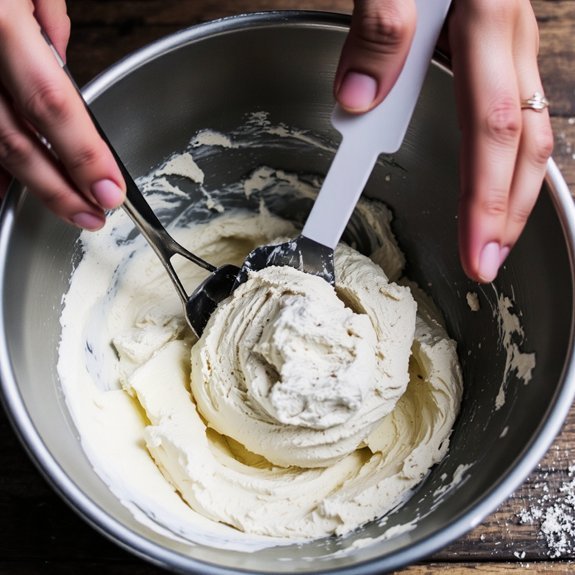
When you’re ready to add your dry ingredients, you’ll fold them in gently using a spatula or wooden spoon, rotating your bowl as you work to avoid overmixing, which can develop gluten and toughen your cookies.
The key is combining your wet and dry components just until they’re fully incorporated without any visible streaks of flour.
Creaming Butter and Sugar
Beating softened butter and sugar together creates the foundation for tender, evenly textured cookies by incorporating air into the fat and dissolving sugar crystals.
You’ll want room-temperature butter—roughly 65-70°F—since cold butter won’t incorporate air effectively, and melted butter won’t trap it.
Start with your stand mixer on medium speed, beating for 2-3 minutes until the mixture becomes pale and fluffy.
This creaming process, with historical origins in 18th-century French pastry techniques, aerates your dough and produces that desirable crumb structure.
Cultural variations exist worldwide; some bakers add a pinch of salt during creaming to enhance flavor complexity.
You’re not merely combining ingredients—you’re creating a stable emulsion that affects rise, spread, and browning.
Watch for color transformation and texture changes, stopping when you’ve achieved light, voluminous consistency.
Folding Dry Ingredients Properly
Incorporating your dry ingredients—flour, baking soda, and salt—requires a gentle touch that preserves the air you’ve worked to trap during creaming.
Use a folding motion rather than stirring, which deflates your batter and compromises texture.
Add your dry mixture in thirds, folding after each addition. Use a spatula to cut down the center, sweep across the bottom, and fold upward, rotating the bowl slightly between strokes.
This technique keeps flour pockets from forming while maintaining the light, fluffy consistency you’ve developed.
Don’t overmix. Stop folding once you no longer see streaks of flour. Your dough should look slightly marbled, not completely uniform.
This restraint directly impacts your cookies’ final texture—delivering the tender crumb you’re after rather than dense, tough results.
Choosing Between Chewy and Crispy
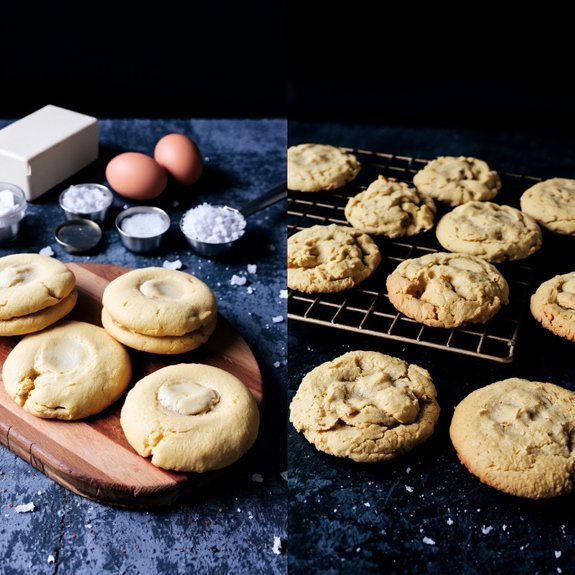
When do cookies change from chewy to crispy? You’ll control this transformation through baking time and ingredient ratios. Your personal preference dictates the outcome you’re after, while cultural influences shape what you consider ideal.
| Factor | Chewy Result | Crispy Result |
|---|---|---|
| Brown sugar ratio | Higher proportion | Lower proportion |
| Baking time | Shorter (underbaked center) | Longer (fully set) |
| Moisture content | More retained | Evaporated completely |
You’ve got options here. Adding extra brown sugar and egg yolk creates chewiness. For crispness, you’ll increase white sugar, reduce moisture, and extend baking time. Pull cookies from the oven slightly underdone for chewy centers—they’ll continue cooking on the hot pan. Conversely, bake longer for uniform crispness throughout. Your oven temperature matters too; lower heat produces chewier cookies, while higher temperatures accelerate moisture loss. You’re free to experiment until you nail your preferred texture.
Shaping and Preparing Your Dough
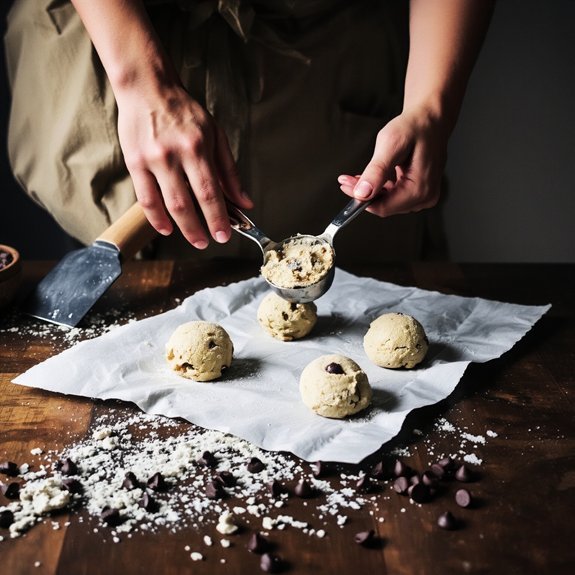
After your dough’s rested and chilled, you’ll shape it into uniform portions that bake evenly.
Consistent sizing guarantees predictable results and professional appearance.
Choose your preferred method:
- Hand pinching: Divide dough into equal pieces by eye, then roll between your palms into balls. This tactile approach gives you direct control over portion size.
- Cookie scoop: Use a standardized scoop for identical portions every time, eliminating guesswork and variability.
- Flattening: Press balls onto your baking sheet with even pressure, or use the bottom of a glass for uniformity.
For enhanced visual appeal, consider ornamental embossing techniques.
Press patterns into unbaked dough using fork tines, wooden molds, or decorative stamps.
These details distinguish your cookies while maintaining structural integrity throughout baking.
Your preparation now determines both taste and presentation.
Baking Tips for Consistent Results
You’ll achieve uniform baking results by maintaining precise oven temperature, proper rack positioning, and strategic timing. Oven calibration guarantees your cookies bake evenly—use an independent thermometer to verify accuracy, since most ovens drift 25 degrees off their dial settings.
Position racks in the center of your oven for ideal heat circulation. Rotate your baking sheet halfway through baking to counteract hot spots.
| Factor | Action |
|---|---|
| Humidity Control | Store dough in airtight containers; bake on low-humidity days |
| Oven Calibration | Verify temperature with thermometer before baking |
| Sheet Positioning | Center rack placement promotes even browning |
Don’t open your oven door during baking—temperature fluctuations compromise results. Set a timer and trust the process. Consistent application of these techniques gives you predictable, professional-quality cookies every time.
Storage and Serving Your Homemade Cookies
You’ll preserve your cookies’ freshness by storing them in an airtight container, which typically keeps them at peak quality for three to five days at room temperature.
Before serving, consider the temperature at which you want to present your cookies—they’ll taste richer when slightly warmed, while chilled cookies offer a firmer texture that some prefer.
Arrange your finished cookies on a clean plate or platter to enhance their visual appeal and make them more inviting to enjoy.
Airtight Container Storage
Once your cookies have cooled completely, transferring them to an airtight container will preserve their texture and flavor for up to a week.
You’ll want to choose your container materials wisely.
Glass or food-grade plastic containers with tight-sealing lids work best, as they prevent moisture exchange and oxidation. Here’s your storage strategy:
- Layer parchment paper between cookie stacks to prevent sticking and flavor transfer
- Store soft and crispy cookies separately—they’ll influence each other’s texture
- Consider vacuum sealing for extended preservation, which removes air and extends shelf life to three weeks
Keep your containers away from direct sunlight and heat sources. You maintain complete control over your cookies’ quality by selecting quality storage methods. This approach guarantees you’ve got fresh, flavorful cookies ready whenever you want them, without compromising your homemade investment.
Room Temperature Shelf Life
Most homemade cookies’ll stay fresh at room temperature for three to five days when stored properly in an airtight container.
You control the shelf life by managing moisture and air exposure—factors that commercial producers navigate through labeling regulations.
Unlike retail display cookies loaded with preservatives, your homemade batches depend on ingredient quality and storage conditions.
You’ll notice butter-based cookies stay fresher longer than those with oil.
Sugar acts as a natural preservative, extending viability.
Monitor your cookies for staleness or texture changes.
You’re free to enjoy them at peak freshness without commercial additives.
For extended storage beyond five days, freeze them in airtight containers for up to three months.
This method preserves your baking investment while maintaining quality you’ve intentionally created from scratch.
Serving Temperature and Presentation
Because cookie texture and flavor develop fully at specific temperatures, serving them slightly warm or at room temperature dramatically impacts the eating experience.
You’ll notice crispy edges yield to chewy centers when cookies reach 65-70°F, while warm cookies at 100-110°F showcase their vanilla and butter notes most prominently.
Elevate your presentation through these strategic choices:
- Plating aesthetics: Arrange cookies on slate, marble, or neutral ceramics to highlight their golden-brown exteriors and create visual contrast
- Beverage pairings: Match cookies’ fat content and sweetness with cold milk, espresso, or aged tea for complementary flavor profiles
- Temperature control: Use warming drawers or hot plates to maintain ideal serving temperatures throughout your gathering
This approach transforms homemade cookies from simple treats into intentional culinary experiences that respect your craft and guests’ palates.
Frequently Asked Questions
Can I Substitute Butter With Oil or Coconut Oil in Cookie Recipes?
You can substitute butter with oil or coconut oil, but you’ll notice texture differences. Oil creates softer, cakier cookies since it doesn’t cream like butter does.
Coconut oil produces similar results but adds distinct flavor impact. Use the same amount by weight—don’t measure by volume. Refined coconut oil won’t alter taste; unrefined will.
You’ll sacrifice the crispy edges butter typically delivers, but you’ll gain freedom from dairy constraints while maintaining moisture and richness.
What’s the Best Way to Prevent Cookies From Spreading Too Much?
You’ll prevent excessive spreading by chilling your dough for at least 30 minutes before baking. This solidifies the fats, slowing the cookies’ expansion during baking.
Additionally, you’ve got to maintain proper oven temperature—too low and your cookies’ll spread before setting. Use an oven thermometer for accuracy.
You can also reduce sugar slightly or increase flour, both of which control spread. These techniques give you complete control over your final product’s texture and shape.
How Do I Know When My Cookies Are Perfectly Baked?
You’ll know your cookies are done when their edges turn golden brown while the centers still show a slight jiggle. Pull them from the oven at this sweet spot—don’t wait for complete firmness.
The carryover heat‘ll continue cooking them on the baking sheet. This technique, relying on your butter-to-flour ratio and egg content, gives you chewy middles with crispy edges. You’re in control of your cookie’s destiny.
Can I Freeze Cookie Dough Before Baking, and for How Long?
Yes, you can freeze cookie dough for up to three months.
Use portion freezing by scooping dough into individual balls and placing them on a baking sheet before transferring to freezer bags.
This method gives you complete control over your baking schedule.
For thawing techniques, you’ve got options: bake directly from frozen, adding 1-2 minutes to bake time, or thaw at room temperature for 15-30 minutes before baking.
Either approach preserves your dough’s quality and flavor.
What Causes Cookies to Crack on Top During Baking?
You’ll experience top cracking when you’ve got rapid leavening—your baking soda or powder’s doing its job too aggressively.
Sugar crusting forms on your dough’s surface, then sets before the interior finishes expanding.
Combat this by reducing leavening agents slightly, chilling your dough longer, or lowering your oven temperature by 25 degrees.
You’ve got the control to adjust these variables and achieve the cookie texture you want.


Leave a Comment