Key Takeaways
- Cream room-temperature butter and granulated sugar for 2–3 minutes until pale and fluffy for proper rise and texture.
- Add room-temperature eggs one at a time, beating 30 seconds between additions to achieve smooth emulsification and consistency.
- Whisk flour, baking soda, and salt together, then gently fold into wet ingredients to prevent gluten overdevelopment and toughness.
- Bake at 375°F for 9–11 minutes until edges are golden brown while centers remain slightly underbaked for optimal texture.
- Transfer cookies to cooling rack after 2–3 minutes on baking sheet; use stainless steel rack elevated for airflow underneath.
Gather Your Ingredients
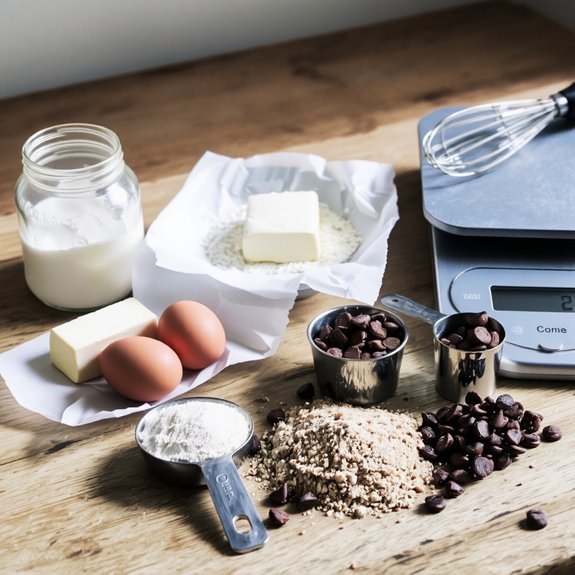
Before you mix anything together, you’ll need to gather the dry and wet ingredients that form the foundation of classic chocolate chip cookies.
Your pantry organization will determine how efficiently you work.
You’ll want all-purpose flour, baking soda, and salt measured precisely.
For wet ingredients, have unsalted butter, granulated sugar, brown sugar, eggs, and vanilla extract ready.
Consider seasonal sourcing when selecting chocolate chips—premium varieties offer superior flavor profiles.
Establish your mise en place by arranging ingredients in order of use.
This methodology streamlines your workflow and prevents measurement errors.
Use a kitchen scale for accuracy; weight measurements trump volume in professional baking.
Room-temperature ingredients emulsify more effectively, yielding superior texture.
Verify ingredient freshness before beginning, particularly leavening agents and chocolate.
This preparation phase takes five minutes but substantially impacts your final product’s quality and consistency.
Cream the Butter and Sugar
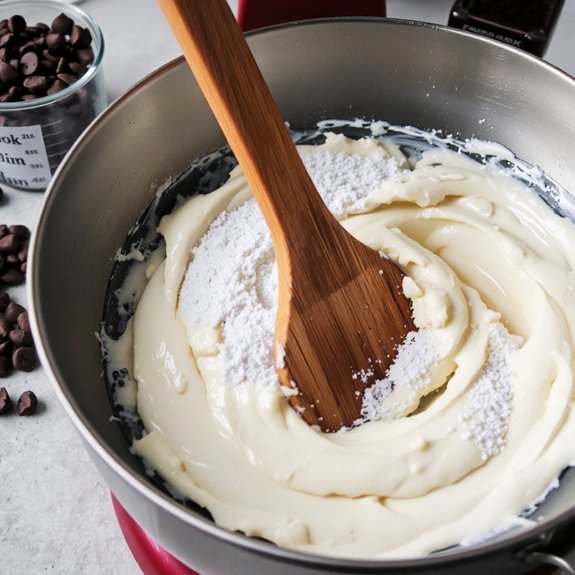
You’ll need room temperature butter—typically softened to 65-70°F—to achieve proper emulsification and incorporate air into your mixture. Using a stand mixer or hand mixer, beat the butter and granulated sugar together for 2-3 minutes until the mixture reaches a pale, fluffy consistency with a volume increase of roughly 50%.
This creaming process is critical because it creates tiny air pockets that give your cookies their desired texture and rise during baking.
Room Temperature Butter Importance
When you’re ready to cream the butter and sugar together, make sure your butter has reached 65-70°F—soft enough to leave a slight fingerprint impression but still holding its shape.
This temperature range is essential for ideal emulsion stability, allowing you to incorporate air efficiently without breaking down the fat structure.
Cold butter won’t incorporate air properly, resulting in dense cookies.
Conversely, melted butter compromises the creaming process entirely.
At the correct temperature, you’ll achieve a light, fluffy mixture that traps nitrogen bubbles—essential for proper rise and texture.
The creaming process also initiates flavor development by distributing sugar crystals evenly throughout the fat.
This mechanical action breaks down sugar granules, creating a homogeneous base that guarantees consistent results.
Room temperature butter gives you complete control over your dough’s structure and final product quality.
Sugar Incorporation Techniques
Combining softened butter with granulated sugar creates the foundation for your cookie’s structure and texture.
You’ll beat these ingredients together for approximately two to three minutes until the mixture becomes light and fluffy, incorporating air that helps your cookies rise properly.
This creaming process guarantees sugar dissolving into the butter, creating an emulsion that distributes moisture evenly throughout your dough.
Maintain medium-high speed on your mixer to achieve ideal results.
If you prefer superfine substitutions, use baker’s sugar or superfine granulated sugar for faster incorporation and smoother texture.
The standard ratio remains one cup softened butter to three-quarters cup granulated sugar.
Scrape your bowl’s sides periodically to guarantee all ingredients blend uniformly, preventing dry pockets in your final batch.
Mix in the Eggs and Vanilla

Adding eggs and vanilla extract to your creamed butter and sugar creates an emulsion that incorporates air while distributing moisture evenly throughout the dough.
Eggs and vanilla extract create an emulsion that incorporates air while distributing moisture evenly throughout cookie dough.
This emulsification science relies on lecithin in egg yolks, which acts as a binding agent between fat and water molecules.
Add one egg at a time, beating for 30 seconds between additions.
This prevents the mixture from separating.
Use room-temperature eggs—they integrate more smoothly than cold ones.
For vanilla, incorporate one teaspoon of pure vanilla extract, or choose vanilla substitutes like almond extract or bourbon for distinctive flavor profiles.
Beat until the mixture achieves a pale, fluffy consistency, approximately two minutes total.
This stage determines your cookie’s texture and rise.
Don’t rush it.
Combine the Dry Ingredients
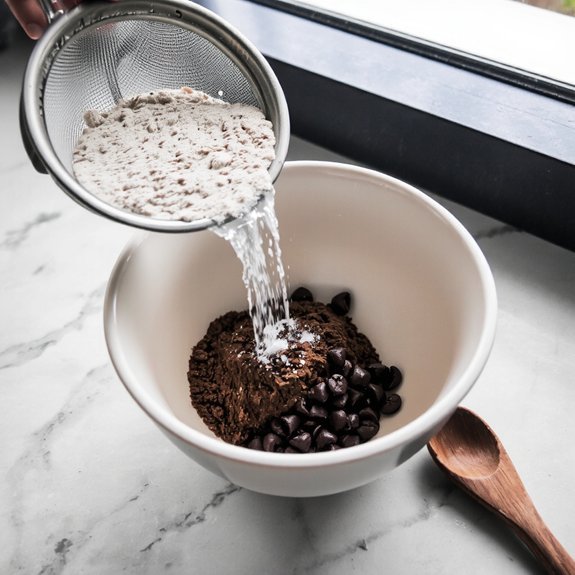
Whisk together two and one-quarter cups all-purpose flour, one teaspoon baking soda, and one teaspoon fine sea salt in a separate bowl. This dry mixture forms your leavening foundation.
Measuring accuracy proves critical here. Use a kitchen scale for precision, or employ the spoon-and-level method: fill your measuring cup, then level with a knife. Avoid scooping directly from the bag, which compacts flour and throws off ratios.
Sifting benefits include aerating your flour and distributing leavening agents uniformly throughout. While optional, sifting guarantees consistent rise and texture. Whisk vigorously for thirty seconds if you skip sifting, ensuring baking soda and salt distribute evenly.
Set this dry mixture aside. You’ll fold it into your wet ingredients next, combining them gently to avoid overdevelopment and maintain your cookies’ tender crumb structure.
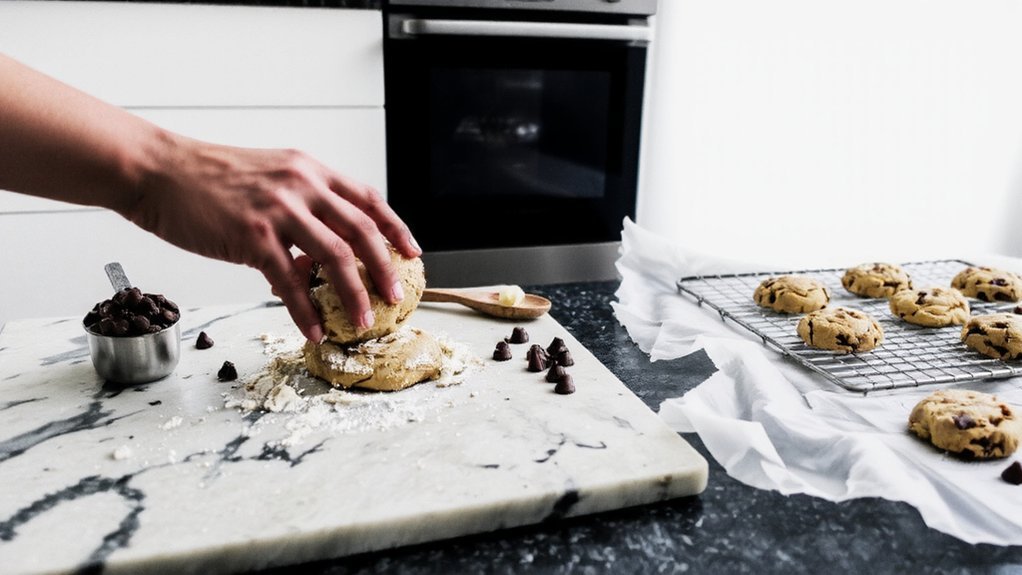
Add the Chocolate Chips

Fold two cups of semi-sweet chocolate chips into your cookie dough using a spatula or wooden spoon, ensuring even distribution throughout the mixture.
You’ll want to achieve uniform chip distribution to guarantee consistent flavor in every bite.
Consider exploring chip varieties beyond traditional semi-sweet options.
Dark chocolate chips provide deeper complexity, while milk chocolate offers subtle sweetness.
You can even combine multiple varieties for nuanced taste profiles.
Work methodically when incorporating chips.
Fold gently to avoid overmixing, which’ll develop gluten and toughen your cookies.
The dough’s temperature matters—if it’s warm, chips’ll partially melt, affecting texture and distribution.
Don’t rush this step.
Proper chip integration determines your final product’s quality.
Take control of your baking process by mastering this fundamental technique.
Bake Until Golden Brown
You’ll want to bake your cookies at 375°F for 9-11 minutes, watching carefully as they shift from pale to light golden brown around the edges.
The centers should still appear slightly underdone when you remove them from the oven, as they’ll continue cooking on the rack through carryover heat.
Once you’ve achieved that perfect golden hue, immediately transfer your cookies to a cooling rack to halt the baking process and set their texture.
Recognizing the Perfect Color
How do you know when your cookies’ve reached their ideal doneness?
The perfect chocolate chip cookie exhibits a golden-brown exterior while maintaining a slightly underbaked center.
Look for edges that’re darker than the middle, indicating proper Maillard reaction development.
To accurately assess color, evaluate your cookies under consistent ambient lighting conditions.
Avoid kitchen fluorescents that distort perception; natural daylight or neutral white balance lighting provides the most reliable visual reference.
The cookie’s surface should display uniform caramelization without burnt spots.
Your baking sheet’s temperature markedly impacts browning rate.
Remove cookies when the edges’re set but the centers still yield slightly to gentle pressure.
This technique guarantees ideal texture—crispy exterior with chewy interior—maximizing flavor complexity from the chocolate chips and caramelized sugars.
Cooling on the Rack
Transferring your cookies from the baking sheet to a cooling rack immediately after removal promotes ideal texture development. You’ll want to allow them to set for 2-3 minutes on the sheet first, preventing structural collapse while the centers firm up.
Choose your rack positioning strategically—elevate it on a countertop to maximize air circulation underneath, which prevents moisture from trapping and creating soggy bottoms.
Material choices matter considerably here. Stainless steel racks outperform nonstick alternatives, offering superior heat dissipation and durability. Avoid wooden racks entirely, as they retain moisture and harbor bacteria.
Position cookies in a single layer, never overlapping. Space them 1-2 inches apart for consistent cooling rates across all batches. This methodology delivers the crispy-edged, chewy-centered texture you’ve earned through precise baking.
Frequently Asked Questions
Can I Use Margarine Instead of Butter in Chocolate Chip Cookies?
You can substitute margarine for butter in chocolate chip cookies, though you’ll notice differences.
Margarine’s melting behavior differs—it spreads faster, creating thinner cookies.
The flavor comparison reveals margarine lacks butter’s rich, complex taste, resulting in a blander final product.
For ideal results, maintain your ingredient ratios precisely. If you choose margarine, use the exact amount specified for butter. Consider using high-quality margarine with higher fat content to minimize texture and taste compromises.
How Do I Store Baked Chocolate Chip Cookies to Keep Them Fresh?
Store your baked cookies in airtight containers to maintain ideal freshness and texture.
You’ll want to implement proper moisture control by placing parchment paper between layers, preventing them from sticking together.
Keep containers at room temperature away from direct sunlight.
For extended storage, you can freeze cookies in airtight containers for up to three months.
This method preserves your cookies’ structural integrity and flavor profile, giving you complete control over your baking results.
What Causes Chocolate Chip Cookies to Spread Too Much While Baking?
You’ll find excessive spreading occurs when your dough temperature’s too warm—you’re not chilling it adequately before baking.
Additionally, you’re likely using too high a sugar ratio relative to flour, which increases spread.
Brown sugar particularly amplifies this effect.
To control your cookies’ structure, chill dough for at least thirty minutes, maintain precise ingredient ratios, and verify your oven temperature’s accurate.
These adjustments give you the freedom to bake consistently exceptional results.
Can I Freeze Chocolate Chip Cookie Dough Before Baking?
Yes, you can absolutely freeze your dough. Freezing Methods include portioning dough into balls and storing them in airtight containers for up to three months.
For Thawing Techniques, you’ve got options: thaw overnight in your refrigerator, or bake directly from frozen—just add 2-3 minutes to your baking time. This approach gives you complete control over your baking schedule without compromising the precise dough structure or ingredient ratios you’ve worked to establish.
Why Did My Cookies Turn Out Too Dry or Cakey?
You’ve likely incorporated excess flour or overmixed your dough, which develops gluten and creates a dense, dry crumb structure.
Measure flour by weight rather than volume to prevent compaction.
Mix until ingredients just combine—stop when you can’t see dry streaks.
Use proper fat-to-flour ratios and don’t overbake.
Your cookies’ll stay tender and moist when you respect these foundational techniques.


Leave a Comment