Key Takeaways
- Make a flaky pie crust by cutting cold butter into flour until pea-sized, then chill at least 30 minutes before rolling.
- Combine cherries with sugar, cornstarch, almond extract, lemon juice, and nutmeg; macerate 15 minutes to release juices before filling.
- Blind bake the bottom crust at 375°F for 12–15 minutes, then add filling and top crust with decorative vents.
- Bake at 375°F for 45–50 minutes until edges are golden-brown and filling bubbles; internal temperature should reach approximately 190°F.
- Cool on a wire rack for at least three hours before slicing to allow filling to set completely and cleanly.
Gathering Your Ingredients
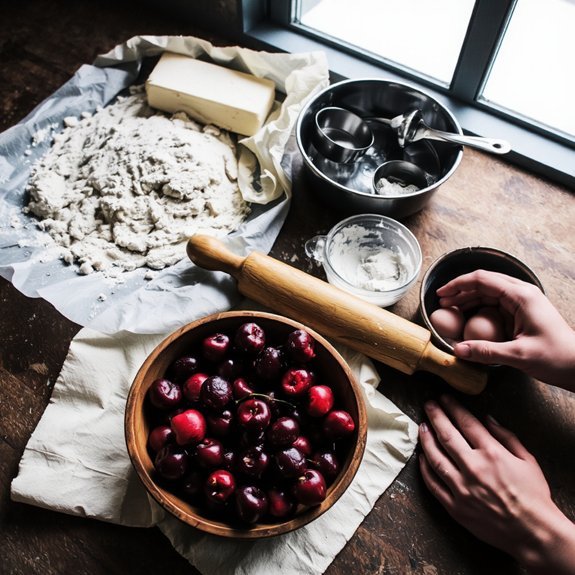
Before you begin mixing, you’ll need to assemble all your ingredients: 2 cups all-purpose flour, ¾ teaspoon salt, 1 tablespoon granulated sugar, 8 ounces unsalted butter (cubed and chilled), 6-8 tablespoons ice water, 4 cups fresh or frozen pitted cherries, ¾ cup granulated sugar, ¼ cup cornstarch, 1/2 teaspoon almond extract, 1 tablespoon fresh lemon juice, and 1/4 teaspoon nutmeg.
Organize your pantry staples—flour, salt, and sugar—in separate bowls for efficient incorporation.
Source cherries seasonally when possible; summer varieties offer superior flavor and texture.
Keep your butter thoroughly chilled to guarantee peak pie crust flakiness.
Measure cornstarch precisely, as this thickening agent directly controls your filling’s consistency.
Combine all dry ingredients separately before introducing wet components.
This methodical approach prevents lumps and guarantees even distribution throughout your dough and filling.
3. Essential Kitchen Tools and Equipment
To execute your cherry pie with precision, you’ll need a 9-inch pie dish (ceramic or glass preferred for even heat distribution), a pastry cutter or two knives for incorporating butter into flour, a rolling pin, a bench scraper for dough manipulation, a 2-cup measuring cup for liquids, dry measuring cups and spoons, a large mixing bowl, a medium saucepan for filling preparation, a wooden spoon for stirring, and a pie shield or aluminum foil strips to prevent crust over-browning.
A 9-inch pie dish, pastry cutter, rolling pin, and bench scraper are essential tools for executing cherry pie with precision.
Additionally, gather safety equipment including oven mitts and a meat thermometer for monitoring internal temperatures.
Keep cleaning supplies accessible—paper towels and a damp cloth—for managing flour dust and sticky residue during preparation.
A kitchen scale guarantees accurate ingredient ratios, while parchment paper facilitates dough transfer.
You’ll appreciate having a cooling rack for proper heat circulation post-baking, allowing you to achieve ideal texture and flavor development without compromising structural integrity.
4. Preparing the Pie Crust From Scratch

You’ll begin by whisking together your flour, salt, and sugar in a large bowl to guarantee even distribution of leavening agents.
Next, you’ll cut cold butter into small cubes and work them into the dry mixture using a pastry cutter or your fingertips until the texture resembles coarse breadcrumbs with pea-sized butter pieces remaining.
Finally, you’ll wrap your dough in plastic and refrigerate it for at least one hour, which allows the gluten to relax and the fat to firm up for ideal flakiness.
Mixing Dry Ingredients
Combining your flour, salt, and sugar creates the foundation for a flaky, well-seasoned crust.
You’ll want to use a 3:1:1 ingredient ratio—three parts all-purpose flour to one part salt to one part sugar.
This precise measurement guarantees balanced flavor and ideal texture.
Begin by employing a sifting technique to aerate your flour, which eliminates lumps and incorporates air into your dry mixture.
Sift your flour into a large mixing bowl, then add your salt and sugar.
Whisk these ingredients together thoroughly for approximately one minute, breaking up any clumps.
This dry ingredient combination prepares you for the next step: cutting in your cold butter.
The aerated flour will distribute fat more evenly, yielding that coveted flaky texture you’re after in your cherry pie crust.
Cutting in Butter
Now that your dry ingredients are aerated and combined, it’s time to cut in your cold butter—a critical technique that creates the distinct layers in your pie crust. This method, rooted in culinary tradition across cultures, demands precision and speed.
| Technique | Tool | Result |
|---|---|---|
| Cut into cubes | Bench scraper | Pea-sized pieces |
| Work quickly | Pastry cutter | Temperature retention |
| Keep cold | Food processor | Even distribution |
Cube your butter into half-inch pieces and scatter them throughout your flour mixture. Using a pastry cutter or fork, press and cut each piece until you’ve achieved pea-sized fragments. Work swiftly—warmth degrades your crust’s texture. The irregularly sized butter bits create steam pockets during baking, producing that coveted flaky crust. This fundamental technique’s cultural history spans generations of bakers seeking that perfect texture—ideal for food photography and genuine culinary excellence.
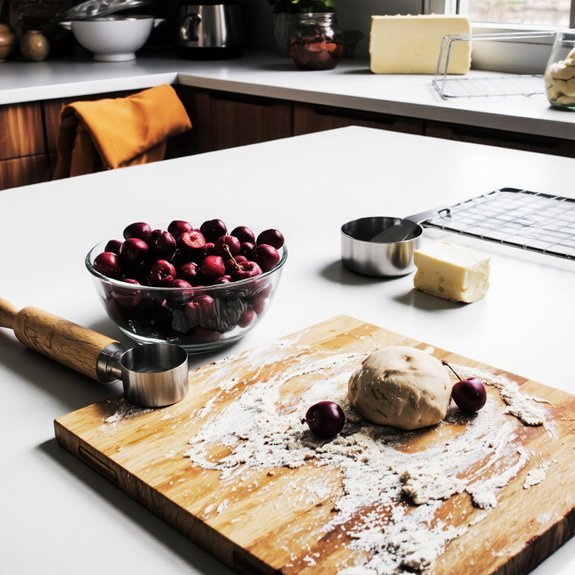
Chilling the Dough
After cutting in your butter, the dough’s gluten strands have begun to relax, but they’ll continue developing unless you halt the process with cold temperatures.
Wrap your dough disk in plastic wrap and refrigerate for a minimum resting duration of 30 minutes—though overnight chilling yields superior results.
Cold temperatures achieve two critical objectives: they solidify fat pockets within your dough, ensuring a flaky texture, and they allow gluten relaxation to stabilize, preventing shrinkage during baking.
This resting duration also facilitates moisture control by allowing the flour to fully hydrate uniformly.
Remove your dough from refrigeration 10-15 minutes before rolling to achieve ideal workability.
This brief tempering prevents cracking while maintaining the structural integrity you’ve carefully developed through your preparation process.
5. Making the Cherry Filling

To create a perfectly balanced cherry filling, you’ll need to combine 4 cups of pitted fresh cherries (or thawed frozen cherries) with ¾ cup granulated sugar, 2 tablespoons of cornstarch, ¼ teaspoon of salt, and ½ teaspoon of almond extract in a large mixing bowl.
Stir these ingredients thoroughly for two minutes until the cornstarch fully hydrates. This guarantees proper texture control and prevents lumping.
Let the mixture macerate for fifteen minutes, allowing the cherries to release their juices naturally.
- Deep crimson juices pooling around glistening dark cherries
- Syrupy consistency thickening as cornstarch activates
- Aromatic almond notes lifting through the filling
The cornstarch absorbs excess liquid while maintaining color preservation. Don’t over-macerate, as extended contact degrades pigmentation.
You’ll achieve the ideal viscosity—neither too thin nor gelatinous. Your filling’s now ready for the prepared pie shell.
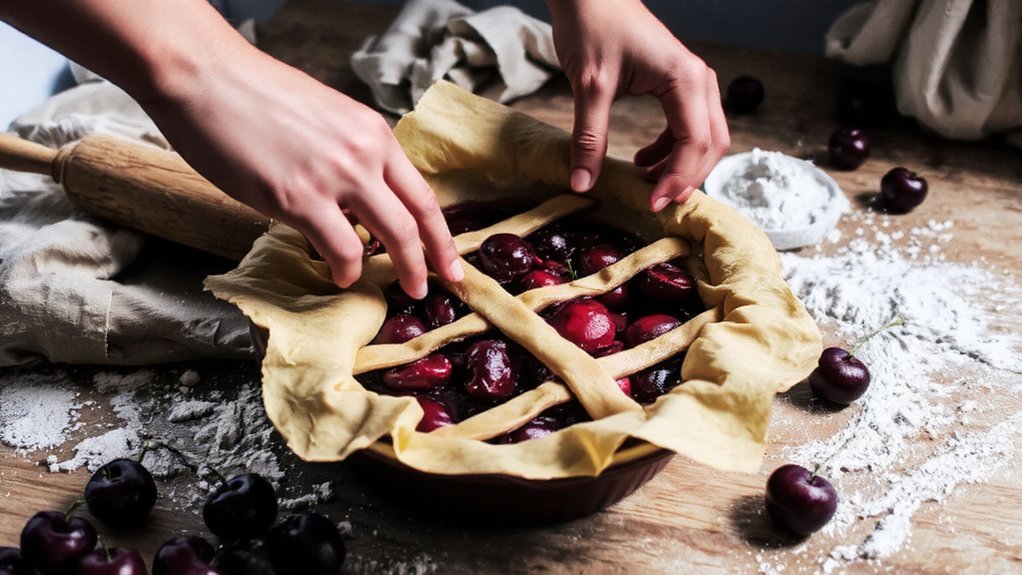
6. Assembling Your Pie
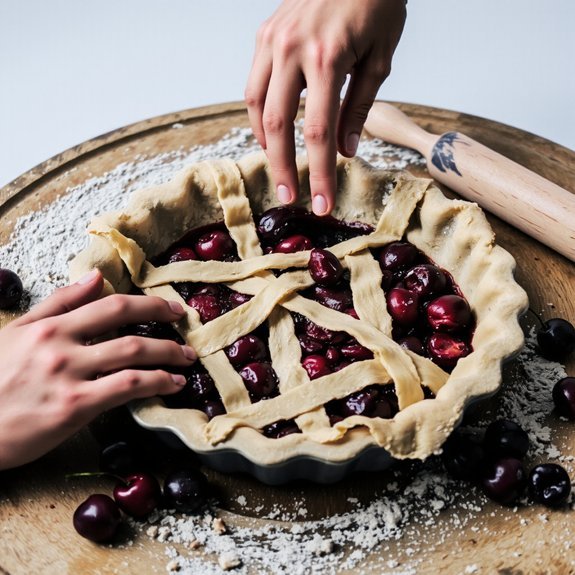
Now that you’ve prepared your cherry filling, you’ll layer it into your bottom crust, ensuring even distribution across the surface.
You’ll then place your top crust over the filling and crimp the edges firmly with your fingers or a fork to seal the two crusts together and prevent leakage during baking.
Finally, you’ll vent the top crust by cutting several small slits or a decorative pattern to allow steam to escape and prevent the pie from becoming soggy.
Layering the Filling
Once your pie shell’s been pre-baked and cooled to room temperature, you’re ready to assemble the filling.
Pour your cherry mixture into the crust, distributing it evenly for ideal color distribution throughout each slice.
Gently spread the filling with a spatula, ensuring uniform thickness while eliminating air pockets that compromise structural integrity.
- Spread filling in thin, even layers using deliberate, controlled motions
- Press gently along edges and corners to remove trapped air pockets completely
- Verify consistent color distribution by observing the deep crimson hue across the entire surface
Don’t overfill—maintain a half-inch clearance from the rim to prevent spillover during baking.
This precision prevents bubbling over and guarantees a professional appearance.
Your filling now awaits its top crust, ready for the final assembly stage.
Crimping the Edges
With your filling perfectly distributed and settled, you’ll place your second pie crust atop the cherry mixture, aligning it carefully over the filled shell.
Press the edges firmly to create an airtight seal, eliminating air pockets that could compromise your pie’s structural integrity.
You’ve got several seal techniques to choose from.
The classic fork method involves pressing tines around the perimeter at quarter-inch intervals.
Alternatively, use a fluted crimper for consistent, professional-looking ridges.
For pattern variations, try the rope technique—pinching the dough at diagonal angles—or the scallop method, which creates decorative semicircles.
Trim any excess dough with a sharp knife, leaving a quarter-inch border.
This precision guarantees even baking and prevents excessive browning.
Your crimped edges now function as both aesthetic detail and functional barrier, locking in those precious cherry juices while the pie bakes.
Venting the Top Crust
Before your pie enters the oven, you’ll need to create steam vents in the top crust to prevent pressure buildup and allow moisture to escape during baking.
Make decorative slits using a sharp knife positioned at a 45-degree angle.
Space your incisions 1-2 inches apart across the crust’s surface.
These strategic openings facilitate steam escape while maintaining structural integrity.
Consider these venting techniques:
- Parallel slits: Create 4-6 straight lines running lengthwise across the pie
- Lattice pattern: Cross two sets of diagonal cuts for maximum visual appeal
- Central design: Make a small circle or X pattern at the pie’s center
Each method allows trapped steam to release gradually, preventing crust rupture and ensuring even filling cookthrough.
Your decorative slits serve dual purposes—functional ventilation and aesthetic enhancement that showcases your craftsmanship.
7. Blind Baking and Pre-Baking Tips
Preventing a soggy bottom crust requires blind baking your pie shell before adding the cherry filling.
Line your unbaked crust with parchment paper and fill it with pie weights or dried beans, distributing them evenly across the bottom and sides.
This technique maintains structural integrity and prevents shrink prevention issues during the initial bake.
Preheat your oven to 375°F and bake for 12-15 minutes until the edges turn light golden.
Remove the parchment weights carefully and return the shell to the oven for an additional 3-5 minutes to set the bottom without over-browning.
For extra protection against moisture, brush the cooled crust with an egg wash or melted chocolate before filling.
This creates a moisture barrier that keeps your cherry filling from penetrating the pastry, ensuring you maintain that desirable crispy texture throughout your pie.
8. Baking Your Cherry Pie to Perfection
Once you’ve prepared and pre-baked your crust, you’re ready to assemble and bake your cherry pie. Pour your filling into the shell, ensuring even distribution of cherries and syrup.
Your pre-baked crust awaits filling. Pour cherries and syrup evenly, ensuring proper distribution throughout the shell.
Verify your oven calibration using an independent thermometer—accuracy matters for consistent results.
Bake at 375°F for 45-50 minutes.
Monitor your browning technique carefully:
- Golden-brown crust edges with slight darkening at crimped borders
- Filling bubbling visibly at pie’s center and edges
- Internal temperature reaching 190°F at the thickest point
Tent with foil if browning accelerates too rapidly.
You’ll know it’s done when the filling sets but retains slight jiggle in the center.
Cool on a wire rack for at least three hours before slicing. This patience guarantees clean cuts and ideal flavor development.
9. Cooling and Serving Your Pie
Allowing your cherry pie to cool properly on a wire rack is essential for structural integrity and flavor stabilization.
You’ll want to let it rest at room temperature for at least two hours before slicing, which prevents the filling from running and allows the crust to set completely.
For ideal serving temperature, serve your pie between 65-70°F for room temperature or gently reheat to 160°F for warm servings.
Both temperatures enhance the cherry flavor without compromising texture.
Regarding presentation tips, you can dust the crust with powdered sugar or add a dollop of whipped cream to individual slices.
Consider pairing with vanilla ice cream for temperature contrast.
Store leftovers in an airtight container at 40°F for up to three days, maintaining quality and food safety standards.
10. Storage and Make-Ahead Suggestions
To maximize your cherry pie’s shelf life, you’ll want to store it in an airtight container at 40°F, where it’ll maintain ideal quality for up to three days.
Store cherry pie in an airtight container at 40°F for optimal quality lasting up to three days.
For extended preservation, freezer storage extends viability up to three months when properly wrapped in plastic film and aluminum foil.
Make-Ahead Strategies:
- Prepare the filling 24 hours prior, storing in sealed containers at refrigeration temperature
- Assemble unbaked pies, freeze, then bake directly without thawing for best crust texture
- Cool completely before wrapping to prevent condensation and sogginess
Reheating tips: Thaw frozen pie at room temperature for six hours, then warm at 350°F for 15 minutes.
Alternatively, reheat from frozen at 325°F for 25–30 minutes, covered loosely with foil to prevent over-browning.
This method preserves your pie’s structural integrity and flavor profile.
Frequently Asked Questions
Can I Use Frozen Cherries Instead of Fresh Ones for Cherry Pie?
You can absolutely substitute frozen cherries for fresh ones in your cherry pie recipe.
Before incorporating them, you’ll need thawing tips: defrost them in the refrigerator overnight to minimize excess moisture.
Be aware of texture changes—thawed cherries release more liquid than fresh fruit, so you might need to increase your thickening agent slightly.
Drain them thoroughly before adding to your filling to maintain ideal pie consistency and structural integrity.
What’s the Difference Between Sour and Sweet Cherries for Baking?
You’ll find sour cherries deliver superior baking results due to their robust flavor profiles and natural acid balance.
They won’t turn mushy during baking and maintain structural integrity better than sweet varieties.
Sweet cherries contain higher sugar content, requiring you to reduce added sugar in your filling.
For ideal pie texture and taste, you’re better served using sour cherries—they won’t compromise your dessert’s quality or require recipe adjustments.
How Do I Prevent a Soggy Bottom Crust in Cherry Pie?
You’ll prevent a soggy bottom crust by blind baking at 375°F for 8-10 minutes before adding filling. Prick your dough with a fork, line it with parchment, and fill with pie weights or dried beans. This creates a moisture barrier that’ll hold firm.
Additionally, brush your pre-baked crust with an egg wash or melted chocolate before pouring cherry filling. You’re free to customize your technique—some bakers add cornstarch to their filling for extra protection.
Can I Make Cherry Pie Filling a Day or Two Ahead?
You can absolutely prepare your cherry pie filling one to two days ahead.
Store it in an airtight container and refrigerate at 40°F or below.
Choose glass or food-grade plastic containers to prevent flavor transfer.
Before assembly, let the filling reach room temperature for ideal thickening.
This advance preparation gives you flexibility on baking day while maintaining the filling’s integrity and texture quality.
Why Did My Cherry Pie Filling Turn Out Too Runny or Thick?
You’ve likely miscalculated your thickener ratios or skipped critical cooking techniques.
If your filling’s too runny, you’ll need more cornstarch or tapioca—typically one tablespoon per cup of filling.
For overly thick consistency, reduce thickener amounts slightly.
Always simmer your filling properly; this activates the thickener’s gelling properties.
You’re in control—adjust measurements precisely based on your cherry juice content and desired consistency before baking.


Leave a Comment