Key Takeaways
- Mix flour, yeast, salt, sugar, and warm water; knead 8–10 minutes until smooth and elastic.
- Let dough rise 1–2 hours at 75–80°F until doubled, or refrigerate overnight for enhanced flavor.
- Shape dough into ~2-ounce portions rolled into 10-inch ropes; brush with olive oil and seasonings.
- Space breadsticks 2 inches apart on parchment; bake at 400–475°F for 6–14 minutes depending on desired color.
- Cool breadsticks on wire rack after baking; store in airtight containers to maintain freshness.
Gathering Your Ingredients
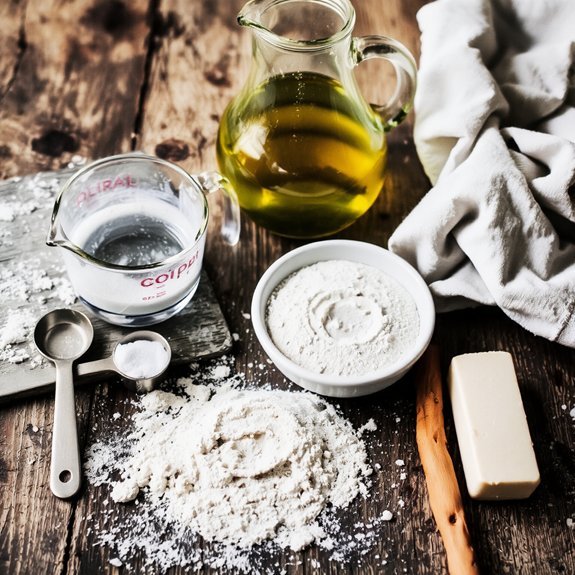
Before you start mixing, you’ll need to gather several key ingredients:
3 cups of all-purpose flour, 1 tablespoon of instant yeast, 1 tablespoon of salt, 2 tablespoons of sugar, 2 tablespoons of olive oil, and 1 cup of warm water (between 110°F and 115°F).
For ingredient sourcing, you’ve got complete freedom choosing quality brands that suit your preferences.
Select unbleached flour for superior texture and flavor control.
Verify your yeast’s expiration date—active yeast is essential for proper rising.
Regarding storage tips, keep your flour in airtight containers away from moisture and heat.
Store yeast in the refrigerator or freezer to maintain potency.
Keep olive oil in a cool, dark place to prevent rancidity.
These practices guarantee consistent results and extend ingredient shelf life, giving you reliable performance every baking session.
Mixing and Kneading the Dough
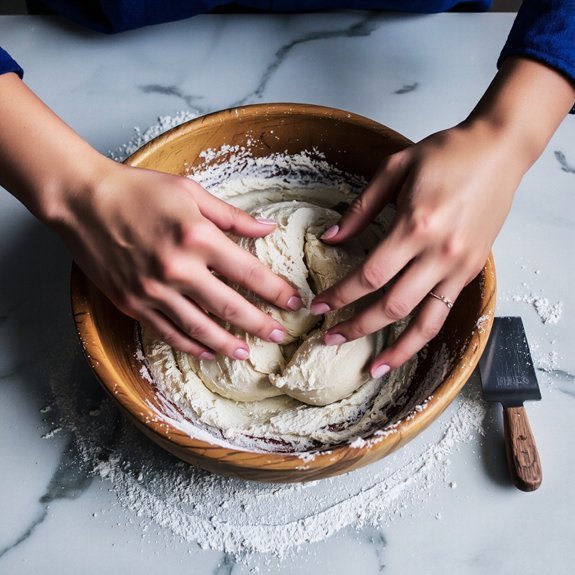
Once you’ve gathered your ingredients, combine the flour, yeast, salt, and sugar in a large mixing bowl.
Add your water gradually, monitoring hydration levels carefully—aim for 60-65% hydration for ideal texture.
Monitor water addition carefully—aim for 60-65% hydration to achieve ideal breadstick texture and consistency.
Mix until a shaggy dough forms.
Transfer the dough to a clean surface.
Knead for 8-10 minutes using the heel of your hand, folding and pushing rhythmically.
You’re building gluten development, which creates the breadsticks’ structure and chew.
The dough should become smooth and elastic.
Test readiness with the windowpane test: stretch a small piece.
If it’s translucent without tearing, you’ve achieved proper gluten development.
If it breaks, continue kneading for another minute.
Place the kneaded dough in a lightly oiled bowl, cover it with plastic wrap, and let it rest before proceeding to the next stage.
Letting Your Dough Rise
As your dough rests in the oiled bowl, you’ll want to maintain an ideal environment for fermentation.
Keep your fermentation temperature between 75-80°F for peak yeast activity—this typically takes 1-2 hours until the dough doubles in size.
Cover the bowl with plastic wrap or a damp towel to prevent drying.
For enhanced flavor development, consider fridge retardation.
Transfer your dough to the refrigerator overnight at 40°F.
This cold fermentation develops complex flavors and gives you scheduling flexibility without sacrificing quality.
Before shaping, remove refrigerated dough and let it reach room temperature for 30 minutes.
You’ll notice increased elasticity and easier handling.
Either method produces superior breadsticks—choose based on your timeline and flavor preferences.
Your control over timing guarantees consistent, delicious results.
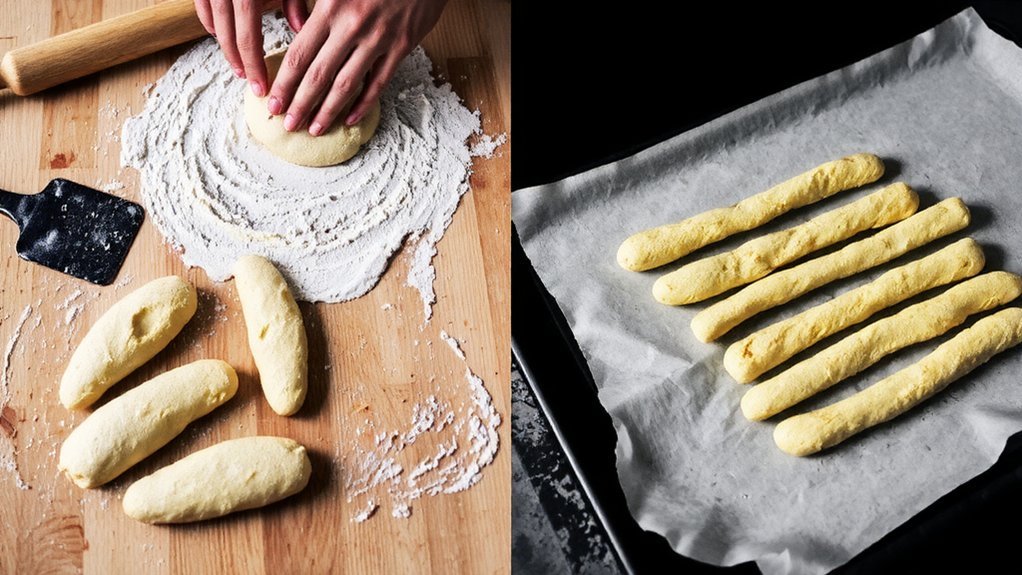
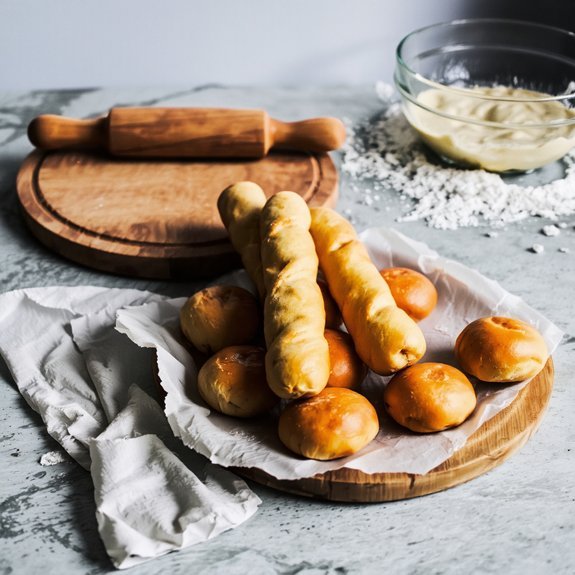
Shaping and Seasoning Your Breadsticks
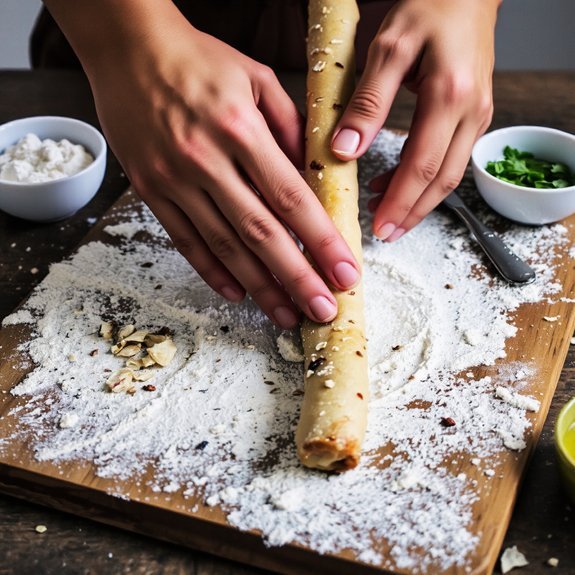
Dividing your risen dough into uniform portions promotes even baking and consistent results.
Cut your dough into equal pieces, roughly 2 ounces each, using a sharp knife or bench scraper.
Roll each portion into a 10-inch rope with consistent thickness.
You can employ various twist techniques to add visual appeal:
- Simple rope—roll straight without manipulation
- Single twist—rotate dough 180 degrees along its length
- Double twist—fold in half and spiral together
- Spiral wrap—coil loosely around itself
Once shaped, brush lightly with olive oil.
Apply your chosen herb blends immediately—garlic and rosemary, Italian seasoning, or everything bagel seasoning work excellently.
Press seasonings gently so they adhere properly.
Place shaped breadsticks on parchment paper, spacing them 2 inches apart to allow for expansion during baking.
Baking to Golden Perfection
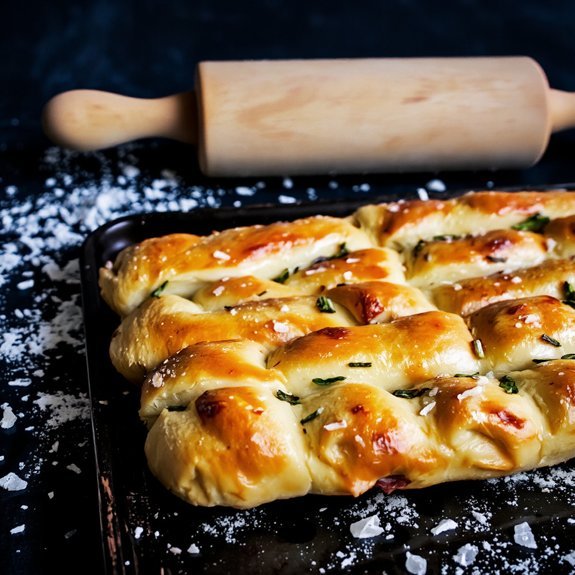
Your seasoned breadsticks are now ready for the oven, where heat will transform them into golden, crispy treats. Start by preheating to 400°F and calibrate your oven using an independent thermometer for accuracy. Place breadsticks on parchment paper, spacing them half an inch apart.
| Temperature | Time | Crust Color |
|---|---|---|
| 400°F | 12-14 minutes | Light golden |
| 425°F | 10-12 minutes | Medium golden |
| 450°F | 8-10 minutes | Deep golden |
| 475°F | 6-8 minutes | Dark golden |
Monitor your breadsticks closely during the final minutes. You’ll know they’re done when the crust color reaches your desired shade. Remove them immediately and cool on a wire rack. This prevents soggy bottoms and maintains that satisfying crunch you’re after.
Frequently Asked Questions
How Long Can I Store Baked Breadsticks, and What’s the Best Storage Method?
You’ll maximize your breadsticks’ shelf life by storing them in airtight containers at room temperature for up to 3 days. For extended storage, freeze them in freezer-safe airtight containers for 2-3 months.
When you’re ready to enjoy them, thaw at room temperature for 30 minutes, then reheat in a 350°F oven for 5-8 minutes. This method preserves your breadsticks’ texture and flavor without any additives or preservatives.
Can I Freeze Breadstick Dough, and How Do I Thaw It Properly?
You can freeze breadstick dough for up to three months.
Wrap it tightly in plastic wrap, then place it in an airtight container.
Thaw it overnight in your refrigerator—this slow method revives the yeast properly without compromising texture.
Once thawed, let dough sit at room temperature for 30 minutes before shaping.
This controlled approach guarantees ideal yeast revival and gives you complete control over your baking schedule.
What Should I Do if My Breadsticks Turn Out Too Dry or Hard?
You’ve likely used an incorrect hydration ratio—bump it up by 2-3% water next time. During baking, you’re missing steam injection, which keeps your breadsticks tender.
Inject steam for the first 12 minutes of baking by placing a pan of boiling water on the oven’s lower rack. This moisture prevents that hard exterior you’re getting.
Adjust your dough’s water content precisely, implement steam immediately, and you’ll achieve the soft, tender breadsticks you want.
Are There Gluten-Free Flour Alternatives That Work Well for Breadsticks?
You’ll find success combining cassava flour (70%) with almond flour (30%) for ideal texture. Cassava flour provides structure and chewiness you’re after, while almond flour adds moisture and richness.
Use precise 1:1 measurements by weight when substituting for wheat flour. Add xanthan gum at ¼ teaspoon per cup to strengthen your dough’s binding. You’ll achieve breadsticks with superior crumb structure and authentic mouthfeel, liberating you from gluten limitations.
How Can I Reheat Leftover Breadsticks to Restore Their Original Texture?
You’ll achieve ideal results with oven revival: preheat to 350°F, wrap breadsticks in foil, and heat for 5-8 minutes.
For microwave hacks, you’re limited—wrap one breadstick in a damp paper towel, microwave 15-20 seconds maximum to avoid sogginess.
The oven method restores your breadsticks’ crispness and interior softness.
You’ve got the freedom to choose your reheating approach based on your schedule and texture preferences.


Leave a Comment