Key Takeaways
- Combine 1½ cups flour, 2 cups wheat bran, 1 tsp baking soda, and ½ tsp salt in a large bowl.
- Whisk together 1 cup oil, ¾ cup honey, 2 eggs, and 1 cup buttermilk until slightly frothy before mixing.
- Fold wet ingredients into dry mixture with 12–15 strokes until small lumps remain; avoid overmixing for tender crumb.
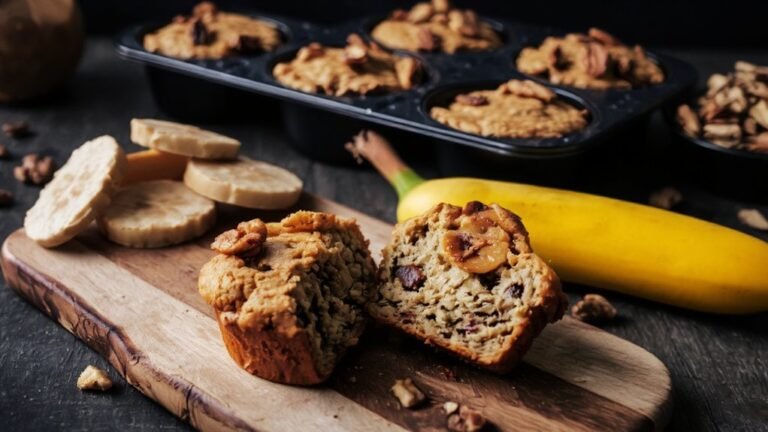
- Fill muffin cups two-thirds full and bake at 375°F for 18–20 minutes until a toothpick emerges clean.
- Cool muffins in tin for five minutes, transfer to wire rack for thirty minutes, then store in airtight container.
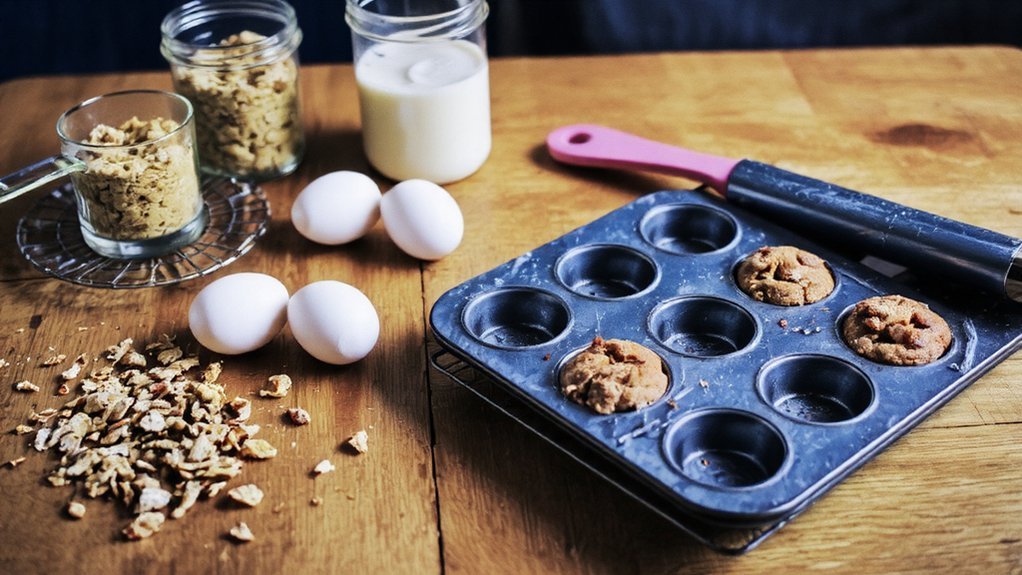
Gather Your Ingredients
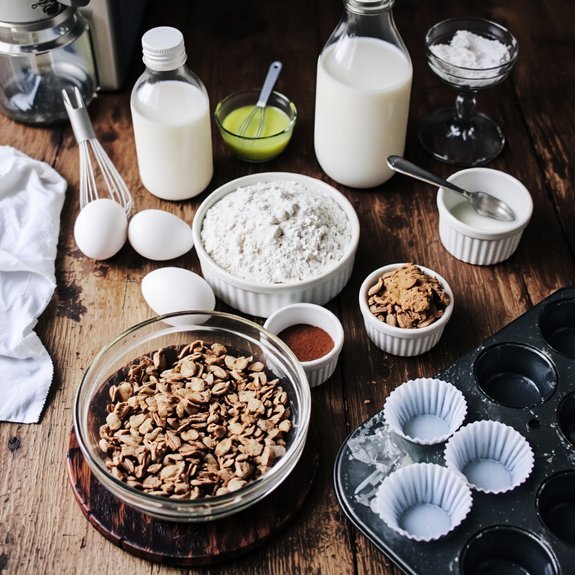
You’ll need to gather dry ingredients: one and one-half cups all-purpose flour, one teaspoon baking soda, half a teaspoon salt, and two cups wheat bran.
Conduct a quick pantry audit to confirm you’ve got these essentials on hand.
Conduct a quick pantry audit to confirm you’ve got these essentials on hand before you begin mixing.
Next, assemble your wet ingredients: one cup vegetable oil, three-quarters cup honey, two large eggs, and one cup buttermilk.
If you’re using seasonal produce, incorporate one cup of mashed bananas or shredded zucchini for added moisture and nutrition.
Measure everything precisely before mixing.
Use a kitchen scale for accuracy rather than volume measurements, which can vary.
Make sure all ingredients are at room temperature for ideal blending.
This preparation method guarantees consistent results and eliminates guesswork from your baking process.
Essential Baking Equipment
Proper equipment guarantees consistent muffin quality and streamlines your baking workflow.
You’ll need a standard 12-cup muffin tin—cast steel or aluminum options both perform well, though aluminum heats faster.
Consider tool durability when selecting a sturdy whisk, mixing bowls, and measuring cups.
A reliable oven thermometer provides accurate temperatures, preventing undercooked or burnt batches.
Brand comparisons reveal that KitchenAid and OXO produce superior measuring tools with precise graduations.
You’ll want parchment liners or silicone cups for easy removal.
A stand mixer handles heavy bran batter efficiently, though hand mixing works if you prefer manual control.
Quality equipment reduces mixing errors and promotes even batter distribution.
Invest in tools that withstand repeated use—your muffin success depends on this foundation.
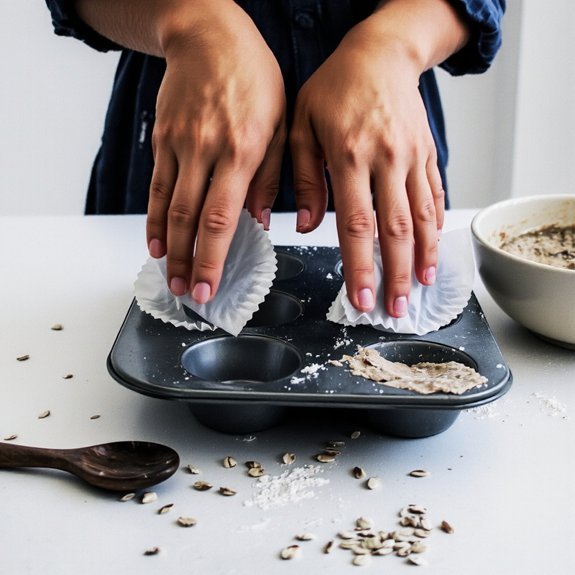
Prepare Your Muffin Tins
You’ll want to select a standard 12-cup muffin tin or a mini muffin tin depending on your desired portion size.
Grease each cup thoroughly with butter or cooking spray, or line them with paper liners for easier removal and cleanup.
If you’re using liners, you can still lightly grease them to prevent the batter from sticking to the paper during baking.
Choosing the Right Tin
What separates perfectly shaped muffins from collapsed or unevenly baked results? Your tin selection. You’ll find critical material comparison between standard steel, silicone, and ceramic options. Steel conducts heat efficiently, ensuring consistent browning. Silicone flexes for easy removal but conducts slower. Ceramic distributes heat evenly but requires careful handling.
| Tin Type | Heat Conductivity | Best For |
|---|---|---|
| Steel | High | Even baking, crisp edges |
| Silicone | Low | Easy release, delicate batches |
| Ceramic | Medium | Gentle, uniform results |
Shape varieties matter equally. Standard 12-cup muffin tins dominate, but jumbo or mini options suit your yield preferences. You’ll want tins with non-stick surfaces—they’re non-negotiable for extracting your bran muffins intact. Choose dark steel for accelerated browning; light steel for controlled, gradual baking. Your freedom to experiment depends on selecting equipment that matches your precise baking methodology.
Greasing and Lining Tips
Once you’ve selected your tin, preparing its surface determines whether your bran muffins release cleanly or stick stubbornly to the walls.
You’ll want to grease each cup thoroughly with butter, oil, or cooking spray—choose based on your dietary preferences and allergen awareness.
For extra insurance against sticking, line cups with paper liners, which also reduce cleanup demands and offer environmental impact benefits by containing crumbs efficiently.
If you’re using liners, you can skip greasing entirely.
If you’re going bare, don’t skimp on coverage—coat the bottom and sides completely.
Consider using silicone liners as a reusable alternative that minimizes waste while maintaining non-stick properties.
Ensure your tin’s surface is completely dry before filling.
Any moisture interferes with proper muffin rise and browning, compromising your final product’s texture and appearance.
Mix the Dry Ingredients
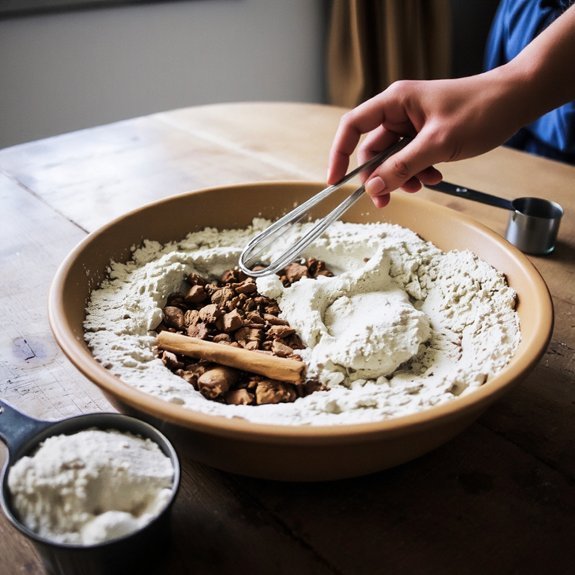
You’ll start by measuring out your flour and bran according to your recipe’s specifications, using a dry measuring cup and leveling each ingredient with a knife for accuracy.
Next, you’ll combine your leavening agents—baking soda and baking powder—with the flour and bran mixture, whisking them together thoroughly to distribute them evenly throughout the dry ingredients.
This guarantees consistent rise and texture throughout your muffins.
Measuring Flour and Bran
Before combining wet and dry components, gather your dry ingredients: 1¾ cups all-purpose flour, 1 cup wheat bran, ¾ cup granulated sugar, 2½ teaspoons baking powder, ½ teaspoon baking soda, and ½ teaspoon salt.
For precision, weigh your flour at 220 grams and bran at 110 grams.
Weight conversions eliminate guesswork inherent in volume measurement.
Density differences between flour and bran require careful attention—bran’s lower density means a cup of bran weighs considerably less than a cup of flour.
Using a kitchen scale guarantees consistent results across batches.
Spoon flour into your measuring cup and level with a knife rather than scooping directly from the bag, which compacts the flour and throws off ratios.
Combine all measured dry ingredients in a large mixing bowl before incorporating your wet components.
Combining Leavening Agents
With your dry ingredients assembled in the mixing bowl, now’s the time to make sure your leavening agents distribute evenly throughout the flour and bran mixture. Combine one and a half teaspoons of baking powder with half a teaspoon of baking soda, whisking them thoroughly into your dry blend.
This dual-agent approach balances pH and controls activation timing—baking soda reacts immediately with acidic ingredients, while baking powder activates during baking. Whisk for thirty seconds minimum, breaking up any clumps that form.
Don’t skip this step; uneven distribution creates inconsistent rise and dense pockets in your finished muffins. Your independence in the kitchen depends on understanding these chemical interactions. Proper technique guarantees reliable, predictable results every single time.
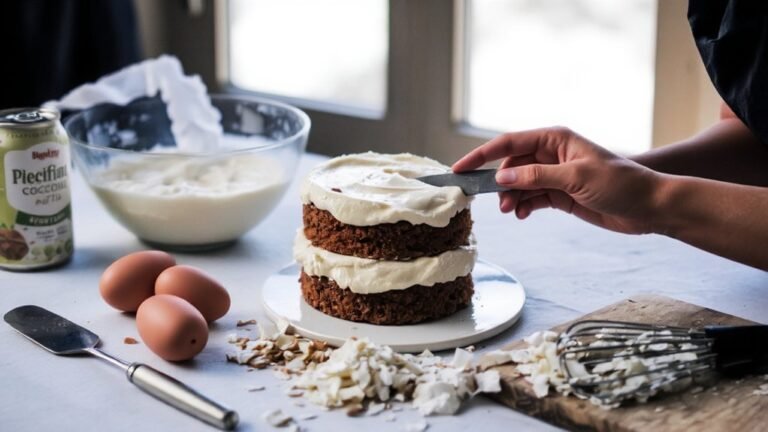
Combine the Wet Ingredients

Whisk together the eggs, milk, vegetable oil, and honey in a medium bowl until they’re fully combined and the mixture’s consistency becomes uniform.
Maintain a steady whisking rhythm to achieve proper emulsification technique, which binds the fat and liquid components into a stable suspension. This process typically requires thirty to forty-five seconds of continuous whisking.
You’ll notice the mixture lighten slightly as air incorporates throughout. The emulsification guarantees your muffins develop an even crumb structure and moist texture.
Don’t underestimate this step—inadequate whisking results in separated ingredients and dense muffins. Once you’ve achieved a homogeneous, slightly frothy liquid, you’re ready to combine this wet mixture with your dry ingredients in the next step.
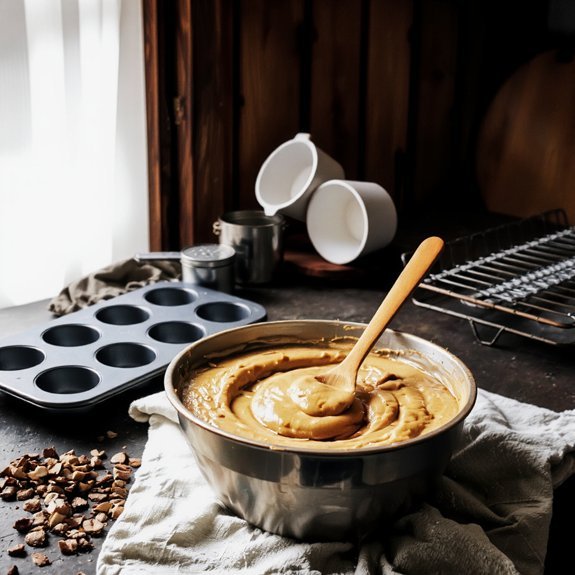
Blend Everything Together
Once your wet mixture’s ready, pour it directly into the bowl containing your dry ingredients. Use a moderate blending speed—a sturdy spatula or wooden spoon works best. Fold the mixture deliberately, making 12-15 strokes until you’ve just combined everything.
Stop immediately when you no longer see dry flour streaks. Overmix prevention is critical here; overworking the batter develops gluten, creating dense, tough muffins rather than the light, tender crumb you’re after.
You’ll notice some small lumps remaining—that’s perfectly fine and actually desirable. These irregularities contribute to better texture. The batter should appear slightly shaggy and loose, never smooth or completely homogeneous.
Your mixture is now ready for portioning into muffin cups. Work quickly to prevent settling and maintain ideal rise during baking.
Add Your Favorite Mix-Ins
Before the batter sets, you’ll want to fold in your chosen mix-ins with gentle strokes to distribute them evenly without deflating the batter. Consider texture contrasts: dried cranberries alongside walnuts, or shredded coconut with chocolate chips.
Strategic flavor pairings enhance complexity—pair blueberries with lemon zest, or dates with cinnamon. Don’t exceed one cup total mix-ins, as excess weight compromises rise and crumb structure.
Fold thoroughly but briefly, using a spatula to cut vertically through the batter, rotate the bowl, and repeat until mix-ins disperse uniformly.
Incorporate hardy ingredients like nuts and dried fruit first; delicate berries last, minimizing breakage. This procedural order prevents settling and guarantees consistent flavor distribution throughout your finished muffins.
Fill and Bake
Transferring your batter to prepared muffin cups requires precision to guarantee even baking and consistent rise. Fill each cup two-thirds full, allowing room for expansion without overflow.
| Temperature | Baking Time | Result |
|---|---|---|
| 375°F | 18-20 minutes | Golden, springy tops |
| 400°F | 15-17 minutes | Crispy exterior |
| 350°F | 22-25 minutes | Dense, moist crumb |
Proper oven calibration makes certain you’ll achieve your desired texture. Preheat thoroughly for 15 minutes before loading your muffin tin. Check doneness at the lower time threshold—a toothpick inserted in the center should emerge clean or with minimal crumbs.
Baking times vary based on your oven’s actual temperature and batter density. Remove muffins immediately upon completion to prevent overcooking. Cool in the tin for five minutes before transferring to a wire rack. This method guarantees muffins you’ll want to bake repeatedly.
Cool and Store Your Muffins
After your muffins finish baking, you’ll want to let them cool properly to set their structure and develop ideal texture.
Transfer the pan to a wire cooling rack immediately—this prevents moisture from accumulating on the bottoms, which would compromise your bran muffins’ crumb integrity.
Transfer the pan to a wire rack immediately to prevent moisture accumulation and preserve your muffins’ crumb integrity.
Allow them to rest in the pan for five minutes, then turn them out directly onto the rack for complete cooling, roughly thirty minutes.
For storage, place cooled muffins in airtight storage containers to maintain freshness and lock in moisture.
They’ll keep at room temperature for two days, refrigerated for up to a week, or frozen for three months.
When freezing, wrap individual muffins in parchment before container placement to prevent sticking and facilitate portion control.
Frequently Asked Questions
Can I Substitute All-Purpose Flour for Whole Wheat Flour in Bran Muffins?
You can substitute all-purpose flour for whole wheat flour, but you’ll notice significant texture differences.
All-purpose flour absorbs less liquid, creating a denser, more compact crumb structure.
Whole wheat flour’s higher absorption rates demand more moisture for ideal consistency.
You’ll need to adjust your liquid content upward by approximately 2-3 tablespoons per cup of substituted flour to maintain the muffin’s tender texture and prevent dry results.
How Do I Know When Bran Muffins Are Fully Baked and Done?
You’ll know your bran muffins are done when you insert a toothpick into the center and it emerges clean with no wet batter clinging to it. Alternatively, check the internal temperature—you’re aiming for 200-205°F at the muffin’s core using an instant-read thermometer.
The tops should be golden brown and spring back when lightly pressed. Don’t overbake, or you’ll end up with dry, crumbly muffins that’ll compromise your ingredient ratios’ effectiveness.
Why Are My Bran Muffins Dry, and How Can I Fix This?
Your bran muffins’re likely dry due to Insufficient Fat or Overmixed Batter.
Increase butter or oil by 2-3 tablespoons per dozen—fat retains moisture.
Don’t overmix; combine ingredients until just incorporated to avoid gluten development, which toughens crumb structure.
Use room-temperature eggs and add an extra egg yolk for richness.
Reduce oven temperature by 25°F if tops brown before centers set.
These adjustments’ll yield tender, moist muffins you’ll actually want to eat.
Can Bran Muffin Batter Be Made Ahead and Refrigerated Overnight?
Yes, you can refrigerate your bran muffin batter overnight without safety concerns.
You’ll actually notice improved flavor development as the bran absorbs moisture and the ingredients meld together.
Store it in an airtight container at 40°F or below.
When you’re ready to bake, proceed directly from the refrigerator—don’t bring it to room temperature.
You may need to add 2-3 minutes to your baking time since you’re working with cold batter.
What’s the Difference Between Wheat Bran and Oat Bran for Muffins?
You’ll find wheat bran delivers higher fiber content and a more robust, nutty flavor that stands up boldly in your muffins. Oat bran offers you a milder, slightly sweet taste with marginally less fiber but superior binding properties.
Your choice determines texture—wheat bran creates grainier crumb structure, while oat bran yields denser, more tender results. You’re free to substitute either, though you’ll need adjusting liquid ratios when switching.


Leave a Comment