Key Takeaways
- Preheat oven to 350°F and bake blondies for 22–26 minutes until golden-brown with slight center jiggle.
- Cream together softened butter, brown sugar, and eggs until pale and thick before folding in flour mixture.
- Sift flour, baking soda, and salt together 2–3 times to ensure even leavening agent distribution throughout batter.
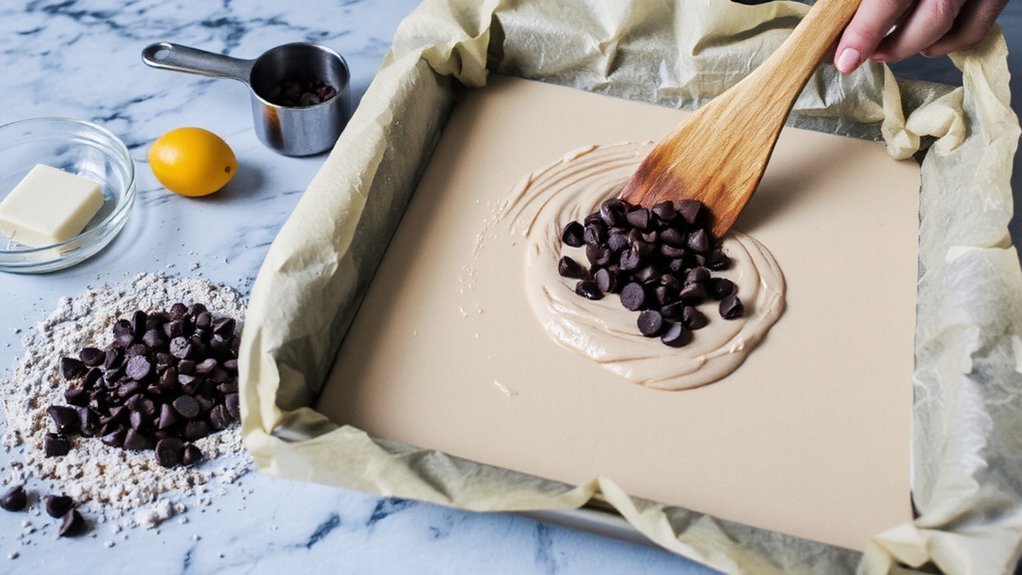
- Prepare a greased 9×13-inch metal pan lined with parchment paper to prevent sticking and ensure easy release.
- Cool blondies in pan for 15 minutes, then transfer to wire rack and cool completely before cutting.
Ingredients You’ll Need

You’ll need two cups of all-purpose flour, one teaspoon of baking soda, and half a teaspoon of salt to form your dry base.
For your wet ingredients, gather one cup of softened butter, one cup of brown sugar, and two large eggs. Add two teaspoons of vanilla extract for depth.
When considering ingredient sourcing, select high-quality butter and fresh eggs from local suppliers for superior results.
Brown sugar’s molasses content directly impacts your blondies’ texture and flavor.
For allergen substitutions, replace all-purpose flour with certified gluten-free flour at a 1:1 ratio. Substitute eggs with flax eggs—mix one tablespoon ground flaxseed with three tablespoons water per egg. Dairy-free butter works equally well as traditional butter.
These ingredient choices determine your blondies’ final structure and taste. Precision in measurement guarantees consistent, reliable outcomes.
Essential Equipment and Tools
You’ll need standard mixing bowls and wooden spoons or rubber spatulas to combine your dry and wet ingredients efficiently.
Prepare a 9×13-inch baking pan lined with parchment paper to prevent sticking and guarantee easy removal.
Gather measuring cups and spoons, along with a whisk and sifter, to accurately portion flour and leavening agents.
Mixing Bowls and Utensils
A sturdy mixing bowl—preferably stainless steel or glass—forms the foundation of blondie preparation. It won’t react with acidic ingredients or retain flavors from previous batches. You’ll need a whisk for incorporating air into your batter, ensuring that light, fluffy texture you’re after. A rubber spatula handles folding dry ingredients without deflating your mixture. Consider your aesthetic choices; professional-grade stainless steel bowls project competence, while ceramic offers visual appeal.
For cleaning techniques, these materials resist staining better than plastic alternatives. Stainless steel demands immediate rinsing to prevent water spots. Glass tolerates vigorous scrubbing without degradation. Rubber spatulas require gentle hand-washing to maintain flexibility. You’re investing in tools that won’t compromise your baking results or your freedom to experiment with confidence.
Baking Pans and Liners
Since blondies require even heat distribution and reliable release, selecting the right pan fundamentally determines your baking success. You’ll want an 8×8 or 9×13-inch metal baking pan with a light or medium pan finish, which conducts heat more evenly than dark finishes and prevents over-browning.
Parchment paper stands as your best liner variety, offering easy removal and minimal sticking. Alternatively, you can use silicone liners for reusable convenience.
Always line your pan before pouring your batter—this simple step saves you from destroying your finished product during removal. Grease your liner lightly if you’re using parchment, ensuring complete coverage.
For aluminum pans specifically, avoid dark nonstick finishes that intensify heat absorption and risk burning your blondies’ edges. Your choice of equipment directly impacts texture, appearance, and overall quality.
Measuring and Preparation Tools
Precise measuring and preparation tools form the foundation of consistent blondies, as even minor variations in ingredient quantities can substantially alter texture and flavor. You’ll need reliable equipment to maintain measurement accuracy throughout your baking process.
| Tool | Purpose | Why It Matters |
|---|---|---|
| Digital Scale | Weighs dry ingredients | Eliminates guesswork in unit conversions |
| Measuring Cups | Volumes for liquids/solids | Standardizes portion sizes |
| Mixing Bowls | Combines ingredients | Allows proper incorporation |
You’ll want a whisk for aerating dry components and a sturdy spatula for folding without deflating your mixture. A microwave-safe bowl enables you to melt butter precisely. Quality measuring spoons handle smaller quantities with exactitude. These tools give you complete control over your blondie’s outcome, ensuring repeatable results every single time you bake.
Preparing Your Baking Pan
Greasing your baking pan properly guarantees that your blondies won’t stick and’ll release cleanly once they’ve cooled.
You’ve got several grease techniques to choose from: butter, vegetable oil, or commercial baking spray.
Apply your chosen lubricant evenly across all interior surfaces, including corners and edges where sticking typically occurs.
For ideal results, use parchment paper as an additional barrier.
Cut a sheet to fit your pan’s bottom, pressing it firmly into place after greasing.
Temperature acclimation matters greatly.
Don’t skip allowing your prepared pan to sit at room temperature before pouring your batter.
This prevents thermal shock and guarantees even baking throughout your blondies.
If you’re using a dark or nonstick pan, reduce your oven temperature by 25 degrees Fahrenheit to prevent over-browning.
Mixing the Wet Ingredients
You’ll begin by melting your butter over medium heat or in the microwave until it’s completely liquefied, then let it cool slightly.
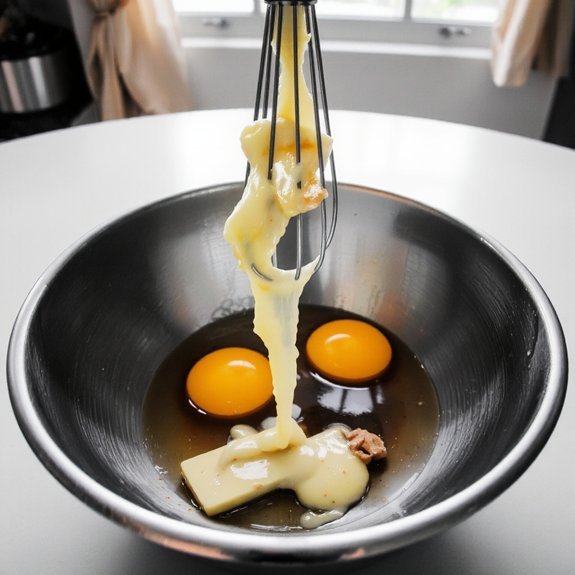
Next, you’ll combine your sugar and eggs in a separate bowl, whisking them together until the mixture becomes pale and thick—typically 2-3 minutes of vigorous beating.
Once your butter has cooled, you’ll fold it into the sugar-egg mixture using a spatula, stirring until the ingredients are fully incorporated and the batter reaches a uniform consistency.
Melting the Butter
Begin by cutting your butter into smaller chunks—roughly one-inch pieces—which’ll accelerate the melting process and promote even heat distribution. You’ll want to use medium heat to prevent clarifying butter or burning. Monitor your stovetop safety by never leaving melting butter unattended.
| Temperature | Timeframe | Appearance | Risk Level | Action |
|---|---|---|---|---|
| Low | 3-4 minutes | Gradual melt | Minimal | Safest option |
| Medium | 2-3 minutes | Steady melt | Moderate | Recommended |
| Medium-High | 1-2 minutes | Rapid melt | High | Risk of scorching |
| High | Under 1 minute | Immediate melt | Critical | Avoid completely |
| Residual Heat | Variable | Post-flame | Low | Remove from heat early |
You’ll know your butter’s ready when it’s completely liquid with a light golden hue. Remove it from heat immediately to avoid clarifying butter further or developing burnt flavors that’ll compromise your blondie batch.
Combining Sugar and Eggs
Once your melted butter reaches room temperature, combine it with your sugar and eggs in a large mixing bowl. Whisk vigorously for approximately two minutes until you’ve achieved proper foam stability—this incorporation of air is essential for your blondies’ rise and texture.
The sugar crystallization process begins immediately as you mix, so maintain consistent whisking speed to guarantee even distribution. You’ll notice the mixture transform from separated components into a cohesive, pale emulsion. This stage demands attention; insufficient mixing compromises your batter’s structure, while overmixing can deflate your carefully built foam stability.
The eggs act as both binder and leavening agent, so their thorough integration matters considerably. Continue whisking until the mixture reaches ribbon stage—when you lift your whisk, the batter should fall in thin, persistent ribbons. You’re now prepared to incorporate your dry ingredients.
Combining Dry Ingredients
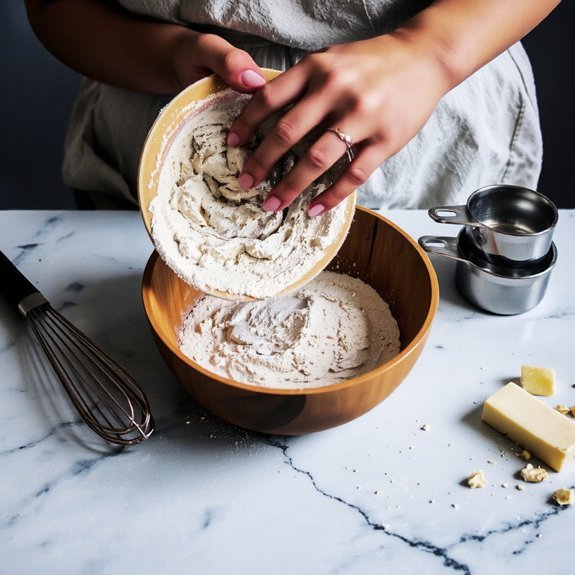
To guarantee even distribution of leavening agents and salt throughout your blondies, sift together your flour, baking powder, and salt in a medium bowl.
This sift technique prevents clump formation that’d compromise texture.
You’ll achieve superior results by following these steps:
- Use a fine-mesh sifter to break down flour particles
- Pass mixture through sifter 2-3 times for ideal clump prevention
- Create an aerated dry blend that incorporates seamlessly with wet ingredients
- Store sifted mixture in bowl until ready for integration
Don’t skip this critical stage.
Proper sifting eliminates lumps and guarantees your leavening agents activate uniformly during baking.
This precision work directly impacts your final product’s rise and crumb structure.
You’re establishing the foundation for perfectly textured blondies that deliver consistent results every time you bake.
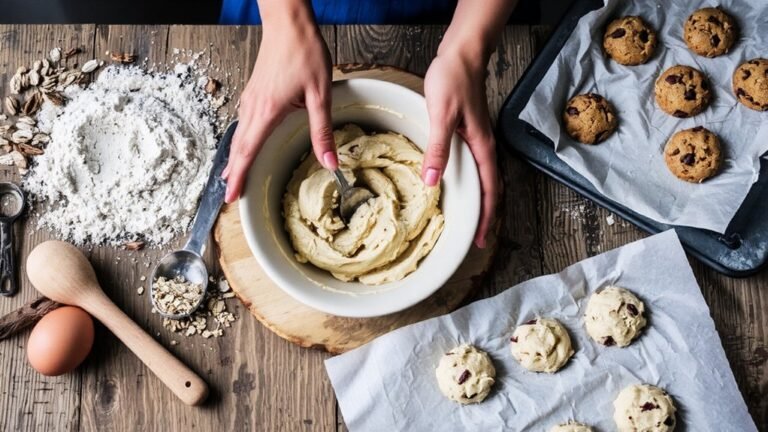
Bringing It All Together
Now that you’ve established your aerated dry blend, you’ll combine it with your wet ingredients to form the blondie batter.
Pour your wet mixture into the dry ingredients, folding gently until you achieve uniform consistency—about 12-15 folds. Don’t overmix; this develops gluten and creates dense results.
| Timing Strategies | Action | Expected Result |
|---|---|---|
| Immediate folding | Combine while wet ingredients are warm | Even distribution |
| 2-minute rest | Let mixture sit briefly | Enhanced flavor melding |
| Fold until combined | Stop at visible streaks | Ideal texture |
Use this troubleshooting checklist: If batter appears lumpy, continue folding gently without vigor. If it’s too thick, you’ve overmixed—start fresh. If separation occurs, your ingredients weren’t properly tempered.
Transfer batter to your prepared pan immediately. Delayed transfer allows settling, compromising your final blondie’s structure and rise.
Baking and Cooling Your Blondies
As you transfer your batter to the prepared pan, you’ll want to make sure even distribution by gently spreading it with an offset spatula until it reaches the corners and edges uniformly.
Preheat your oven to 350°F and bake for 22-26 minutes, monitoring closely for ideal results.
Watch for these critical indicators:
- Golden-brown crust formation across the entire surface
- Edges pulling slightly away from pan sides
- Internal doneness verified by toothpick insertion—slight crumbs indicate perfect texture
- Center remaining just-set with slight jiggle
Remove blondies when they’ve achieved crust formation but retain subtle moisture inside.
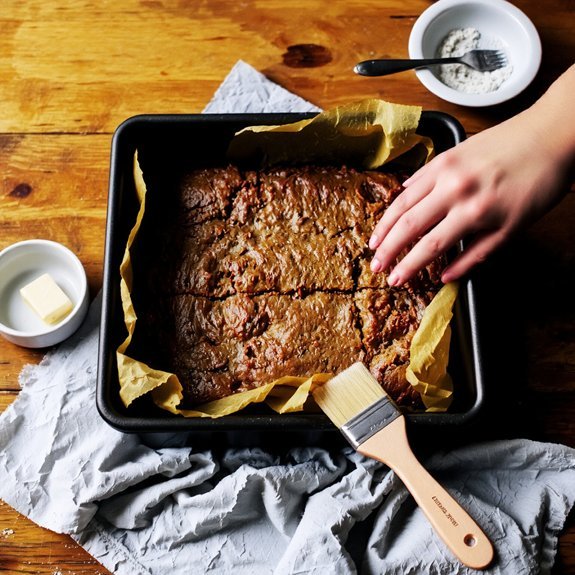
Cool in the pan for 15 minutes, allowing carryover cooking to complete internal doneness without overcooking edges. Transfer to a wire rack for complete cooling before cutting. This approach guarantees chewy centers and crisp borders.
Storing and Serving Tips
Once your blondies have cooled completely on the wire rack, proper storage will preserve their texture and flavor for several days. Store them in an airtight container at room temperature for up to five days, or freeze them for extended preservation.
For ideal serving temperature, enjoy your blondies at room temperature or slightly warm them for enhanced butter and vanilla notes. You’ll notice the caramel undertones intensify when served warm.
Explore flavor pairings that complement your blondies’ rich profile. Serve them alongside cold milk, coffee, or vanilla ice cream.
Consider pairing with sea salt for contrast, or drizzle with dark chocolate ganache for depth. These combinations elevate your blondies from simple treats to sophisticated desserts, giving you complete control over your tasting experience.
Frequently Asked Questions
What’s the Difference Between Blondies and Brownies?
You’ll find the primary distinction lies in chocolate content.
Brownies contain cocoa or melted chocolate, delivering rich, dark flavor profiles.
Blondies omit chocolate entirely, instead featuring brown sugar, butter, and vanilla for a caramel-forward taste.
You’re looking at completely different flavor experiences—blondies offer butterscotch notes while brownies provide deep cocoa complexity.
Your choice depends on whether you want chocolate-forward indulgence or prefer caramel-based sweetness.
Can I Substitute Butter With Oil in Blondie Recipes?
You can substitute butter with oil in blondie recipes, but you’ll need to adjust your fat ratios carefully. Oil won’t provide the same structure as butter since it lacks water content.
Use about 75% of the oil amount compared to butter weight—this accounts for moisture retention differences. You’ll get denser, greasier blondies if you use equal amounts. The resulting texture becomes chewier rather than cake-like, demanding precision for ideal results.
Why Did My Blondies Turn Out Too Cake-Like?
Your blondies turned out too cake-like because you’ve likely used excess leavening agents—baking soda or baking powder—which created too much lift.
You’re also probably overmixing your batter, incorporating excess air and developing gluten, making them rise excessively.
To reclaim that dense, fudgy texture you’re after, reduce leavening by a quarter teaspoon, mix just until combined, and avoid overworking your ingredients.
How Do I Know if Blondies Are Perfectly Baked?
You’ll know your blondies are perfectly baked when you’ve achieved that ideal center texture—slightly underdone in the middle while the edges firm up completely. Insert a toothpick near the center; it shouldn’t come out clean, but rather with a few moist crumbs clinging to it.
Check your internal temperature: you’re aiming for 205-210°F at the center. This precise range guarantees you’ll bypass that cake-like consistency and nail the dense, fudgy brownie-adjacent texture you’re after.
Can Blondies Be Frozen for Long-Term Storage?
You can absolutely freeze blondies for extended storage. Wrap them individually in parchment paper, then seal them in airtight freezer bags—this packaging option prevents freezer burn and maintains quality.
Your blondies’ll stay fresh for up to three months. You’re free to thaw them at room temperature for two hours before serving, preserving their fudgy texture and rich flavor profile throughout their entire shelf life.


Leave a Comment