
Key Takeaways
- Use cold butter cut into pea-sized pieces and ice-cold buttermilk to create flaky layers and proper rise.
- Mix dry ingredients, cut in cold butter until coarse breadcrumbs form, then add buttermilk and mix minimally.
- Press dough straight down with a floured cutter without twisting to ensure clean edges and maximum lift.
- Bake at 400–425°F for 12–15 minutes until golden brown; check starting at 10 minutes for doneness.
- Store cooled biscuits in airtight containers at room temperature for two days or freeze individually for three months.
Understanding the Essential Ingredients

Flour, butter, buttermilk, salt, and baking powder form the foundation of every reliable biscuit recipe.
You’ll need all-purpose flour as your dry base, which provides structure and body to your biscuits.
Butter contributes richness and creates the flaky layers you’re after.
You’ll want cold butter cut into small pieces—this creates steam pockets during baking, producing that desirable texture.
Cold butter cut into small pieces creates steam pockets during baking, producing that desirable flaky texture.
Buttermilk activates your leavening agents, which are critical for rise and lift.
Baking powder serves as your primary leavening agent, creating CO2 bubbles throughout the dough.
Salt enhances flavor and strengthens gluten development.
While eggs aren’t traditional in basic biscuits, their functions—binding ingredients and adding moisture—can be achieved through buttermilk when you’re baking without them.
Understanding these components’ roles guarantees you’ll produce consistently excellent results.
Choosing the Right Flour Type

While all-purpose flour works reliably for basic biscuits, you’ll achieve superior results by understanding how different flour types affect your final product.
All-purpose flour contains moderate protein content—around 10-12%—producing tender yet structured biscuits.
For lighter, more delicate results, choose cake flour with 7-9% protein content.
It yields fluffier biscuits with a softer crumb.
Conversely, bread flour‘s higher protein content creates denser, chewier textures—generally undesirable for traditional biscuits.
If you’re exploring gluten alternatives, you’ll need to experiment.
Rice flour, almond flour, and cornstarch produce different outcomes.
Many bakers combine gluten alternatives to replicate all-purpose flour’s binding properties.
Your flour choice determines biscuit texture, rise, and moisture retention.
Select based on your desired outcome: tender and flaky demands cake flour; sturdy and substantial demands bread flour.
The Importance of Cold Ingredients

You’ll find that temperature matters tremendously in biscuit baking because cold ingredients create steam pockets that produce those desirable flaky layers.
Keep your butter solid by chilling it before mixing, as warm butter blends too smoothly into the flour and prevents the distinct separation you need.
When you work quickly with cold ingredients, you’re effectively trapping small air pockets that expand during baking, giving your biscuits their characteristic tender, layered texture.
Why Temperature Matters
Because biscuits depend on fat remaining distinct within the dough, cold ingredients are essential to achieving the proper texture. You’ll control thermal gradients and heat transfer by maintaining temperature precision throughout your process.
Here’s what you need to know:
- Chilled butter creates steam pockets that produce flaky layers when you bake
- Cold milk prevents premature gluten development and keeps your dough workable
- Low dough temperature slows heat transfer, allowing even baking and ideal rise
- Room-temperature flour accelerates fat absorption, compromising your biscuit structure
You’re fundamentally managing the rate at which heat moves through your ingredients. When you work with cold components, you’re taking control of the baking chemistry.
Keep your butter below 65°F, use ice-cold liquid, and work quickly. This deliberate approach gives you the flaky, tender biscuits you want—not dense, tough results.
Keeping Butter Solid
To achieve the flaky texture that defines a quality biscuit, you’ve got to keep your butter solid throughout the mixing process.
Cold butter creates steam pockets when baked, producing those desirable layers you’re after.
Start by freezing your butter for at least thirty minutes before mixing.
You’ll want to cut it into small cubes—this maximizes surface area and maintains its temperature longer.
Modern insulation technology in quality coolers helps preserve ingredient temperatures during prep work.
Some bakers utilize packaging innovations like butter wrappers designed with thermal properties.
Work quickly once you’ve begun combining ingredients.
Your kitchen’s ambient temperature matters considerably; aim for a workspace below seventy degrees Fahrenheit.
If butter softens prematurely, return it to your freezer immediately.
This discipline separates mediocre biscuits from exceptional ones.
Measuring and Mixing Techniques
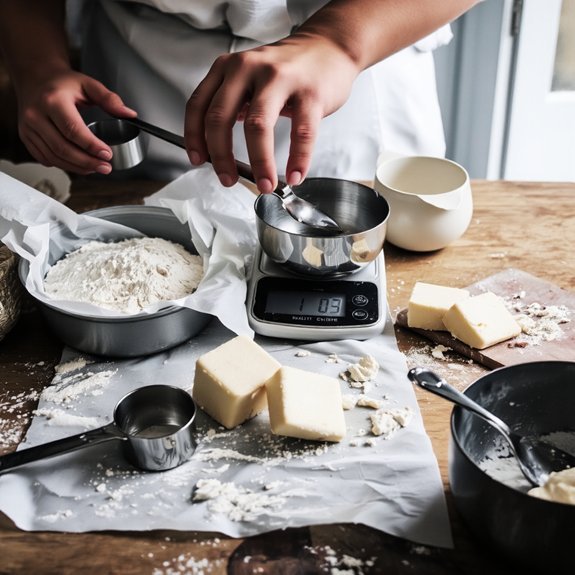
Accurate measurements form the foundation of successful biscuits, so it’s essential you weigh your dry ingredients rather than rely on volume measurements when possible.
When you must scoop, employ proper scoop leveling techniques:
- Fluff flour with a fork before scooping to eliminate air pockets
- Fill your measuring cup generously, then level off with a straight knife
- Avoid tapping or shaking the cup, which compacts flour
- Weigh ingredients when precision matters most
For mixing, hand mixing gives you superior control over dough development.
Use your fingertips to break butter into flour until the mixture resembles coarse breadcrumbs.
This tactile method prevents overworking the dough and promotes proper fat distribution.
Add your wet ingredients last, mixing just until the dough barely comes together.
Overmixing develops gluten excessively, yielding tough, dense biscuits rather than the tender, flaky results you’re after.
Cutting in the Butter Correctly
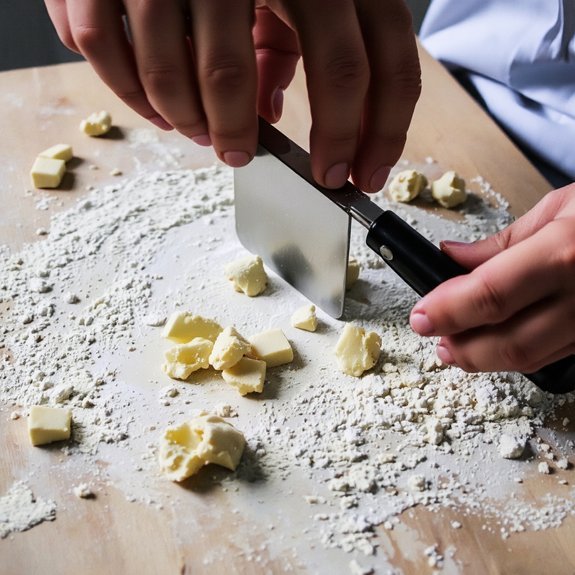
The butter-to-flour ratio you’ve achieved through hand mixing demands proper technique to maintain throughout the cutting process. Use a pastry cutter, two knives, or your fingertips to break the cold butter into pea-sized pieces throughout your flour mixture.
Keep everything cold—refrigerate your tools and ingredients beforehand. Work quickly so the butter doesn’t soften and blend completely.
Maintain strict sanitation practices by washing your hands before handling ingredients and using clean equipment. If you’re managing allergen awareness, verify that your butter and flour are certified allergen-free and use dedicated tools to prevent cross-contamination.
The goal is creating distinct butter pockets that’ll produce flaky layers when baked. Don’t over-mix or you’ll lose the texture advantage you’ve built. Stop when your mixture resembles coarse breadcrumbs.
Shaping and Cutting Your Biscuits
You’ll shape your dough using either hand-molding or a biscuit cutter, each technique affecting your final texture and rise.
Hand-shaping gives you control over thickness and uniformity, while cutting tools like round cutters or biscuit presses guarantee consistent sizing and clean edges.
Whichever method you choose, work quickly and gently to avoid overworking the dough and compromising your biscuits’ flaky structure.
Hand-Shaping Techniques
Shaping your dough properly guarantees uniform biscuits that’ll bake evenly and rise consistently.
Master these hand-shaping techniques to control your baking outcome:
- Maintain dough tension by gently stretching the surface as you form each biscuit, creating structure that supports rise
- Use controlled wrist motion in smooth, deliberate movements—avoid aggressive handling that deflates trapped air pockets
- Press from center outward with your palms to distribute dough uniformly without overworking the gluten
- Work quickly to keep dough cool and responsive, preventing premature spreading
Your hands give you precise control that cutters can’t match.
Feel the dough’s resistance and adjust pressure accordingly. This tactile approach lets you create perfectly textured biscuits with ideal height and flakiness every time.
Cutting Methods and Tools
Once you’ve mastered hand-shaping, cutting tools offer consistency and efficiency for producing uniform biscuits at scale.
Biscuit cutters—whether round, square, or fluted—deliver identical sizes essential for even baking.
Select tools with comfortable handles that reduce hand fatigue during extended use; proper tool ergonomics prevent strain and maintain precision.
Keep your cutters sharp and clean between batches.
Dull edges compress dough rather than cutting cleanly, compromising rise and texture.
Establish a knife maintenance routine: wash immediately after use, dry thoroughly, and store safely.
For maximum efficiency, dip cutters in flour before each cut, preventing sticking.
Press straight down without twisting—rotating dulls edges and seals dough edges, inhibiting lift.
You’ll achieve professional results when you prioritize tool quality and proper cutting technique.
Baking Temperature and Timing
The oven’s temperature critically determines your biscuits’ texture and browning. You’ll want precision here—no guessing.
Key baking parameters:
- Set your oven to 400-425°F for standard results; higher temps create crispier exteriors
- Bake for 12-15 minutes until golden brown; don’t underbake or you’ll sacrifice texture
- Account for altitude adjustments; higher elevations require temperature increases of 15-25°F
- Consider convection differences; convection ovens bake 25°F hotter, so reduce your set temperature accordingly
You’re not locked into rigid rules. Monitor your specific oven’s behavior.
Some run hot; others run cool. Start checking at the 10-minute mark.
Your biscuits should rise substantially and develop a light golden color on top.
Underbaked biscuits stay dense; overbaked ones turn hard. Trust your observations and adjust future batches accordingly.
Achieving Golden, Flaky Layers
Building flaky layers requires proper lamination of your dough—a technique where you fold cold butter into the flour mixture to create distinct, separated strata.
This process develops the crumb structure that makes biscuits irresistibly tender.
You’ll want to work quickly, keeping everything cold.
Use a pastry cutter or your fingertips to break butter into pea-sized pieces before mixing.
Don’t overwork the dough; you’re building pockets, not creating a uniform paste.
Watch for visual cues indicating doneness.
Your biscuits should emerge golden brown on top with a slightly darker bottom.
The exterior crispness contrasts beautifully with the interior’s tender, layered texture.
Remove them immediately when they reach that perfect golden hue—typically 12-15 minutes at 425°F.
Overbaking compromises flakiness, so trust your eyes and don’t delay.
Storage and Reheating Tips
To preserve your biscuits’ flakiness after baking, you’ll want to store them in an airtight container at room temperature for up to two days.
For ideal results, follow these storage and reheating techniques:
- Airtight containers: Transfer cooled biscuits immediately to prevent moisture loss and staleness
- Freezer storage: Wrap individually and freeze for up to three months without compromising quality
- Microwave revival: Heat frozen biscuits for 20-30 seconds to restore softness and warmth
- Oven reheating: Wrap in foil and warm at 350°F for five minutes to regain flakiness
Don’t leave biscuits exposed on countertops—they’ll dry out rapidly.
Microwave revival works best for individual servings when you need quick results.
For larger batches, oven reheating delivers superior texture.
These methods guarantee you maintain the structural integrity and taste your effort produced.
Frequently Asked Questions
Can I Make Biscuits Without Buttermilk, and What Are Suitable Substitutes?
You can absolutely make biscuits without buttermilk. Mix regular milk with vinegar—let it sit five minutes until it curdles, creating a reliable substitute.
Yogurt substitutes work excellently too; thin Greek yogurt with milk achieves similar acidity and tenderness.
You’ve got full control over your baking outcome. These vinegar milk and yogurt substitutes deliver the necessary acid for proper rise and texture, giving you freedom to bake quality biscuits with pantry staples you already possess.
Why Do My Biscuits Turn Out Dense Instead of Light and Fluffy?
You’re creating dense biscuits because you’re overmixing your dough and not achieving sufficient aeration. Mix your ingredients until they’re just combined—don’t overwork them.
Use cold butter cut into pea-sized pieces; these create steam pockets that lift your biscuits. Fold gently, avoiding excessive kneading.
Handle your dough minimally. If you’re not using a leavening agent properly or your oven’s too cool, you’ll also lose lift.
Precision matters here—treat your dough with restraint.
How Do I Prevent My Biscuits From Spreading Too Much While Baking?
You’ll prevent excessive spreading by keeping your dough cold throughout preparation.
Chill your dough for at least 30 minutes before baking—this slows butter melting and gives structure time to set.
Use cold butter cut into small cubes; it creates steam pockets that lift biscuits upward rather than outward.
Work quickly to maintain temperature, and don’t overwork the mixture.
These techniques guarantee you’ve got control over your biscuit’s rise and shape.
What’s the Difference Between Southern Biscuits and Scones or English Biscuits?
You’ll find Southern biscuits prioritize a tender, flaky texture contrast achieved through cold butter and minimal handling.
Their cultural origins trace to English quick breads, but Americans ditched the sweetness and added buttermilk for tang.
English biscuits and scones are sweeter, denser, and often contain eggs.
Scones demand clotted cream and jam.
You’re basically choosing between savory American comfort food and Britain’s refined tea accompaniments—two distinct baking traditions born from colonial divergence.
Can I Freeze Biscuit Dough Before Baking, and for How Long?
You can absolutely freeze your biscuit dough.
Flash freeze unbaked biscuits on a sheet for two hours, then transfer them to airtight containers for up to three months.
When you’re ready to bake, you’ve got two thaw methods: refrigerate overnight for best results, or bake directly from frozen, adding just five extra minutes to your baking time.
Either approach preserves your dough’s quality and gives you maximum flexibility.


Leave a Comment