
Key Takeaways
- Cream softened butter and sugar until pale and fluffy, then add eggs one at a time while beating thoroughly to maintain proper emulsion.
- Whisk flour, baking powder, and salt separately, then gently fold into wet ingredients until just combined to prevent overmixing and toughness.
- Shape dough into two 12-inch logs, bake at 350°F for 25–30 minutes until golden brown, then cool for 10 minutes before slicing.
- Slice cooled logs diagonally at 45° angles into ¾-inch pieces, arrange upright with spacing, and bake at 325°F for 15–20 minutes until crispy.
- Cool biscotti completely on baking sheet for at least 30 minutes, then store in airtight containers at room temperature for up to two weeks.
Gathering Your Ingredients
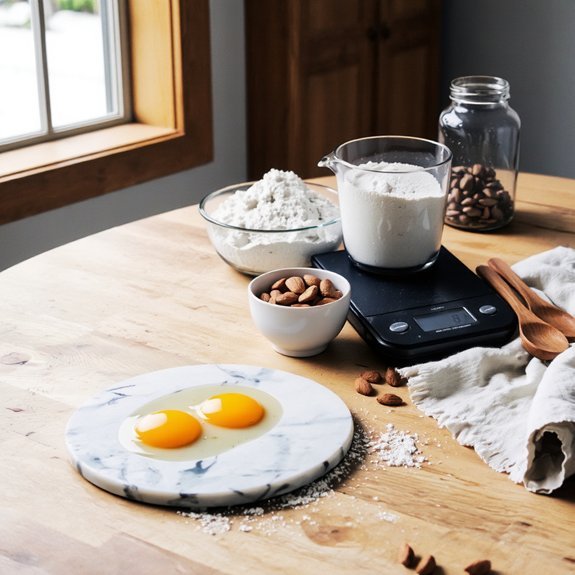
Assembling your dry and wet ingredients before you begin mixing guarantees you won’t scramble mid-recipe.
Prepare all ingredients in advance to maintain composure and avoid recipe complications.
Measure two cups flour, one teaspoon baking powder, and half a teaspoon salt into a bowl.
You’ll need three-quarters cup sugar, two eggs, and one teaspoon vanilla extract for your wet mixture.
Consider seasonal sourcing for your ingredients—local eggs and fresh vanilla deliver superior flavor.
If you’re managing allergen alternatives, substitute all-purpose flour with almond or chickpea flour, adjusting liquid ratios accordingly.
Gather one-quarter cup melted butter and your choice of mix-ins: anise seeds, almonds, or chocolate chips.
Line your baking sheet with parchment paper.
This preparation prevents mistakes and keeps your baking process efficient and controlled.
You’re now ready to combine and bake with confidence.
Mixing and Preparing the Dough
You’ll start by creaming together butter and sugar until the mixture turns pale and fluffy, which typically takes 2-3 minutes of beating.
Next, you’ll incorporate your wet ingredients—eggs and vanilla—one at a time, ensuring each addition fully combines before adding the next.
Finally, you’ll gently fold your dry ingredients into the wet mixture using the proper ratios to achieve the right dough consistency for slicing and baking.
Ingredient Ratios and Measurements
Three core ratios govern successful biscotti dough: flour serves as your foundation, typically measured at 2 cups (250g) per batch, while eggs—usually two large ones—provide structure and binding power, and sugar, ranging from ¾ to 1 cup (150-200g), contributes both sweetness and moisture.
You’ll also need baking powder (1-2 teaspoons) for lift and salt (¼ teaspoon) for flavor enhancement.
Measurement accuracy directly impacts your results. You’ll want to weigh ingredients when possible rather than relying solely on volume measurements, which can vary based on how densely you pack ingredients.
For recipe scaling, maintain these ratios consistently—doubling a batch means doubling each component proportionally. This methodical approach guarantees your biscotti develops the proper texture and structure every time you bake.
Creaming Butter and Sugar
With your ingredients measured and ready, the first mixing step involves creaming softened butter with sugar—a process that’s fundamental to developing proper biscotti structure. This technique, rooted in baking’s historical origins, aerates your dough while distributing fat evenly throughout.
| Mixing Stage | Duration | Temperature | Result |
|---|---|---|---|
| Initial beating | 2-3 minutes | Room temperature | Pale color |
| Crystal formation | 3-4 minutes | 68-72°F | Fluffy texture |
| Final incorporation | 1-2 minutes | Consistent | Homogeneous blend |
Beat your softened butter and sugar together until the mixture transforms from dense and grainy to light and fluffy. Crystal formation during this phase creates tiny air pockets essential for proper rise and crumb structure. You’ll notice the mixture’s volume increase and color lighten as you work. Don’t rush this stage—proper creaming guarantees your biscotti develops the characteristic twice-baked texture you’re after.
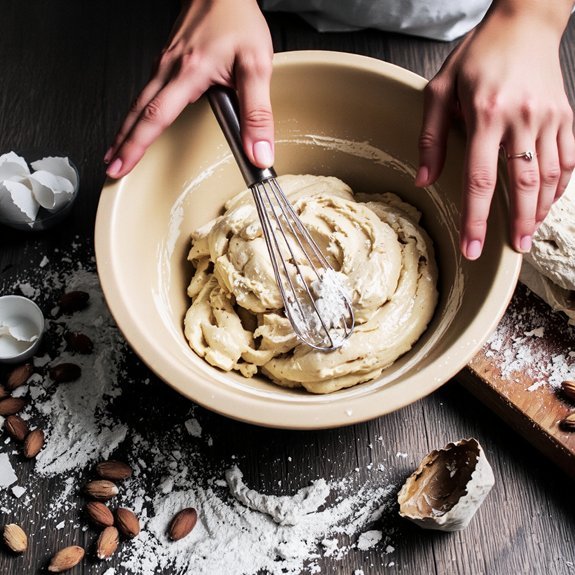
Combining Wet and Dry
Now that your butter and sugar’ve reached that fluffy, pale stage, it’s time to incorporate your wet ingredients—eggs and vanilla extract—before folding in the dry components.
Add eggs one at a time, beating thoroughly after each addition to maintain emulsion stability.
This prevents separation and results in a cohesive batter.
In a separate bowl, whisk together flour, baking powder, and salt.
This step guarantees clump prevention and uniform leavening distribution throughout your dough.
Gently fold the dry mixture into your wet ingredients using a spatula, working methodically until just combined.
Avoid overmixing, which develops gluten unnecessarily and toughens your biscotti.
Your dough should be slightly stiff yet manageable.
You’re now ready for shaping and the first bake.
Shaping and First Bake
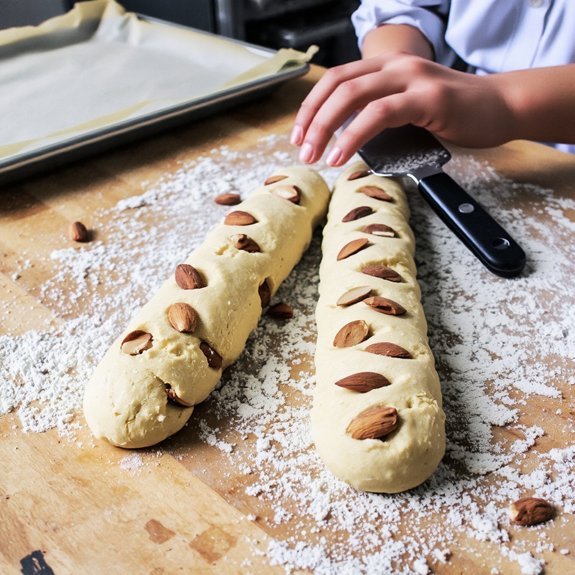
Once you’ve combined your dough ingredients thoroughly, you’ll divide the mixture into two equal portions and shape each into a log approximately 12 inches long and 2 inches wide on a parchment-lined baking sheet.
Proper log shaping promotes even baking and consistent thickness throughout.
Bake at 350°F for 25-30 minutes until the logs turn golden brown and feel firm to the touch.
This initial bake develops structure and allows oven spring to work, giving your biscotti its characteristic density.
The logs should be set but still slightly yielding inside.
Cool them for 10 minutes before slicing, which makes cutting cleaner and easier, preventing crumbling and guaranteeing uniform biscotti pieces for the second bake.
Slicing Your Biscotti
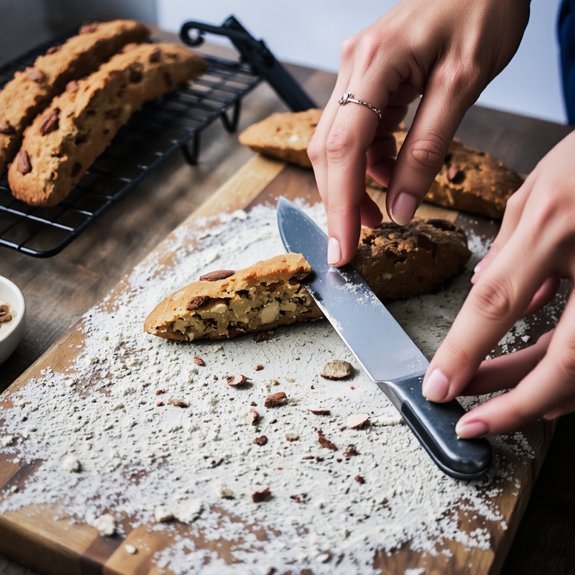
After your biscotti logs have cooled for 10 minutes, you’ll use a serrated knife to slice each log diagonally at a 45-degree angle into pieces roughly ¾ inch thick.
Slice cooled biscotti logs diagonally at 45 degrees into ¾-inch pieces using a sharp serrated knife for clean, uniform cuts.
Knife selection matters here—a sharp serrated blade prevents crumbling and crushing.
Support the log firmly with your non-knife hand while cutting, maintaining consistent pressure throughout.
Your slice thickness directly impacts the second bake. Thinner pieces crisp faster; thicker ones stay slightly softer inside. Aim for uniformity across all biscotti to guarantee even drying.
Arrange sliced pieces upright on your baking sheet, allowing space between each piece for air circulation. This positioning facilitates thorough toasting during the second bake, delivering that signature hard, dunking-ready texture you’re after.
The Second Bake for Crispness
The transformation from soft cookie to shelf-stable biscotti happens entirely in this second bake, where precise temperature control and timing determine whether you’ll achieve that signature snap or end up with chewy disappointment.
You’ll return your sliced biscotti to a 325°F oven for 15-20 minutes, depending on thickness.
Rack placement matters crucially—position them on the middle rack to guarantee even heat circulation and consistent moisture evaporation.
Rotate your baking sheet halfway through to prevent uneven browning.
You’re looking for a golden-brown exterior with a completely dry interior.
Don’t rush this stage by increasing temperature; high heat caramelizes exteriors while leaving centers moist.
Remove biscotti when they’re hard enough to snap cleanly.
Cool completely before storing in airtight containers.
Cooling and Storage Tips
Allowing your biscotti to cool completely on the baking sheet for at least 30 minutes guarantees the interior hardens fully and moisture continues evaporating from the surface. You’ll achieve ideal crispness by resisting the urge to store them prematurely.
| Storage Method | Duration |
|---|---|
| Room temperature in airtight containers | 2 weeks |
| Freezer storage | 3 months |
| Refrigerator | 1 week |
| Pantry shelf (sealed) | 10 days |
| Vacuum-sealed bags | 4 months |
Once cooled, you’ll transfer your biscotti into airtight containers, which prevent moisture absorption and preserve their characteristic crunch. For extended preservation, freezer storage extends shelf life substantially without compromising flavor or texture. You’re free to portion them before freezing for convenient single-serving access. This methodical approach maintains your biscotti’s quality indefinitely.
Flavor Variations and Customization
Once you’ve mastered the fundamental technique of baking and storing biscotti, you can begin experimenting with flavor profiles that’ll elevate your biscotti beyond the traditional almond version.
Master biscotti basics, then elevate your creations with innovative flavor combinations beyond traditional almond.
Customize your biscotti by incorporating:
- Citrus zest and pistachios for bright, distinctive notes that complement morning beverage pairings like espresso or black tea
- Chocolate chips and dried cranberries to create complex flavor layers that pair excellently with dessert wines
- Anise seeds and fennel for authentic Italian character with licorice undertones
- Ginger, cinnamon, and candied orange peel to develop warming spice profiles
Your dipping options expand dramatically with these variations.
Chocolate-dipped versions work with coffee, while fruit-forward biscotti pair with herbal infusions.
Experiment systematically by altering one ingredient at a time, adjusting liquid ratios accordingly to maintain proper dough consistency and structural integrity throughout baking.
Frequently Asked Questions
Can I Make Biscotti Without Eggs or Dairy for Vegan Baking?
You can absolutely make vegan biscotti by substituting binding agents.
Use flax egg—one tablespoon ground flaxseed mixed with three tablespoons water per egg—or try aquafaba binding for superior structure.
Replace dairy butter with coconut oil or vegan butter at a 1:1 ratio.
You’re liberated from conventional constraints; these alternatives deliver comparable texture and crumb while maintaining biscotti’s characteristic twice-baked crispness.
Your ingredient selection determines your results, so measure precisely and embrace the vegan methodology confidently.
What’s the Difference Between Biscotti and Other Twice-Baked Cookies?
You’ll find biscotti’s historical origins trace back to medieval Italy, distinguishing them from other twice-baked cookies through their unique texture profiles.
While you’re crafting biscotti, you’ll notice they’re denser and crunchier than most alternatives because you’re using higher ratios of flour and eggs.
You’re not constrained by traditional recipes—you can methodically adjust ingredient proportions to achieve your desired crispness.
This ingredient-focused approach gives you freedom to experiment while maintaining biscotti’s signature hard, dunking-friendly texture.
How Long Does Homemade Biscotti Stay Fresh in an Airtight Container?
You’ll keep your homemade biscotti fresh for up to three weeks in an airtight container.
Moisture control is critical—store them in a cool, dry place away from humidity.
The hard, twice-baked structure resists staleness better than soft cookies.
For ideal flavor preservation, you can freeze biscotti for up to three months.
Simply thaw at room temperature before serving.
This method maintains your cookies’ crisp texture and rich taste without compromise.
Can I Freeze Biscotti Dough Before the First Baking?
You can freeze biscotti dough before the first baking.
Wrap your dough tightly in plastic wrap, then place it in a freezer-safe container for up to three months.
For best results, use flash freezing—freeze the wrapped dough for two hours before sealing it away.
When you’re ready to bake, thaw your dough overnight in the refrigerator. This thawing method prevents condensation and maintains your dough’s structural integrity for ideal rise and texture.
Why Did My Biscotti Turn Out Soft Instead of Crispy?
Your biscotti turned soft because you didn’t bake them long enough.
You’re likely underbaking the dough during both baking stages.
Additionally, you’re probably slicing them too thick, which prevents moisture from fully evaporating.
Cut thinner slices—about half an inch—and extend your second bake until they’re completely dry and hard.
This dual approach guarantees you’ll achieve that satisfying crunch you’re after.
Leave a Comment