Key Takeaways
- Select firm apples balancing tartness and sweetness, such as Granny Smith and Honeycrisp blends for optimal flavor complexity.
- Mix spices thoroughly with apples before sweetening; toast whole spices and grind fresh to maximize aromatic intensity.
- Use a 3:2:1 flour-to-butter-to-water ratio for crust; keep ingredients cold and handle minimally to preserve flaky layers.
- Bake at 375°F for 45–50 minutes until golden brown, then cool completely for at least 3 hours before slicing.
- Store covered at room temperature up to 4 days or refrigerated up to 5 days; reheat in oven, never microwave.
Selecting the Right Apples
Since apple variety directly affects your pie’s flavor and texture, you’ll want to choose types that balance tartness with sweetness and maintain their structure during baking.
Granny Smith apples deliver reliable acidity and firmness, while Honeycrisp varieties contribute natural sweetness. You can blend these for ideal complexity.
Visit local orchard tours to sample varieties and understand apple history in your region.
This firsthand knowledge helps you identify which cultivars work best for your climate and preferences. You’re not bound to supermarket selections—seek heirloom varieties that independent growers cultivate.
Avoid mealy apples that’ll collapse into mush.
Conduct a simple firmness test by applying pressure with your thumb. Select unblemished specimens free from soft spots. Your pie’s success hinges on this foundational choice.
Gathering Your Ingredients and Equipment
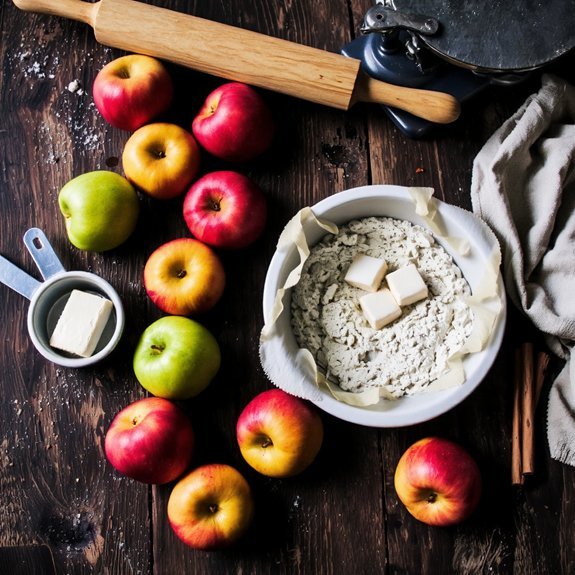
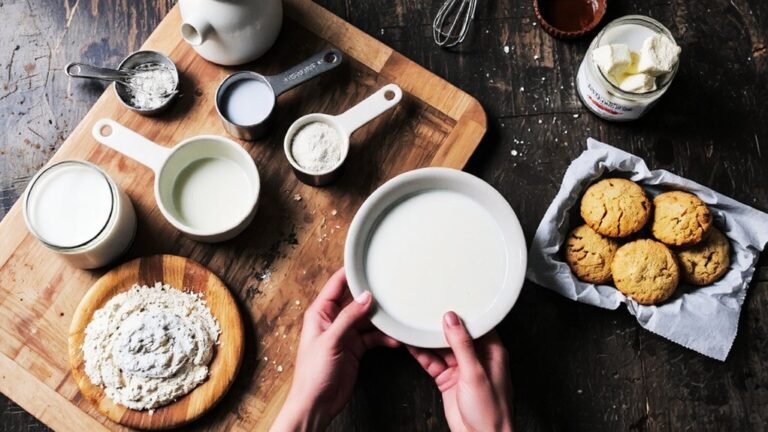
Before you begin assembling your pie, you’ll want to organize all necessary components to streamline your baking process.
Before you begin assembling your pie, organize all necessary components to streamline your baking process.
Create a supply checklist encompassing dry ingredients: flour, sugar, salt, and baking powder.
Gather wet components: butter, eggs, and milk.
Don’t forget your apple filling additions like cinnamon, nutmeg, and lemon juice.
Equip yourself with essential tools: mixing bowls, measuring cups and spoons, a rolling pin, pie dish, and a pastry cutter.
You’ll need a whisk, wooden spoon, and sharp knife for prep work.
Establish a prep timeline by laying out everything before starting.
This approach prevents mid-bake scrambling and guarantees you maintain control over your baking operation.
Having your workspace organized allows you to work efficiently and confidently through each step.
Making the Perfect Pie Crust
You’ll want to master three critical elements to achieve a flaky pie crust: selecting the right fat-to-flour ratio and keeping your butter cold, employing precise mixing techniques that create distinct layers without overdeveloping gluten, and understanding how proper chilling and rolling methods preserve the crust’s structure.
Your ingredient ratios directly impact texture—too much liquid creates toughness, while too little prevents binding—so you’ll measure flour and fat by weight for accuracy.
Finally, you’ll discover that strategic chilling periods and gentle rolling techniques prevent shrinkage and yield the light, crispy crust you’re after.
Ingredient Selection and Ratios
The foundation of an exceptional apple pie rests on mastering the precise balance of flour, fat, salt, and water in your crust.
You’ll want to use a 3:2:1 ratio—three parts flour to two parts cold butter to one part water—as your baseline.
For salt proportions, add 1/2 teaspoon per two cups of flour; it enhances flavor without overpowering.
Incorporate acid balance by using ice water with a splash of lemon juice or vinegar.
This lowers the gluten development rate, yielding a more tender crust.
Keep your ingredients cold and handle them minimally.
Cut butter into pea-sized pieces, then distribute evenly throughout your flour mixture.
Work quickly—warmth degrades your crust’s flakiness.
You’re building structure through precision, not guesswork.
Mixing Techniques for Flakiness
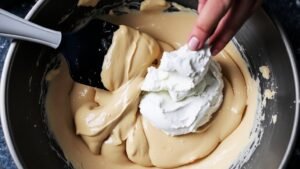
Combining your ingredients with purpose transforms separated components into a cohesive dough while maintaining the butter’s distinct pockets. You’ll employ intermittent mixing—alternating between gentle folding and brief resting periods—to prevent overworking your dough.
This technique preserves those essential fat layers that create flakiness.
Here’s your mixing strategy:
- Use a pastry cutter or fork to break butter into pea-sized pieces throughout the flour
- Fold ingredients together using upward strokes, rotating the bowl between each motion
- Stop before full incorporation; visible butter flecks should remain
- Allow 5-minute rests between mixing intervals to relax gluten strands
Your final whisking incorporates ice water just until the dough barely holds together. You’re aiming for a shaggy, underdeveloped texture—not a smooth ball. This controlled approach gives you the flaky, tender crust you’ve earned.
Chilling and Rolling Tips
After mixing, your dough’s next critical phase involves chilling and shaping. You’ll want to follow a strict chill schedule—refrigerate your dough for at least 30 minutes before rolling. This resting period allows gluten to relax and fat to firm up, ensuring maximum flakiness in your final crust.
When you’re ready to roll, work quickly on a floured surface. Your rolling cadence matters: apply even pressure with smooth, deliberate strokes from the center outward. Rotate your dough a quarter-turn between each stroke to maintain uniform thickness.
If your dough warms up and becomes sticky, chill it again for 10-15 minutes. You’re aiming for a consistent quarter-inch thickness. This disciplined approach gives you complete control over your crust’s texture and structure, eliminating guesswork from your baking process.
Preparing and Seasoning Your Filling
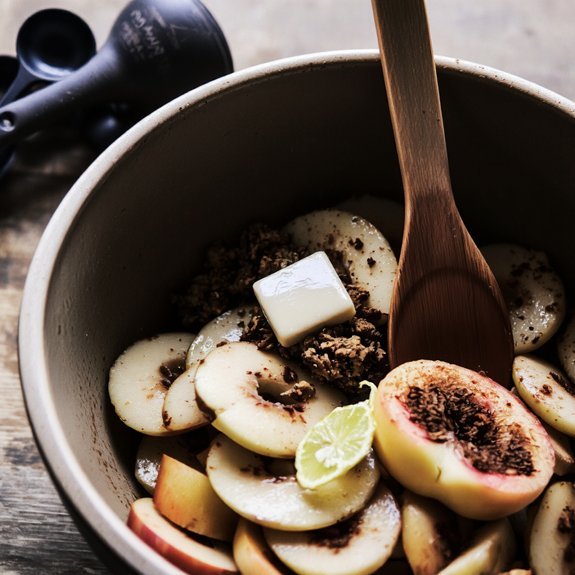
You’ll want to select firm, tart apple varieties like Granny Smiths or Honeycrisps, as they hold their structure during baking and provide balanced flavor.
Mix your spices—cinnamon, nutmeg, and allspice—thoroughly with the apples before adding sweetener to guarantee even distribution.
Adjust your sugar content gradually, tasting as you go, since apple tartness varies by variety and ripeness.
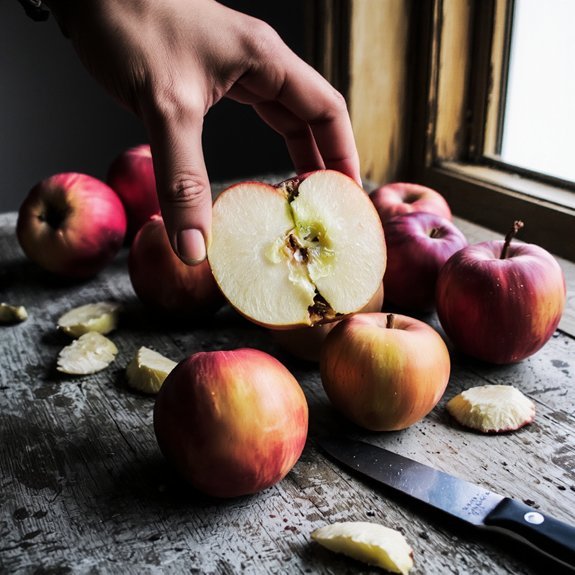
Selecting Quality Apples
The foundation of an exceptional apple pie depends entirely on your fruit selection.
You’ll want to choose varieties that balance tartness with sweetness, ensuring your filling doesn’t taste one-dimensional.
Consider harvest seasonality when shopping—apples picked at peak ripeness offer superior flavor complexity.
Select apples based on these criteria:
- Firmness: Press gently; you want resistance without softness
- Storage longevity: Granny Smith, Honeycrisp, and Braeburn varieties last longest
- Flavor profile: Mix tart and sweet varieties for depth
- Size consistency: Choose medium apples for even cooking
Inspect each apple for blemishes, bruises, or soft spots that indicate decay.
You’re not locked into conventional choices—experiment with heirloom varieties available at farmers’ markets.
Quality fruit selection directly determines your pie’s success, so don’t compromise here.
Mixing Spices Correctly
Balancing your spice blend transforms ordinary apple filling into something extraordinary, yet many bakers rely on cinnamon alone and miss essential depth.
Understanding spice chemistry allows you to craft a filling that’s truly yours.
Start with grinding order: toast your whole spices first—nutmeg, cloves, and allspice—before grinding them fresh.
This releases volatile oils that pre-ground versions lose.
You’ll notice the immediate difference in aroma and flavor intensity.
Combine your ground spices in precise ratios: one teaspoon cinnamon, half-teaspoon nutmeg, quarter-teaspoon cloves, and eighth-teaspoon allspice per pound of apples.
Add a pinch of cardamom for complexity if you’re feeling adventurous.
Mix your spices directly into your sugar before tossing with apples.
This distributes them evenly throughout your filling, preventing hot spots of concentrated flavor.
You’re controlling your pie’s destiny here.
Sweetening to Taste
How much sugar transforms your apple filling from tart to balanced?
You’ll master sweetening by conducting palate calibration—tasting as you adjust.
Start conservatively; you can’t remove excess sugar.
Your preference mapping determines the final flavor profile:
- Granulated sugar dissolves quickly, providing immediate sweetness without texture
- Brown sugar adds depth and molasses complexity to your filling
- Honey or maple syrup contribute subtle floral notes and natural viscosity
- Tasting intervals allow you to control sweetness precisely, preventing oversaturation
Add sweetener incrementally—roughly one tablespoon at a time.
Stir thoroughly, then sample.
You’re building flavor independence, not following rigid recipes.
Consider your apples’ natural tartness; Granny Smiths require more sugar than Honeycrisps.
Your filling should taste slightly sweeter than your final pie, accounting for crust dilution.
This approach gives you complete control over your dessert’s character.
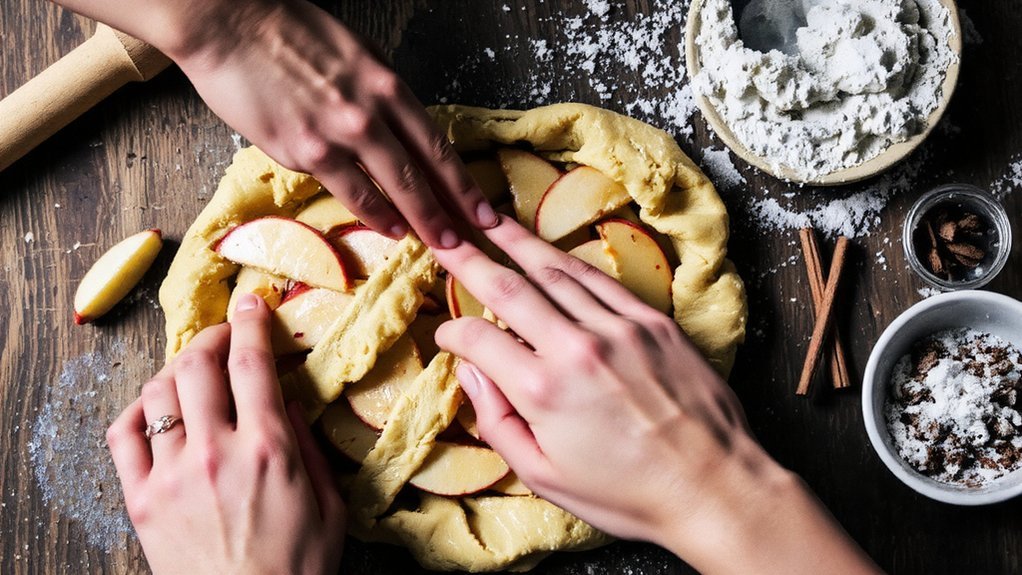
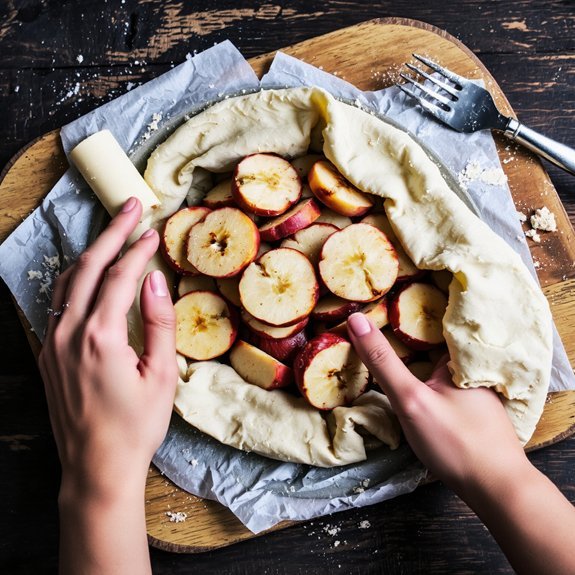
Assembling Your Pie
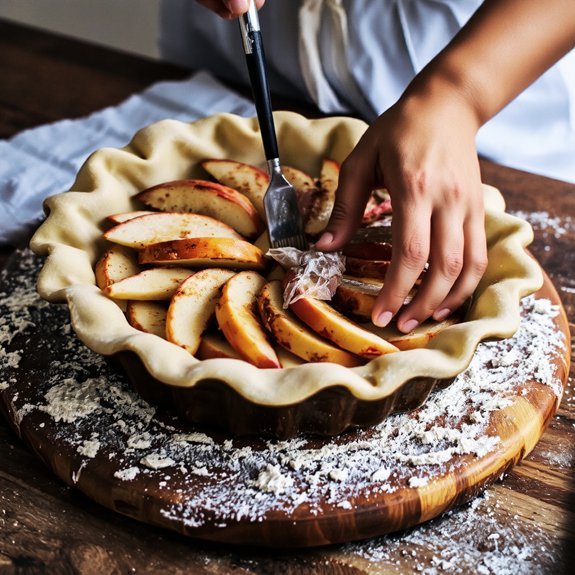
Once you’ve prepared your crust and filling, you’re ready to assemble your pie. Pour your sweetened apple mixture into the bottom crust, distributing it evenly.
Pour your sweetened apple mixture into the bottom crust, distributing it evenly across the entire surface.
If you’re using a top crust, brush its edges with water to seal it properly. Lay the top crust over your filling and press the edges firmly together.
Trim any excess dough, then crimp the perimeter with a fork or your fingers for a professional finish.
Next, address vent placement by cutting three to four slits across the top crust. Space these vents evenly to allow steam to escape during baking.
Proper slice spacing in your vents—about two inches apart—prevents excessive moisture buildup while maintaining structural integrity.
Brush the top crust with an egg wash or milk for golden browning. Your pie’s now ready for the oven.
Baking and Cooling Your Pie
Preheat your oven to 375°F before your assembled pie enters the baking chamber.
Proper oven calibration guarantees consistent results and prevents under or over-baking. Place your pie on the middle rack, allowing heat to circulate freely around it.
Bake for 45-50 minutes until the crust turns golden brown.
Monitor steam venting by slightly cracking your oven door during the final 15 minutes if the crust darkens too quickly.
Key cooling steps:
- Remove the pie and let it rest on a wire rack for 10 minutes
- This allows structural integrity to set without compromising filling consistency
- Transfer to a cooling surface away from direct sunlight
- Cool completely—at least 3 hours—before slicing to maintain clean portions
You’ve earned the freedom to enjoy your homemade apple pie at its peak quality.
Serving and Storage Tips
After your pie’s cooled completely, you’ll want to slice it with a sharp, thin-bladed knife—dipping it in hot water and wiping it clean between cuts guarantees neat portions without dragging the filling.
Store your pie in airtight storage containers or wrap it tightly with plastic wrap to maintain freshness for up to four days at room temperature, or refrigerate for up to five days.
For reheating methods, warm individual slices at 350°F for ten minutes, or reheat the entire pie covered with foil for twenty minutes.
You can also thaw frozen pie overnight in the refrigerator before reheating. Avoid the microwave, as it produces soggy crust and uneven heating. This approach preserves your pie’s structural integrity and flavor profile while maximizing your freedom to enjoy it whenever you choose.
Frequently Asked Questions
Can I Make Apple Pie Filling the Day Before Baking?
Yes, you can prepare your filling ahead.
Overnight maceration allows your apples to release juices while spices meld thoroughly, intensifying flavors.
Store your mixture in an airtight container in the refrigerator for up to twenty-four hours.
This advance preparation gives you freedom to bake on your schedule.
Before assembling your pie, drain excess liquid if needed to prevent a soggy crust.
You’ll achieve superior flavor development through this technique.
What’s the Best Way to Prevent a Soggy Bottom Crust?
You’ll prevent soggy bottoms by blind baking your crust. Pre-bake it at 375°F for 10-12 minutes until it’s set but not browned. Maintain adequate crust thickness—roughly 1/8 inch—to withstand moisture without deteriorating.
You’ve got the freedom to brush the cooled crust with egg wash or melted butter for added moisture resistance. This technique creates a protective barrier that stops your filling’s liquid from penetrating the dough.
How Do I Fix a Cracked or Broken Pie Crust?
You’ll fix that crack using the patch technique.
Cut a small piece from your dough scraps, dampen the damaged area with water, and press the patch firmly over the break.
For larger cracks, chill your repair for 15 minutes before baking—this sets the patch and prevents it from separating.
You’ve got complete control over your crust’s integrity with this straightforward method.
Can I Substitute Butter With Coconut Oil in Pie Crust?
Yes, you can substitute butter with coconut oil in your pie crust.
You’ll notice texture differences—coconut oil creates a crispier, more delicate crust than butter’s flakier result.
Your flavor profile shifts toward subtle coconut notes, which complements apple pie well.
Use refined coconut oil to minimize coconut taste.
Maintain the same oil-to-flour ratio as you’d use with butter.
Keep your coconut oil cold before mixing to achieve ideal crust structure and crispness.
Why Is My Apple Pie Filling Too Runny After Baking?
Your apple pie filling’s too runny because you’ve likely under-thickened it or haven’t extended your cooking time sufficiently.
You control the outcome by adjusting your thickener choice—cornstarch, tapioca, or flour each behave differently.
Increase your thickener ratio or bake longer until you achieve desired consistency.
Don’t settle for mediocre results; experiment with thickener amounts and baking duration until you master your preferred filling texture.


Leave a Comment