Key Takeaways
- Prepare apples by rinsing, peeling, coring, and dicing into uniform quarter-inch cubes for consistent baking.
- Sift combined dry ingredients twice to incorporate air, then gently fold in apples before mixing wet ingredients.
- Blend wet and dry ingredients at low speed until just incorporated; avoid overmixing to prevent dense muffins.
- Fill muffin cups two-thirds full and bake at 375°F for 18–20 minutes until a toothpick emerges clean.
- Cool muffins in pan for five minutes, then transfer to wire rack to cool completely before storing.
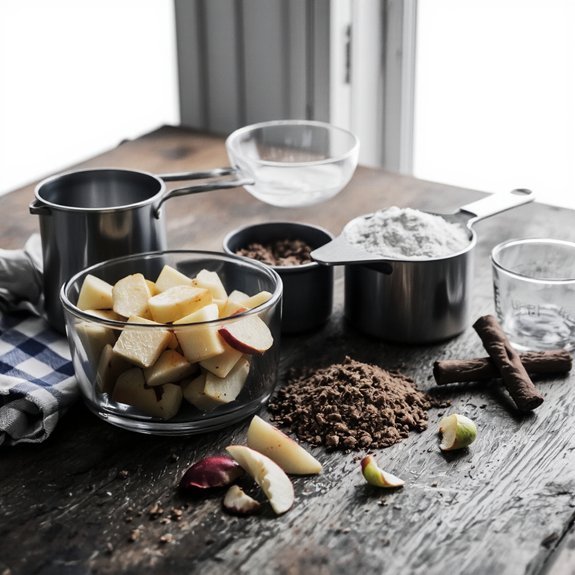
Gathering Your Ingredients and Equipment

Before you start mixing, you’ll need to gather your dry ingredients:
Before you start mixing, gather your dry ingredients: flour, baking powder, baking soda, cinnamon, and salt.
2 cups all-purpose flour, 1½ teaspoons baking powder, ½ teaspoon baking soda, 1 teaspoon ground cinnamon, and ¼ teaspoon salt.
Next, assemble your wet ingredients:
¾ cup unsalted butter (melted), ¾ cup granulated sugar, 2 large eggs, 1 teaspoon vanilla extract, and ½ cup plain yogurt.
For your mix-ins, prepare 2 cups diced Granny Smith apples and ¼ teaspoon nutmeg.
Establish proper pantry organization by arranging all items within arm’s reach.
Make sure your mixing bowls, whisk, measuring spoons, and muffin tin are clean and ready.
Perform basic tool maintenance on your oven, verifying accurate temperature calibration.
Line your muffin tin with paper cups for ideal results and easy release.
3. Preparing Your Apples and Dry Ingredients
Dicing your apples requires a sharp knife and a steady hand; start by rinsing your Granny Smith apples under cold water, then pat them dry with a paper towel. Remove the core using a melon baller or paring knife, then employ efficient peeling techniques—either a vegetable peeler or a Y-shaped peeler works best.
Cut the apples into uniform quarter-inch cubes to promote consistent moisture distribution throughout your batter.
Next, combine your dry ingredients in a mixing bowl. Measure 2 cups flour, 1 tablespoon baking powder, 1 teaspoon salt, and 2 teaspoons ground cinnamon.
Utilize proper sifting tips by passing these ingredients through a fine-mesh sieve twice, incorporating air and eliminating lumps. This creates an even texture and guarantees ideal rise during baking. Fold your prepared apples into the dry mixture immediately before combining with wet ingredients.
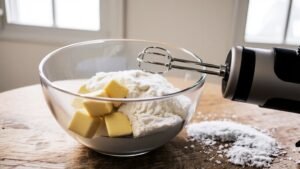
4. Mixing and Creating the Batter
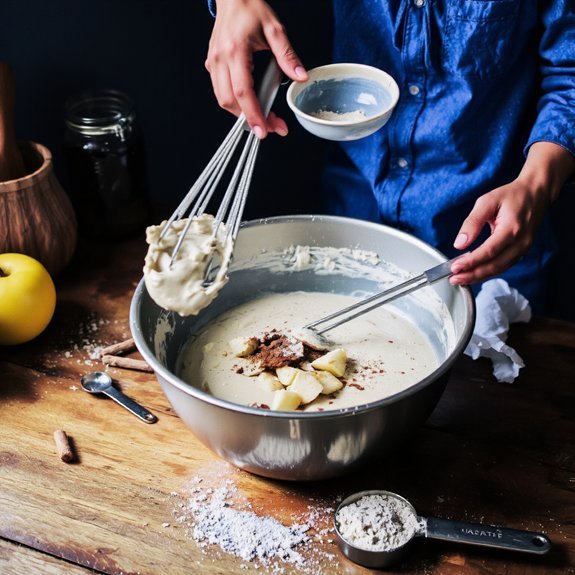
Combining your wet and dry ingredients requires careful attention to prevent overmixing, which can result in dense, tough muffins.
You’ll pour your wet mixture into the dry ingredients and blend at low mixing speed until just incorporated.
Don’t overthink this process—you’re not creating a smooth batter.
Use a folding technique with a spatula to gently combine the remaining streaks of flour.
This method preserves air pockets essential for light, fluffy muffins.
Work deliberately but quickly; stop mixing the moment you see no dry flour.
Your batter should appear slightly lumpy.
Now fold in your prepared apples and cinnamon mixture using the same gentle folding technique.
This final step distributes fruit evenly throughout without compressing your batter.
You’re ready to portion and bake.
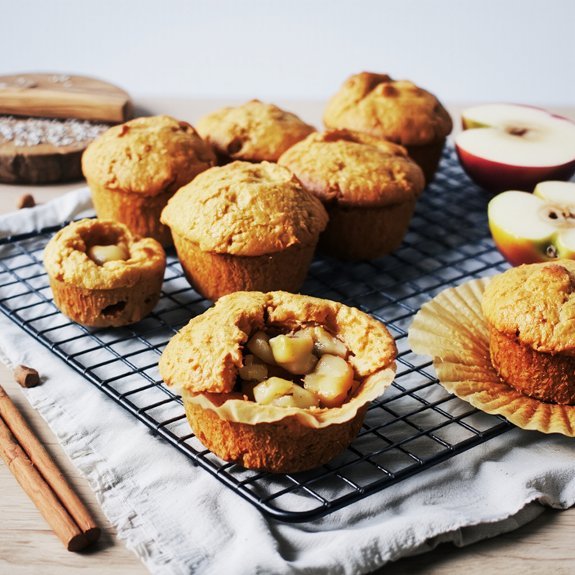
5. Filling the Muffin Cups and Baking
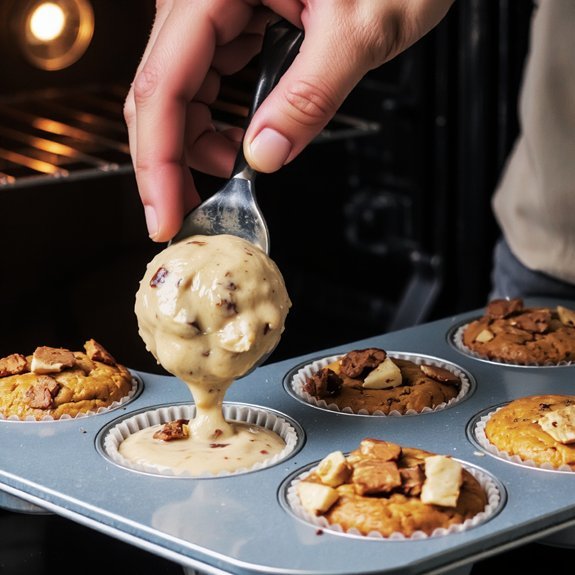
Distribute your batter evenly among the muffin cups, filling each about two-thirds full. This portion accuracy guarantees uniform baking and prevents overflow. Position your oven rack to the center position for ideal oven placement and heat circulation.
| Temperature | Time | Result |
|---|---|---|
| 375°F | 18-20 min | Golden tops |
| 400°F | 16-18 min | Darker crust |
| 350°F | 22-25 min | Lighter color |
| 425°F | 14-16 min | Rapid rise |
| 380°F | 19-21 min | Even bake |
Insert the muffin tin into the preheated oven. Bake until a toothpick inserted in the center emerges clean, indicating complete doneness. Don’t open the oven door excessively, as temperature fluctuations compromise structural integrity. Upon completion, cool muffins in the pan for five minutes before transferring to a wire rack for final cooling.
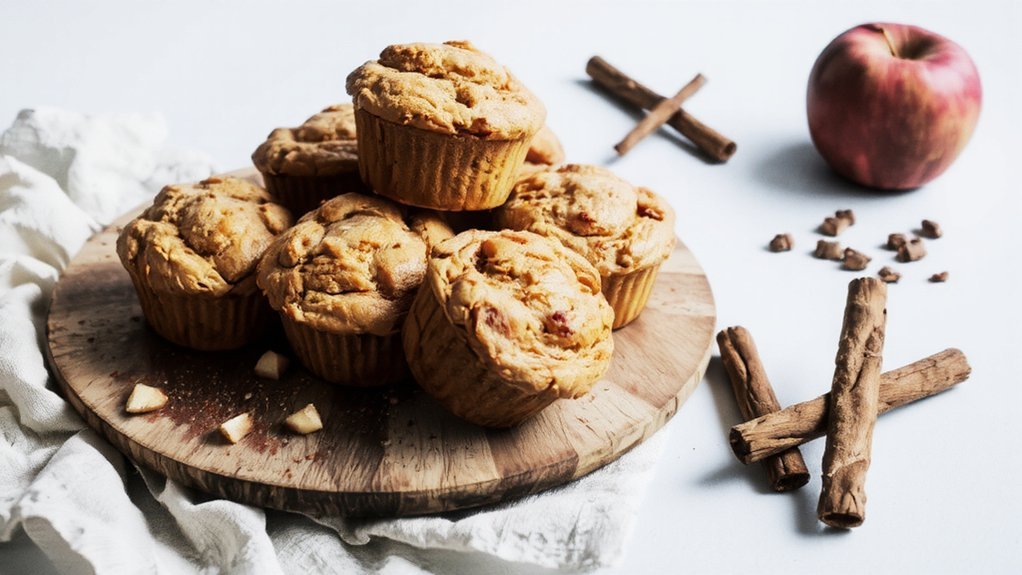
6. Cooling and Serving Your Muffins
Once you’ve removed the muffins from the oven, you’ll want to let them rest in the pan for approximately five minutes—this allows the structure to set without becoming too firm.
Transfer them to cooling racks immediately afterward to prevent moisture accumulation on the bottom.
Follow these serving steps:
- Cool completely on racks (approximately 30 minutes) before consuming
- Store in airtight containers at room temperature for up to three days
- Freeze individually wrapped muffins for extended storage up to three months
- Reheat frozen muffins at 350°F for 12-15 minutes before serving
Serving suggestions include pairing your muffins with black coffee, fresh-squeezed orange juice, or Greek yogurt.
You’re free to customize accompaniments based on preference.
These muffins work equally well as breakfast options or afternoon snacks, providing versatile enjoyment throughout your day.
Frequently Asked Questions
Can I Make Apple Cinnamon Muffins Ahead of Time and Freeze Them?
You can absolutely freeze your apple cinnamon muffins for future enjoyment.
Cool them completely, then place them in airtight freezer storage containers or freezer bags, removing excess air. They’ll maintain quality for up to three months.
For thawing tips, transfer muffins to room temperature for two hours, or microwave individual muffins at 50% power for 30-45 seconds. You’ve got complete flexibility with your baking schedule.
What’s the Best Apple Variety to Use for Muffins?
You’ll want to select Granny Smith or Honeycrisp varieties for best results.
Granny Smiths deliver tart flavor profiles that balance sweetness, while Honeycrisps provide superior texture retention through baking.
You’re free to blend both varieties—combine 60% Granny Smith with 40% Honeycrisp for complexity.
Dice them uniformly to ¼-inch cubes, then toss with lemon juice immediately.
This prevents oxidation and guarantees consistent moisture distribution throughout your batter.
How Do I Know When My Muffins Are Fully Baked?
You’ll know your muffins are fully baked when you apply the Toothpick Test—insert a wooden pick into the center, and it should emerge clean or with minimal crumbs.
Additionally, the tops should Spring Back immediately when you lightly press them.
The internal temperature should reach 200°F.
These indicators confirm your muffins have set properly without remaining undercooked, giving you complete control over your baking results.
Can I Substitute Butter With Oil in This Recipe?
You can substitute butter with oil using measurement conversions: replace one cup butter with three-quarters cup oil.
This adjustment works because oil’s higher water content concentrates fat differently.
Choose oils with appropriate smoke points—coconut or vegetable oil at 350-400°F work well for muffin baking.
You’ll achieve a moister crumb structure.
Don’t overthink it; you’ve got the freedom to experiment with ratios until you hit your preferred texture.
Why Did My Muffins Turn Out Dry and Dense?
Your muffins turned dry and dense because you’re likely overmixing batter, which develops excessive gluten and creates a tough crumb structure.
You’ve also probably set your oven at incorrect temperature—too high burns exteriors while underbaking interiors.
Measure ingredients precisely, mix wet and dry components until just combined, and calibrate your oven accurately.
Don’t overthink the process; trust your instincts and follow sequential steps without deviation for ideal results.


Leave a Comment