Key Takeaways
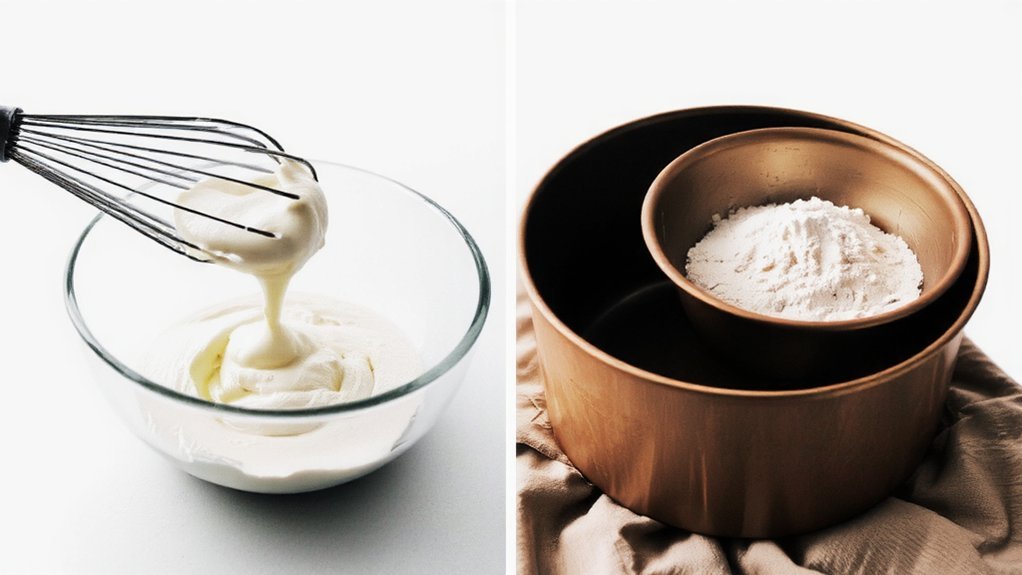
- Use room-temperature egg whites whipped to stiff peaks with cream of tartar for maximum volume and structure.
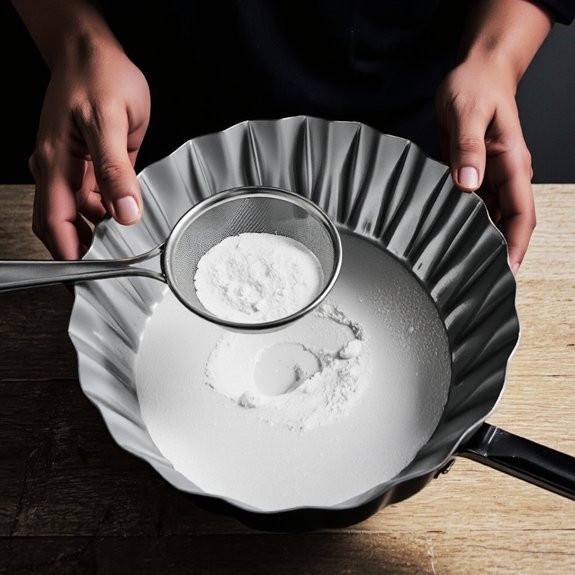
- Sift cake flour four times and fold gently into meringue in four portions to prevent deflation.
- Bake in an ungreased 10-inch tube pan at 375°F for 35–40 minutes until golden and springy.
- Invert pan immediately after baking and cool completely (4–6 hours) before removing from pan.
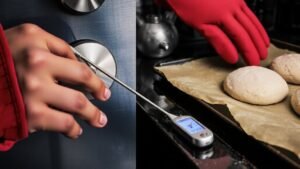
- Maintain precise oven temperature within five degrees; use thermometer to verify calibration for consistent results.
Why Angel Food Cake Requires Precision
Because angel food cake relies entirely on whipped egg whites for its structure, you’ll find that even minor deviations in ingredient ratios, mixing times, or oven temperatures can collapse your cake.
This unforgiving nature stems from its historical origins in the nineteenth century, when bakers valued its ethereal crumb as the ultimate showcase of technical mastery.
You’re working with a delicate foam structure where protein denaturation and air incorporation must achieve precise equilibrium.
The slightest contamination—egg yolk, grease, or moisture—destabilizes the meringue.
Your oven temperature must stay constant within five degrees; fluctuations cause tunneling or shrinkage.
Meeting aesthetic expectations demands you respect these parameters.
You won’t find shortcuts here.
Your commitment to exact measurements, methodical whisking, and controlled heat determines whether you’ll produce that signature tender crumb or a disappointing failure.
Gathering Your Ingredients and Equipment

You’ll need to gather specific dry ingredients—cake flour, granulated sugar, and cream of tartar—along with wet components including egg whites, vanilla extract, and cold water.
Assemble your equipment: a 10-inch tube pan with a removable bottom, electric mixer, sifter, measuring cups and spoons calibrated to standard volumes, and a rubber spatula.
Having all ingredients and tools prepared before mixing helps guarantee you’ll maintain the precise technique this cake demands.
Essential Dry Ingredients
Before you start mixing, gather your dry ingredients: 1 cup (120g) cake flour, ¾ teaspoon cream of tartar, ¼ teaspoon salt, and 1½ cups (300g) granulated sugar.
| Ingredient | Function |
|---|---|
| Cake flour | Provides structure with lower protein content |
| Cream of tartar | Stabilizes egg whites; enhances volume |
| Salt | Intensifies flavor; strengthens protein matrix |
You’ll want to measure precisely using a kitchen scale for accuracy. Cream of tartar serves as your leavening option, reacting with egg whites to create stability and lift. Consider your sugar varieties—granulated sugar dissolves readily, while superfine sugar yields finer crumb structure. Sift cake flour separately to eliminate lumps and incorporate air. Combine all dry ingredients thoroughly before folding them into your whipped egg mixture. This methodical approach guarantees even distribution and ideal cake rise, giving you the freedom to achieve professional results.
Wet Ingredients Required
Angel food cake’s structure hinges entirely on properly prepared wet ingredients: 12 large egg whites (room temperature, approximately 420g), 1½ teaspoons vanilla extract, and ½ teaspoon almond extract. These moisture sources constitute your only liquid components—you’ll notice no oil, butter, or traditional dairy.
This absence distinguishes angel food cake from conventional cakes and demands precision. Room-temperature egg whites whip to maximum volume, creating the foam structure that gives angel food cake its characteristic lightness.
If you’re exploring dairy substitutes, understand that traditional angel food cake contains none. The egg whites themselves provide both binding and leavening properties.
Don’t substitute these wet ingredients; their specific ratios determine your cake’s rise and crumb structure. Measure extracts carefully—too much overwhelms delicate flavor profiles.
Kitchen Tools Needed
Gathering the right equipment proves essential since angel food cake’s success depends on specific tools that facilitate proper technique. You’ll need a 10-inch tube pan with a removable bottom—non-stick surfaces compromise structure. Obtain a stand mixer or whisk for incorporating air into egg whites, achieving the volume necessary for ideal rise.
Stock your utensil caddy with a rubber spatula for gentle folding, measuring cups for dry ingredients, and measuring spoons for extracts. You’ll require a sifter for flour aeration, ensuring even distribution throughout your batter. A whisk attachment guarantees proper meringue formation.
For preparation, maintain organized knife storage nearby for trimming parchment paper. Add a wire rack for cooling—critical for preventing collapse during the delicate cooling phase.
Preparing Your Pan for Success
Since you’ll need an ungreased 10-inch tube pan with a removable bottom, don’t apply any oil or cooking spray to the interior surfaces. The ungreased surface is critical—it allows the batter to climb the pan’s walls as it rises, creating the cake’s signature structure.
An ungreased tube pan is essential—its surface allows batter to climb the walls, creating the cake’s signature height and structure.
Position your tube pan on the middle oven rack before preheating. Make sure the center post sits securely in the base.
Check that the removable bottom fits snugly without gaps that might leak batter. If you’re using a vintage pan, verify it’s completely clean and dry.
The absence of grease means you’re in control of the baking process, enabling your angel food cake to achieve maximum height and that ideal feathery crumb structure you’re after.
Mastering the Art of Whipping Egg Whites

Separating your eggs with meticulous care sets the foundation for perfect meringue. You’ll need room-temperature eggs—they whip faster and achieve greater volume. Use an electric mixer on medium speed, starting with clean, grease-free bowls to prevent sabotage of your efforts.
Begin whisking until soft peaks form, approximately three to four minutes. Continue beating as you gradually incorporate your cream of tartar, which stabilizes the foam through protein denaturation. This chemical process strengthens your whites’ structure.
Slowly add sugar once stiff peaks form, beating until glossy and completely dissolved. Proper air incorporation creates the thousands of tiny bubbles that give angel food cake its signature tender crumb and airy texture.
Don’t rush this process—your patience directly determines success.
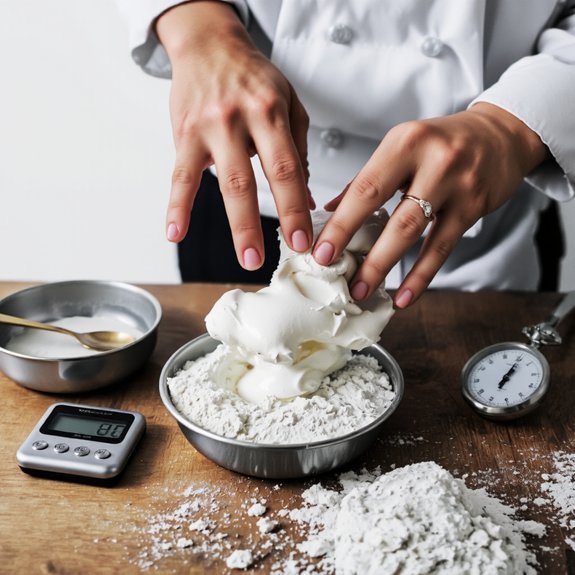
Folding in Flour Without Deflating Your Mixture
Incorporating flour into your meringue requires a gentle hand and strategic technique to preserve the air you’ve worked to build.
Folding flour into meringue demands precision and care to preserve the delicate air structure you’ve carefully built.
You’ll sift your cake flour four times to eliminate lumps and maximize batter elasticity.
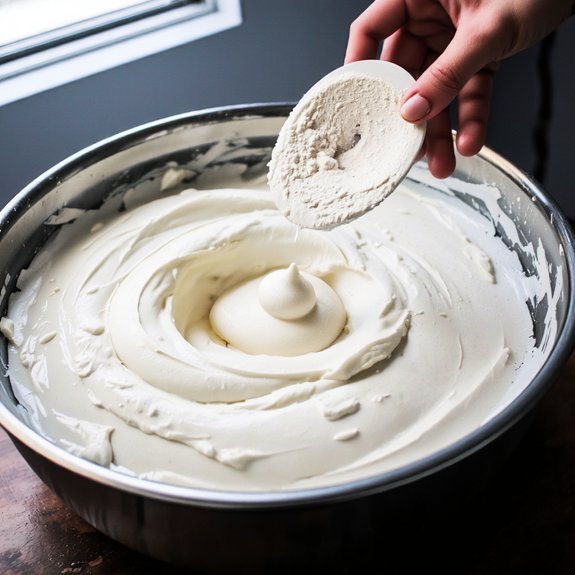
Add flour in four equal portions, folding with a spatula using an over-under motion rather than stirring.
Rotate your bowl quarter-turns between additions.
Work deliberately but don’t overthink—hesitation causes deflation.
The ambient humidity affects your mixture’s stability, so adjust your folding speed accordingly on dry versus damp days.
Your batter should flow like lava when finished.
You’re not aiming for homogeneity; slight streaks indicate proper technique.
Trust your instincts over perfection.
This methodical approach guarantees you’ll maintain the structural integrity your egg whites earned.
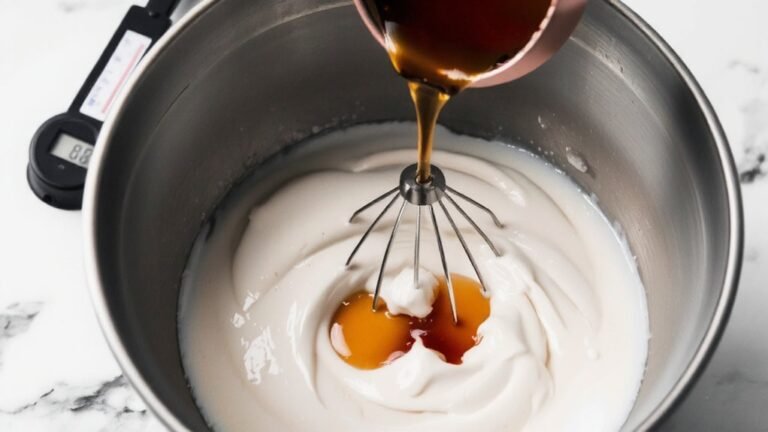
Adding Flavor: Vanilla, Almond, and Beyond
Now that you’ve folded your flour in without compromising your meringue’s structure, you’ll add flavorings to enhance the cake’s delicate crumb.
Measure your extracts precisely—1½ teaspoons vanilla extract or ½ teaspoon almond extract per dozen eggs.
For advanced flavor development, consider these options:
- Citrus zest: Add 1 tablespoon lemon or orange zest for brightness without excess moisture
- Herb infusions: Steep dried lavender or chamomile in warm water, then strain and incorporate ¼ teaspoon into your batter
- Almond extract blends: Combine ¼ teaspoon almond with ¼ teaspoon vanilla for complexity
- Cream of tartar enhancement: Use white vinegar instead, adding subtle tang
Incorporate flavorings after folding flour but before final batter transfer.
Stir gently for 10 seconds maximum to preserve your carefully maintained foam structure and guarantee uniform distribution throughout.
Pouring and Positioning Your Batter
Transferring your batter to an ungreased 10-inch tube pan requires careful technique to maintain the foam’s integrity.
Pour your mixture in a steady pour, working methodically to achieve even distribution throughout the pan.
Don’t dump the batter carelessly—this collapses air bubbles you’ve worked hard to incorporate.
Position the pan on a level surface before pouring.
Use a rubber spatula to guide the batter if needed, ensuring it fills all corners uniformly.
Fill the pan approximately three-quarters full, leaving adequate headspace for rise during baking.
Tap the filled pan gently on your work surface two to three times to release any trapped air pockets.
This final step prevents large voids from forming inside your cake.
Your batter’s now ready for the oven’s heat, where transformation begins.
Baking at the Right Temperature and Time
You’ll need to preheat your oven to 375°F (190°C) for approximately 15 minutes before inserting your cake, as this temperature guarantees proper rise without browning the delicate structure too quickly.
Once you’ve positioned your batter in the ungreased tube pan, you’ll bake it for 35-40 minutes until the top springs back when you lightly touch it and a toothpick inserted near the center emerges clean. You’ll know your cake’s reached doneness when it’s golden brown and the internal temperature registers 200-210°F (93-99°C).
Preheating Your Oven Properly
Before you pour the batter into your pan, set your oven to 375°F (190°C) and allow it to preheat for 10-15 minutes until it reaches full temperature.
This preparatory step provides uniform heat distribution throughout your baking chamber, eliminating calibration myths about temperature accuracy.
Your preheating process requires these essential steps:
- Position your oven rack to the lower-middle placement for even rising
- Verify internal temperature using an oven thermometer for precise calibration
- Allow full thermal equilibration before introducing your batter
- Maintain stable ambient conditions without door opening
Proper preheating guarantees that your angel food cake rises uniformly and develops the characteristic light, airy crumb structure you’re pursuing.
Skipping this phase compromises your final product’s texture and volume.
Your commitment to technical accuracy directly determines your baking success.
Temperature Settings for Success
Once your oven reaches full thermal equilibration at 375°F (190°C), maintaining that precise temperature throughout the baking cycle becomes your primary focus. You’ll bake for approximately 35-40 minutes, monitoring carefully for thermostat drift, which can compromise your cake’s structure.
| Factor | Impact | Solution |
|---|---|---|
| Thermostat Drift | Uneven browning, collapsed peaks | Verify with oven thermometer |
| Seasonal Variations | Temperature fluctuations | Adjust rack position accordingly |
| Humidity Levels | Extended baking time | Reduce oven opening frequency |
You’re aiming for a golden-brown exterior while maintaining a tender crumb. Don’t open that oven door—you’ll sabotage your rise. Insert a toothpick near completion; it should emerge clean. Consistent temperature management separates mediocre results from exceptional angel food cakes. Your precision directly determines success.
Timing and Doneness Tests
Precise timing combined with multiple doneness indicators will guarantee your angel food cake reaches ideal doneness without over- or under-baking.
You’ll bake your cake for 35–40 minutes at 375°F, though exact timing depends on your oven’s calibration and pan size.
Perform these doneness tests:
- Insert a toothpick into the cake’s center—it should emerge clean with minimal crumb texture clinging to it
- Apply the jiggle test by gently shaking the pan; the cake should hold its structure without wobbling
- Check the surface for golden-brown coloring across the entire top
- Verify the cake springs back when lightly pressed with your fingertip
Don’t rely on a single indicator.
You’ve earned the independence to trust your judgment using all four methods.
Remove your cake immediately when all tests confirm doneness, then invert it for proper cooling.
The Cooling Process: Why It Matters
Because angel food cake’s structure depends on stable air cells trapped within its protein matrix, you’ll need to cool it inverted—a critical step that prevents the cake from collapsing under its own weight.
Invert the pan immediately after removing it from the oven, placing the center tube over a bottle neck or cake cooler to maintain elevation.
During the cooling phase, crust formation occurs as the exterior sets while internal moisture redistribution continues.
This process stabilizes the foam structure and prevents structural failure.
Allow the cake to cool completely—typically four to six hours—before removing it from the pan.
Don’t rush this stage.
Premature removal risks destroying your cake’s delicate architecture.
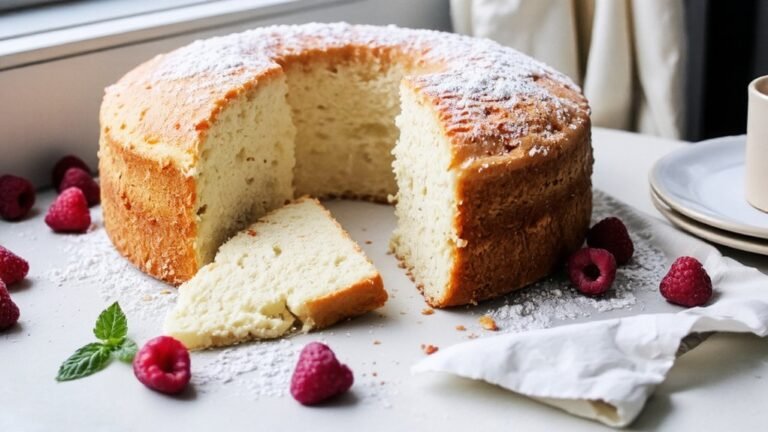
Once cooled, you’ll possess the freedom to slice and serve your perfectly textured creation.
Removing Your Cake and Troubleshooting Common Issues
After your cake’s cooled completely, you’ll run a thin, flexible knife or offset spatula around the outer edge and the center tube to loosen it from the pan’s walls.
Run a thin, flexible knife around the outer edge and center tube to loosen the cooled cake from pan walls.
Invert the pan onto a cooling rack and gently tap the bottom to release the cake.
Address common issues strategically:
- Sticking spots—apply additional pressure with your spatula and work slowly
- Sunken center—indicates underbaking; note oven temperature variance for future batches
- Dense crumb structure—verify egg white incorporation and avoid deflating during folding
- Cracking during removal—implement cake repair by securing fragments with frosting
For slice preservation, use a serrated knife with a gentle sawing motion rather than downward pressure. This prevents compression and maintains the delicate crumb structure that defines quality angel food cake.
Frequently Asked Questions
Can I Substitute All-Purpose Flour With Cake Flour in Angel Food Cake?
You can substitute cake flour for all-purpose flour in angel food cake, but you’ll need to adjust your approach.
Cake flour’s lower protein content—around 7-8% versus all-purpose’s 10-12%—produces a more delicate crumb.
When you’re sifting, incorporate cake flour using the same methodical sifting method you’d employ with all-purpose flour.
Sift it ten times minimum with your dry ingredients to achieve proper aeration.
This substitution yields a lighter, more tender cake structure that respects your desire for superior results.
How Long Does Homemade Angel Food Cake Stay Fresh Before Going Stale?
You’ll maintain your homemade angel food cake’s best freshness for approximately three to four days with proper room storage techniques.
Store it uncovered in a cool, dry environment—between 65-70°F—to preserve its characteristic light crumb structure.
Your shelf timeline extends if you refrigerate the cake in an airtight container, reaching up to one week. Freezing whole cakes or individual slices yields six to eight months of preservation, though you’ll sacrifice some textural integrity upon thawing.
Can I Make Angel Food Cake Without a Tube Pan Successfully?
You can’t achieve authentic results without a tube pan, but you’ve got alternatives. The Bundt method works if you’re willing to accept a denser crumb structure.
Your best bet’s the Springform adaptation—line it with parchment, bake at identical temperatures, then carefully invert it post-cooling. You’ll sacrifice some rise, but you’ll maintain structural integrity.
Neither option gives you complete freedom from compromise, though both prove workable for determined bakers.
Is It Possible to Freeze Angel Food Cake for Later Consumption?
Yes, you can freeze your angel food cake successfully.
Wrap it tightly in plastic wrap, then aluminum foil to prevent freezer burn.
Store it at 0°F for up to three months.
When you’re ready, use proper thawing techniques: leave it wrapped at room temperature for two to four hours.
This methodical approach preserves moisture and texture, ensuring you maintain complete control over your baking timeline.
Why Does My Angel Food Cake Sometimes Have a Rubbery Texture?
You’re likely overbeating your meringue, which incorporates excess air and creates a dense, rubbery crumb structure.
Don’t beat beyond stiff peaks—you’ll compromise the cake’s delicate texture.
Additionally, insufficient cooling causes structural collapse and rubber-like density.
Allow your cake to cool completely inverted on a bottle neck for minimum six hours.
These precise techniques’ll yield you the light, airy result you’re after.


Leave a Comment