Key Takeaways
- Preheat your oven to 350°F and prepare a 9×13-inch pan by greasing thoroughly and dusting with flour.
- Cream butter and sugar for 2–3 minutes until pale, then gradually add eggs and alternate dry and wet ingredients.
- Pour batter from 6 inches above the pan in a circular motion, then use an offset spatula to level evenly.
- Bake for 25–30 minutes until edges turn golden-brown and a toothpick inserted in the center shows few moist crumbs.
- Cool in the pan for 10–15 minutes on a wire rack, then wait until room temperature before frosting.
Gathering Your Ingredients and Equipment
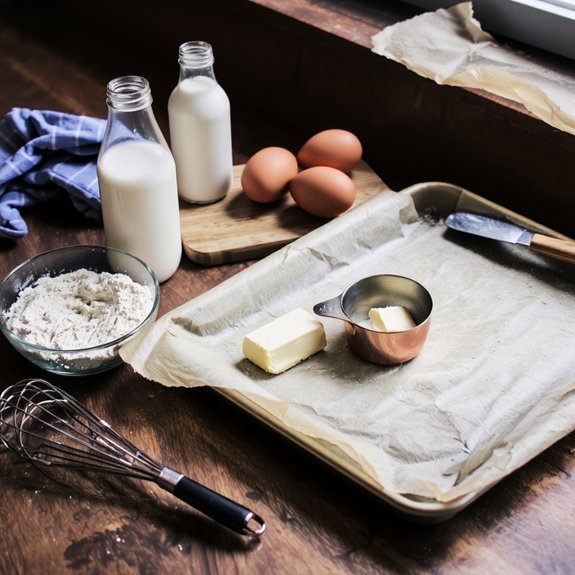
Before you’ll mix a single ingredient, you’ll need to assemble everything required for your sheet cake.
Start with your shopping checklist: all-purpose flour, granulated sugar, eggs, butter, baking powder, salt, vanilla extract, and milk.
Gather mixing bowls, measuring cups, measuring spoons, a whisk, an electric mixer, and a 9×13-inch baking pan.
Consider ingredient substitutions for dietary flexibility.
Ingredient substitutions offer flexibility for various dietary needs without compromising your sheet cake’s quality.
You can swap all-purpose flour with cake flour for a lighter crumb, or use oil instead of butter for moisture.
Plant-based milk works equally well as dairy milk.
Prepare your workspace by arranging ingredients within arm’s reach.
Line your baking pan with parchment paper for easy removal.
Preheat your oven to 350°F.
This methodical preparation eliminates mid-baking scrambling and guarantees consistent results.
Preparing Your Pan and Oven
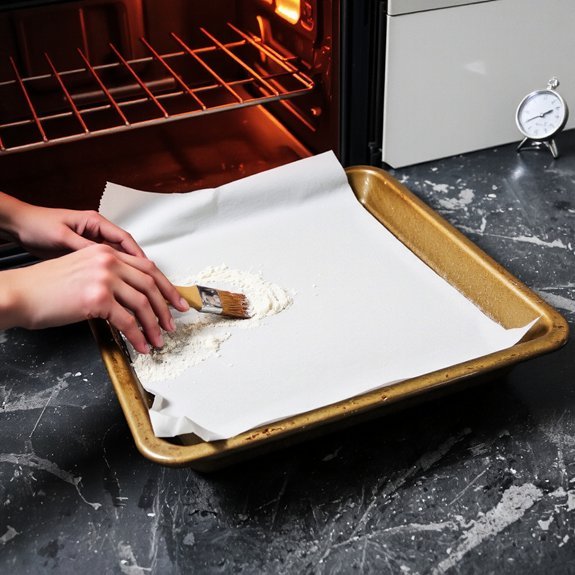
You’ll need to grease your pan thoroughly with butter or cooking spray, then dust it with flour, tapping out the excess to create an even coating that prevents sticking.
Preheat your oven to the temperature specified in your recipe—typically 350°F for sheet cakes—and position your rack in the center to guarantee uniform heat distribution and consistent baking results.
Verify your oven temperature with an oven thermometer, since many ovens run hot or cold, which directly affects your cake’s rise and browning.
Greasing and Flouring Techniques
Properly preparing your sheet pan prevents sticking and guarantees even baking throughout your cake. You’ll want to choose your greasing agent carefully—butter, vegetable oil, and cooking spray all work effectively, though butter adds flavor while oil and spray prevent browning edges. Apply your chosen fat evenly across the pan’s bottom and sides using a pastry brush for precision.
Next, dust the greased surface with flour, rotating the pan to coat thoroughly. For specialized diets, you can substitute flour alternatives like almond flour or coconut flour, though they may affect texture. Tap out excess flour, leaving only a thin, protective layer.
This dual-step method creates a barrier between your batter and the pan, ensuring your cake releases cleanly while maintaining even heat distribution. Your sheet cake will bake uniformly and unmold effortlessly.
Oven Temperature and Positioning
Once your pan’s prepared with its protective coating of fat and flour, getting your oven right becomes the next critical step.
Preheat to 350°F, allowing 15-20 minutes for thermal stabilization.
Position your rack in the center to avoid thermal stratification—uneven heat distribution that ruins cakes.
Check your oven’s accuracy with an independent thermometer; many run 25°F off.
Account for ambient humidity by reducing liquid slightly in dry climates, increasing it in humid conditions.
Place your sheet cake pan directly on the center rack, ensuring at least two inches of clearance on all sides for proper air circulation.
Avoid opening the door during the first 25 minutes; this destabilizes internal temperature.
Your oven’s performance depends on these precise adjustments—master them for consistent results.
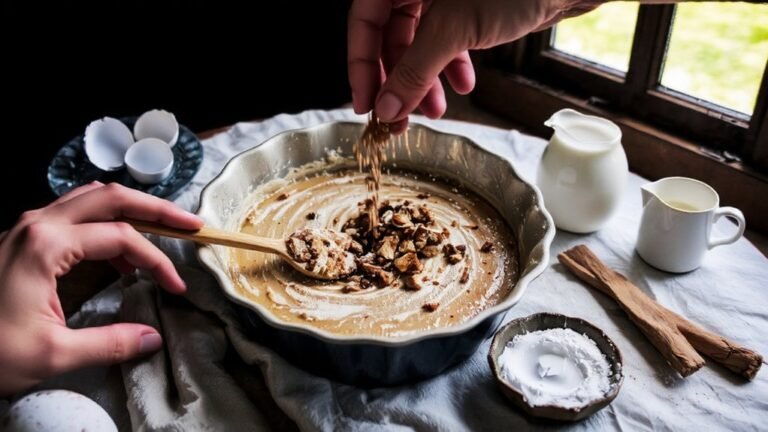
Mixing Your Cake Batter
Three fundamental techniques’ll determine your batter’s success: creaming, incorporating, and folding. Master these mixing techniques to control gluten development and achieve ideal texture.
| Technique | Purpose | Method | Duration | Result |
|---|---|---|---|---|
| Creaming | Aerate butter | Beat butter and sugar | 2-3 minutes | Light, fluffy base |
| Incorporating | Combine wet ingredients | Add eggs gradually while beating | 1-2 minutes per egg | Emulsified mixture |
| Folding | Minimize gluten development | Use spatula with gentle, deliberate strokes | Until just combined | Tender crumb structure |
Start by creaming softened butter with granulated sugar until pale and fluffy. Gradually add eggs, beating thoroughly after each addition. Alternate adding dry ingredients with wet ingredients in thirds, beginning and ending with dry components. This methodical approach prevents overmixing, which develops excessive gluten and results in dense, tough cake. Your freedom to experiment increases when you understand these fundamental principles—you’ll confidently adjust techniques based on desired outcomes.
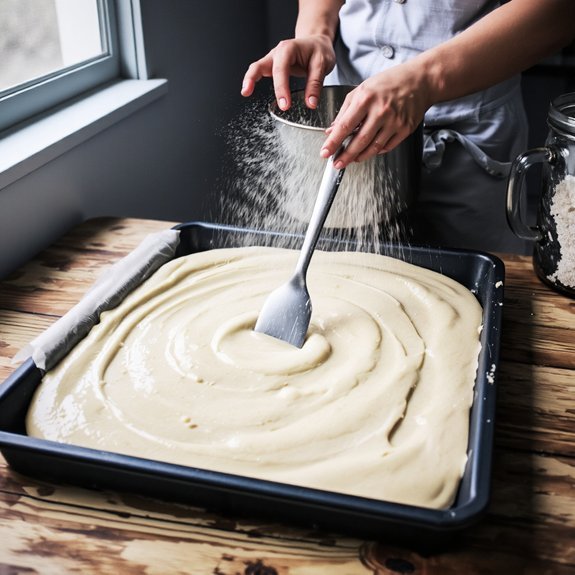
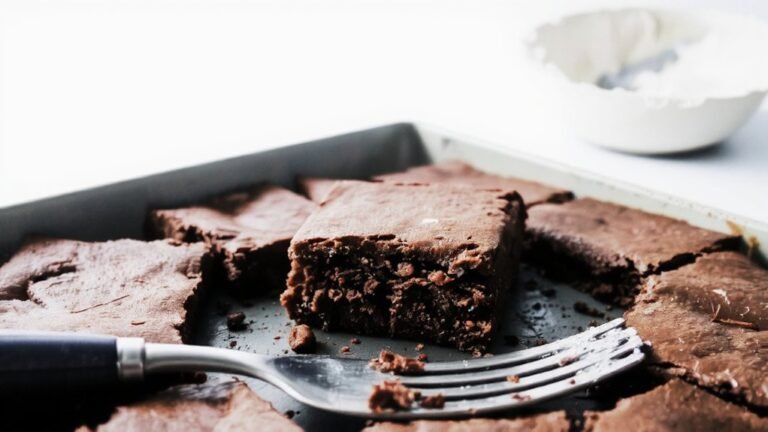
Pouring and Baking Your Cake
You’ll need to prepare your sheet pan by greasing it thoroughly and lining it with parchment paper to prevent sticking.
Pour your batter into the prepared pan in a thin, even layer, using an offset spatula to distribute it uniformly across all corners.
Monitor your cake’s progress by setting a timer for the specified bake time and checking for doneness using the toothpick method—inserting a pick into the center should yield only a few moist crumbs.
Preparing Your Sheet Pan
Before pouring your batter, make sure your sheet pan’s been properly prepared with either parchment paper or a light coating of nonstick spray, then position it in your preheated 350°F oven.
This critical preparation step guarantees your cake releases cleanly without sticking.
Your pan inspection should verify:
- Even surface flatness—warped pans cause uneven baking and inconsistent crumb structure
- Absence of damage, rust, or residue that compromises heat distribution
- Proper dimensions matching your recipe’s specifications for accurate bake times
Position the rack in your oven’s center for ideal air circulation.
Storage tips for future baking include washing your pan immediately after use and storing it in a dry location.
Dark-colored pans absorb more heat, so adjust your temperature down 25°F if using them.
You’ve now established the foundation for baking success.
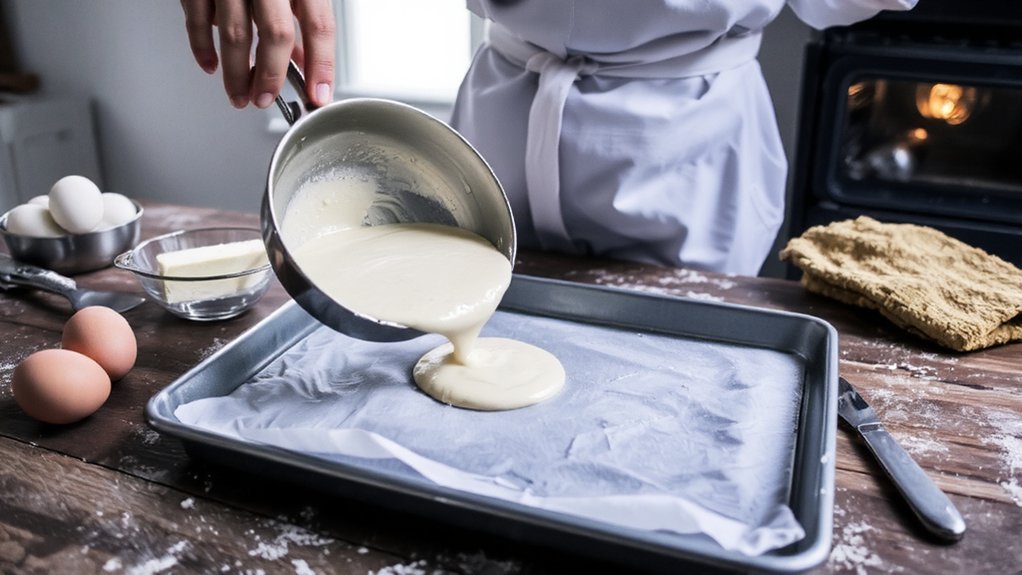
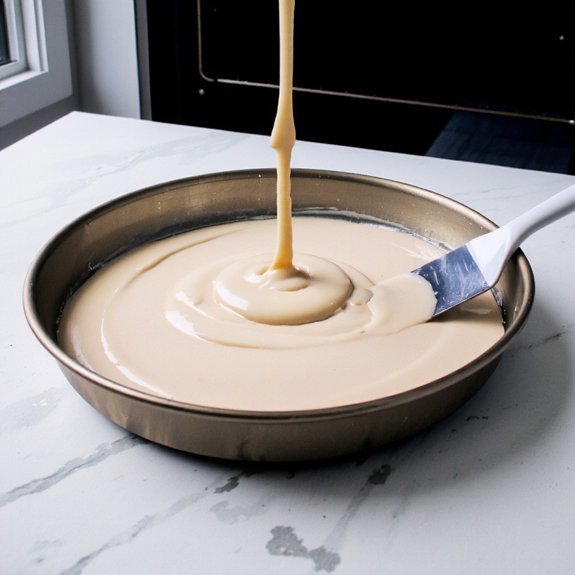
Pouring Batter Evenly
With your pan positioned and preheated, it’s time to pour the batter evenly across the surface. Maintain proper pouring posture by holding the bowl at a 45-degree angle, approximately 6 inches above the pan’s center. Use deliberate hand positioning with your dominant hand controlling the bowl while your non-dominant hand stabilizes the rim.
Begin pouring slowly, moving methodically from the center outward in a circular motion. This technique distributes batter uniformly, preventing air pockets and ensuring consistent rise during baking.
| Factor | Impact | Result |
|---|---|---|
| Uneven Distribution | Dry Edges | Compromised Texture |
| Slow Pouring | Even Thickness | Perfect Consistency |
| Quick Pour | Surface Bubbles | Imperfect Crumb |
| Hand Control | Precision Flow | Professional Outcome |
| Centered Start | Balanced Expansion | Uniform Bake |
Rotate the pan slightly if needed, but don’t overpour any single section. You’re now ready for baking.
Monitoring Bake Time
Once your batter’s settled evenly in the pan, set a timer for the lower end of your recipe’s recommended baking range—typically 25-30 minutes for standard sheet cakes.
Don’t rely solely on time; you’re in control of your baking outcome.
Monitor your cake’s development through these critical checkpoints:
- Visual assessment at 80% of projected time—look for golden-brown edges and slight dome formation
- Toothpick insertion test near the center for moist crumbs, not wet batter
- Jiggle test by gently shaking the pan; the center should firm up noticeably
Maintain accurate batch timing by recording temperatures, oven calibration, and actual bake duration in your bake logs.
This methodical approach eliminates guesswork and guarantees consistent results.
Your oven’s individual characteristics demand this systematic documentation, freeing you from trial-and-error baking.
Testing for Doneness
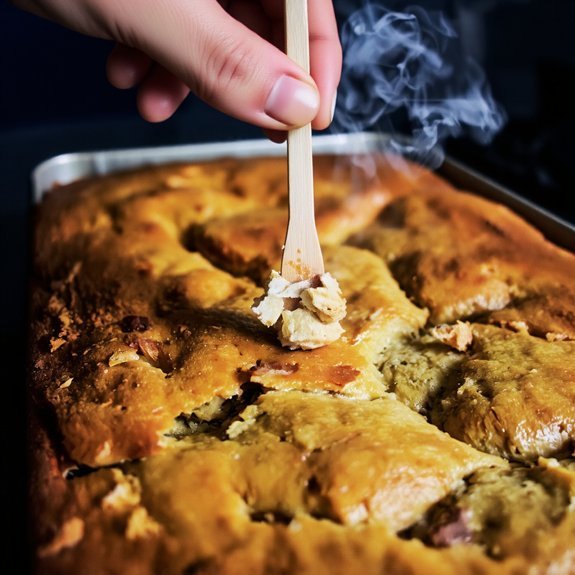
You’ll know your sheet cake’s ready when you’ve got the right visual and tactile cues.
Perform a Crumb Inspection by inserting a toothpick or cake tester into the center.
Insert a toothpick into the cake’s center; if it emerges clean or with minimal moist crumbs, baking is complete.
If it emerges clean or with just a few moist crumbs, you’re done baking.
Wet batter indicates underbaking; you’ll need additional time.
Execute the Spring Test by pressing your finger gently on the cake’s surface.
Properly baked cake springs back immediately without leaving an indent.
If it leaves a depression, continue baking.
Monitor the cake’s edges—they should pull slightly from the pan’s sides.
The top should display a golden-brown color with no wet shine.
These indicators work independently or combined, giving you reliable confirmation that your sheet cake’s achieved ideal doneness and structure for frosting and serving.
Cooling Your Sheet Cake
After your sheet cake’s emerged from the oven with golden edges and a springy surface, don’t immediately turn it out onto a cooling rack.
Instead, let it rest in the pan for 10-15 minutes. This critical interval allows:
- Structural stabilization—the crumb matrix sets firm enough to handle without collapsing
- Crust formation—the exterior develops its characteristic texture and seal
- Moisture equilibration—internal steam redistributes evenly throughout
Place your pan on a wire rack at room temperature, away from direct drafts. Monitor ambient humidity levels; high moisture environments can interfere with proper crust development and cooling efficiency. Once the cake reaches room temperature, invert it onto your cooling rack. This methodical approach prevents structural failure and guarantees ideal texture throughout your finished sheet cake.
Frosting and Decorating Your Cake
How soon should you frost your cooled sheet cake?
You’ll want to wait until your cake reaches room temperature—typically 2-3 hours.
This prevents frosting from melting into the crumb layer.
Start with a thin crumb coat using buttercream techniques: spread a ¼-inch layer across all surfaces, then refrigerate for 15 minutes.
Apply your final frosting layer at ⅜-inch thickness for ideal coverage.
For piping patterns, fill your decorator bag fitted with your chosen tip—round, star, or basket weave work best.
Apply steady, consistent pressure while moving smoothly across the cake’s surface.
You’ve got complete control over your design choices.
Whether you prefer geometric patterns, floral borders, or abstract swirls, execute each stroke deliberately.
Let your creativity guide your decorating hand without restriction.
Frequently Asked Questions
Can I Substitute Ingredients Like Eggs, Butter, or Milk in Sheet Cake Recipes?
You can absolutely substitute eggs, butter, and milk in your sheet cake recipe.
Replace each egg with a flax egg (1 tablespoon ground flaxseed plus 3 tablespoons water).
For dairy-free options, swap butter with coconut oil at a 1:1 ratio and substitute milk with almond or oat milk using equivalent measurements.
You’ll maintain structural integrity and moisture content while accommodating vegan alternatives.
Adjust baking time slightly if needed—check your cake’s doneness at the standard interval using the toothpick test.
How Do I Store Leftover Sheet Cake to Keep It Fresh Longer?
You’ll preserve your sheet cake by placing it in airtight containers immediately after cooling. Control humidity by storing it at room temperature for 2-3 days, or refrigerate for up to a week.
For extended storage, you’re free to freeze portions in freezer-safe containers for three months. Make sure you’ve sealed all edges completely to prevent moisture loss and oxidation, maintaining ideal texture and flavor integrity throughout storage duration.
What’s the Best Way to Level an Uneven Sheet Cake Before Frosting?
You’ll want to use a serrated knife or cake leveller to remove the domed top. Mark your desired height with toothpicks as guides.
With steady, horizontal strokes, you’ll slice off the crown in one smooth motion.
A cake leveller gives you precision control—it’s got adjustable wire guides that guarantee even cuts.
Work methodically, keeping your blade parallel to your work surface.
You’re now ready to frost without worrying about unstable, uneven layers.
Can Sheet Cakes Be Made Ahead and Frozen for Later Use?
You can absolutely freeze your sheet cake for later use.
Wrap it tightly in plastic wrap, then aluminum foil to prevent freezer burn and maintain texture preservation. Store at 0°F for up to three months.
When you’re ready, thaw it completely at room temperature—approximately two to four hours depending on thickness. This methodical approach guarantees you’ll reclaim your baked goods’ original crumb structure and moisture content without compromise.
How Do I Fix a Sheet Cake That Sinks in the Middle?
You’ll fix that sunken center by adjusting your methodology.
First, diagnose the culprit: an undercooked center indicates insufficient baking time or low oven temperature—verify your thermometer’s accuracy.
Second, overmixed batter incorporates excess air, causing structural collapse during cooling.
Next time, cream butter and sugar precisely, then fold dry ingredients with minimal strokes.
Use an oven thermometer, bake at exact temperature specifications, and employ the toothpick test for doneness verification.


Leave a Comment