Key Takeaways
- Assemble all ingredients and equipment before mixing to ensure a smooth, controlled baking process.
- Keep butter cold and work quickly with ice-water to create flaky layers through proper lamination.
- Roll dough to 1/8-inch thickness from center outward, rotating quarter-turns for even, consistent results.
- Select ripe fruit, balance sweetness with 3/4–1 cup sugar, and thicken with cornstarch or tapioca.
- Preheat oven to 375–425°F, bake on lower-middle rack, and cool completely before slicing for optimal texture.
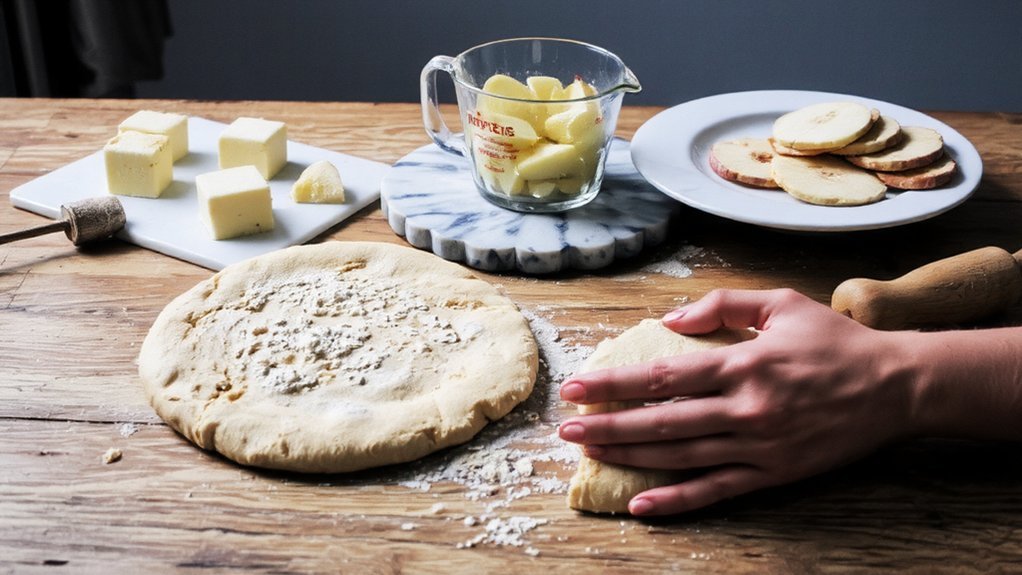
Gathering Your Ingredients and Equipment
Before you start mixing, you’ll need to assemble your ingredients and equipment to guarantee a smooth baking process.
Assemble your ingredients and equipment before mixing to guarantee a smooth, controlled baking process.
Organize your kitchen layout strategically by positioning your work surface near your oven and refrigerator for efficient movement.
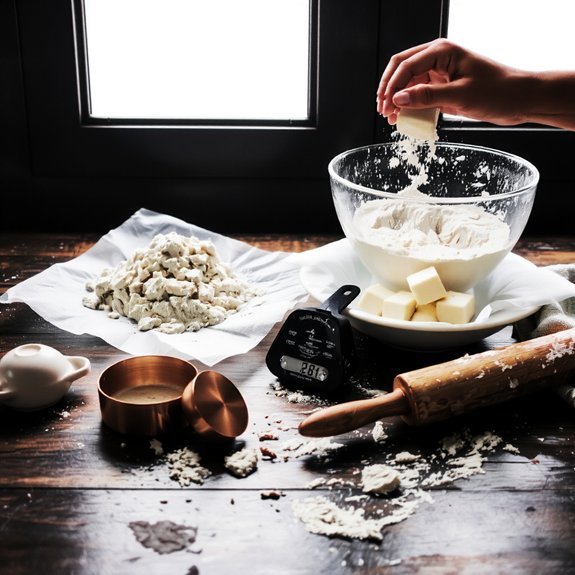
Gather dry ingredients—flour, sugar, salt, and baking powder—in measured quantities.
You’ll need cold butter, eggs, and any liquid components your recipe demands.
Equipment-wise, assemble a rolling pin, pie dish, mixing bowls, measuring cups, and a pastry cutter.
Don’t overlook a whisk, wooden spoon, and parchment paper.
Implement smart storage solutions by keeping frequently used tools within arm’s reach and storing seasonal equipment accessibly.
Check your oven’s calibration beforehand.
Having everything prepped and positioned eliminates scrambling mid-process, giving you complete control over your baking timeline and results.
Making the Perfect Pie Crust
Mastering pie crust requires understanding the interplay between fat, flour, and hydration—you’ll want to keep your butter cold so it creates distinct pockets that steam during baking, producing those desirable flaky layers.
| Technique | Result |
|---|---|
| Lamination | Shattered, crispy layers |
| Over-mixing | Dense, tough texture |
| Proper hydration | Tender, manageable dough |
You’re honoring centuries of crust history when you blend flour, salt, and fat with precision. Regional variations—from French pâte brisée to Southern buttermilk crusts—demonstrate how local ingredients shaped baking traditions. Your technique determines everything: work quickly, use ice-cold water, and rest your dough for ideal gluten relaxation. Don’t overwork the mixture; you’re creating controlled imperfection. This balance between structure and tenderness gives you the freedom to achieve professional-quality results in your own kitchen.
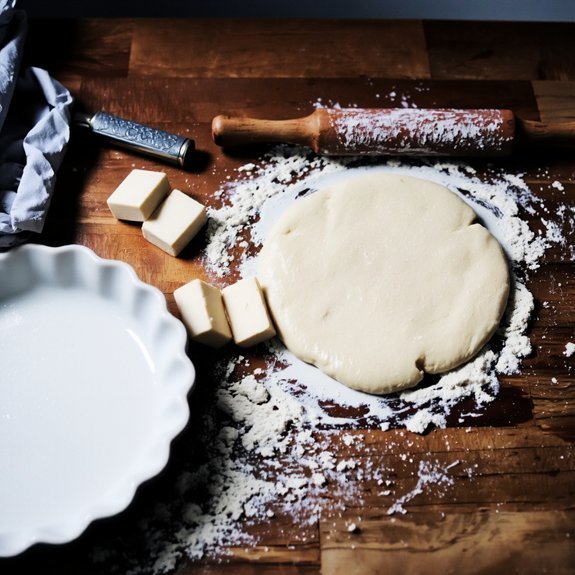
Chilling and Preparing Your Dough
Resting your dough after mixing is where you’ll solidify the foundation you’ve built. This essential step allows gluten to relax and flavors to develop fully.
Resting dough after mixing solidifies your foundation, allowing gluten to relax and flavors to develop fully.
To master dough preparation:
- Wrap your disk tightly in plastic wrap and refrigerate for at least 2 hours, or up to 48 hours for enhanced flavor complexity
- Remove from cold storage 10-15 minutes before rolling to achieve ideal pliability without compromising structure
- Roll between parchment sheets to prevent sticking and maintain consistent thickness
Embrace make ahead strategies by preparing dough several days in advance, freeing yourself from last-minute stress.
For freezer organization, label your wrapped dough with the date and freeze up to three months. You’ll maintain complete control over your baking schedule while ensuring superior crust quality every time.
Rolling Out Your Crust
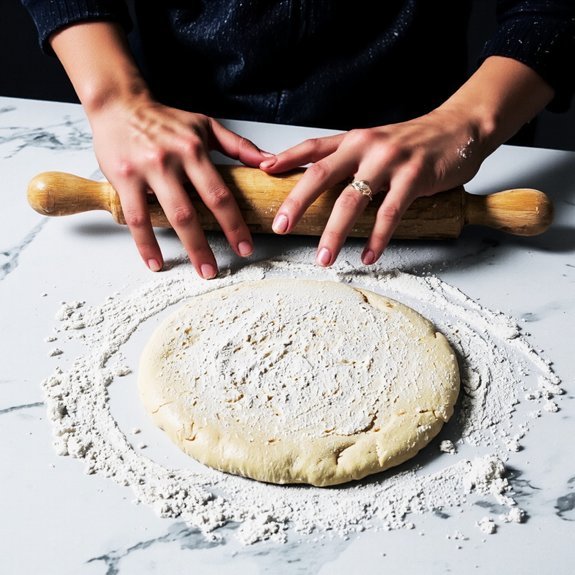
Transforming your chilled dough into a thin, even sheet requires finesse and the right technique. You’ll need consistent hand pressure and a steady rolling rhythm to achieve uniform thickness without tearing.
| Technique | Pressure | Result |
|---|---|---|
| Light strokes | Minimal | Uneven thickness |
| Medium strokes | Moderate | Ideal crust |
| Heavy strokes | Maximum | Dough damage |
| Circular motions | Varied | Irregular shape |
| Linear motions | Steady | Controlled expansion |
Start from the center and work outward, rotating your dough quarter-turns between strokes. Dust your work surface and rolling pin with flour to prevent sticking. Maintain even hand pressure throughout—this prevents thick edges and thin centers. Your rolling rhythm should feel natural and unhurried. Aim for approximately one-eighth inch thickness. If cracks appear, gently press them together. Work deliberately; rushing compromises your crust’s structural integrity and final texture.
Preparing Your Filling
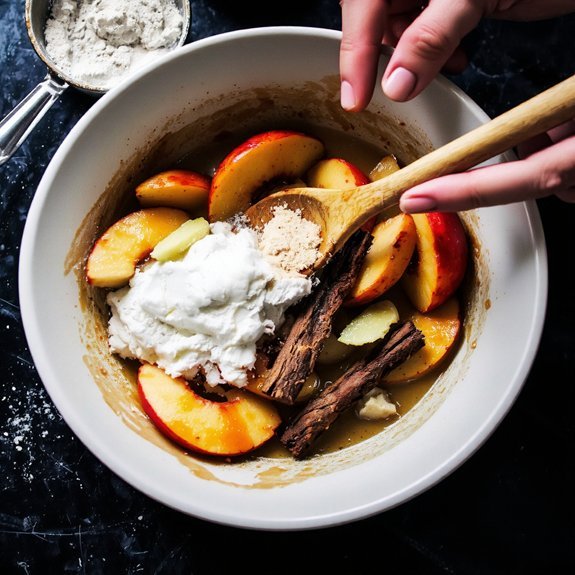
You’ll want to select your fruit based on ripeness and flavor profile, as underripe fruit won’t release sufficient juice while overripe fruit can become mushy during baking.
Next, you’ll balance sweetness and seasoning by adjusting sugar content and incorporating complementary spices like cinnamon or nutmeg to enhance the fruit’s natural flavors.
Finally, you’ll thicken your filling using cornstarch, flour, or tapioca starch to achieve the proper consistency and prevent your finished pie from becoming runny.
Selecting Your Fruit
Before you combine your filling ingredients, choosing the right fruit determines your pie’s structural integrity and flavor profile.
You’ll want to evaluate seasonal varieties available in your region, as they’ll offer superior quality and cost-efficiency compared to out-of-season alternatives.
Assess ripeness indicators specific to your chosen fruit:
- Firmness – Gently press the fruit; it should yield slightly without feeling mushy or hard
- Color – Look for deep, uniform hues indicating peak maturity and sugar content
- Aroma – Smell near the stem; a strong, sweet fragrance signals ideal ripeness
You’re free to mix complementary fruits for complex flavor dimensions.
Avoid bruised specimens, which’ll compromise texture and introduce unwanted fermentation.
Select unblemished fruit harvested at peak maturity for the most reliable structural stability and authentic taste in your final pie.
Sweetening and Seasoning
How do you balance sweetness with structural integrity when preparing your filling? You’ll need to understand sugar chemistry—granulated sugar dissolves readily, while brown sugar adds moisture and depth. Use 3/4 to 1 cup per pie depending on your fruit’s natural sweetness and tartness.
Salt balancing is equally critical. Add 1/4 teaspoon of salt to enhance flavors and suppress excess sweetness without making your filling taste salty. This counterbalance creates complexity.
Consider your thickening agent carefully. Cornstarch or tapioca starch absorbs juice while maintaining structural support, preventing a soggy crust. You’ll want a filling that’s neither runny nor gelatinous.
Spices like cinnamon, nutmeg, or cardamom amplify perceived sweetness, allowing you to reduce sugar content while maintaining satisfying flavor. Lemon juice or vanilla extract brightens the overall profile.
Mix these components thoroughly, ensuring even distribution before filling your crust.
Thickening Your Filling
With your sweetening and seasoning components balanced, it’s time to add structural support to prevent your filling from running across the crust during baking.
You’ve got three primary thickening agents at your disposal:
- Cornstarch – Delivers reliable viscosity without altering flavor; use 1-2 tablespoons per cup of fruit for medium thickness.
- Tapioca starch – Creates superior texture and maintains clarity; resistant to retrogradation effects that cause weeping over time.
- Flour or arrowroot – Traditional options offering subtle binding; adjust ratios based on your filling’s liquid content.
Conduct viscosity testing by dropping a spoonful of filling onto a cold plate; it should move slowly, not run freely.
Account for retrogradation effects—starches continue thickening as they cool.
You’ll want your filling firm enough to slice cleanly without sacrificing that desirable fruity texture that keeps your pie memorable.
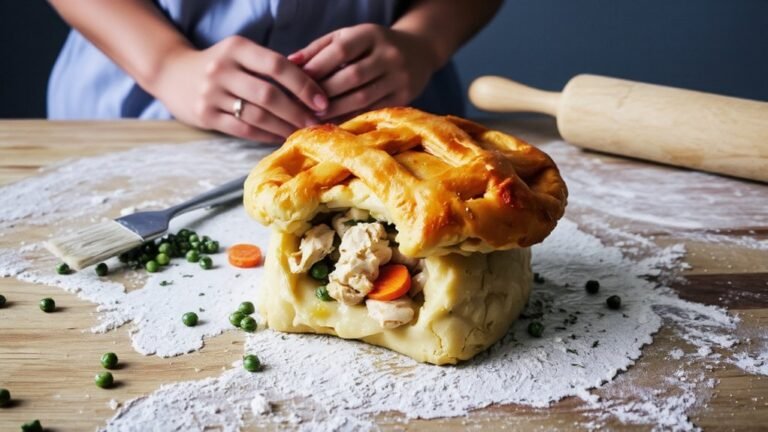
Assembling Your Pie
You’ll start by placing your chilled pie crust into your baking dish, pressing it firmly against the bottom and sides to eliminate air pockets.
Next, you’ll layer your filling and any additional ingredients according to your recipe’s specifications, distributing them evenly to guarantee consistent baking.
Finally, you’ll crimp the edges of your crust with your fingers or a fork, creating a seal that prevents filling from leaking and adds structural integrity to your pie.
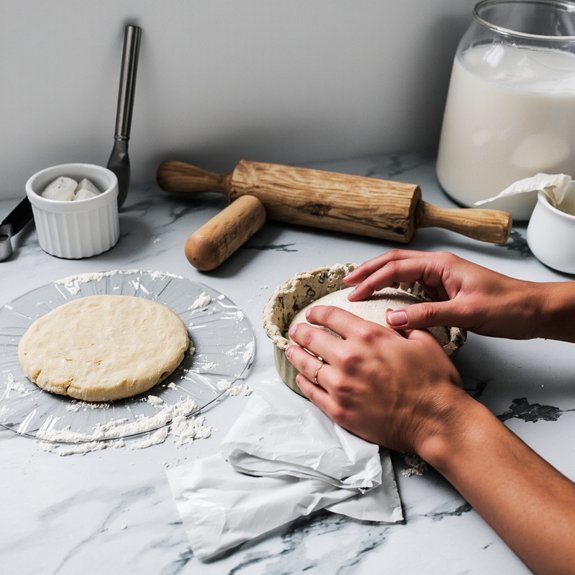
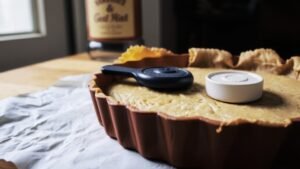
Preparing Your Pie Crust
Getting your pie crust ready requires careful attention to temperature and technique.
You’ll want to understand the texture science behind your dough—gluten development creates flakiness when fat remains distinct from flour.
Crust history reveals that laminated doughs revolutionized baking, giving you freedom to achieve restaurant-quality results.
Here’s what you need to do:
- Roll your dough between parchment sheets to prevent sticking and maintain even thickness
- Transfer carefully to your pie pan, pressing gently without stretching the dough
- Chill for at least 30 minutes to relax gluten and stabilize your crust
You’ll dock the surface with a fork to prevent bubbling during blind baking.
This technical precision guarantees you’re not fighting against physics.
Your crust’ll hold its shape, creating that coveted crispy texture that distinguishes exceptional pies from mediocre ones.
Layering Filling and Ingredients
Once your crust has chilled and you’ve docked the surface, it’s time to build the layers that transform your prepared shell into a complete pie. Strategic flavor sequencing makes certain each component enhances the others without competing. You’ll want to establish texture contrast—creamy fillings against crisp crusts, firm fruits against silky custards.
| Layer | Purpose | Timing |
|---|---|---|
| Egg wash or butter | Moisture barrier | Before filling |
| Fruit or custard base | Primary flavor | Immediate layering |
| Secondary filling | Depth and complexity | Mid-assembly |
| Top crust or topping | Structure and finish | Final application |
Pour your filling deliberately, distributing it evenly to prevent soggy spots. If you’re using multiple ingredients, arrange them by density and moisture content. This methodical approach guarantees balanced results that respect your pie’s architectural integrity.
Crimping Edges for Structure
After filling your pie shell, the crimped edge becomes both functional seal and decorative finish, binding the top and bottom crusts while creating an impermeable barrier that contains moisture and prevents filling from seeping during baking.
Master crimping mechanics through these techniques:
- Position your thumb and forefinger on the outer edge, using your opposite hand’s knuckle to push inward, creating a V-shaped ridge
- Space crimps uniformly around the perimeter at half-inch intervals for consistent edge reinforcement and professional appearance
- Apply firm, deliberate pressure—weak crimps fail during baking, allowing steam escape and compromised structural integrity
You’ll develop rhythm quickly.
The crimped edge must seal completely; any gaps compromise your pie’s integrity.
This technique gives you total control over your baking outcome, ensuring your pie maintains its structure throughout the baking process while achieving that distinctive, restaurant-quality finish.
Crimping the Edges
Sealing your pie’s perimeter with a crimped edge requires a steady hand and consistent pressure to create both an attractive finish and a functional seal. You’ll position your thumb and forefinger on the outer edge while using your opposite hand’s index finger to push inward, forming a V-shaped pattern along the rim.
Sealing your pie’s perimeter with a crimped edge requires steady hands and consistent pressure for both attractive appearance and functional integrity.
This technique accomplishes two critical objectives: it bonds the top and bottom crusts while preventing filling leakage during baking.
You’re free to personalize your crimping with regional motifs or decorative symbolism that reflects your cultural heritage. Whether you’re creating traditional fluted patterns or contemporary designs, maintain uniform depth and spacing.
Work methodically around the entire perimeter, ensuring consistent pressure prevents weak points. Your crimped edges shouldn’t just look professional—they’ll perform functionally, containing moisture and creating structural integrity throughout the baking process.
Baking Your Pie to Golden Perfection
You’ll want to preheat your oven to 375–425°F, depending on your filling type, and position your rack in the lower-middle section to promote even heat distribution and proper crust browning.
Monitor your pie carefully during the 30–60 minute bake window, rotating it halfway through if you notice uneven coloring, and begin checking for doneness around the two-thirds mark.
Your pie’s done when the crust reaches deep golden-brown, the filling bubbles visibly at the edges, and a knife inserted near the center meets slight resistance rather than flowing freely.
Temperature and Oven Settings
Since proper heat distribution is critical to achieving an evenly baked crust and filling, you’ll want to preheat your oven to 375–425°F depending on your pie type—fruit pies typically require 375–400°F.
Cream and custard varieties need 350–375°F to prevent overcooking the filling before the crust sets.
- Oven calibration: Verify your oven’s accuracy with a thermometer, as most home ovens run 25°F off from their displayed temperature, directly affecting bake times and browning consistency.
- Convection differences: Enable convection settings only for pre-baking crusts; disable them during full-pie baking since moving air causes uneven browning and excessive moisture loss.
- Bottom-rack positioning: Place your pie on the lowest rack during initial baking to intensify bottom crust heat exposure, preventing soggy bases while allowing proper filling set.
Timing Your Bake Perfectly
How long should your pie bake? You’ll typically need 45-55 minutes, but altitude adjustments matter. Higher elevations require longer baking times due to lower atmospheric pressure. Monitor your pie’s progress without opening the oven door frequently—you’ll lose heat and compromise browning.
| Pie Type | Temperature | Time |
|---|---|---|
| Fruit | 375°F | 50-55 min |
| Custard | 350°F | 40-45 min |
| Cream | 350°F | 30-35 min |
| Pecan | 350°F | 60-70 min |
| Pumpkin | 425°F then 350°F | 65-75 min |
Remove your pie when the crust turns golden-brown and the filling’s barely set. Residual heat continues cooking the interior for several minutes after removal. Let it cool completely before slicing—this prevents structural collapse and guarantees clean cuts.
Testing for Doneness Cues
What separates an underbaked pie from a perfectly set one? Mastering doneness indicators gives you complete control over your bake’s outcome.
Trust these three reliable cues:
- Jiggle test – Gently shake your pie. The filling should barely wobble at the center, not slosh freely. This indicates proper gelatin or starch set.
- Aroma cues – A rich, caramelized scent signals ideal browning. Avoid an acrid smell, which indicates burning.
- Visual assessment – Your crust should display deep golden-brown edges. The filling surface may show slight browning or slight cracks, depending on your pie type.
You’ll know you’ve nailed it when these indicators align.
Don’t rely solely on time—every oven behaves differently.
Your pie’s doneness depends on these tangible signs, not arbitrary clock-watching.
Cooling and Setting Your Pie
Allowing your pie to cool properly is essential for achieving the ideal texture and structural integrity.
You’ll want to set your pie on a wire rack at room temperature, ensuring adequate airflow around all sides.
Your resting duration shouldn’t be rushed—typically 2-4 hours for fruit pies, longer for custard varieties. This patience lets fillings set completely and crusts firm up properly.
Monitor ambient humidity in your kitchen; high moisture can soften crusts and extend cooling times. Avoid refrigerating too early, as this can trap steam and create a soggy bottom crust.
Once fully cooled, you can slice with confidence, knowing your pie’s structure will hold firm. Proper cooling transforms a good pie into an excellent one.
Troubleshooting Common Pie-Baking Problems
Even after you’ve mastered the cooling process, pie-baking challenges can still emerge from unexpected sources.
You’ll encounter predictable issues that demand technical solutions.
Address these common problems effectively:
- Soggy crusts — Pre-bake your shell at 425°F for 8-10 minutes before filling to create a moisture barrier.
- Uneven browning — Rotate your pie halfway through baking and shield edges with foil if they’re darkening too quickly.
- High-altitude failures — Make altitude adjustments by increasing oven temperature by 25°F and reducing sugar slightly to prevent structural collapse.
For reheating techniques, use 350°F for 10-15 minutes to restore texture without overcooking.
You’ll troubleshoot successfully by understanding these variables control your results. Master these solutions and you’ll consistently produce excellent pies.
Frequently Asked Questions
Can I Use Store-Bought Pie Crust Instead of Making My Own?
You can absolutely use store-bought pie crust—it’s your choice. Premium brand recommendations like Butta or Pillsbury deliver solid results.
However, you’ll notice texture differences; homemade crusts develop superior flakiness through proper lamination, while store-bought versions often feel denser. Pre-made crusts sacrifice some complexity for convenience.
You’re trading craftsmanship for speed, but they’ll still produce decent pies. Select all-butter varieties when possible; they’ll give you better flavor and texture approximation to scratch-made crusts.
How Far in Advance Can I Prepare and Freeze My Pie?
You can freeze your pie up to three months in advance.
For ideal freezer storage, wrap it tightly in plastic wrap and aluminum foil after it’s completely cooled.
When you’re ready, skip thawing techniques—bake your frozen pie directly at 350°F for an additional 15-20 minutes beyond your normal baking time.
This method preserves your crust’s integrity and prevents soggy bottoms, giving you complete control over your baking schedule.
What’s the Best Way to Prevent a Soggy Bottom Crust?
You’ll prevent a soggy bottom crust through blind baking—your essential technique. Dock your fitted crust with a fork, then pre-bake it at 375°F for 10-12 minutes using parchment paper and pie weights.
A preheated pan secures immediate crust setting, creating a moisture barrier. You’re free to skip this step for double-crust pies, but single-crust designs demand it.
This precision method guarantees crispy, structurally sound foundations every time you bake.
Can I Substitute Ingredients for Dietary Restrictions or Allergies?
You can absolutely substitute ingredients for your dietary needs.
For gluten-free alternatives, you’ll replace wheat flour with almond flour, coconut flour, or commercial gluten-free blends.
Nut-free substitutions include using seeds like sunflower or pumpkin in place of nuts.
You’ve got freedom to swap dairy butter for coconut oil or vegan alternatives.
Adjust liquid ratios carefully since substitutions absorb differently.
Test your modifications first to make sure you’re achieving the structural integrity and texture your pie demands.
How Do I Know When My Pie Is Completely Done Baking?
You’ll know your pie’s done when you’ve got bubbling edges throughout the crust’s perimeter and the filling reaches an internal thermometer reading of 165-180°F, depending on your filling type.
The crust should display golden-brown coloring without burning.
You’ve earned complete freedom from guessing—trust your thermometer’s precision.
If edges brown too quickly, shield them with foil.
Don’t hesitate to bake longer; undercooked fillings risk foodborne illness.


Leave a Comment