Key Takeaways
- Preheat oven to 350°F for at least 15 minutes and verify actual temperature with an independent thermometer.
- Grease pans thoroughly, line with parchment paper grain-side lengthwise, and dust lightly with flour or cocoa.
- Cream butter and sugar until fluffy, then alternate adding dry and wet ingredients on low speed.
- Bake on center rack until toothpick emerges with minimal crumbs; cool in pan 10–15 minutes, then completely on wire racks.
- Level cake domes with horizontal cuts using serrated knife, trim sides for uniform edges, and cool fully before assembly.
Gathering Your Ingredients and Equipment

Before you begin mixing, you’ll need to gather your ingredients and equipment to guarantee a smooth baking process.
Assemble dry ingredients—flour, sugar, baking powder, and salt—in separate containers for easy access.
Store liquids and eggs at room temperature for ideal incorporation.
Prepare your equipment by ensuring all pans, mixing bowls, and measuring tools are clean and ready.
Verify that your oven racks are positioned correctly before preheating.
Check your mixer and beaters for proper functionality.
Perform regular equipment maintenance on your stand mixer, ensuring the bowl rotates freely and attachments fit securely.
Organize your ingredient storage strategically, keeping dry goods in airtight containers away from moisture and heat.
Arrange everything within arm’s reach of your workspace.
This methodical preparation eliminates delays and prevents missed steps during the baking process.
Preparing Your Cake Pans
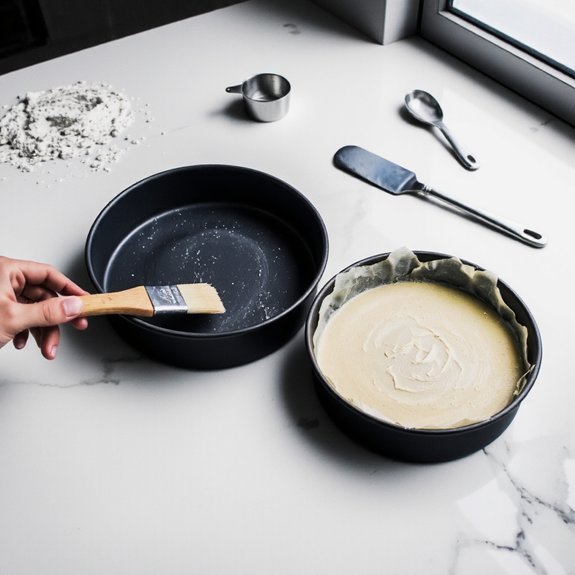
You’ll want to grease your pans thoroughly with butter or cooking spray, ensuring you reach all corners and crevices to prevent sticking.
Line the bottom of each pan with parchment paper cut to size, which provides an extra insurance policy for clean cake removal.
Match your pan sizes precisely to your recipe’s specifications, as variations in diameter or depth will affect baking time and cake structure.
Greasing Pans Properly
Proper pan preparation prevents sticking and guarantees even cake release, making it essential to grease your pans thoroughly before adding batter.
Understanding surface chemistry helps you choose the right greasing method for ideal results.
- Use butter or oil to create a hydrophobic barrier that prevents batter adhesion
- Apply a thin, even coating across all interior surfaces, including corners and edges
- Consider sustainable alternatives like coconut oil or beeswax-based products for environmentally conscious baking
- Dust lightly with flour or cocoa powder after greasing to provide additional grip
You’ll achieve superior cake release and cleaner edges by mastering this fundamental technique.
Skipping proper greasing compromises your final product’s appearance and structural integrity.
Don’t rush this critical step—it’s your foundation for baking success.
Parchment Paper Placement
Layer a sheet of parchment paper on top of your greased pan to create an additional non-stick barrier that guarantees effortless cake removal. Position the paper with its grain direction running lengthwise across the pan for maximum stability. Make sure seam placement faces downward to prevent snagging during batter pouring.
| Step | Action |
|---|---|
| 1 | Cut parchment to fit pan dimensions |
| 2 | Align grain direction lengthwise |
| 3 | Position seam side down |
| 4 | Press firmly into greased surface |
| 5 | Verify complete pan coverage |
This dual-barrier approach—grease plus parchment—eliminates sticking risks entirely. You’ll extract your baked layers cleanly without crumbling or tearing. The parchment’s heat-resistant properties maintain consistent browning while protecting cake edges from over-darkening. This technique gives you complete control over your baking results.
Pan Size Considerations
Once you’ve secured your parchment paper, selecting the right pan dimensions becomes your next critical step.
You’re committing to your final slice yield and overall cake structure, so choose wisely.
Consider these essential factors:
- Standard 9-inch rounds produce 12-16 slices per layer, ideal for most recipes
- 8-inch pans yield fewer slices but create taller, more dramatic layers
- Oven fit requires measuring your oven’s interior to confirm all pans fit simultaneously without touching walls or each other
- Aluminum construction conducts heat evenly, preventing uneven browning and promoting consistent baking
Your pan selection directly impacts baking time and temperature distribution.
Darker nonstick pans may require lowering your oven temperature by 25 degrees Fahrenheit to prevent over-browning.
Always verify your specific pan dimensions match your recipe’s requirements for best results and predictable outcomes.
Mixing Your Cake Batter

Combine your dry ingredients—flour, baking powder, baking soda, and salt—in a medium bowl and whisk thoroughly to distribute the leavening agents evenly.
In a separate bowl, cream your butter and sugar together until light and fluffy, which provides essential aeration control for your cake’s crumb structure.
Alternate adding your dry mixture and wet ingredients to the creamed mixture, beginning and ending with dry ingredients. This technique minimizes gluten development, preventing a dense, tough cake.
Mix on low speed only until ingredients are incorporated; overmixing activates gluten strands unnecessarily.
Don’t overwork your batter. Streaks of flour are acceptable—they’ll disappear during baking.
Proper mixing technique gives you direct control over your cake’s final texture and tenderness, ensuring the light, delicate layers you’re after.
Achieving the Perfect Bake
Because your cake’s texture depends entirely on proper oven conditions, you’ll want to preheat your oven to the temperature specified in your recipe—typically 350°F for standard layer cakes—for at least 15 minutes before pouring your batter.
Oven calibration guarantees accurate heat distribution, preventing undercooked centers or burnt edges.
Consider these critical factors:
- Check your oven’s actual temperature with an independent thermometer, as many units run hot or cold
- Make altitude adjustments if you’re baking above 3,000 feet, reducing leavening agents and increasing liquid slightly
- Position cake pans in the center rack, leaving adequate space for air circulation
- Avoid opening the oven door during the first 25 minutes, which disrupts rising
Test doneness at the minimum time using a toothpick—it should emerge with minimal crumbs, indicating completion.
Cooling and Removing Your Layers
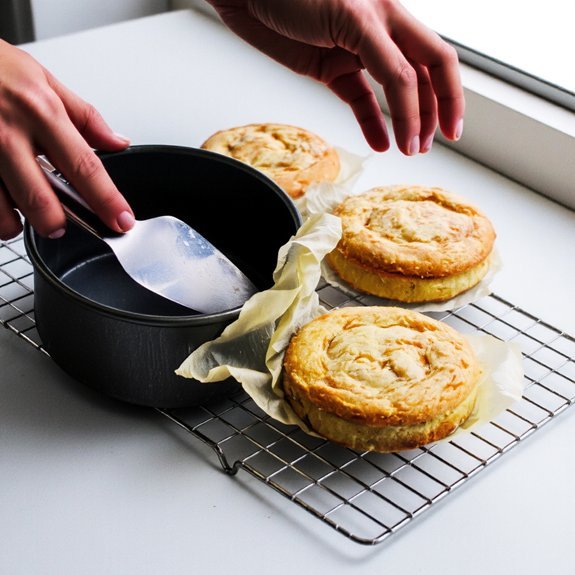
You’ll want to let your cake layers cool completely before removal to prevent structural collapse and crumbing.
Begin by inverting each layer onto a wire rack, then gently peel away the parchment paper to expose the delicate surface underneath.
Proper handling during this stage—avoiding sudden temperature changes and supporting the cake’s weight evenly—ensures you’ll preserve the integrity of your layers for successful stacking and frosting.
Proper Cooling Time Matters
After the oven timer sounds, resist the urge to remove your cake layers immediately.
Proper cooling time is essential for achieving ideal results without compromising your baked goods.
Here’s why you shouldn’t rush:
- Allows the crumb structure to set completely, preventing collapse when handling
- Enables flavor development as compounds continue stabilizing during cooling
- Supports moisture retention within the layers, keeping cake tender and moist
- Reduces thermal shock that can cause cracking or warping
Let your cakes cool in the pan for 10-15 minutes at room temperature.
They’ll firm up sufficiently while remaining warm enough to release easily.
Then transfer them to a wire rack for complete cooling—typically 1-2 hours.
This disciplined approach guarantees you’ll achieve professional-quality layers with superior texture and taste.
Removing Layers Successfully
Once your cake layers have cooled completely on the wire rack, you’re ready to remove them from their pans—a critical step that determines whether you’ll achieve clean, intact layers or damaged, crumbly results.
Run a thin, sharp knife around the cake’s perimeter, separating it from the pan’s sides. Then place your hand over the pan’s top, invert it onto a clean surface, and gently lift away the pan. If resistance occurs, tap the bottom firmly or use a bench scraper for additional leverage.
For transport techniques, wrap cooled layers in plastic wrap to prevent drying and shifting.
Regarding storage methods, keep wrapped layers in an airtight container at room temperature for up to two days, or refrigerate for extended freshness. Proper removal guarantees structurally sound layers ready for assembly.
Preventing Cake Damage
The cooling process directly impacts your cake’s structural integrity and removal success.
You’ll want to implement strategic storage techniques and transport safety measures to preserve your layers.
- Cool cakes completely on wire racks for at least two hours before removal
- Wrap cooled layers individually in plastic wrap to prevent moisture loss and contamination
- Store in airtight containers at room temperature for up to two days, or freeze for extended preservation
- Transport stacked layers in rigid cake boxes with non-slip bases to minimize shifting
These methods guarantee your cakes maintain their shape and crumb structure throughout handling.
By establishing proper cooling protocols and storage techniques, you’ll dramatically reduce damage risk.
This disciplined approach gives you the freedom to remove layers confidently without compromising your finished product’s quality.
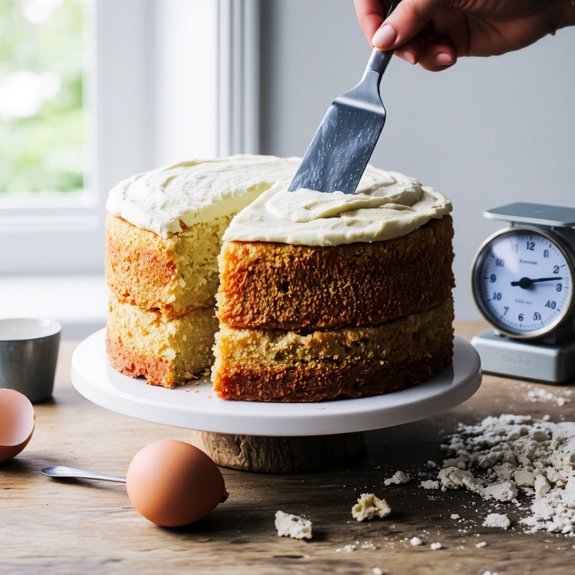
Leveling and Preparing Your Cake
Ensuring your cake layers are level is essential for proper stacking and frosting.
You’ll want to master dome trimming first—this removes the rounded top that naturally forms during baking.
Using a serrated knife or cake leveler, you’ll make horizontal cuts across the dome’s highest point, working carefully to maintain an even surface.
Make horizontal cuts across the dome’s highest point with a serrated knife or cake leveler, maintaining an even surface throughout.
Next, focus on layer squaring.
You’ll trim the cake’s sides to create uniform, vertical edges that’ll stack cleanly without shifting.
This prevents frosting from squeezing out unevenly between layers.
After leveling and squaring, you’ll have perfectly uniform cake layers ready for assembly.
These preparation steps demand precision and patience, but they’re non-negotiable if you’re serious about professional-looking results.
Your final cake’s stability and appearance depend entirely on how well you’ve executed this critical phase.
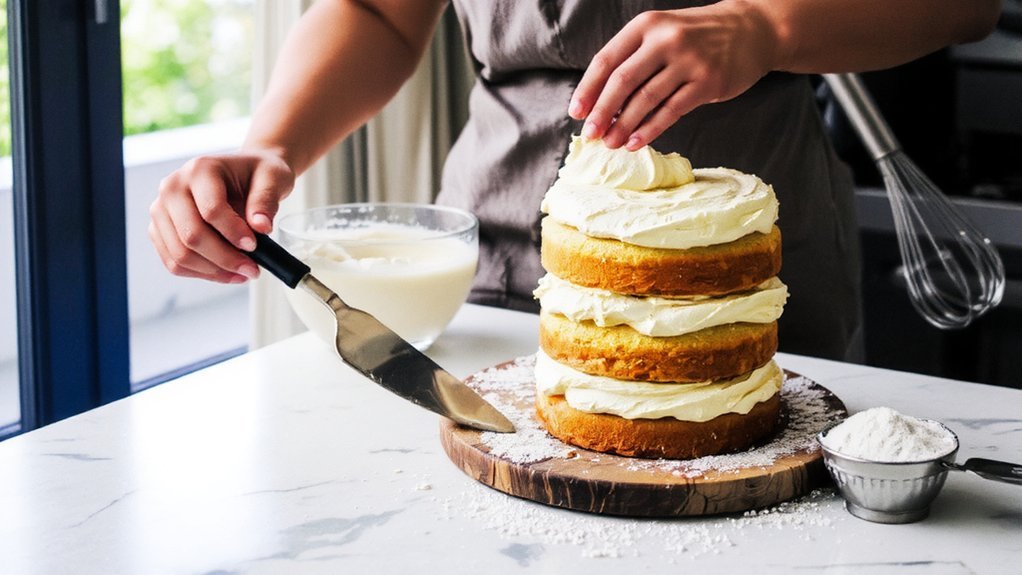
Frosting and Assembling Your Masterpiece
With your cake layers leveled and squared, you’re ready to execute the assembly—the phase that transforms individual components into a cohesive structure.
Master buttercream techniques to achieve professional results.
Follow these essential steps:
- Apply a crumb coat—a thin frosting layer that seals in loose particles before your final coat.
- Chill the crumb coat for thirty minutes to stabilize the structure.
- Execute your final frosting layer with smooth, even strokes using an offset spatula.
- Pipe patterns with precision, employing piping bags fitted with specialized tips for decorative borders and accents.
Work methodically.
Each layer demands attention to detail and consistent pressure.
Your freedom to create distinctive designs emerges through controlled technique and deliberate execution.
Chill between applications when needed.
This disciplined approach guarantees your masterpiece stands structurally sound and visually striking.
Frequently Asked Questions
Can I Make Layer Cake Batter the Day Before Baking?
You can prepare layer cake batter the day before, though you’ll need overnight refrigeration to maintain ingredient integrity.
Upon removing batter from the fridge, you must make leavening adjustments—add fresh baking powder or baking soda immediately before pouring.
This counteracts the leavening agents’ reduced potency after extended storage.
You’re fundamentally recalibrating your chemical reactions for ideal rise and texture.
Precise timing matters here; don’t skip this critical step if you want your layers rising properly and achieving that professional crumb structure you’re after.
How Do I Prevent My Cake Layers From Sinking in the Middle?
You’ll prevent cake layers from sinking by ensuring proper oven calibration—your oven’s actual temperature must match its setting.
During batter mixing, don’t overmix, which incorporates excess air that collapses during baking.
Use room-temperature ingredients for even mixing.
Fill pans only halfway, allowing room for rise.
Avoid opening the oven door prematurely.
Insert a toothpick at the center; it should emerge with minimal crumbs, indicating proper doneness without overdrying.
What’s the Best Way to Store a Frosted Layer Cake?
You’ll want to keep your frosted layer cake in a cake carrier or covered with plastic wrap to maintain freshness and prevent drying.
Store it at room temperature for up to two days, or refrigerate for up to five days if your frosting contains perishable ingredients.
For longer storage, you can freeze it for up to three months. Always allow the cake to reach room temperature before serving to restore ideal texture and flavor.
Can I Freeze Baked Cake Layers, and for How Long?
You can absolutely freeze baked cake layers for up to three months.
Start with the flash freezing technique—place unwrapped layers on a baking sheet at zero degrees for two hours.
Then use vacuum sealing benefits by wrapping each layer individually in plastic wrap before vacuum sealing.
This method prevents freezer burn and preserves moisture.
You’re free to thaw layers at room temperature for roughly two hours before frosting and assembly.
How Do I Fix a Cake Layer That Cracked While Cooling?
You’ve got options to salvage your cracked layer.
Apply crack filling strategically along the fracture using frosting or ganache—this’ll reinforce the weak point when you stack layers.
For significant damage, proceed with layer leveling; carefully trim the top flat and use it as your base layer where the crack won’t show.
You’re maintaining structural integrity while maximizing usable cake.


Leave a Comment